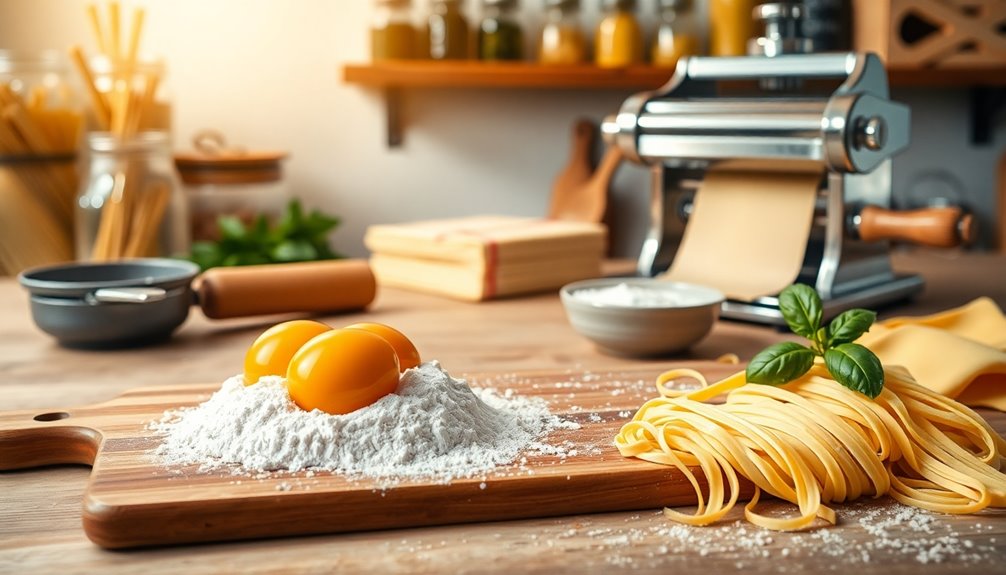
You can easily bake a delicious loaf of bread using just a few simple ingredients. Start with three cups of all-purpose flour, one packet of active dry yeast, a cup of warm water, a tablespoon of sugar, and one teaspoon of salt. Mix the dry ingredients, gradually add the water, and knead the dough until smooth. Let it rise until doubled in size, shape it, let it rise again, and then bake at 375°F for 25-30 minutes. The aroma will be irresistible! If you want to explore variations and tips for perfecting your bread, keep going!
Key Takeaways
- Combine 3 cups of flour, 1 packet of yeast, 1 tbsp of sugar, and 1 tsp of salt in a bowl.
- Gradually mix in 1 cup of warm water to form a dough.
- Knead the dough on a floured surface for 8-10 minutes until smooth and elastic.
- Allow the dough to rise in a warm space for 1-2 hours until doubled in size.
- Preheat the oven to 375°F and bake the dough for 25-30 minutes until golden brown.

Amazon Basics Basket Coffee Filters for 8-12 Cup Coffee Makers, White, 200 Count, Packaging May Vary
- Package Quantity: 200 white basket filters
- Compatibility: Fits 8-12 cup coffee makers
- Filtration Quality: Excellent sediment removal
As an affiliate, we earn on qualifying purchases.
History

When you plunge into the history of bread, you'll discover it's one of humanity's oldest and most essential foods. Dating back over 14,000 years, evidence shows that early humans were grinding grains and mixing them with water to create primitive forms of bread.
This staple transcended cultures and continents, evolving alongside civilizations. Ancient Egyptians perfected leavening techniques, while the Romans spread bread-making knowledge throughout their empire.
As societies grew, bread became a symbol of sustenance, often linked to social status and community. Today, you can find countless varieties, each reflecting local ingredients and traditions.
Understanding this rich history enhances your appreciation for the simple loaf, reminding you that bread is more than just food—it's a connection to our past.
Recipe

Making homemade bread is a delightful experience that fills your kitchen with a warm, comforting aroma. This easy bread recipe is perfect for beginners and requires just a few simple ingredients. You can enjoy the satisfaction of baking your own bread without the need for any special equipment or complicated techniques.
Whether you're planning to use it for sandwiches, toast, or simply to enjoy with butter, this bread is sure to become a staple in your home.
To get started, gather your ingredients and prepare your workspace. The process of making bread is as much about enjoying the journey as it's about the final product. There's something truly rewarding about kneading the dough and watching it rise. You'll find that making your own bread not only saves money but also allows you to create a healthier version tailored to your tastes.
So, roll up your sleeves and let's get baking!
Ingredients:
- 3 cups all-purpose flour
- 1 packet (2 ¼ teaspoons) active dry yeast
- 1 teaspoon salt
- 1 tablespoon sugar
- 1 cup warm water (about 110°F)
- 2 tablespoons olive oil
To make the bread, start by dissolving the sugar and yeast in warm water in a mixing bowl, allowing it to sit for about 5-10 minutes until it becomes frothy.
In another bowl, combine the flour and salt. Once the yeast mixture is ready, pour it into the flour mixture along with the olive oil. Stir until a dough forms.
Knead the dough on a floured surface for about 8-10 minutes until it's smooth and elastic. Place the dough in a greased bowl, cover it with a clean cloth, and let it rise in a warm place for about an hour or until it has doubled in size.
Preheat your oven to 375°F (190°C). Shape the risen dough into a loaf, place it in a greased loaf pan, and bake for 25-30 minutes until the top is golden brown and sounds hollow when tapped on the bottom.
Extra Tips:
For best results, make certain your water is at the right temperature to activate the yeast; too hot can kill it, while too cold can prevent it from activating.
If you want to add flavor, consider mixing in herbs, cheese, or seeds into the dough.
Always allow your bread to cool completely before slicing to guarantee it holds its shape and doesn't become gummy.
Enjoy your homemade bread fresh or store it wrapped in plastic to keep it soft for several days.
Cooking Steps

Now that you have your ingredients ready, it's time to start mixing things up.
First, you'll combine warm water and yeast, then add sugar and salt to enhance the flavor.
With those basics in place, you can knead the dough until it's smooth and ready to rise!
Step 1. Mix Warm Water and Yeast

To kick off your bread-making journey, combine one cup of warm water with two teaspoons of active dry yeast in a mixing bowl.
Make sure the water is warm but not hot, ideally between 100°F and 110°F, to activate the yeast without killing it. Stir the mixture gently to dissolve the yeast completely.
Let it sit for about five to ten minutes until you see bubbles forming on the surface. This bubbling indicates that the yeast is active and ready to work its magic.
While you wait, you can prepare other ingredients for your bread.
Once the yeast mixture is bubbly, you'll be ready to move on to the next steps in your easy bread recipe. Enjoy the process!
Step 2. Add Sugar and Salt

With your yeast mixture bubbling and alive, it's time to add sugar and salt.
Start by measuring out about 1 to 2 tablespoons of sugar. This sweetener not only enhances flavor but also feeds the yeast, helping it to thrive. Sprinkle the sugar evenly into the mixture, stirring gently until it dissolves completely.
Next, grab your salt—around 1 teaspoon will do. Salt is vital for balancing the flavors in your bread, but be careful not to add too much, as it can hinder yeast activity. Mix the salt in thoroughly, ensuring it's well combined with the other ingredients.
This step is important for developing the bread's taste, setting you up for a delicious loaf. Additionally, keep in mind that excessive sodium intake can lead to health issues, so measure your salt carefully. You're now ready for the next phase!
Step 3. Knead Dough Until Smooth

Kneading the dough is where the magic happens, transforming your mixture into a smooth, elastic texture.
Start by dusting your countertop with a bit of flour to prevent sticking. Place the dough on the surface and fold it in half. Using the palms of your hands, push the dough away from you, then fold it back over itself.
Repeat this process for about 8 to 10 minutes. You'll know it's ready when the dough is soft and springs back when you poke it. If it feels too sticky, sprinkle a little more flour as needed.
This step is essential, as it develops the gluten, ensuring a light and airy bread. Enjoy the process—it's therapeutic!
Step 4. Let Dough Rise in Warmth

After kneading, it's important to let your dough rise in a warm environment. This step activates the yeast, allowing it to ferment and create those delightful air bubbles that give your bread its texture.
Find a cozy spot in your kitchen, away from drafts. You can preheat your oven to the lowest setting, then turn it off, creating a gentle warmth. Cover your dough with a damp cloth or plastic wrap to prevent it from drying out.
Let it rise until it's doubled in size—this usually takes about 1 to 2 hours. Keep an eye on it; the dough should feel soft and springy when ready.
This vital step sets the foundation for your delicious homemade bread!
Step 5. Shape Dough Into Loaf

Once your dough has risen and doubled in size, it's time to shape it into a loaf. Start by gently punching down the dough to release any air bubbles.
On a lightly floured surface, turn the dough out and knead it for about a minute to smooth it out. Then, flatten it into a rectangle, roughly 8 inches wide.
Fold the long edges in toward the center, and then roll the dough tightly from the top down to form a log shape. Pinch the seams to seal the loaf and tuck the ends under.
Place the shaped dough seam side down into a greased loaf pan, cover it with a cloth, and let it rise again until it puffs up, about 30 minutes.
Final Thoughts

As you wrap up your baking adventure, it's important to appreciate the simple joy that comes from making bread at home.
You've transformed basic ingredients into something warm and delicious, and that's no small feat! Remember, each loaf you bake is a chance to experiment and refine your skills.
Don't be discouraged by imperfections; they're part of the process and can lead to delightful surprises. Share your creations with friends and family, and relish the smiles that follow.
Whether it's a crusty baguette or a soft sandwich loaf, each bite carries your effort and love. So, keep that oven warm, explore new flavors, and continue this rewarding journey of homemade bread.
Happy baking!
Frequently Asked Questions
Can I Use Whole Wheat Flour Instead of All-Purpose Flour?
Yes, you can use whole wheat flour instead of all-purpose flour, but it'll change the texture and flavor of your dish.
Whole wheat flour absorbs more liquid, so you might need to adjust your recipe by adding extra water or other liquids. It also has a nuttier taste and denser texture.
If you're experimenting, consider mixing the two flours to achieve a balanced outcome that maintains some lightness in your baked goods.
How Long Does Homemade Bread Last?
Homemade bread typically lasts about 3 to 5 days at room temperature, depending on the ingredients and storage conditions.
If you want it to last longer, you can refrigerate it, but that might dry it out.
Freezing is another option, extending its life to about 3 months. Just make sure to wrap it well to prevent freezer burn.
When you're ready to eat it, let it thaw at room temperature for the best texture.
Can I Freeze the Bread After Baking?
Yes, you can freeze bread after baking!
Just make sure it's completely cooled before wrapping it tightly in plastic wrap or aluminum foil. This prevents freezer burn and keeps the bread fresh longer.
When you're ready to enjoy it, simply take it out and let it thaw at room temperature, or pop it in the toaster for a quick warm-up.
Freezing is a great way to extend its shelf life and enjoy later!
What Can I Substitute for Yeast?
If you're looking for substitutes for yeast, you've got a few options. You can use baking soda combined with an acid like vinegar or lemon juice; this will help your dough rise.
Another option is using sourdough starter, which contains natural yeast.
You might also try baking powder, though it won't provide the same flavor.
Just remember, each substitute may affect the texture and taste of your final product, so experiment a bit!
How Do I Know When the Bread Is Done Baking?
To know when your bread's done baking, you'll want to look for a few key signs. First, it should have a golden-brown crust.
You can also tap the bottom; if it sounds hollow, it's likely ready.
Use a thermometer, too—aim for an internal temperature of about 190°F to 200°F.
Finally, let it cool before slicing to maintain its texture.
Trust your instincts, and you'll bake a perfect loaf!