
To make a delicious manicotti, start by preheating your oven to 375°F. Cook 12-14 manicotti shells in salted water until al dente. In a bowl, mix 15 oz ricotta, 1 cup shredded mozzarella, and ½ cup grated Parmesan. Stuff the cooled shells with this mixture. Spread marinara sauce in a baking dish, layer the stuffed shells, cover with more sauce, and sprinkle with remaining cheese. Bake covered for 25 minutes, then uncovered for another 15 until bubbly. Let it sit for a few minutes before serving. For more tips and variations, stick around for additional ideas!
Key Takeaways
- Boil 12-14 manicotti shells for 8-10 minutes, then cool and stuff with a mixture of ricotta, mozzarella, and Parmesan cheeses.
- Spread marinara sauce on the baking dish, place filled shells, cover with more sauce, and sprinkle with additional cheese.
- Bake at 375°F (190°C) covered for 25 minutes, then uncover and bake for an additional 15 minutes until bubbly and golden.
- Allow the dish to cool for 5-10 minutes before serving to enhance ease of serving.
- Pair manicotti with a side salad and garlic bread for a complete meal experience.
Top picks for "manicotti recipe"
Open Amazon search results for this keyword.
As an affiliate, we earn on qualifying purchases.
History

While many people enjoy manicotti today as a delicious Italian dish, its origins trace back to Southern Italy, where pasta-making traditions flourished.
You might be surprised to learn that the term "manicotti" means "sleeves" in Italian, referring to the pasta's tubular shape. Traditionally, this dish was filled with ricotta cheese and various other ingredients, showcasing local flavors and ingredients.
It gained popularity in the United States during the early 20th century, especially within Italian immigrant communities.
As you savor manicotti, you're not just enjoying a meal; you're partaking in a rich culinary history that reflects cultural heritage and innovation.
The combination of simple ingredients and heartfelt preparation makes manicotti a beloved comfort food across generations.
Recipe
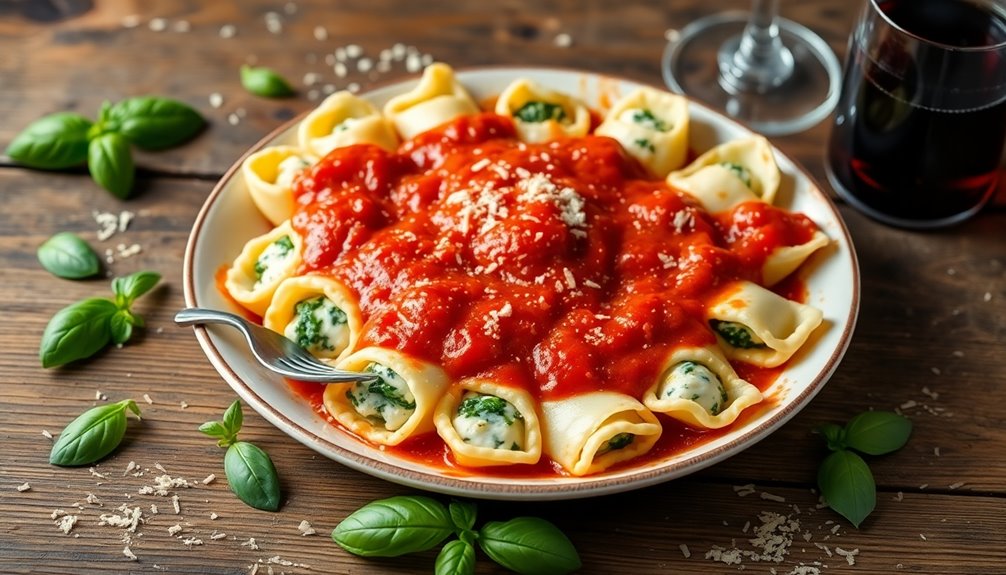
Manicotti is a classic Italian dish that features large pasta tubes filled with a delightful mixture of cheeses, herbs, and sometimes meat. It's often baked in a rich tomato sauce and topped with gooey melted cheese, making it a comforting and satisfying meal. This dish is perfect for family gatherings, special occasions, or simply a cozy night in. The combination of flavors and textures will surely impress anyone at your dinner table.
Preparing manicotti can be a fun and rewarding cooking experience. While the process may seem a bit intimidating at first, once you get the hang of filling the pasta tubes and layering the sauce, you'll find it quite manageable. Plus, you can customize the filling to suit your taste, whether you prefer a classic ricotta and spinach blend or a meaty option with ground beef or sausage. Gather your ingredients, roll up your sleeves, and get ready to create a delicious homemade manicotti that will have everyone coming back for seconds.
Ingredients:
- 12 manicotti pasta shells
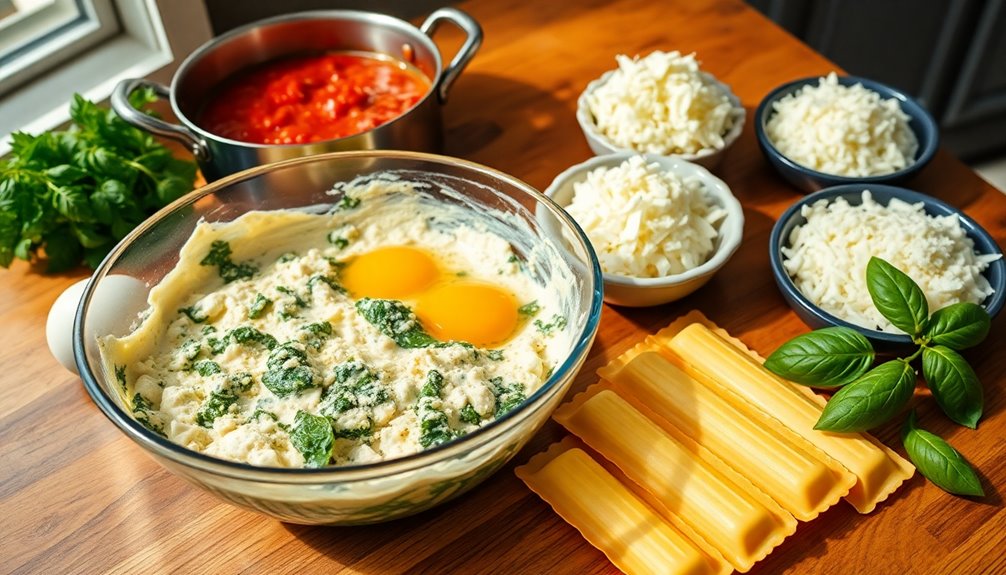
- 15 oz ricotta cheese
- 1 cup shredded mozzarella cheese
- 1/2 cup grated Parmesan cheese
- 1 cup fresh spinach, chopped
- 1 egg
- 2 cups marinara sauce
- 1 teaspoon garlic powder
- 1 teaspoon dried basil
- Salt and pepper to taste
- Fresh basil, for garnish (optional)
To begin, preheat your oven to 375°F (190°C). Cook the manicotti shells in a large pot of boiling salted water according to the package instructions until al dente. Drain and set aside to cool slightly.
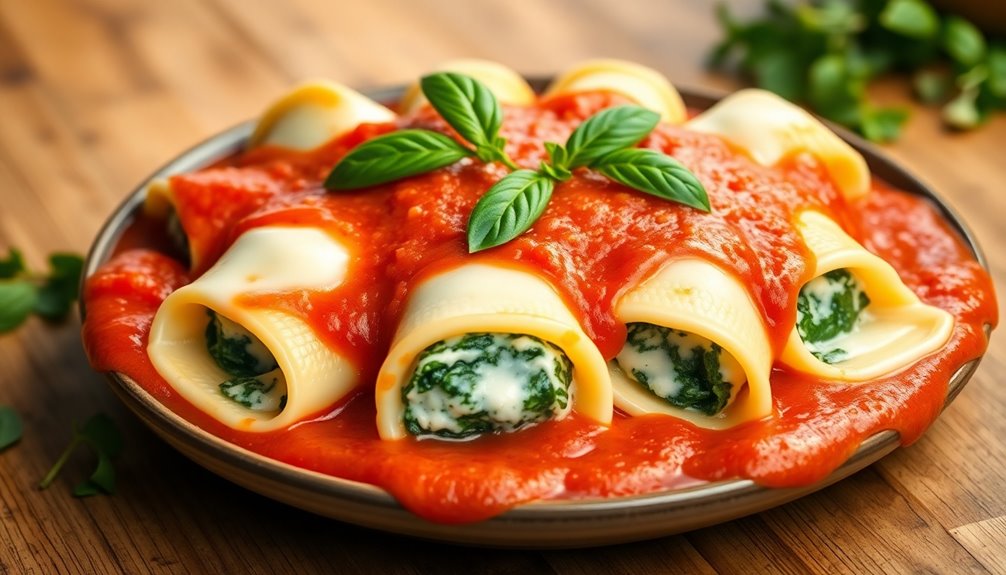
In a large mixing bowl, combine the ricotta cheese, 1/2 cup of mozzarella cheese, Parmesan cheese, chopped spinach, egg, garlic powder, dried basil, salt, and pepper. Mix until well combined.
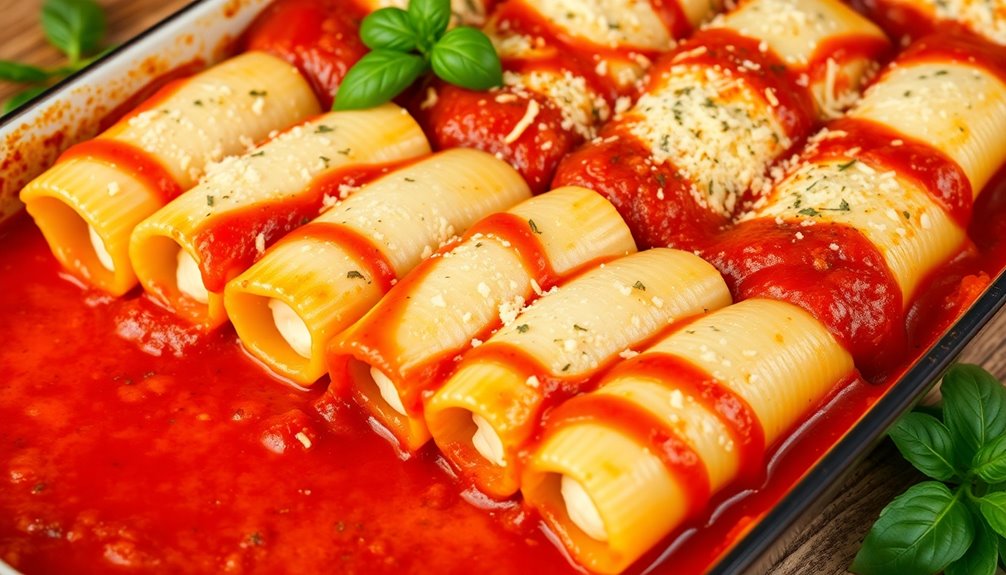
Carefully fill each manicotti shell with the cheese mixture using a piping bag or a spoon. Spread a thin layer of marinara sauce on the bottom of a baking dish, then place the filled shells in the dish. Pour the remaining marinara sauce over the shells and sprinkle the remaining mozzarella cheese on top.
Cover with foil and bake for 25 minutes, then remove the foil and bake for an additional 10-15 minutes, until the cheese is bubbly and golden.
One tip to keep in mind is to make sure that your pasta shells are slightly undercooked, as they'll continue to cook while baking in the oven, preventing them from becoming mushy. Additionally, if you want to make this dish ahead of time, you can assemble the manicotti and refrigerate it for up to 24 hours before baking. Just add an extra 10-15 minutes to the baking time if starting from cold.
For a little extra flavor, consider adding some Italian sausage or finely chopped vegetables to the cheese filling. Enjoy your homemade manicotti!
Cooking Steps

Now that you've got your ingredients ready, it's time to start cooking your manicotti.
First, you'll briefly boil the shells, then stuff them with your delicious filling.
After that, you'll top everything with marinara sauce and get ready to bake until golden brown.
Step 1. Boil Manicotti Shells Briefly
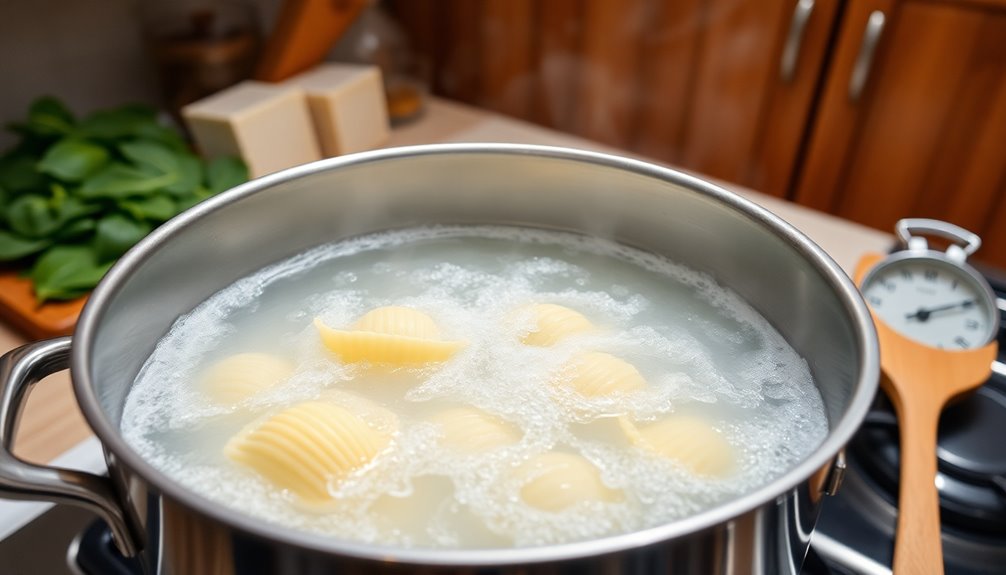
To prepare the manicotti shells, you'll want to bring a large pot of salted water to a rolling boil.
Once the water's bubbling, gently add the manicotti shells. Be careful not to overcrowd the pot; you may need to do this in batches.
Cook the shells for about 4 to 5 minutes, just until they start to soften but aren't fully cooked. Stir occasionally to prevent sticking.
After that, carefully drain the shells in a colander and rinse them under cold water to stop the cooking process.
This step helps keep the shells pliable and prevents them from sticking together.
Now, they're ready for the next stage of your delicious manicotti dish!
Step 2. Stuff the Cooked Shells

With the manicotti shells cooled and ready, it's time to fill them with your chosen stuffing.
Grab a piping bag or a spoon to ease the process. If you're using a piping bag, carefully fit the tip into one end of the shell and gently squeeze until the filling reaches the other end.
If you're using a spoon, scoop a generous amount of stuffing and push it into the shell, making sure it's evenly distributed. Aim to fill each shell without overstuffing, as they might burst during baking.
Once all your shells are filled, set them aside on a plate. This step is essential for ensuring each bite is packed with flavor, setting the stage for the perfect manicotti.
Step 3. Top With Marinara Sauce
Once you've filled all your manicotti shells, pour a generous amount of marinara sauce over them to create a flavorful base.
Verify that every shell is well-coated; this not only adds taste but also keeps them moist while cooking. You can use store-bought marinara or your favorite homemade version for an extra touch of flavor.
If you like, sprinkle some Italian seasoning or crushed red pepper over the sauce for added depth. Don't forget to reserve a little sauce to drizzle on top later.
This step is essential, as it helps meld the flavors together. Finally, gently spread the sauce with a spoon to guarantee even coverage.
Now, you're ready for the next cooking step!
Step 4. Bake Until Golden Brown
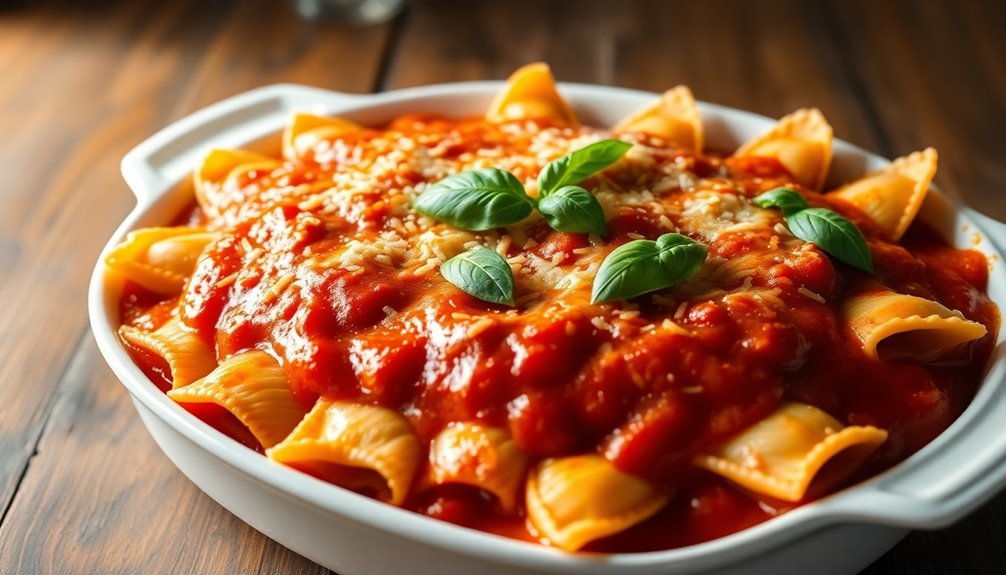
Bake the manicotti in a preheated oven at 375°F for about 25 to 30 minutes, or until the top is golden brown and bubbly.
Keep an eye on it during the last few minutes of baking; you want to catch that perfect golden color without burning. The aroma wafting through your kitchen will be a sure sign that it's almost done.
If you notice the edges starting to crisp up nicely, it's a good indication that it's time to check on the center.
Once it's achieved that beautiful color, carefully remove it from the oven. Let it sit for a few minutes before serving; this helps the filling set and makes it easier to serve.
Enjoy your delicious creation!
Step 5. Sprinkle With Parmesan Cheese
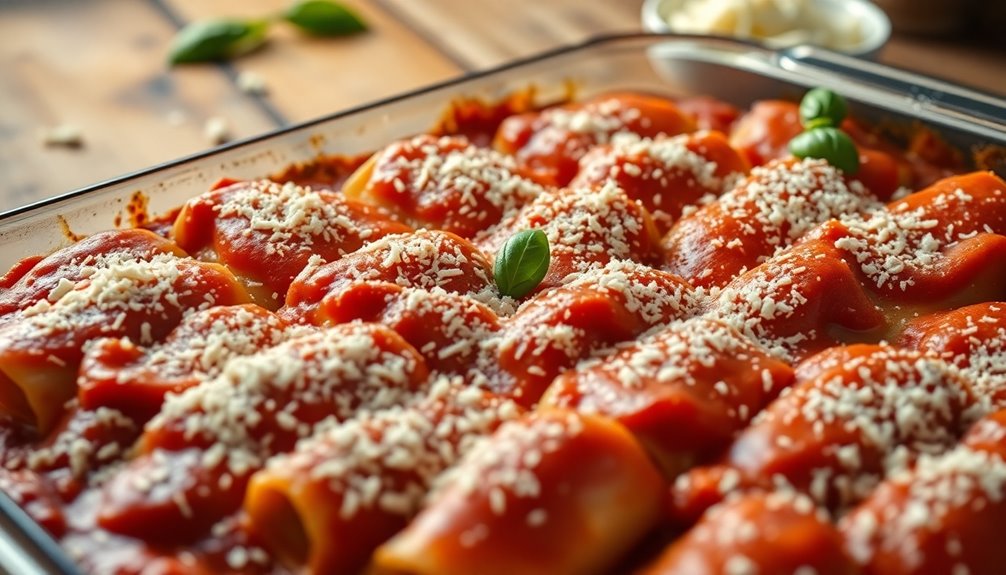
After you've removed the manicotti from the oven and allowed it to sit, it's time to add the finishing touch.
Grab your grated Parmesan cheese and sprinkle a generous layer over the top of the manicotti. This cheese will melt beautifully, creating a deliciously golden crust. Make sure to cover the entire surface, ensuring every bite is packed with flavor.
If you like a little extra zest, consider adding some freshly cracked black pepper or a pinch of Italian seasoning on top of the cheese.
Once you've finished sprinkling, pop the dish back into the oven for just a few minutes to melt the cheese. Then, serve it hot and enjoy your delightful creation!
Final Thoughts
As you wrap up your cooking adventure, it's clear that making manicotti is both rewarding and delicious.
You've crafted a dish that's not only visually appealing but also bursting with flavor. This recipe invites creativity—feel free to experiment with different fillings or sauces to suit your taste.
Remember, the key to a great manicotti is the balance of textures and flavors, so don't rush the process. Share your creation with family and friends; they'll appreciate the effort you put into it.
Whether you're enjoying a cozy dinner or celebrating a special occasion, this dish is sure to impress. So, gather your loved ones, savor each bite, and relish the joy of homemade manicotti!
Happy cooking!
Frequently Asked Questions
Can I Use a Gluten-Free Pasta for Manicotti?
Absolutely, you can use gluten-free pasta for your dish!
Just make sure to check the packaging for cooking instructions, as gluten-free pasta may require different cooking times.
You'll want to choose a brand that holds up well when stuffed.
When you're ready to assemble, be gentle to prevent breaking.
With the right gluten-free pasta, you'll still enjoy a delicious meal that everyone can savor, regardless of dietary needs!
What Is the Best Way to Freeze Manicotti?
To freeze manicotti effectively, start by letting it cool completely after cooking.
Once cooled, arrange the manicotti in a single layer on a baking sheet and freeze them for about an hour.
After they're firm, transfer them to airtight containers or freezer bags, removing as much air as possible.
Label the bags with the date, and you're set! They'll stay fresh for up to three months, making dinner planning super easy.
How Long Does Cooked Manicotti Last in the Fridge?
Cooked manicotti lasts about 3 to 5 days in the fridge when stored properly.
To keep it fresh, place it in an airtight container or tightly wrap it with plastic wrap or aluminum foil.
Make sure to let it cool down before refrigerating.
If you notice any off smells or changes in texture, it's best to discard it.
Enjoy your leftovers within that time frame for the best taste and quality!
Can I Substitute Ricotta Cheese in This Recipe?
Yes, you can substitute ricotta cheese in this recipe.
If you're looking for alternatives, try cottage cheese for a similar texture, or cream cheese for a richer flavor.
Silken tofu works well for a dairy-free option, providing a smooth consistency.
Just blend any substitute until it's creamy, and adjust seasonings to taste.
Don't hesitate to experiment; you might discover a new favorite filling!
Enjoy your cooking adventure!
What Side Dishes Pair Well With Manicotti?
When you're planning a meal, pairing side dishes is key to enhancing flavors.
For a hearty dish like manicotti, consider serving garlic bread for a crunchy contrast. A fresh green salad with a light vinaigrette balances the richness, while roasted vegetables add a colorful touch.
If you want something comforting, a creamy risotto works wonderfully too.
These sides will complement your meal and create a satisfying dining experience. Enjoy your cooking!