
You can easily create tasty gluten-free bread with just a few ingredients. Start with 2 cups gluten-free all-purpose flour and add 1/2 cup almond flour, 1/4 cup ground flaxseed, and 1 teaspoon xanthan gum. Mix in a packet of instant yeast and some warm water until smooth. Let your dough rise until doubled, then shape it into a loaf and bake at 350°F for 30-45 minutes. Remember, letting the bread cool completely before slicing enhances its texture. Want tips on variations or an easy way to prepare it? There's plenty more to explore!
Key Takeaways
- Combine 2 cups gluten-free all-purpose flour, 1/2 cup almond flour, and 1/4 cup ground flaxseed in a mixing bowl.
- Mix wet ingredients separately, then gradually combine them with the dry ingredients until smooth.
- Knead the dough gently for 5-7 minutes, shape into a loaf, and let it rise until doubled.
- Bake in a preheated oven at 350°F for 30-45 minutes, checking doneness with a toothpick.
- Allow the bread to cool completely before slicing for the best texture and flavor.
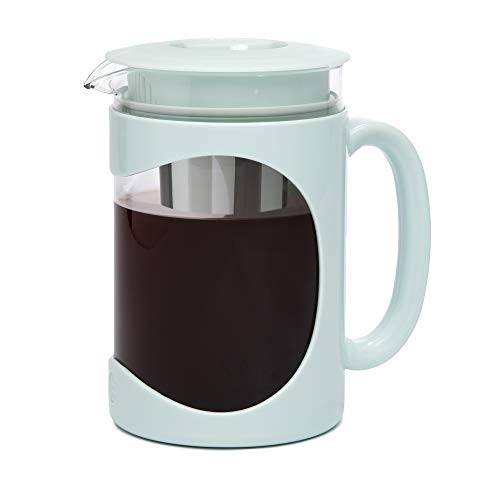
Primula Burke Deluxe Cold Brew Iced Coffee Maker, Comfort Grip Handle, Durable Glass Carafe, Removable Mesh Filter, Perfect 6 Cup Size, Dishwasher Safe, 1.6 qt, Aqua
Note: 1)Too coarse a grind, too little coffee, or insufficiently tamping the grounds before brewing can all lead...
As an affiliate, we earn on qualifying purchases.
History

Gluten free bread has a rich history that dates back centuries, long before the gluten-free trend took off in modern times.
Ancient civilizations often relied on grains that lacked gluten, such as rice, millet, and corn. These cultures created various forms of bread-like foods to sustain themselves.
As you explore this history, you'll find that the need for gluten-free options emerged primarily from health concerns, particularly celiac disease.
In the 20th century, awareness of gluten-related disorders increased, leading to the development of dedicated gluten-free products.
Through the years, bakers experimented with alternative flours and ingredients, refining their techniques.
Today, gluten-free bread has evolved into a popular choice for many, blending tradition with modern dietary needs.

County Line Kitchen Glass Cold Brew Coffee Maker with Lid - Wide Mouth, 2 Quart (64 oz) - Heavy Duty, Leak Proof - Sun & Iced Tea Pitcher, Cold Brew Coffee, Breast Milk Storage, Water - Gray
SIMPLE TO USE & CLEAN: Making cold brew has never been more straightforward. Our easy-to-use design takes the...
As an affiliate, we earn on qualifying purchases.
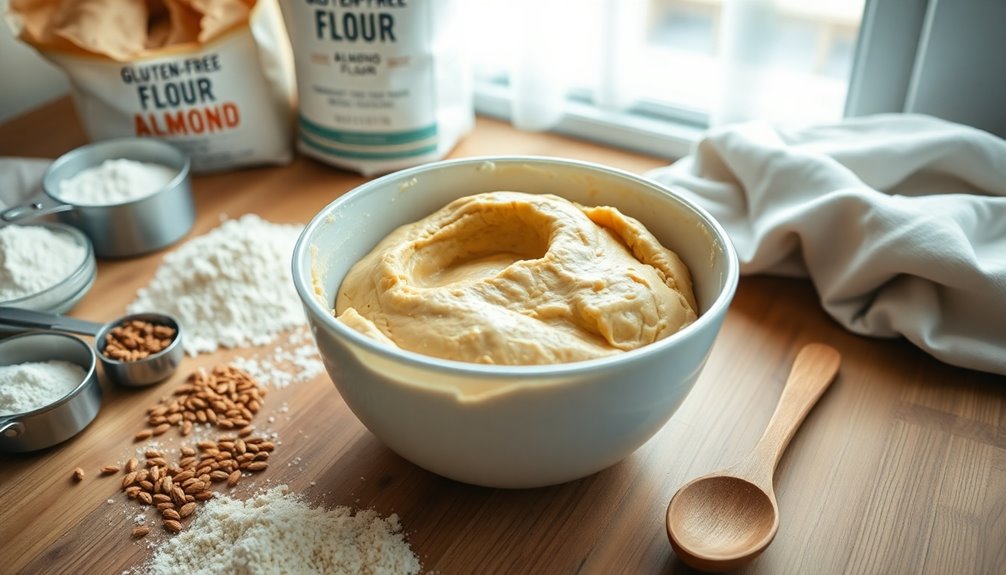
Recipe

Making gluten-free bread at home can be a rewarding experience, providing you with a delicious and healthy alternative to store-bought options. This recipe is crafted to be both straightforward and satisfying, guaranteeing that even those new to gluten-free baking will feel confident in their culinary skills.
With the right combination of gluten-free flours and ingredients, you can create a loaf that's airy, flavorful, and perfect for sandwiches, toast, or enjoying on its own. This gluten-free bread is versatile and can be customized to fit your taste preferences. Feel free to experiment with different add-ins like seeds, herbs, or even cheese for a unique flavor profile.
The key to achieving the best texture lies in the careful measurement of ingredients and allowing the dough to rise adequately. With this recipe, you'll be well on your way to baking your own gluten-free bread that your family and friends will love.
Ingredients:
- 2 cups gluten-free all-purpose flour
- 1/2 cup almond flour
- 1/4 cup ground flaxseed
- 1 teaspoon xanthan gum
- 1 teaspoon salt
- 1 tablespoon sugar or honey
- 1 packet (2 1/4 teaspoons) instant yeast
- 1 1/4 cups warm water (about 110°F)
- 2 tablespoons olive oil
- 2 large eggs
To prepare the gluten-free bread, start by preheating your oven to 375°F (190°C) and greasing a 9×5-inch loaf pan. In a large mixing bowl, combine the gluten-free all-purpose flour, almond flour, ground flaxseed, xanthan gum, salt, sugar, and instant yeast.
In a separate bowl, whisk together the warm water, olive oil, and eggs until well combined. Gradually add the wet mixture to the dry ingredients, mixing until a smooth dough forms. Pour the dough into the prepared loaf pan, smoothing the top with a spatula.
Cover the pan with a clean kitchen towel and let it rise in a warm place for 30-45 minutes, or until it has doubled in size. Bake in the preheated oven for 30-35 minutes or until the bread is golden brown and sounds hollow when tapped on the bottom.
Allow the bread to cool in the pan for 10 minutes before transferring it to a wire rack to cool completely. When making gluten-free bread, it's important to remember a few key tips for success.
Always use a kitchen scale to measure your ingredients accurately, as gluten-free baking can be quite sensitive to variations in measurement. If your dough appears too dry, you can add a little more warm water, one tablespoon at a time, until you achieve the desired consistency.
Additionally, consider using a bread machine if you have one, as it can handle the mixing and kneading process more efficiently. Finally, let the bread cool completely before slicing to guarantee the best texture and flavor. Enjoy your homemade gluten-free bread!
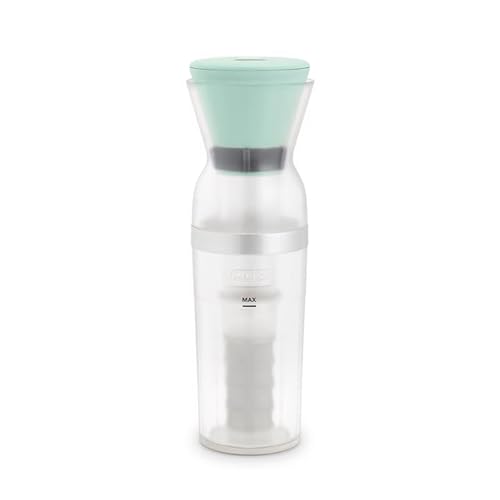
DASH Brew2Go™ Portable Cold Brew System
Lightning-fast coffee house quality cold brew at home
As an affiliate, we earn on qualifying purchases.
Cooking Steps

Now it's time to get cooking! Start by gathering all your gluten-free ingredients, making sure you have everything on hand.
Then, you'll mix the dry ingredients thoroughly before adding the wet ingredients gradually.
Step 1. Gather Gluten-Free Ingredients

Before you start baking, it's essential to gather all your gluten-free ingredients to guarantee a successful loaf.
Begin with gluten-free flour blends, which often combine various flours like almond, rice, or tapioca. You'll also need a binding agent, such as xanthan gum or guar gum, to help your bread hold together.
Don't forget to include a leavening agent like baking powder or yeast, depending on your recipe.
For added flavor and nutrition, consider incorporating ingredients like honey, olive oil, or apple cider vinegar.
Finally, check your pantry for any optional mix-ins, like seeds or nuts, to enhance your bread's texture.
Once you've gathered everything, you'll be ready to create a delicious gluten-free loaf!
Step 2. Mix Dry Ingredients Thoroughly

With all your gluten-free ingredients ready, it's time to mix the dry components. Start by combining your gluten-free flour, baking powder, salt, and any other dry ingredients in a large mixing bowl.
Use a whisk to guarantee everything blends well; this step helps to evenly distribute the baking powder and salt throughout the flour. If you're using xanthan gum or another binding agent, add it now.
Mixing thoroughly prevents clumping and guarantees a smooth dough later on. Don't rush this step—take your time to incorporate air into the mixture, which will contribute to a lighter bread texture.
Once everything's well combined, you're set to move on to the next step. Happy baking!
Step 3. Add Wet Ingredients Gradually

As you prepare to add the wet ingredients, remember that doing so gradually is key to achieving the right texture for your gluten-free bread.
Start by pouring in a small amount of your wet mixture—this usually includes ingredients like water, oil, or eggs—into the dry ingredients. Stir gently to combine, ensuring no lumps form.
Continue to add the wet ingredients in small increments, mixing thoroughly after each addition. This method helps the dry ingredients absorb moisture evenly, preventing clumps and ensuring a consistent dough.
Keep an eye on the texture; it should be slightly sticky but manageable. If you find it too dry, add a bit more liquid until you reach the desired consistency.
Step 4. Knead the Dough Gently
Gently knead the dough on a clean, lightly floured surface to develop its texture. Use the palms of your hands to press down and fold the dough over itself.
Don't rush; this process helps incorporate air, making the bread lighter. Knead for about five to seven minutes, or until the dough feels smooth and slightly elastic. If the dough sticks to your hands, sprinkle a little more flour, but avoid adding too much, as it can affect the final result.
Step 5. Shape the Dough Loaf

After kneading the dough, it's time to shape it into a loaf.
First, lightly flour your work surface with gluten-free flour to prevent sticking. Gently turn the dough onto the surface and form it into a rough rectangle.
With your hands, fold the edges inward toward the center, creating tension in the dough. Roll it tightly from one end to the other, ensuring the seam is on the bottom.
Pinch the ends to seal them, shaping the loaf into a smooth oval. Place the shaped dough into a greased loaf pan, ensuring it fits snugly.
Cover it with a clean cloth and let it rise again until it doubles in size, usually about 30-45 minutes.

Cold Brew Coffee Maker, 1 Gallon Iced Coffee Maker With Stainless Steel Filter, Heavy Duty Glass Cold Brew Pitcher With Stainless Steel Spigot, Mason Jar Cold Brew Coffee Maker Fast Iced Tea Maker
【High Quality Material】This cold brew coffee maker is built with heavy-duty, food-grade soda-lime glass that’s durable, long-lasting, and...
As an affiliate, we earn on qualifying purchases.
Final Thoughts

When you finally taste your homemade gluten-free bread, the effort you put into the recipe will feel incredibly rewarding.
You'll savor the texture and flavor, knowing you created something delicious without gluten. Remember, practice makes perfect; don't be discouraged if your first loaf isn't flawless. Each attempt helps you refine your technique and learn what works best for your taste.
Experiment with different gluten-free flours or add-ins like seeds or herbs to discover new flavors. Share your creation with friends or family, and enjoy their reactions.
Most importantly, embrace the process—baking is as much about the journey as the destination. You've taken a significant step towards healthier eating, and that's something to celebrate!
Enjoy your baking adventures!
Frequently Asked Questions
Can I Freeze Gluten Free Bread?
Absolutely, you can freeze gluten-free bread!
It's a great way to extend its shelf life. Just make sure to wrap it tightly in plastic wrap or aluminum foil to prevent freezer burn.
When you're ready to enjoy it, simply thaw it at room temperature or pop it in the toaster.
This way, you'll always have delicious bread on hand without worrying about it going stale.
Enjoy your fresh slices whenever you want!
How Long Does Gluten Free Bread Stay Fresh?
Gluten free bread typically stays fresh for about 3 to 5 days when stored properly at room temperature.
If you want to extend its shelf life, consider refrigerating it, which can keep it fresh for up to a week.
Just remember, freezing is also an option if you won't finish it in time. You can thaw slices as needed, ensuring you enjoy it at its best!
What Can I Use Instead of Xanthan Gum?
If you're looking for alternatives to xanthan gum, you're in luck! You can use guar gum, which works similarly in providing structure.
Another option is psyllium husk, known for adding fiber and moisture.
You might also try ground flaxseeds or chia seeds mixed with water, creating a gel-like substance that binds ingredients.
Just remember, each substitute might alter the texture slightly, so it's worth experimenting to find what you like best!
Is Gluten Free Bread Healthier Than Regular Bread?
When you're comparing gluten-free bread to regular bread, it really depends on your dietary needs.
Gluten-free options can be healthier for those with gluten sensitivities or celiac disease, as they avoid potential health issues. However, many gluten-free breads can be high in sugar and low in fiber.
It's essential to check labels and choose whole-food ingredients. Ultimately, what's healthier for you depends on your individual health goals and nutritional requirements.
Can I Make Gluten Free Bread in a Bread Machine?
Absolutely, you can make gluten-free bread in a bread machine!
Just make sure your machine has a gluten-free setting, as this will adjust the kneading and rising times.
You'll want to use a gluten-free flour blend for the best results.
Follow the instructions specific to your machine, and keep an eye on the dough's consistency—it should be thicker than traditional bread dough.
Enjoy the convenience and deliciousness of homemade gluten-free bread!