Recipes
Coffee in Skincare Benefits Risks and DIY Recipes
Nourish your skin with the hidden powers of coffee – from natural exfoliation to soothing inflammation, explore DIY recipes and expert tips to get glowing results.
Coffee may be the secret weapon for your skin! This age-old ingredient offers a trove of benefits, from natural exfoliation to soothing inflammation. Craft DIY coffee scrubs and masks to reveal brighter, smoother skin. But proceed with caution – improperly formulated recipes could cause irritation. Follow expert tips on effective application and moderate use to reap coffee's skin-enhancing powers without risking over-exfoliation. Explore the rich history and versatile applications of this powerful plant – there's much more to discover beyond the morning brew.
History
Coffee has a rich and captivating history, dating back to its origins in the Arabian Peninsula around the 15th century.
The first coffee shops, known as qahveh khaneh, emerged in the Middle East, providing spaces for social and cultural exchange. Over the centuries, coffee's popularity grew, leading to its establishment as a cultural staple.
By the 20th century, Brazil became the world's leading coffee producer, shaping the global coffee industry.
Coffee's historical significance extends to its role in social gatherings and coffeehouses, which became centers for intellectual and political discourse during the Enlightenment.
This rich history has influenced the use of coffee in skincare products, offering benefits for your skin and a DIY Coffee Skin Care Routine with coffee grounds.
Recipe
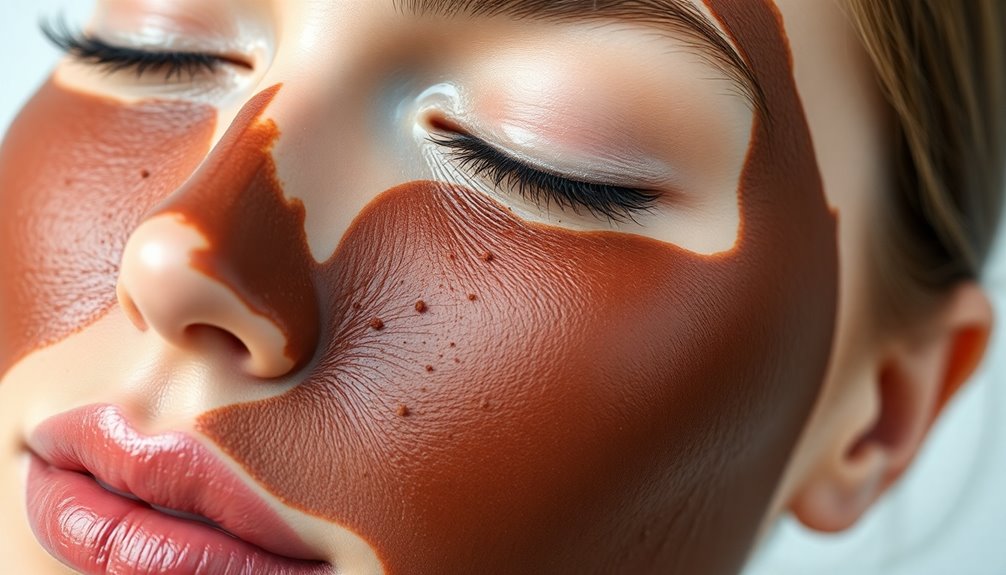
Coffee has become a popular ingredient in many homemade skincare recipes. Its natural exfoliating and antioxidant properties make it a great addition to face masks, body scrubs, and lip treatments. Additionally, coffee is known for its anti-inflammatory properties, which can help soothe and calm irritated skin.
Try these easy-to-make coffee-infused recipes for smooth, radiant skin.
For a nourishing Detox Mask, combine 2 tablespoons of coffee grounds, 1 tablespoon of honey, and 1 tablespoon of plain yogurt. Apply the mixture to clean, damp skin and let it sit for 10-15 minutes before rinsing. The coffee helps draw out impurities, while the honey and yogurt provide deep hydration.
Ingredients:
- 2 tablespoons coffee grounds
- 1 tablespoon honey
- 1 tablespoon plain yogurt
To make, simply mix all the ingredients together until a smooth paste forms. Apply to the face, avoiding the eye area, and let sit for 10-15 minutes. Rinse thoroughly with warm water. Use this mask 1-2 times per week for a refreshed, glowing complexion.
For best results, make this mask fresh before each use. The ingredients can lose potency over time and increase the risk of bacterial growth if stored.
Additionally, be cautious when using coffee-based products near the eyes, as the grounds can be irritating. Adjust ingredient amounts as needed to suit your skin type and desired effect.
Cooking Steps
Before applying your homemade coffee scrub, make sure to cleanse your skin thoroughly.
Then, gently massage the scrub onto your skin using circular motions.
Rinse the scrub off completely with warm water, and follow up with a nourishing moisturizer to keep your skin healthy and hydrated.
Step 1. Cleanse Skin Before Exfoliating
To get the most out of your coffee scrub, it's essential to start with a clean canvas.
Begin by cleansing your skin with a gentle facial cleanser to remove dirt, oil, and impurities. This prepares your skin for the exfoliation process, allowing the coffee scrub's benefits to truly shine.
Use lukewarm water to thoroughly rinse off the cleanser, which helps open up your pores for a more efficient exfoliation.
Pat your skin dry before applying the coffee scrub, as excess moisture can dilute its effectiveness.
Cleansing before exfoliating not only enhances the benefits of the coffee scrub but also minimizes the risk of irritation or breakouts caused by residual products on your skin.
Step 2. Apply Scrub With Circular Motions
First, apply the coffee scrub using gentle circular motions. This technique ensures even exfoliation and stimulates blood circulation in your skin.
Start with a small amount and gradually increase the area being treated, focusing on dry or rough patches for better results. Avoid applying excessive pressure – the goal is to buff away dead skin cells without causing irritation.
Spend about 1-2 minutes massaging the scrub onto your skin in circular motions, allowing the beneficial ingredients to penetrate effectively.
Rinse off the scrub thoroughly with lukewarm water to remove all residue, then follow up with a moisturizer to hydrate your skin after exfoliation.
Step 3. Rinse Scrub Thoroughly With Water
Thoroughly rinse the coffee scrub off your skin using lukewarm water.
Make sure to continue rinsing until the water runs clear, confirming that no coffee grounds are left on your skin.
Pat your skin dry gently with a clean towel to prevent irritation from rubbing too harshly.
Rinsing immediately after application helps prevent the coffee grounds from drying on your skin, which could make them more difficult to remove.
Following the rinse, applying a moisturizer can help lock in hydration and further enhance the benefits of your DIY coffee scrub.
Step 4. Apply Moisturizer After Exfoliating
After rinsing the coffee scrub, it's time to apply a moisturizer. Exfoliating can strip away your skin's natural oils, so using a moisturizer is essential to replenish hydration and restore your skin barrier.
Look for a moisturizer with ingredients like hyaluronic acid, glycerin, or coffee oil – they'll maximize hydration and nourishment post-exfoliation. Additionally, incorporating essential oils for hydration can enhance the moisture retention properties of your skincare routine.
Be sure to apply the moisturizer within a few minutes while your skin is still damp, as this helps with better absorption and increased hydration.
Consistent use of a moisturizer after exfoliating can lead to improved skin texture and a more radiant, supple complexion.
Step 5. Avoid Irritation by Moderating Scrub
When using coffee scrubs, it's crucial to start with a gentle application to evaluate your skin's reaction, as excessive scrubbing can lead to irritation and damage.
Limit the frequency of coffee scrubs to 1-3 times a week, allowing your skin to recover between treatments and preventing over-exfoliation.
Always mix coffee grounds with moisturizing agents, such as coconut oil or yogurt, to reduce the abrasive effects and enhance hydration during exfoliation.
Choose finely ground coffee for scrubs to minimize the risk of micro-tears in the skin, and perform a patch test on a small area before widespread use, especially if you have sensitive skin, to ensure no adverse reactions occur. Additionally, it is recommended to apply pimple patches after all other skincare products for targeted treatment.
Final Thoughts
Although coffee-infused skincare products can offer promising benefits, it's crucial to weigh the potential risks and advantages before incorporating them into your routine.
While DIY coffee scrubs can exfoliate and improve the appearance of cellulite and dark circles, they may also cause skin irritation if not properly formulated.
Commercial coffee-based products, like L'Oréal's Pure-Sugar Resurface and Energize Kona Coffee Scrub, provide a safer alternative that delivers similar skincare benefits without the guesswork.
Ultimately, understanding the nuances of coffee in skincare can help you achieve healthier, more vibrant skin – just be mindful of your skin's unique needs and limitations when exploring DIY recipes or new products.
Frequently Asked Questions
How to Make Coffee Skincare?
To make coffee skincare at home, you'll need a few simple ingredients. Start by saving your used coffee grounds – they make a great exfoliator!
You can mix the grounds with yogurt for a face mask, or combine them with sugar and oil for a soothing body scrub.
For a hydrating lip treatment, blend the grounds with coconut oil.
Finally, create a rejuvenating toner by infusing coffee into your favorite facial mist.
Have fun experimenting with these easy DIY coffee skincare recipes!
Are There Any Side Effects of Applying Coffee on Skin?
Using coffee on your skin can cause some issues. It may irritate sensitive skin, leading to redness or allergic reactions.
The coarse texture could also damage your skin, causing tiny tears. And coffee can dry out your skin by constricting blood vessels.
Plus, homemade scrubs lack preservatives, so they could grow bacteria if not used right away.
Be careful with coffee on your skin – do a patch test first to see how it reacts.
How to Use Coffee for Skin Care?
To use coffee for your skin, start by gently cleansing with a coffee-infused face wash.
Then, make a DIY coffee and coconut oil scrub to exfoliate.
For tired eyes, soak cotton pads in cold brew coffee and let them soothe your skin.
You can also mix coffee, honey, and yogurt for a revitalizing face mask.
Regularly using coffee-based moisturizers and eye creams can hydrate and reduce signs of aging too.
Give these easy coffee skincare tips a try!
Which Type of Coffee Is Best for Skin?
When it comes to skin care, Arabica coffee is the way to go!
This type of coffee is packed with antioxidants and has a gentle, mild flavor.
Plus, the coarse texture of Arabica coffee grounds makes them an awesome natural exfoliant.
You'll love how Arabica coffee boosts blood flow, reduces inflammation, and even helps fight aging.
Give Arabica a try for glowing, healthy skin!
Conclusion
Coffee is a versatile ingredient that can provide plenty of benefits for your skin when used correctly. Whether you’re looking to reduce puffiness, exfoliate, or add a natural glow, the recipes in this article are easy to make at home. Just be sure to do a patch test first to ensure your skin reacts well. Enjoy experimenting with this powerful ingredient! For reducing puffiness, try mixing ground coffee with a little bit of water to form a paste, then gently massaging it onto the affected areas. If you’re looking for a natural exfoliant, combine coffee grounds with coconut oil and sugar for a rich and creamy scrub. And for adding a natural glow, mix some coffee grounds with aloe vera gel for a refreshing face mask. And if you prefer to enjoy your coffee in a different way, try a rich and creamy flat white for a delicious treat!
In the vast and diverse world of coffee, coffee alternatives, and tea, Olivia has found her calling. As an author and a dedicated coffee and tea aficionado, her work for Cappuccino Oracle reflects her profound love and understanding of the intricate complexities found within these beverages. Olivia’s passion for the subject serves as both a catalyst for her creativity and a connection point with her audience.
Recipes
How Much Baking Soda Is 2 Teaspoons of Baking Powder
Not sure how to substitute baking powder with baking soda? Discover the perfect ratio and essential tips for your baking success!
If you're looking to substitute 2 teaspoons of baking powder, you'll need about 2/3 teaspoon of baking soda. Remember, baking soda is much more potent than baking powder, being three times stronger. To activate the baking soda, you'll also need to add an acid, like cream of tartar, vinegar, or lemon juice. Just mix the baking soda with the acid right before using it for the best results. This combination helps create those carbon dioxide bubbles that make your baked goods rise. Want to know more handy tips for baking substitutes? Keep on exploring!
Key Takeaways
- To replace 2 teaspoons of baking powder, use 2/3 teaspoon of baking soda combined with an acid.
- Common acids for activation include cream of tartar, vinegar, and lemon juice.
- For 2 teaspoons of baking powder, mix 2/3 teaspoon baking soda with 1 teaspoon of your chosen acid.
- Baking soda is stronger than baking powder, so precise measurements are crucial for desired results.
- Always combine baking soda with acid just before baking for optimal leavening effects.
Understanding Leavening Agents
When you immerse yourself in baking, understanding leavening agents like baking soda and baking powder is essential for achieving the perfect rise in your creations.
Baking soda is about three times stronger than baking powder, so if you need to substitute, you'll use less baking soda. For instance, to replace 2 teaspoons of baking powder, mix 2/3 teaspoon of baking soda with an acidic ingredient, such as 1 teaspoon of cream of tartar or 1 tablespoon of vinegar or lemon juice. This combination creates bubbles that help your batter rise.
Baking Soda Overview
Baking soda, or sodium bicarbonate, is a key ingredient in many baked goods, known for its powerful leavening properties.
It's a pure alkaline compound that requires an acidic ingredient to activate. When you mix baking soda with moisture and an acid, it produces carbon dioxide bubbles, causing your dough or batter to rise.
In recipes, you'll often see baking soda used in conjunction with ingredients like yogurt or vinegar to enhance leavening and avoid a metallic taste.
If you need to substitute baking powder, remember that 2 teaspoons of baking powder can be replaced with about 2/3 teaspoon of baking soda, as baking soda is three times stronger.
It's especially popular in quick breads, cookies, and pancakes for that perfect lift.
Baking Powder Basics
Leavening agents play an essential role in achieving the right texture in baked goods, and baking powder is a key player in this process.
Baking powder typically contains baking soda, an acid like cream of tartar, and a moisture-absorbing agent, allowing it to activate without needing additional acidic ingredients. Most baking powder is double-acting, releasing carbon dioxide gas in two stages: once when mixed with liquid and again when heated.
For every 1 teaspoon of baking soda, you can substitute about 3 teaspoons of baking powder due to the extra acid. This leavening agent helps create a lighter texture in cakes, muffins, and biscuits, especially when recipes lack sufficient acidic ingredients.
Substituting Baking Powder
Substituting baking powder can be straightforward if you know the right ratios and ingredients. To create a baking powder substitute, you can mix baking soda with an acidic component. Here's a quick guide:
Baking Powder Substitute | Amount of Baking Soda | Acidic Component |
---|---|---|
Cream of Tartar | 2/3 teaspoon | 1 teaspoon of cream of tartar baking |
Vinegar | 2/3 teaspoon | 1 teaspoon of vinegar |
Lemon Juice | 2/3 teaspoon | 1 teaspoon of lemon juice |
When you need to use baking soda for baking, always combine it with the acidic component just before use to maximize leavening action. Remember, you may need to adjust flavors if your recipe already includes acidic ingredients.
Calculating Baking Soda Amount
When you need to calculate the right amount of baking soda for your recipe, it's important to remember that it has a much stronger leavening power compared to baking powder.
To substitute 2 teaspoons of baking powder, follow these steps:
- Use about 2/3 teaspoon of baking soda.
- Include an acid in your recipe, like vinegar or yogurt, to activate the baking soda.
- Adjust other ingredients, especially liquid components, to maintain the recipe's moisture balance.
- For accurate measurement, level off the baking soda to avoid an overly alkaline taste.
Tips for Successful Substitution
Successfully swapping baking soda for baking powder can make a big difference in your baking results. When you substitute, remember to mix the baking soda with an acid before adding it to your recipe. This guarantees proper activation and helps maintain the desired flavor and texture. If you're using yogurt or buttermilk, you'll need to adjust the liquid ingredients since they add extra moisture and acidity.
Here's a quick reference:
Substitute Type | Amount of Baking Soda | Acid Needed |
---|---|---|
Baking Powder (2 tsp) | 2/3 tsp | 1 tsp cream of tartar or lemon juice |
Add Yogurt/Buttermilk | Adjust liquid | N/A |
Monitor Baking Times | Adjust as needed | N/A |
Keep a close eye on baking times; reactions may vary!
Common Baking Recipes
Understanding how baking soda and baking powder function is key when working with common baking recipes.
Here's a quick guide to help you navigate their use:
- Cakes: Often require baking powder for a light texture.
- Muffins: Use baking powder to achieve a fluffy rise.
- Biscuits: Rely on baking powder for that perfect airy effect.
- Substituting: To substitute 2 teaspoons of baking powder, use 2/3 teaspoon of baking soda and 1 teaspoon of cream of tartar.
Frequently Asked Questions
What Can I Substitute for 2 Teaspoons of Baking Powder?
If you need to substitute 2 teaspoons of baking powder, you've got a few options.
You can mix 2/3 teaspoon of baking soda with 1 teaspoon of cream of tartar.
Alternatively, try 1 teaspoon of baking soda plus 1 tablespoon of vinegar or lemon juice.
If you have self-rising flour, use 1 cup instead, adjusting your liquid and salt.
Just remember to include an acid when using baking soda for proper leavening!
How Much Baking Soda Is 1 Tsp of Baking Powder?
Ever wondered how to make your baked goods rise without baking powder?
To substitute 1 teaspoon of baking powder, you'll need 1/4 teaspoon of baking soda mixed with 1/2 teaspoon of an acidic ingredient like vinegar or lemon juice.
This combination activates the baking soda, creating carbon dioxide bubbles that help your treats rise.
Just remember, precision is key to achieving that perfect texture and lift in your delicious creations!
How to Make 2 Teaspoons of Baking Powder?
To make 2 teaspoons of baking powder, you'll need to mix 2/3 teaspoon of baking soda with 1½ teaspoons of cream of tartar.
If you prefer a quick alternative, combine 2 teaspoons of lemon juice or vinegar with the baking soda instead.
Always verify your cream of tartar is fresh for the best results.
Mix these ingredients just before using them to maintain their leavening power for your baking recipes.
How Do I Replace Baking Soda With Baking Powder?
Imagine your kitchen as an alchemist's lab, where ordinary ingredients transform into culinary magic.
To replace baking soda with baking powder, you'll need a slightly different approach. For every teaspoon of baking soda, use three teaspoons of baking powder.
If you're using liquid acids like vinegar, mix one teaspoon with a teaspoon of baking soda to achieve the desired rise.
Conclusion
When substituting baking powder, remember that it typically contains about one-third baking soda. So, for 2 teaspoons of baking powder, you'd need roughly ⅔ teaspoon of baking soda combined with an acid. Curiously, about 90% of all baked goods rely on these leavening agents to achieve that perfect rise. By understanding the balance between baking soda and baking powder, you can guarantee your recipes turn out just right every time you bake. Happy baking!
Noah, the Editor-in-Chief at Cappuccino Oracle, plays a pivotal role in shaping the voice and vision of our renowned platform. With an unwavering passion for coffee, coffee alternatives, and tea, Noah leads Cappuccino Oracle towards new horizons in the realm of coffee journalism.
Noah’s upbringing immersed him in the distinct aromas of artisanal coffee roasters, sparking a fascination that continues to fuel his professional journey. He joined Cappuccino Oracle as a senior editor and later assumed the position of Editor-in-Chief. Under his guidance, our platform has flourished into a trusted source for coffee, coffee alternatives, and tea lovers worldwide.
Recipes
How to Make a Flavored Iced Americano
How to create a refreshing flavored iced Americano that tantalizes your taste buds—discover the simple steps to elevate your coffee experience!
To make a flavored iced Americano, start by brewing a double shot of espresso using your preferred method. Fill a glass with ice cubes, then pour the hot espresso over the ice, stirring gently. Add 1-2 pumps of flavored syrup like vanilla or caramel, and mix in cold filtered water to achieve your desired strength. You can customize your drink further by incorporating spices like cinnamon or adjusting the syrup quantity. This simple process delivers a revitalizing and tasty beverage. If you're curious about other flavor combinations or variations, there's plenty more to explore.
Key Takeaways
- Brew a double shot of espresso (30 grams) using an espresso machine or Aeropress for a robust flavor base.
- Fill an 8-ounce glass with ice cubes to chill the drink without diluting it.
- Pour the hot espresso over the ice and stir gently until chilled.
- Add 1-2 pumps of your preferred flavored syrup (like vanilla or caramel) to enhance the taste.
- Incorporate 30 grams of cold filtered water for a smoother drink, adjusting sweetness and flavor as desired.
What Is a Flavored Iced Americano?
A flavored iced Americano is a rejuvenating twist on the classic iced Americano, designed to elevate your coffee experience. By adding flavored syrups, like vanilla, caramel, or hazelnut, you can enhance the rich taste of espresso mixed with cold water and ice.
This drink maintains the same invigorating base as a traditional iced Americano but offers a more personalized flavor profile. You can easily adjust sweetness levels by choosing different syrup quantities or opting for sugar-free sweeteners, perfect for those mindful of calories.
With countless flavor combinations available, experimenting with various syrups and espresso roasts allows you to create unique variations that cater to your individual taste preferences, making every sip a delightful experience.
Essential Ingredients for Your Drink
To craft a delicious flavored iced Americano, you'll need a few essential ingredients that come together to create a perfectly balanced drink.
Here's what you'll need:
- Espresso shots: Start with a double shot (30 grams) for robust flavor.
- Cold filtered water: Use 30 grams to dilute the espresso, ensuring smoothness.
- Ice cubes: Fill an 8-ounce glass to chill your drink and enhance that invigorating experience.
- Flavored syrups: Add 1-2 pumps or tablespoons of your favorite syrup, like vanilla or caramel, to elevate the taste.
Optional ingredients include sweeteners like sugar or agave, and dairy alternatives like almond milk or half-and-half for a creamier texture.
Additionally, the right training regimen can also improve your coffee-making skills.
Enjoy your iced Americano!
Tools You Will Need
Making a flavored iced Americano requires not just the right ingredients but also the right tools to bring your drink to life.
First, you'll need an espresso machine, Moka pot, or Aeropress to brew your espresso base. A precise burr grinder is essential for grinding your coffee beans, ensuring a rich flavor profile.
Don't forget a kitchen scale to accurately measure your coffee and water, maintaining a perfect 1:2 ratio for balance. Regular ice cubes are vital to chill your drink without diluting the flavor, so steer clear of coffee ice cubes.
Finally, an 8-ounce glass is ideal for serving your flavored iced Americano, providing enough room for ice and any additional flavorings you choose to add.
Step-by-Step Preparation
Now that you have your tools ready, let's get into the step-by-step preparation of your flavored iced Americano.
You'll explore various flavoring options and learn how to customize sweetness to match your taste.
We'll also touch on different brewing techniques to help you achieve that perfect espresso base.
Flavoring Options Available
Flavoring your iced Americano opens up a world of taste possibilities that can elevate your coffee experience. Here are some flavoring options you can try:
- Flavored Syrups: Start with 1-2 tablespoons of vanilla, caramel, or hazelnut syrup to enhance sweetness.
- Splash of Milk: Add a splash of milk or a dairy alternative for a creamier texture—adjust to your taste.
- Spices: Sprinkle a pinch of spices like cinnamon or nutmeg on top to add a unique twist and elevate the aroma.
- Experiment: Don't hesitate to mix flavors or try new combinations to discover your perfect iced Americano.
Incorporating color accuracy into your flavor choices can also enhance your visual presentation and make your drink more appealing.
With these options, your coffee will never be boring again! Enjoy the journey of flavor exploration.
Customizing Sweetness Levels
How can you achieve the perfect sweetness in your iced Americano? Start by preparing your drink with a double shot of espresso over ice. To customize sweetness levels, use simple syrup, beginning with one teaspoon and adjusting to your taste. For flavored options, add flavored syrup—like vanilla or caramel—starting with half a pump. Experiment with sweeteners such as agave or stevia, measuring around 1/2 teaspoon initially.
Sweetener Type | Starting Amount |
---|---|
Simple Syrup | 1 teaspoon |
Flavored Syrup | 1/2 pump |
Agave | 1/2 teaspoon |
Stevia | 1/2 teaspoon |
Other Sweeteners | To taste |
Remember to stir the mixture gently to enhance the overall flavor!
Brewing Techniques Explored
To create a flavorful iced Americano, you'll begin by brewing a double shot of espresso, which is essential for achieving a rich and balanced taste.
Here's how to prepare it step-by-step:
- Use an espresso machine to brew approximately 30 grams of espresso.
- Fill a tall glass with regular ice cubes to prevent dilution.
- Pour the hot espresso over the ice and stir gently until chilled.
- Add flavored syrups, like vanilla or caramel, adjusting the amount to your preference.
Finally, incorporate cold filtered water to reach your desired strength, usually a 1:2 ratio of espresso to water. A double shot of espresso contains about 120 mg of caffeine, which contributes to the energizing effect of the drink.
Serve immediately for the best flavor experience of your iced Americano!
Customization and Flavor Options
When it comes to customizing your iced Americano, sweetener choices and flavor syrup variations can make all the difference.
You can start with a flavored syrup like vanilla or caramel and adjust the sweetness with options like agave syrup or stevia.
This way, you'll create a drink that perfectly suits your taste buds!
Sweetener Choices
While you might think a classic iced Americano only needs coffee and ice, the right sweetener can transform it into a truly delightful experience.
Choosing the perfect sweetener not only enhances the flavor but also offers customization. Here are some great options to contemplate:
- Flavored syrups: Try vanilla, caramel, or hazelnut for an indulgent twist.
- Liquid sweeteners: Simple syrup or agave nectar dissolve easily in cold beverages.
- Healthier alternatives: Use stevia or monk fruit sweeteners for guilt-free sweetness.
- Spices: A sprinkle of cinnamon or nutmeg can elevate your drink's complexity. Adding anti-inflammatory herbs like turmeric or ginger can also provide health benefits alongside flavor.
Experimenting with these sweeteners lets you create a personalized iced Americano that perfectly matches your taste!
Flavor Syrup Variations
Flavor syrups offer endless possibilities for customizing your iced Americano, allowing you to explore a variety of taste sensations. You can add popular flavor syrups like vanilla, caramel, or hazelnut, using 1-2 tablespoons per serving to enhance sweetness.
If you prefer a personal touch, try making homemade syrups by dissolving equal parts sugar and water with your favorite flavoring. To elevate your drink further, consider incorporating spices like cinnamon or nutmeg, which complement the espresso's boldness without extra sweeteners.
For a creamier texture, opt for flavored creamers or dairy alternatives, introducing flavors like chocolate or almond. If you're looking for healthier options, sugar-free sweeteners like agave or stevia can still satisfy your customization cravings. Additionally, using sugar-free sweeteners can help reduce calorie intake while still allowing for delicious flavor enhancements.
Tips for Perfecting Your Drink
To create the perfect flavored iced Americano, start with high-quality, freshly ground espresso beans, as they lay the foundation for a rich, bold taste.
Here are some tips to elevate your drink:
- Experiment with flavored syrups like vanilla, caramel, or hazelnut—add about 1-2 tablespoons for a sweet twist.
- For a creamier texture, include a splash of milk or a dairy alternative, which complements the espresso beautifully.
- Adjust sweetness by starting with a small amount of syrup, gradually increasing it to find the right balance.
- Finish with a sprinkle of spices like cinnamon or nutmeg for an aromatic finish that enhances the flavor profile of your iced Americano.
Enjoy your delicious creation!
Storing Leftover Ingredients
After perfecting your flavored iced Americano, you might find yourself with some leftover ingredients. Properly storing these can enhance your future coffee drinks. Here's how to keep them fresh:
Ingredient | Storage Method | Duration |
---|---|---|
Leftover Espresso | Store in the fridge | 2-3 days |
Flavored Syrups | Store in a cool, dark place | Several weeks (opened) |
Ice Cubes (coffee) | Store in the freezer | Indefinitely |
For ideal freshness, avoid freezing leftover espresso, as it alters the flavor. Flavored syrups can last longer when stored properly. Using ice cubes made from leftover coffee preserves taste while preventing dilution, enhancing flavor in your next iced Americano.
Related Coffee Recipes to Try
While you're enjoying your flavored iced Americano, why not explore other delicious variations that can elevate your coffee experience?
Here are some enticing recipes to try:
- Vanilla Iced Americano: Add vanilla syrup for a sweet, aromatic twist that enhances the bold coffee flavor.
- Mocha Iced Americano: Incorporate chocolate syrup for a rich, indulgent chocolate flavor that pairs perfectly with your espresso.
- Caramel Iced Americano: Drizzle caramel sauce into your drink for a sweet, buttery flavor that balances the coffee's natural bitterness.
- Cinnamon Iced Americano: Stir in ground cinnamon or cinnamon syrup for a warm spice note that complements the drink's intensity.
Feeling adventurous?
Don't forget to try a invigorating Mint Iced Americano for a cool twist!
Frequently Asked Questions
Can You Add Flavor to Iced Americano?
Absolutely, you can add flavor to your Iced Americano!
Try incorporating flavored syrups like vanilla or caramel for a sweet twist. If you want a creamier texture, a splash of milk or cream does the trick.
You can also sprinkle spices like cinnamon for an aromatic touch. Don't forget to adjust the sweetness with options like agave or simple syrup.
Experimenting with different espresso roasts can also give you unique flavors without extra ingredients!
Can an Iced Americano Be Sweet?
Yes, an Iced Americano can definitely be sweet!
You can add sugar, flavored syrups, or natural sweeteners like agave or stevia to enhance its bold coffee flavor.
If you want to keep it smooth, try using simple syrup, as it dissolves easily in cold drinks.
A splash of milk or cream can also sweeten it while adding a creamy texture.
Just remember to stir gently for an even distribution of flavors!
Can You Add Cream to Iced Americano?
Yes, you can definitely add cream to your Iced Americano! It creates a creamier texture and balances the boldness of the espresso, making it more enjoyable for those who prefer a smoother taste.
Just a splash of half-and-half, whole milk, or a dairy alternative works well without overpowering the coffee flavor.
Keep in mind that adding cream will increase the calorie count, so consider that if you're watching your intake.
Enjoy your drink!
Why Do Koreans Like Iced Americanos so Much?
Koreans love iced Americanos for several reasons.
First, the bold, coffee-forward flavor provides a revitalizing boost, especially during hot, humid summers.
You'll appreciate the drink's low-calorie profile, making it a guilt-free choice for health-conscious individuals.
Plus, the vibrant café culture in South Korea encourages young professionals and students to enjoy it daily.
As the appreciation for high-quality coffee grows, iced Americanos fit perfectly into this evolving coffee scene.
Conclusion
Now that you know how to make a flavored iced Americano, it's time to get creative and personalize your drink. Remember, "variety is the spice of life," so don't hesitate to experiment with different flavorings and ingredients. Whether you prefer a hint of vanilla or a splash of caramel, each sip can be a delightful surprise. Enjoy your invigorating creation, and share it with friends to spread the coffee love! Cheers to your new favorite drink!
Noah, the Editor-in-Chief at Cappuccino Oracle, plays a pivotal role in shaping the voice and vision of our renowned platform. With an unwavering passion for coffee, coffee alternatives, and tea, Noah leads Cappuccino Oracle towards new horizons in the realm of coffee journalism.
Noah’s upbringing immersed him in the distinct aromas of artisanal coffee roasters, sparking a fascination that continues to fuel his professional journey. He joined Cappuccino Oracle as a senior editor and later assumed the position of Editor-in-Chief. Under his guidance, our platform has flourished into a trusted source for coffee, coffee alternatives, and tea lovers worldwide.
Recipes
Christmas Crack Recipe
Prepare to indulge in the delightful layers of salty and sweet with this Christmas Crack Recipe that will leave you wanting more!
You'll love making Christmas crack, a sweet and salty holiday treat that combines saltine crackers, buttery toffee, and rich chocolate. Start by preheating your oven to 350°F. Line a baking sheet with parchment paper, arranging the crackers in a single layer. Boil together 1 cup of unsalted butter and 1 cup of packed brown sugar for about three minutes, then pour it over the crackers. Bake for 5-7 minutes until bubbly. After pulling it out, sprinkle 2 cups of chocolate chips on top, allowing them to melt. If you're curious about variations and serving ideas, there's plenty more to explore!
Key Takeaways
- Combine saltine crackers, butter, brown sugar, chocolate chips, and optional nuts to create the addictive layers of Christmas Crack.
- Preheat your oven to 350°F (175°C) and prepare a lined baking sheet for even baking.
- Boil butter and brown sugar for 3-4 minutes before pouring over the crackers for a delicious toffee layer.
- Bake for 5-7 minutes, then sprinkle melted chocolate chips and optional toppings like nuts or sprinkles before cooling.
- Break into pieces and serve, or package in decorative bags for gifting during the holiday season.
History
The history of Christmas Crack is as delightful as the treat itself. Originating in the mid-20th century, this sweet and salty snack quickly became a holiday favorite. You might've heard it referred to as "Crack" due to its addictive nature, and it's easy to see why!
The treat typically combines saltine crackers, toffee, chocolate, and nuts, creating a uniquely satisfying experience. Many believe it was popularized through community cookbooks, where families shared their cherished recipes.
You'll find variations across different regions, with some adding seasonal spices or toppings. Over time, Christmas Crack has evolved into a holiday staple, often gifted in festive tins or served at parties.
Its rich history adds to the joy of enjoying this irresistible treat each year.
Recipe
Christmas Crack Recipe
Christmas Crack, also known as toffee or saltine cracker toffee, is a delightful holiday treat that combines sweet, salty, and crunchy flavors. This simple yet indulgent recipe is perfect for sharing with friends and family during the festive season. It features layers of buttery toffee and chocolate, all built upon a base of saltine crackers. The result is a delicious confection that's hard to resist, making it a popular choice for gift-giving or holiday parties.
Making Christmas Crack is a straightforward process that requires minimal ingredients and just a little bit of patience. The beauty of this dessert lies in its versatility; you can easily customize it with your favorite toppings, such as nuts, sprinkles, or holiday-themed candies. Once you try this recipe, you'll find yourself making it year after year as a holiday tradition. Additionally, enjoying your homemade treats can be enhanced by using the aromatic properties of essential oils to create a festive atmosphere.
Ingredients:
- 1 sleeve saltine crackers
- 1 cup unsalted butter
- 1 cup packed brown sugar
- 2 cups semi-sweet chocolate chips
- 1 cup chopped nuts (optional)
- Sea salt (for sprinkling)
Instructions:
Preheat your oven to 350°F (175°C) and line a baking sheet with parchment paper. Arrange the saltine crackers in a single layer on the baking sheet, ensuring they cover the entire surface.
In a saucepan over medium heat, melt the butter and brown sugar together, stirring constantly until the mixture comes to a boil. Let it boil for 3 minutes without stirring, then pour the hot toffee mixture evenly over the saltine crackers.
Bake in the preheated oven for 5-7 minutes until bubbly. Remove from the oven and immediately sprinkle the chocolate chips on top. Allow them to sit for a few minutes to melt, then spread the melted chocolate evenly over the toffee.
If desired, sprinkle chopped nuts and sea salt on top before letting it cool completely. Once set, break into pieces and enjoy!
Extra Tips:
When preparing Christmas Crack, make sure to watch the toffee closely as it cooks to prevent it from burning.
If you're using toppings, feel free to get creative; crushed candy canes, M&M's, or holiday-themed sprinkles can add a festive touch.
For easier breaking, chill the completed crack in the refrigerator for about 30 minutes before cutting or breaking it apart.
Store the pieces in an airtight container at room temperature to maintain their freshness. Enjoy your delicious homemade treat!
Cooking Steps
To start making your Christmas Crack, you'll need to preheat your oven to 400°F.
Next, spread the Saltine crackers evenly on a baking sheet.
Once that's done, you can move on to adding the melted butter mixture for that delicious flavor.
Step 1. Preheat Oven to 400°F
Before diving into the deliciousness of your Christmas Crack, you'll want to verify your oven is preheated to 400°F. This step is essential, as it guarantees the butter and sugar mixture melts perfectly, creating that irresistible caramel layer.
Take a moment to adjust your oven settings, checking that the temperature is accurate. If your oven has a built-in thermometer, use it to verify the heat level.
While you wait for the oven to reach the right temperature, gather your ingredients and prep your baking sheet.
Once the oven signals that it's ready, you'll be all set to take the next steps. A properly preheated oven makes all the difference in achieving that perfect crispy and chewy texture.
Step 2. Spread Saltine Crackers Evenly
Start by lining your baking sheet with a single layer of Saltine crackers, ensuring they're spread evenly across the surface.
Make sure the crackers are touching but not overlapping, as this helps create a uniform base for your Christmas Crack. If you have a larger sheet, you can fit more crackers; just remember to maintain that single layer.
This step is essential because an even distribution of crackers allows for consistent coverage of the sweet topping you'll add later.
Take your time here—rushing can lead to uneven areas, which might result in some bites missing that delicious flavor.
Once you've got them laid out perfectly, you're ready to move on to the next part of your festive treat!
Step 3. Add Melted Butter Mixture
Melt the butter in a saucepan over medium heat, allowing it to become bubbly and fragrant.
Once melted, carefully stir in the brown sugar until it's fully combined.
Keep cooking the mixture, stirring constantly, until it comes to a gentle boil.
Let it boil for about three minutes without stirring, watching closely to prevent burning.
You want it to thicken slightly and develop a rich color.
After three minutes, remove the saucepan from the heat and let it cool for a moment.
Then, pour the bubbly butter mixture evenly over the Saltine crackers.
Make sure to spread it out gently with a spatula, ensuring every cracker is coated.
This step is essential for achieving that delicious caramel flavor in your Christmas Crack.
Step 4. Sprinkle With Chocolate Chips
Once you've poured the butter mixture over the Saltine crackers, it's time to sprinkle a generous layer of chocolate chips on top.
Grab your bag of chocolate chips and sprinkle them evenly across the surface. You want to cover every inch, so don't hold back! The heat from the crackers will help them melt slightly, creating a deliciously gooey layer.
Depending on your preference, you can use semi-sweet, milk, or even dark chocolate chips. If you're feeling adventurous, mix in some white chocolate chips or peanut butter chips for added flavor.
Once you've got your chocolate layer set, let it sit for a few minutes to allow the chips to soften before moving on to the next step.
Enjoy the sweet aroma!
Step 5. Drizzle With Caramel Sauce
As the chocolate chips begin to soften, it's the perfect moment to drizzle your caramel sauce over the top.
Grab your prepared caramel sauce, whether homemade or store-bought, and give it a gentle stir to guarantee it's smooth. Using a spoon or a squeeze bottle, start at one end and slowly drizzle the caramel back and forth across the chocolate layer.
Make sure to cover as much of the surface as possible for that delightful sweet contrast. Don't worry if it isn't perfect; the rustic look adds charm!
Once you've finished drizzling, let it cool for a few minutes to allow the caramel to set slightly. Then, pop it into the fridge for a deeper set before cutting into pieces.
Enjoy!
Final Thoughts
While enjoying your homemade Christmas Crack, you might find it hard to believe how simple and delicious this treat is. This easy recipe combines the perfect balance of sweet and salty, making it a crowd-pleaser at any holiday gathering.
You'll love how quickly it comes together, allowing you to spend more time creating memories with loved ones. Plus, it's incredibly versatile; feel free to experiment with different toppings or flavorings to suit your taste.
Whether you package it up as gifts or keep it for yourself, Christmas Crack is sure to bring joy and satisfaction. So, gather your ingredients, embrace the festive spirit, and indulge in this delightful treat that's bound to become a holiday tradition in your home. Enjoy!
Frequently Asked Questions
Can I Use Gluten-Free Crackers for the Recipe?
Absolutely, you can use gluten-free crackers for the recipe!
Just make sure to choose a brand that holds up well under heat, as some gluten-free options can be a bit fragile.
You'll still get that delicious crunch and flavor you want.
By using gluten-free crackers, you're accommodating dietary needs without sacrificing taste.
How Should I Store Leftover Christmas Crack?
To store your leftovers, you'll want to keep them in an airtight container to maintain freshness.
Line the container with parchment paper to prevent sticking, then layer the pieces carefully. If you've got a lot, consider separating them with more parchment.
You can store it at room temperature for a few days, or in the fridge for a week. Just make sure it's completely cool before sealing.
Enjoy your tasty treat later!
Can I Add Different Toppings to the Christmas Crack?
Absolutely, you can add different toppings!
Get creative with your favorite ingredients. Consider using crushed pretzels for a salty crunch, or sprinkle on some nuts for added texture.
You might try drizzling melted chocolate or caramel for a decadent touch. Experiment with colorful sprinkles or even dried fruit for a unique twist.
Just remember to let your imagination guide you, and have fun customizing it to suit your taste!
Is There a Dairy-Free Version of Christmas Crack?
Yes, you can definitely make a dairy-free version!
Simply substitute the traditional butter with a dairy-free alternative, like coconut oil or a plant-based butter. For chocolate, opt for dairy-free chocolate chips or a vegan chocolate bar.
You'll still enjoy that delicious crunch and sweetness without the dairy. Just be sure to check labels for any hidden dairy ingredients.
With these swaps, you'll have a tasty treat everyone can enjoy!
How Long Does Christmas Crack Typically Last?
Typically, treats like this can last about two weeks when stored properly.
You'll want to keep it in an airtight container to maintain its freshness. If you refrigerate it, it might last even longer, up to a month.
Just make sure to let it come to room temperature before enjoying again.
If you notice any changes in texture or smell, it's best to toss it for safety.
Enjoy your treats while they're at their best!
Arf, an author and an innovative enthusiast of coffee, coffee alternatives, and tea, plays a crucial role as a contributor to the esteemed Cappuccino Oracle platform. Renowned for his curiosity and passion for these captivating beverages, Arf has carved out a unique space for himself in the world of exploration and writing. He realized that coffee, coffee alternatives, and tea are not mere drinks to keep one awake, but universes of flavors and stories waiting to be explored.
-
Sustainability and Industry Trends1 day ago
The Future of Coffee: Trends and Predictions for 2025
-
Coffee Essentials2 days ago
Decoding Coffee Roasts How Roast Levels Affect Caffeine Content and Flavor
-
Brewing Guides and Equipment2 days ago
10 Strongest Starbucks Coffees From Blonde Roast to Nitro Cold Brew
-
FAQs1 day ago
Caffeine Content Comparison: Nespresso Vs Traditional Coffee Vs Energy Drinks
-
Coffee Alternatives2 days ago
Who Sells Mushroom Coffee Near Me
-
Coffee Essentials2 days ago
The Rich World of Brazilian Coffee a Guide and Brewing Tips
-
Brewing Guides and Equipment2 days ago
How to Empty Pods From Nespresso Vertuo
-
Recipes2 days ago
How to Make a Mocha Latte at Home: Easy 5-Minute Recipe