
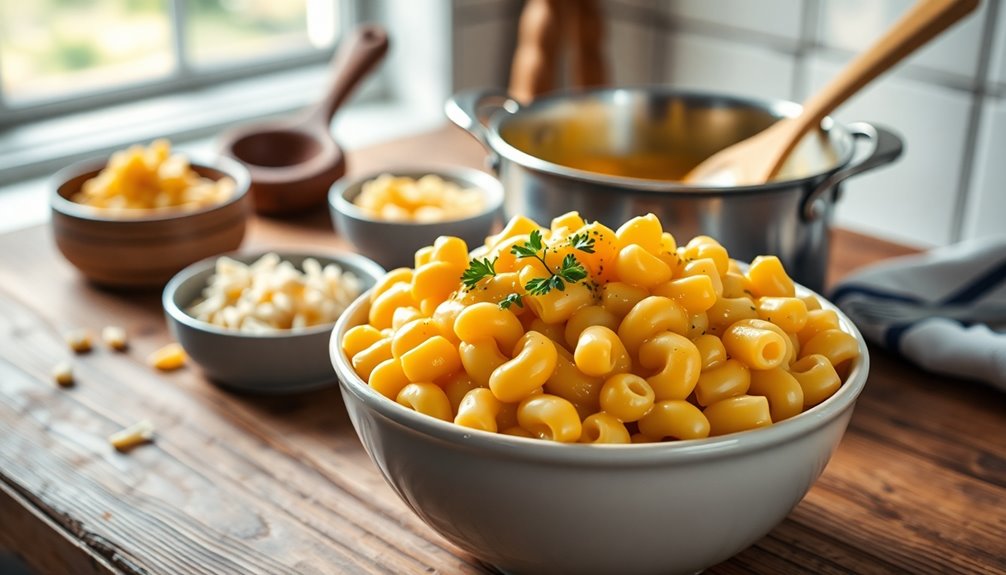
You're about to enjoy a cozy Tini Mac and Cheese that's perfect for a quick, personal meal. Start by boiling 1 cup of elbow macaroni until al dente. In a separate pan, melt 1 tablespoon of butter, then whisk in 1 tablespoon of flour. Gradually add 1 cup of milk, stirring until smooth. Mix in 1 cup of shredded cheddar cheese, garlic powder, and paprika to taste. Combine the cheese sauce with the drained macaroni and stir until creamy. Feel free to add some crispy bacon or breadcrumbs on top for extra flavor. There's plenty more to explore in this dish!
Key Takeaways
- Tini Mac and Cheese features a creamy cheese sauce combined with al dente elbow macaroni for a rich, comforting dish.
- The recipe includes simple ingredients: elbow macaroni, unsalted butter, flour, milk, and shredded cheddar cheese.
- It's easy to customize with mix-ins like vegetables or proteins, and toppings such as bacon or breadcrumbs.
- Preparation involves boiling the macaroni, making a cheese sauce, and mixing everything together for a smooth consistency.
- This dish is perfect for solo meals or quick indulgences, suitable any time of year.
Top picks for "tini cheese recipe"
As an affiliate, we earn on qualifying purchases.
History

When you think of comfort food, mac and cheese often comes to mind, but its history is more complex than you might expect.
This creamy dish traces its roots back to 18th-century Italy, where pasta and cheese were combined in early recipes. Thomas Jefferson introduced it to America after his travels in Europe, serving it at a state dinner in 1802.
Over time, it evolved into the beloved staple that we recognize today. The dish gained popularity during the Great Depression for its affordability and ease of preparation.
Today, mac and cheese represents not just a meal but a nostalgic reminder of home and warmth. Its enduring appeal shows how food can connect us to our past while adapting to modern tastes.
Recipe

Tini Mac and Cheese is a delightful twist on the classic comfort food, perfect for a quick lunch or a cozy dinner. This recipe is designed to serve a smaller portion, ideal for those solo meals or when you're just looking for a little indulgence without leftovers. The creamy cheese sauce, combined with al dente pasta, creates a rich and satisfying dish that warms the soul.
Plus, the addition of a few simple ingredients elevates the flavor profile, making it a delightful treat any time of year.
To make Tini Mac and Cheese, you'll need a handful of pantry staples and a few extra touches to bring out the best in your dish. This recipe isn't only straightforward but also allows for creativity—feel free to add your favorite mix-ins like vegetables or proteins to customize it to your liking.
Whether you're a mac and cheese aficionado or a newcomer to this classic dish, this recipe is sure to become a favorite.
Ingredients:
- 1 cup elbow macaroni
- 1 tablespoon unsalted butter
- 1 tablespoon all-purpose flour
- 1 cup milk
- 1 cup shredded cheddar cheese
- 1/4 teaspoon garlic powder
- 1/4 teaspoon onion powder
- Salt and pepper to taste
To prepare Tini Mac and Cheese, start by boiling a pot of salted water and cooking the elbow macaroni according to the package instructions until al dente.
While the pasta is cooking, melt the butter in a saucepan over medium heat. Once melted, whisk in the flour to create a roux, cooking for about a minute until it's lightly golden. Gradually add the milk, whisking continuously until the mixture thickens.
Stir in the shredded cheddar cheese, garlic powder, onion powder, and season with salt and pepper. Once the cheese has melted and the sauce is creamy, drain the cooked pasta and mix it with the cheese sauce until well combined.
When cooking Tini Mac and Cheese, consider using a mix of cheeses for a more complex flavor, such as adding mozzarella for stretchiness or parmesan for a sharp bite.
If you want to make your dish even heartier, you can mix in cooked bacon, sautéed vegetables, or even a sprinkle of breadcrumbs on top before broiling for a crispy finish.
Remember to adjust the seasonings to match your taste preferences, and enjoy experimenting with different toppings or mix-ins for a personalized touch! Feel free to get creative with your combinations; for instance, you might consider adding a splash of citrus or a hint of spice to elevate the dish. If you’re looking for a refreshing drink to accompany your meal, try a cocktail made with ‘sex on the beach cocktail ingredients‘ for a fun twist. The vibrant flavors will not only complement your meal but also enhance your overall dining experience!
Cooking Steps

Now that you've got your ingredients ready, it's time to start cooking!
First, you'll boil the macaroni until it's tender, then gradually add the cheese mixture.
Finally, mix in your favorite seasonings and spices until you achieve that creamy consistency you love.
Step 1. Boil Macaroni Until Tender

To achieve perfectly tender macaroni for your Tini Mac and Cheese, start by bringing a large pot of salted water to a rolling boil.
Once the water's bubbling, add your macaroni, stirring immediately to prevent sticking.
Keep an eye on the clock, as you'll want to cook it for about 8 to 10 minutes, or until it reaches al dente, which means it should still have a slight bite to it.
Stir occasionally to guarantee even cooking.
After the time's up, taste a piece to check for tenderness.
Once it's done, drain the macaroni in a colander, but don't rinse it; you want to keep that starchy coating.
Now you're ready for the next steps in your Tini Mac and Cheese!
Step 2. Add Cheese Mixture Gradually

Once your macaroni is perfectly drained, it's time to add the cheese mixture gradually for that creamy texture you crave.
Start by returning the macaroni to the pot over low heat. Spoon a portion of the cheese mixture into the macaroni, stirring continuously until it melts and coats the pasta evenly. This step is essential, as it guarantees all the noodles are enveloped in cheese goodness.
Repeat this process, adding more cheese mixture in small amounts, stirring well after each addition. Keep the heat low to avoid scorching, allowing the cheese to blend seamlessly with the pasta.
You'll notice the mac and cheese transforming into a rich, creamy dish. Enjoy the process; this is where the magic happens!
Step 3. Mix in Seasonings and Spices

As you stir in the cheese mixture, don't forget to elevate the flavor by mixing in your favorite seasonings and spices. A pinch of salt and pepper is a must, but feel free to get creative!
Consider adding a dash of garlic powder for depth, or a sprinkle of paprika for a smoky touch. If you like a bit of heat, toss in some cayenne or red pepper flakes. Additionally, you can enhance the dish's nutritional profile by incorporating complete proteins like quinoa.
For a fresh twist, try adding dried herbs like thyme or basil. Taste as you go, adjusting the quantities until it's just right for you.
These simple additions will enhance the overall dish, making your tiny mac and cheese truly memorable. Enjoy the process and let your taste buds guide you! Additionally, using non-toxic materials in your cooking process ensures a safer and healthier meal preparation experience.
Step 4. Stir Until Creamy Consistency

Stir the cheese mixture into the pasta over medium heat, ensuring everything combines well. As you mix, keep an eye on the consistency; it should start to come together beautifully.
If it seems too thick, don't hesitate to add a splash of milk or a bit of reserved pasta water. This'll help create that creamy texture you're aiming for.
Continue stirring for a few minutes, allowing the heat to gently melt the cheese and blend the flavors. You want to achieve a smooth, velvety feel without any lumps.
Be patient and attentive during this step; it's essential for the final dish. Once you've reached the desired creaminess, it's time to move on to the next stage of your mac and cheese masterpiece.
Step 5. Add Toppings of Choice

How do you want to elevate your mac and cheese experience? Adding toppings is the perfect way to personalize your dish!
Start by sprinkling some crispy bacon bits on top for a savory crunch. If you're a fan of spice, sprinkle jalapeños or a dash of cayenne pepper. For a gourmet twist, consider adding truffle oil or a drizzle of pesto.
You might also enjoy a layer of breadcrumbs mixed with parmesan for a delightful, crunchy finish. Fresh herbs like parsley or chives can brighten up the dish, too.
Final Thoughts
While you might think mac and cheese is just a simple dish, the Tini Mac and Cheese recipe elevates it to something special. This recipe combines creamy cheese with perfectly cooked pasta, creating a comforting meal that's sure to impress.
Whether you're serving it as a main course or a side dish, the flavors will delight everyone at your table. Don't hesitate to get creative with your toppings and mix-ins; they'll add a personal touch that makes this dish your own.
Frequently Asked Questions
Can I Substitute Gluten-Free Pasta in This Recipe?
Yes, you can definitely substitute gluten-free pasta in this recipe!
Just make sure to choose a high-quality gluten-free pasta that suits your taste.
Cook it according to the package instructions, as gluten-free pasta may have different cooking times.
Keep an eye on the texture; you want it to be al dente.
Once you mix it with the sauce, you'll still get that creamy goodness you love, minus the gluten!
Enjoy!
How Can I Make Tini Mac and Cheese Vegan?
To make your dish vegan, start by replacing dairy ingredients with plant-based alternatives.
Use a vegan cheese or nutritional yeast for that cheesy flavor. For the creamy texture, try unsweetened almond milk or cashew cream. Substitute butter with vegan margarine or coconut oil.
You can also add veggies like spinach or broccoli for extra nutrients.
Just mix everything together and enjoy your delicious, vegan mac! It's easier than you might think!
What Cheese Varieties Work Best for Tini Mac and Cheese?
When you're choosing cheese varieties for a creamy mac and cheese, go for sharp cheddar for its tangy flavor, mozzarella for that stretchy goodness, and a bit of Gruyère for added richness.
Mixing these cheeses creates a wonderful blend of flavors and textures. You might also try adding some cream cheese for extra creaminess.
Experiment with proportions until you find the perfect combination that satisfies your taste buds!
Can I Prepare Tini Mac and Cheese Ahead of Time?
Yes, you can definitely prepare a dish ahead of time!
Just cook it as usual, then let it cool completely before storing it in the refrigerator.
When you're ready to serve, you can reheat it in the oven or on the stove.
If you want to keep it creamy, consider adding a splash of milk before reheating.
This way, you'll have a delicious meal ready to enjoy without hassle!
How Do I Store Leftovers Properly?
To store your leftovers properly, let them cool down first.
Transfer the mac and cheese into an airtight container, ensuring it's sealed tightly to prevent air from getting in.
Label the container with the date, then place it in the refrigerator. It'll stay fresh for about three to five days.
If you want to keep it longer, consider freezing it. Just remember to thaw it in the fridge before reheating!