To pour a latte heart, start with properly steamed milk that has a silky, glossy texture. Begin by gently pouring milk into the center of your espresso, holding the pitcher about 4-5 inches above. As you pour, tilt the cup and gradually increase the flow to fill it without disturbing the crema. Once near the rim, use a side-to-side motion to form the heart shape, speeding up the pour to circulate the milk. Remember, practice makes perfect, so experiment with angles and flow rates. Keep going, and you'll discover more tips to master this art form!
Key Takeaways
- Start with properly steamed milk, achieving a glossy texture between 140°F and 160°F for optimal pour quality.
- Hold the pitcher 4-5 inches above the espresso for a thin stream, starting slowly to avoid disrupting the crema.
- Pour into the center of the cup to create a circular base, then wiggle the pitcher side-to-side to shape the heart.
- Increase the pour rate as the cup fills, allowing the milk to circulate around the edges for depth in the design.
- Practice consistently, focusing on milk texture and flow control to refine your pouring technique and achieve a symmetrical heart shape.

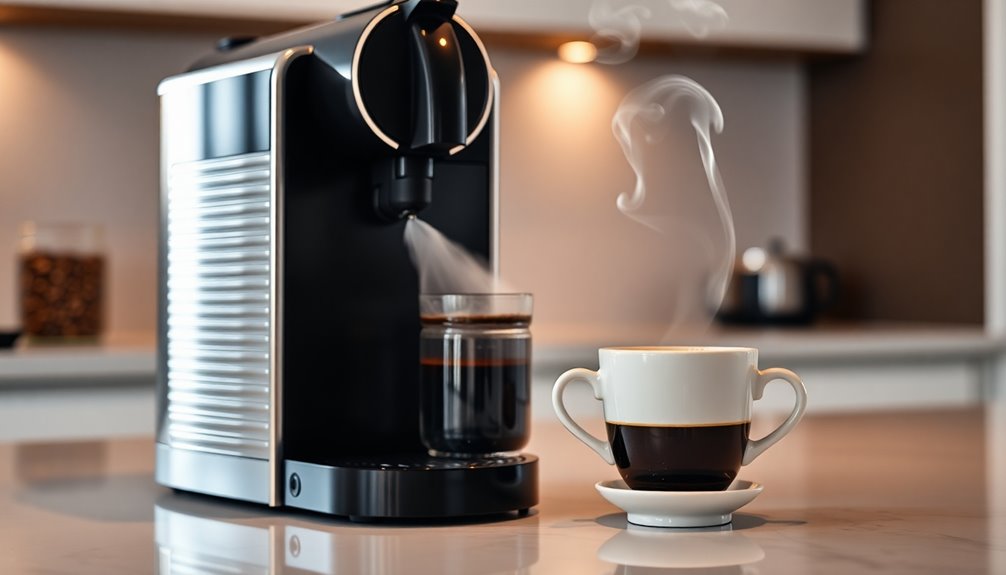
Elite Gourmet EHC111A Personal Single-Serve Compact Coffee Maker, Black
- Quick Brew Time: Brews coffee in under 60 seconds
- Single-Touch Operation: Easy one-touch brewing for convenience
- Includes Travel Mug: Comes with a 12oz stainless steel mug
As an affiliate, we earn on qualifying purchases.
Preparation Steps for Latte Art

To create a beautiful latte heart, you'll need to follow a few essential preparation steps.
First, gather your equipment: an espresso machine with a steaming wand, a chilled metal pitcher, and fresh whole milk or oat milk. Quality steamed milk is crucial for achieving the best results in latte art. Once you have your equipment ready, you can also prepare your espresso to create a perfect base for your latte art. If you’re interested in exploring different coffee methods, you might want to learn how to brew americano with aeropress, which offers a rich and robust flavor profile. This versatility in brewing techniques can enhance your overall coffee experience and inspire creativity in your latte designs.
Start by grinding and tamping your coffee, then pull two shots of espresso and pour them into a 6-ounce mug, ensuring a rich crema layer forms on top.
For the milk, fill your pitcher just below the spout and chill it beforehand. Steam the milk until it reaches a temperature between 140°F and 160°F, creating microfoam.
Tap and swirl the milk to eliminate large bubbles and achieve a shiny texture.
With everything ready, you're set to pour your latte heart!
Initial Pouring Techniques

As you begin pouring your latte, the initial height and distance of the milk pitcher are essential for achieving that perfect blend of milk and espresso.
Start by holding the pitcher about 4-5 inches above the espresso, maintaining a distance of 5-10 centimeters to create a thin, pencil-width stream. This height helps mix the milk without disturbing the crema, setting a solid foundation for your art.
Begin with a slow flow rate to fill the cup gently, avoiding any disruption. As the cup nears fullness, increase your flow rate to fan out the milk effectively.
Tilt the cup at an angle to allow smooth pouring and guarantee the milk flows evenly across the surface, preparing for your latte art masterpiece. Additionally, achieving quality espresso is crucial as it enhances the overall flavor and presentation of your latte art.
Positioning the Milk Jug

Positioning the milk jug correctly is vital for creating a beautiful latte heart.
Start by placing the steam wand in the bottom right-hand quadrant of the jug, making certain it's just inside the milk to avoid steaming it flat. For stability, let the wand pass through the spout of the jug.
Hold the jug steady with your dominant hand, using the lip for added support. You can tilt the jug forwards and backwards to adjust the wand's height while keeping its contact point fixed. Properly textured milk should resemble wet paint, as this enhances the visual appeal and mouthfeel of the beverage.
If you need to control the milk swirl, shift the jug left to right. Visualize the jug in quadrants to make certain the wand aligns for a smooth, non-turbulent milk spin, which is vital for your latte art.
Creating the Heart Shape

Once you've poured the milk into the cup, it's time to focus on creating that heart shape. Start by pouring the milk directly into the center, forming a circular base.
Keep a steady flow while gently moving the pitcher from side to side to round the shape. As the heart begins to emerge, adjust your flow rate to define its size. If you want to add texture, employ a slight wiggle motion with the pitcher. Remember that achieving a velvety microfoam consistency is key for milk frothing to create a beautiful design.
Maintain the pitcher close to the surface for better control. As you approach the cup's rim, speed up the pour to let the milk circulate around the edges.
Finally, lift the jug to form a thin stream, dragging it down to create the heart's point.
Finishing the Design

After you've shaped the heart, it's time to refine your design and give it that polished finish.
Position your pitcher a couple inches above the drink, ensuring the nozzle is centered over the heart. Keep a steady hand and maintain the pitcher's height to avoid sinking your design.
Adjust the milk flow to a pencil-width stream, avoiding bubbles or disruptions. As you execute the pull-through, lift the pitcher and move it smoothly through the center of the heart. Remember, achieving the ideal milk texture is crucial for a flawless finish.
Apply gentle pressure and stop the flow when you complete the design. Focus on achieving symmetry with a clear tail at the end.
With practice, you'll master the pull-through technique for consistently beautiful latte hearts.
Advanced Techniques

While mastering the basic latte heart is essential, delving into advanced techniques can elevate your skills and creativity.
Start your pour with a fast flow, filling the cup halfway while holding the pitcher about 4-5 inches above the espresso. Once you reach the desired level, lower the pitcher and adjust the flow to create the white pattern.
To form the heart, pour into the center, slow the flow, and lift the pitcher's back. Experiment with variations like the wavy heart using wrist movements or adding texture with slow wiggles. Maintaining a consistent flow helps to achieve a smoother finish and enhances the quality of your design.
Verify the cup is tilted for better access, and maintain a consistent flow for predictable results. With practice, you'll refine your technique and impress others with your latte art!
Choosing the Right Milk

Choosing the right milk is essential for creating beautiful latte art, as the texture and consistency directly impact your design. You want silky smooth milk, so steam it to the perfect consistency. In fact, using low-acid coffee can also enhance the overall flavor profile of your latte, complementing the milk's texture.
Swirl and tap the pitcher to eliminate bubbles and guarantee a homogeneous mixture. This prevents separation during pouring, which can ruin your design. Both dairy and alternative milks, like oat milk, can work, but remember that the fat content affects stability. Adjust your steaming technique based on the milk type, aiming for a temperature between 140-160°F.
Use the right pitcher size, and avoid over-steaming to keep your milk manageable. With quality milk and proper technique, you'll create stunning latte art every time. Mastering the importance of heart in your pouring technique will greatly enhance your overall latte art skills.
Common Mistakes to Avoid

When creating a latte heart, it's easy to make mistakes that can compromise your design.
First, jug positioning matters—holding it too high or low can ruin the shape. Keep the jug close to the espresso for better control. To achieve a well-defined heart pattern, maintain a low jug position during the pull-through phase.
Next, watch your flow rate; pouring too slowly results in a tiny heart, while pouring too quickly can wash out your design. Aim for a steady pace.
Also, guarantee your pour is centered; an off-center approach leads to asymmetry.
Finally, focus on milk texture—too thick or thin creates undesirable patterns. Introduce air while steaming and pour immediately to maintain that silky feel.
Avoiding these common pitfalls will set you on the right path to crafting beautiful latte hearts.
Practicing for Perfection

To master the art of pouring a latte heart, consistent practice is essential. Start by ensuring your milk achieves that glossy, paint-like texture; avoid over-aerating and focus on achieving a hot, silky consistency. Mastery of milk steaming is crucial before attempting latte art.
Begin practicing with larger cups, as they offer more room for error. Use food coloring to get the hang of pouring without wasting coffee. Pay attention to your hand movements and adjust your pouring speed—too fast fills the cup too quickly, while too slow creates splashes.
As you gain confidence, tilt the cup and lower the pitcher to create your designs. With each attempt, you'll develop the muscle memory needed to pour beautiful latte hearts.
Keep refining your technique; perfection takes time!
Frequently Asked Questions
What Type of Espresso Machine Is Best for Latte Art?
When you're looking for the best espresso machine for latte art, you'll want one with a powerful steam wand and the ability to produce high-quality espresso shots.
Consider a manual or semi-automatic model for better control. Machines like the Breville Bambino or Barista Express are fantastic choices.
Features such as an adjustable steam wand and durable design also enhance your latte art experience, making it easier to create stunning designs.
How Do I Clean My Milk Frother Properly?
To clean your milk frother properly, start by unplugging it and disassembling the removable parts.
Soak them in a vinegar solution for about 30 minutes, adding dish soap to tackle any residue.
Clean the frothing wand by running it in a vinegar solution, then rinse all parts thoroughly.
Wipe the exterior with a damp cloth and avoid getting electrical components wet.
Regular maintenance will keep your frother in top shape for your next latte!
Can I Use Non-Dairy Milk for Latte Art?
Absolutely, you can use non-dairy milk for latte art! Just make sure you choose the right type—oat milk often works best for a silky foam.
When steaming, keep an eye on the texture; you want it smooth and not too aerated.
Practice your pouring techniques, and don't forget to adjust your speed and angle.
With a bit of patience, you'll create beautiful designs, even with non-dairy options!
What Temperature Should the Milk Be for Pouring?
For the best results when pouring, you should steam your milk to the ideal temperature range.
For dairy milk, aim for 140-150°F, while alternative milks generally do well between 130-160°F.
Staying within these ranges guarantees your milk has the right consistency for microfoam and a creamy texture.
If the temperature goes too high, it can burn or curdle, ruining your latte.
Always monitor the temperature to achieve that perfect pour!
How Can I Practice Latte Art at Home?
To practice latte art at home, start by gathering your tools like an espresso maker and milk frother.
Use YouTube tutorials to learn techniques, and try practicing with food coloring mixed in milk to avoid wasting coffee.
Begin with larger cups for more room to maneuver, focusing on simple designs initially.
Consistency and patience are key, so keep practicing regularly to improve your skills and build confidence in your pouring technique.
Conclusion
Now that you know how to pour a latte heart, it's time to practice! Remember, the key is in the consistency of your milk and your pouring technique. Don't get discouraged by mistakes; they're part of the learning process. Keep refining your skills, and soon you'll impress everyone with your latte artistry. Enjoy the journey, have fun experimenting with different designs, and most importantly, savor each cup you create. Happy pouring!