You can easily whip up delicious refried beans that'll enhance your meals. Start by soaking 2 cups of pinto beans overnight. Drain and rinse them before mashing them in a skillet with 2 tablespoons of vegetable oil or lard. Add a diced onion and 2 cloves of minced garlic for flavor. Season with salt and cumin, simmering until everything's well blended and soft. You might also want to remix with jalapeños or tomatoes for a kick. These beans pair beautifully with tacos or can stand alone as a tasty dip. Keep reading to discover more tips and variations!
Key Takeaways
- Soak 2 cups of pinto beans overnight, then drain and rinse to improve texture and flavor.
- Sauté 1 small diced onion and 2 minced garlic cloves in 2 tablespoons of vegetable oil or lard.
- Mash the cooked beans in the pan, adding salt, cumin, and optional spices for enhanced flavor.
- Simmer the mixture until smooth and well combined, adjusting seasoning to taste.
- For added variety, consider incorporating jalapeños, diced tomatoes, or experimenting with different spices.
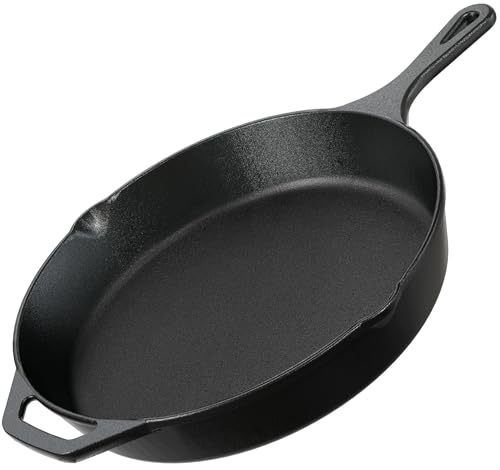
Utopia Kitchen Cast Iron Skillet 12 Inch Pre-Seasoned PFAS-Free Black
- Heat Retention: Exceptional even heat distribution
- Versatile Use: Suitable for stovetop, campfire, grill
- Pre-Seasoned: Ready to use with non-stick coating
As an affiliate, we earn on qualifying purchases.
As an affiliate, we earn on qualifying purchases.
History

Refried beans have a rich history that dates back centuries, as they were originally created by indigenous peoples in Mesoamerica.
You'll find that these beans were a staple in their diet, providing essential nutrients and energy. They were often cooked in pots over open flames, giving them a unique flavor that's cherished even today.
As Spanish colonizers arrived, they adopted and adapted the dish, introducing new spices and techniques.
Over time, refried beans spread across regions, becoming a beloved component of many cuisines, particularly in Mexican and Tex-Mex cooking.
You may notice how they've transformed throughout history, reflecting cultural exchanges and innovations.
Today, they're not just a side dish; they're a symbol of tradition and community.
Recipe

Refried beans are a staple in many Latin American cuisines and are a versatile dish that can be used in a variety of meals. They're typically made from pinto beans, although black beans can also be used for a different flavor profile. This creamy, savory dish is perfect as a side for tacos, burritos, or enchiladas, and can even stand alone as a filling or dip.
Making refried beans from scratch isn't only rewarding but allows you to control the flavors and textures according to your preference.
To prepare refried beans, you'll need to start with cooked beans, which can be made from dried beans or canned beans for convenience. The key to achieving the perfect consistency is mashing the beans while sautéing them with aromatic ingredients such as onions and garlic. The result is a rich and hearty dish that can be seasoned to taste with spices like cumin or chili powder.
Whether you prefer them smooth or chunky, homemade refried beans are a delicious addition to any meal.
Ingredients:
- 2 cups cooked pinto beans (or canned)
- 1 small onion, diced
- 2 cloves garlic, minced
- 2 tablespoons vegetable oil or lard
- 1 teaspoon ground cumin (optional)
- Salt, to taste
- Pepper, to taste
- 1/4 cup vegetable broth or water (as needed)
Cooking Instructions:
In a pan over medium heat, heat the vegetable oil or lard until shimmering. Add the diced onion and cook until translucent, about 3-4 minutes. Stir in the minced garlic and cook for another minute until fragrant.
Add the cooked beans to the pan, along with ground cumin if using. Begin to mash the beans with a fork or potato masher as they cook, adding vegetable broth or water as needed to achieve your desired consistency.
Season with salt and pepper to taste and continue cooking for about 5-7 minutes, stirring frequently, until the beans are heated through and creamy.
Extra Tips:
For an extra layer of flavor, consider adding chopped jalapeños or diced tomatoes during the cooking process. If you prefer a smoother texture, you can blend the beans in a food processor before cooking them.
Additionally, feel free to experiment with different spices or herbs to suit your taste. Refried beans can be made ahead of time and stored in the refrigerator for a few days or frozen for longer storage, making them a convenient option for meal prep.
Cooking Steps

To make delicious refried beans, you'll want to start by soaking your pinto beans overnight.
Once they're ready, drain and rinse them before mashing thoroughly.
Finally, add your favorite seasonings and cook the beans until they're soft and flavorful.
Step 1. Soak Pinto Beans Overnight

Although it may seem like a small step, soaking pinto beans overnight is essential for achieving the perfect texture and flavor in your refried beans.
Start by measuring out the amount of dried pinto beans you need. Rinse them under cold water to remove any dirt or debris. Once clean, place the beans in a large bowl and cover them with at least three inches of water. The beans will absorb a lot of moisture, so be generous with the water.
Let them sit at room temperature for eight to twelve hours. This soaking process softens the beans, making them easier to cook and ensuring even cooking.
You'll notice a difference in taste and consistency when you finally refry them.
Step 2. Drain and Rinse Beans

After soaking your pinto beans overnight, the next step is to drain and rinse them thoroughly.
Start by pouring the beans into a colander, allowing all the soaking liquid to drain away. Rinsing is vital, as it helps remove excess sodium and any impurities that may have settled during soaking.
Run cold water over the beans for a minute or two, gently shaking the colander to guarantee all beans get rinsed evenly.
Once you've rinsed them, give the beans a gentle shake to remove any excess water before transferring them to your cooking pot.
This simple step prepares your beans perfectly for the next stage, making certain they're clean and ready to absorb all those delicious flavors.
Step 3. Mash Beans Thoroughly

Begin by transferring the drained and rinsed beans into a large pot over medium heat.
As the beans warm up, use a potato masher or fork to start mashing them. You'll want to break them down until they reach your desired consistency—smooth or a bit chunky, it's up to you!
Keep mashing while stirring occasionally to guarantee even heating. If the beans seem too thick, feel free to add a splash of water or broth to help them along.
Continue mashing until they're thoroughly combined and heated through. Taste the beans to verify they're cooked to your liking; they should be creamy and flavorful.
Once you're satisfied, you're ready to move on to adding seasoning for that extra kick!
Step 4. Add Seasoning to Beans

Once your beans are mashed and heated, it's time to elevate their flavor by adding seasonings. Start by stirring in some salt to taste; this is essential for bringing out the natural flavors.
Next, toss in a pinch of ground cumin and chili powder for a warm, earthy kick. If you enjoy a little heat, consider adding a dash of cayenne pepper or some diced jalapeños.
For a touch of richness, incorporate a tablespoon of butter or a splash of olive oil. Finally, don't forget to add some minced garlic or onion for depth.
Mix everything well and taste as you go, adjusting the seasonings until you achieve the perfect balance that suits your palate. Enjoy your flavorful beans!
Step 5. Cook Beans Until Soft

With your beans seasoned to perfection, it's time to cook them until they're soft and tender.
Start by adding enough water to cover the beans by about an inch. Bring the mixture to a gentle boil over medium heat. Once boiling, reduce the heat to low, cover the pot, and let the beans simmer.
Stir occasionally to prevent sticking and check the water level; add more if necessary to keep the beans submerged. Depending on the type of beans you're using, this process can take anywhere from 30 minutes to over an hour.
You'll know they're ready when they're easily mashed with a fork. Once soft, drain any excess liquid if needed, and get ready for the next step!
Final Thoughts

As you wrap up your culinary adventure with refried beans, remember that this dish is more than just a side; it's a versatile staple that can elevate any meal.
Whether you enjoy them in tacos, burritos, or simply as a dip, refried beans offer a comforting, hearty flavor that complements many cuisines.
Don't be afraid to experiment with spices or add toppings like cheese, onions, or jalapeños to make them your own.
Making them from scratch not only enhances the taste but also allows you to control the ingredients.
With just a few simple steps, you can create a delicious batch that'll impress your family and friends.
Frequently Asked Questions
Can I Use Canned Beans Instead of Dried Beans?
Absolutely, you can use canned beans instead of dried beans! Canned beans are convenient, saving you time on soaking and cooking.
Just rinse them to remove excess sodium and any canning liquid. Keep in mind that the texture might differ slightly, but they'll still work well in most recipes.
If you're in a hurry or don't have dried beans on hand, canned beans are a great alternative that won't compromise your dish's flavor.
How Long Can Leftovers Be Stored in the Fridge?
Leftovers can typically be stored in the fridge for about three to four days.
Make sure you keep them in airtight containers to maintain freshness. If you think you won't eat them within that time, consider freezing them instead.
Just remember to label the containers with the date, so you know how long they've been there.
Always check for any signs of spoilage before consuming leftovers, just to be safe!
What Are Some Popular Toppings for Refried Beans?
When you're looking to enhance your meal, toppings can make all the difference. Some popular choices include shredded cheese, sour cream, and diced onions, which add creaminess and crunch.
You might also enjoy fresh cilantro or sliced jalapeños for a burst of flavor. If you're feeling adventurous, try adding avocado or a drizzle of hot sauce.
These toppings not only elevate the dish but also let you customize it to your taste!
Can I Freeze Refried Beans for Later Use?
Yes, you can freeze refried beans for later use!
Just let them cool completely before transferring them to an airtight container or freezer bag.
Make sure to remove as much air as possible to prevent freezer burn.
When you're ready to enjoy them, simply thaw in the fridge overnight or heat them directly from the freezer in a pot.
They'll retain their flavor and texture, making them a convenient meal option!
Are Refried Beans Gluten-Free?
Yes, refried beans are generally gluten-free.
They're made from beans, which don't contain gluten, and the typical ingredients like onions, garlic, and spices are also gluten-free.
However, you should always check the labels or ingredient lists of pre-packaged varieties to verify there aren't any hidden gluten sources.
If you're making them from scratch, you can easily control what goes in, making it a safe option for those avoiding gluten.