
You can make delicious pretzels at home with just a few simple ingredients. Start by combining 4 cups of all-purpose flour, a packet of active dry yeast, warm water, sugar, and salt. Knead the dough, let it rise, and then shape it into pretzels. For a perfect finish, boil them briefly in water mixed with baking soda, then bake at 450°F until golden brown. Don't forget to sprinkle them with coarse salt before baking! Enjoy with your favorite dip, and if you stick around, you'll discover more tips and variations to elevate your pretzel game.
Key Takeaways
- Combine 1 ½ cups warm water, 1 tablespoon sugar, and 1 packet active dry yeast; let sit for 5-10 minutes to activate the yeast.
- Mix 4 cups all-purpose flour and 1 teaspoon salt; gradually add the yeast mixture until a dough forms, then knead for 8-10 minutes.
- Shape the dough into pretzels by rolling into ropes and twisting into the traditional shape; tuck ends underneath.
- Boil pretzels in a solution of 8 cups water and ½ cup baking soda for 30 seconds before placing them on a baking sheet.
- Bake at 450°F for 12-15 minutes until golden brown; cool on a wire rack and enjoy with toppings like salt, cheese dip, or mustard.
History

The history of pretzels dates back over a thousand years, and their origins are often debated. You might find it fascinating that early forms of pretzels appeared in ancient Rome, where they were likely a reward for children who learned their prayers.
As you explore their journey, you'll discover that they gained popularity in medieval Europe, especially among monks. The twisted shape symbolizes arms crossed in prayer, adding a spiritual element to their allure.
By the 19th century, German immigrants brought pretzels to America, where they evolved into the soft, chewy creations you enjoy today.
Recipe
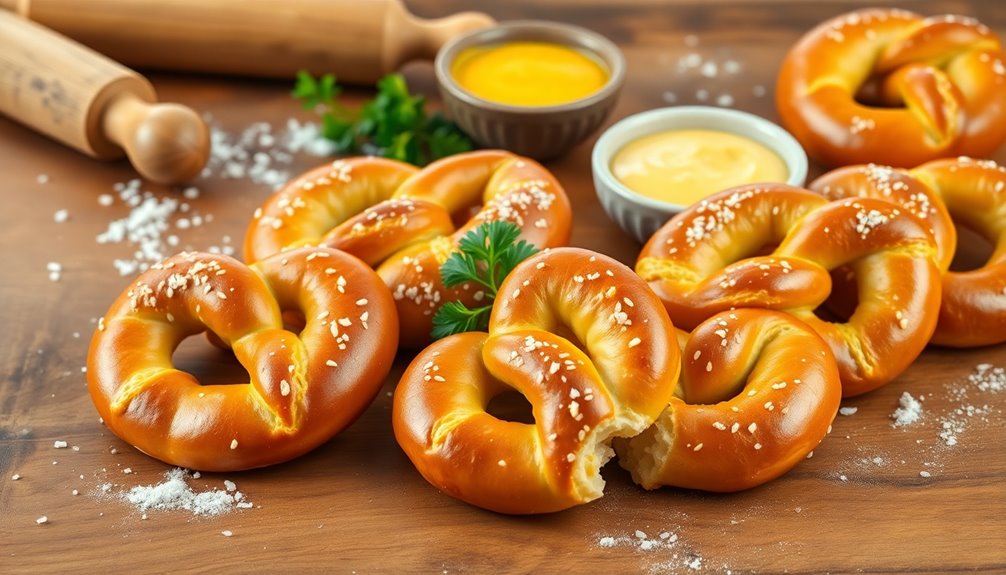
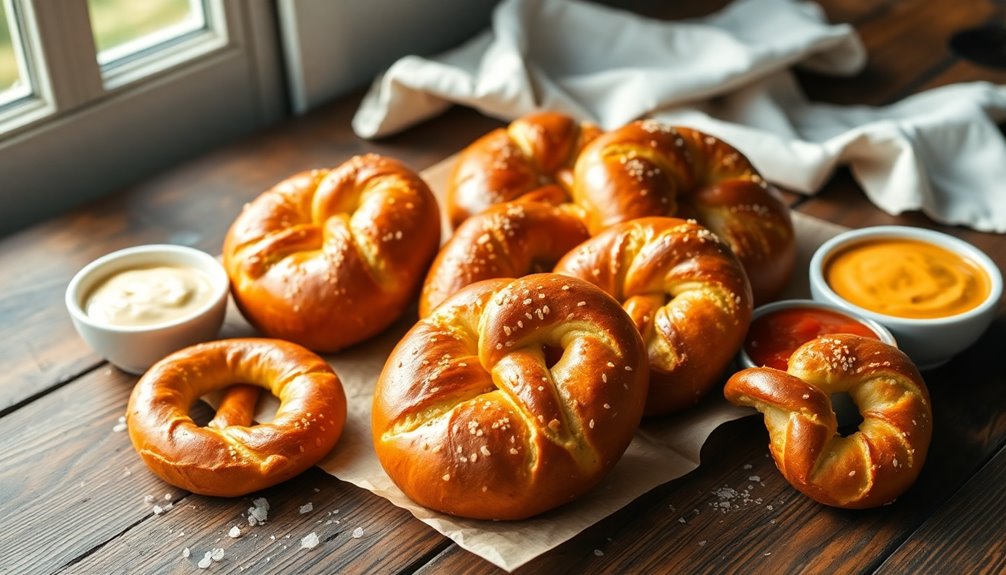
Making pretzels at home can be a fun and rewarding experience. The aroma of freshly baked pretzels wafting through your kitchen is hard to resist, and the taste is even better! This recipe will guide you through the steps to create soft and chewy pretzels that can be enjoyed on their own or paired with your favorite dips. Perfect for a snack, party, or even as a fun family activity, homemade pretzels are a great addition to any occasion.
You'll be surprised at how simple the ingredients are to put together, and the process is quite straightforward. With just a few basic items, you can whip up a batch of delicious pretzels that rival those from your favorite bakery. Enjoy the satisfaction of kneading the dough and shaping the pretzels, and don't forget to sprinkle them with coarse salt for that classic finish!
Ingredients:
- 4 cups all-purpose flour
- 1 packet (2 ¼ teaspoons) active dry yeast
- 1 ½ cups warm water (110°F)
- 1 tablespoon sugar
- 1 teaspoon salt
- ⅓ cup baking soda
- 1 egg (for egg wash)
- Coarse sea salt (for topping)
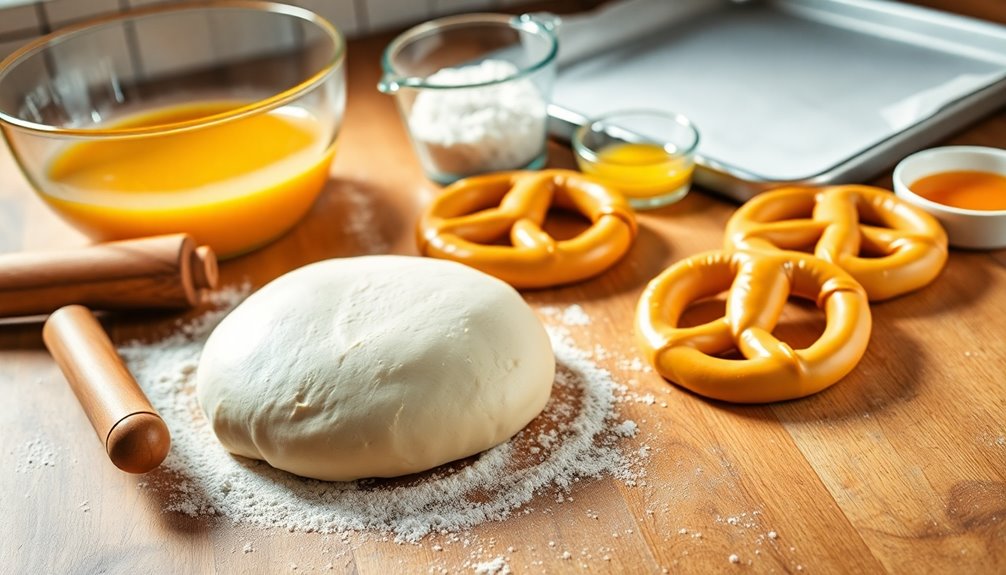
To make the pretzels, begin by dissolving the sugar and yeast in warm water in a large mixing bowl. Let it sit for about 5 minutes until foamy. Gradually add the flour and salt, mixing until a dough forms.
Knead the dough on a floured surface for about 5-7 minutes, until smooth and elastic. Place the dough in a greased bowl, cover it with a damp cloth, and let it rise in a warm place for about 1 hour, or until it has doubled in size.
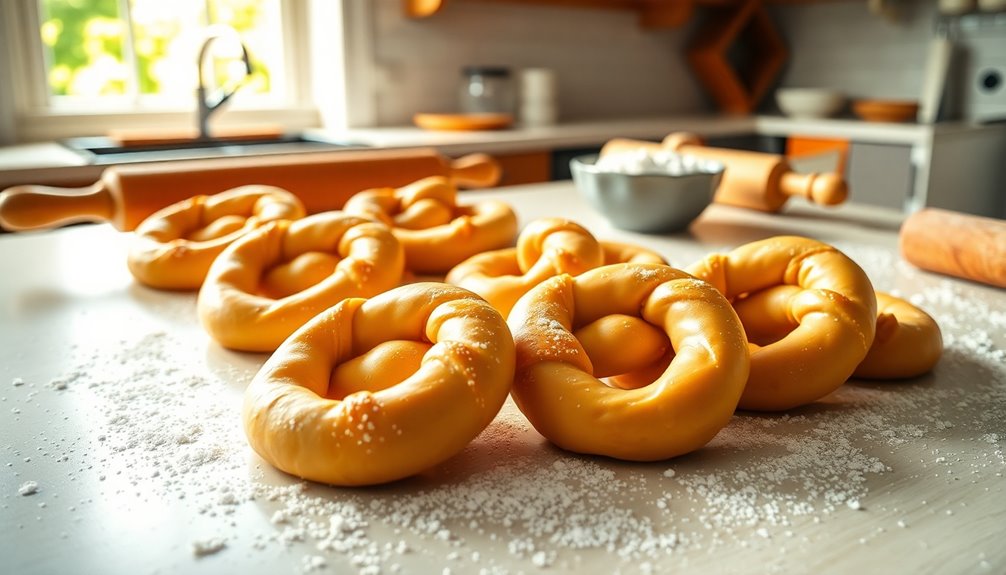
Once risen, preheat your oven to 450°F (230°C). Divide the dough into 8 equal pieces and roll each piece into a long rope. Shape each rope into a pretzel shape and place them on a baking sheet lined with parchment paper.
In a large pot, bring 10 cups of water to a boil and add the baking soda. Boil each pretzel for about 30 seconds, then remove and place them back on the baking sheet. Brush the pretzels with the beaten egg and sprinkle with coarse salt. Bake for 12-15 minutes, or until golden brown.
Here are some extra tips to enhance your pretzel-making experience. Make sure the water used for proofing the yeast is warm but not too hot, as high temperatures can kill the yeast.
If you want to experiment with flavors, try adding toppings like garlic powder, cheese, or sesame seeds before baking. For a sweet twist, you can brush the pretzels with melted butter and sprinkle them with cinnamon sugar after they bake.
Enjoy your homemade pretzels fresh out of the oven for the best taste!
Cooking Steps

Now that you've got your ingredients ready, it's time to start cooking your pretzels.
You'll activate the yeast mixture first, then knead the dough thoroughly to get that perfect texture.
Once that's done, shaping and boiling your pretzels will bring you one step closer to that delicious finish!
Step 1. Activate Yeast Mixture

To kick off your pretzel-making adventure, you'll need to activate the yeast mixture. Begin by measuring out warm water—ideally between 110°F and 115°F.
Stir in the sugar, then sprinkle the yeast over the top. Let it sit for about five to ten minutes. You'll know it's ready when the mixture becomes frothy and bubbly, indicating the yeast is alive and kicking.
If it doesn't foam, your yeast might be old, so it's best to start over with fresh yeast. Once activated, gently stir the mixture to combine it with the water and sugar.
This step is essential, as it forms the foundation for your dough, ensuring that your pretzels rise beautifully later on. Get ready for the next steps!
Step 2. Knead the Dough Thoroughly

Knead the dough thoroughly until it becomes smooth and elastic, which usually takes about 8 to 10 minutes.
Start by dusting your work surface with a light sprinkle of flour to prevent sticking. Grab the dough and push it down and away from you with the palms of your hands. Fold it back over itself, give it a quarter turn, and repeat the process.
You'll notice the dough changing texture; it should feel soft and pliable. If it's too sticky, add a little more flour, but be careful not to overdo it.
Keep kneading until it springs back when you poke it with your finger. This step is essential for developing the gluten, ensuring your pretzels have the perfect chewy texture.
Step 3. Shape the Pretzels
Once the dough is smooth and elastic, it's time to shape the pretzels. Start by dividing the dough into equal portions, about the size of a golf ball.
Roll each piece into a long rope, roughly 20 to 24 inches long. Make sure it's even in thickness.
Now, form a U-shape with the rope, crossing the ends over each other to create the classic pretzel twist. Tuck the ends down towards the center of the U to secure the shape. Press firmly to guarantee they stick together.
Place your shaped pretzels on a baking sheet lined with parchment paper, giving them enough space to expand.
Repeat this process until all the dough is shaped, and you're ready for the next step!
Step 4. Boil in Baking Soda Solution

Boiling the shaped pretzels in a baking soda solution is an essential step that enhances their flavor and gives them that characteristic chewy texture.
Start by bringing a large pot of water to a boil and adding about 1/2 cup of baking soda to it. Once it's bubbling, gently lower your pretzels into the boiling water, making sure not to overcrowd the pot.
Boil each pretzel for about 30 seconds on each side. You'll notice they'll puff up slightly during this process.
Using a slotted spoon, carefully remove them from the water and let them drain briefly on a towel. This step not only contributes to the pretzel's iconic taste but also prepares them perfectly for baking.
Step 5. Sprinkle With Coarse Sea Salt
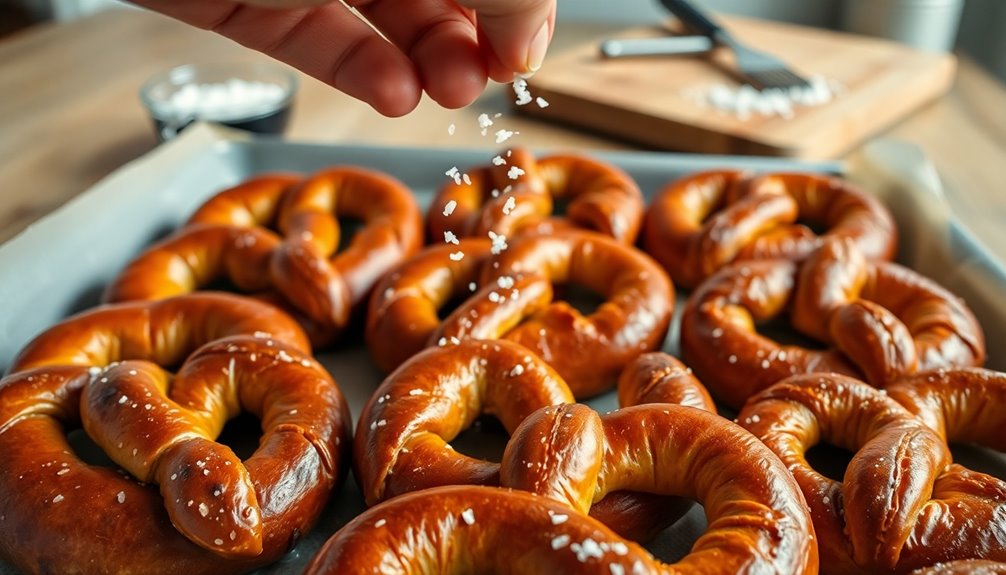
After you've boiled your pretzels, it's time to add the finishing touch: coarse sea salt.
Start by placing the boiled pretzels on a parchment-lined baking sheet. While they're still wet from the boiling process, grab your coarse sea salt and sprinkle it generously over the surface of each pretzel.
Make certain to cover all sides to guarantee every bite is flavorful. Don't be shy—this step is essential for that classic pretzel taste. If you prefer a less salty flavor, you can adjust the amount to your liking.
Once you've salted them to perfection, pop the pretzels into the oven. They'll transform into golden-brown delights, ready to be enjoyed!
Final Thoughts
As you savor your homemade pretzels, it's clear that the effort put into crafting them is well worth it.
You've transformed simple ingredients into a delicious snack that brings joy to your taste buds. Whether you enjoy them straight from the oven or paired with your favorite dipping sauce, each bite is a reminder of your culinary skills.
Remember, practice makes perfect; don't hesitate to experiment with flavors and shapes. Share your creations with friends and family to spread the love, or keep them all to yourself—no judgment here!
Baking pretzels is more than just a recipe; it's an experience. So, roll up your sleeves, embrace the process, and enjoy every moment of this delightful journey into pretzel-making!
Frequently Asked Questions
Can I Use Whole Wheat Flour for Pretzels?
Absolutely, you can use whole wheat flour!
It'll give your pretzels a nuttier flavor and a denser texture. Just keep in mind that whole wheat flour absorbs more liquid, so you might need to adjust the amount of water in your recipe.
Also, they could turn out a bit darker than those made with all-purpose flour.
Experimenting can lead to delicious results, so don't be afraid to try it out!
How Do I Store Leftover Pretzels?
To store leftover pretzels, let them cool completely before wrapping them in plastic wrap or placing them in an airtight container.
If you want to keep them fresh longer, consider freezing them. Just make sure they're well-wrapped to prevent freezer burn.
When you're ready to enjoy them again, simply reheat in the oven for a few minutes. This way, you'll retain their delicious texture and flavor, making them just as tasty as when they were fresh!
Can I Freeze Pretzels?
Yes, you can freeze pretzels! Just make sure they're completely cooled before you wrap them tightly in plastic wrap or aluminum foil.
This helps prevent freezer burn. Place the wrapped pretzels in an airtight container or a freezer bag for extra protection.
When you're ready to enjoy them, just thaw them in the fridge or at room temperature. You can also reheat them in the oven for that fresh, warm taste!
What Toppings Can I Use on Pretzels?
When it comes to toppings, you’ve got plenty of options! You can sprinkle coarse salt for that classic flavor, or get creative with garlic powder and Parmesan. You can also add a squeeze of fresh lime juice for a zesty kick or toss on some chopped cilantro for a burst of freshness. For those looking to enhance their culinary adventure, don’t forget to check out the shrimp taco cooking instructions; they can elevate your meal to a whole new level. Whether you’re grilling, frying, or baking, the right toppings can truly transform your dish into a memorable experience.
If you're feeling adventurous, try cinnamon sugar for a sweet twist. You could even drizzle melted cheese on top or add a dash of everything bagel seasoning.
Don't forget about dipping sauces like mustard or cheese sauce to elevate your pretzel experience!
How Can I Make Gluten-Free Pretzels?
To make gluten-free pretzels, you'll need gluten-free flour, yeast, warm water, sugar, and salt.
Start by mixing the yeast with warm water and sugar, letting it activate.
Combine the flour and salt, then mix in the yeast mixture until it forms a dough.
Knead it gently, shape your pretzels, and boil them briefly in a baking soda solution before baking.
Brush with butter and sprinkle salt for that classic taste!