
You can whip up delightful lemon bars using just a few simple ingredients. Start by preheating your oven to 350°F. Cream together 1 cup of softened unsalted butter and 1 cup of granulated sugar. Mix in 2 cups of flour and a pinch of salt, then press the dough into a greased 9×13-inch baking dish. Bake for 15-20 minutes. For the filling, whisk together 4 large eggs, more sugar, ½ cup of lemon juice, 1 tablespoon of zest, and a bit of flour. Pour it over the crust and bake again until set. There's even more to discover about this classic treat!
Key Takeaways
- Combine softened butter, granulated sugar, and flour to create a buttery shortbread crust before baking for 15-20 minutes at 350°F (175°C).
- Whisk together eggs, sugar, lemon juice, lemon zest, and a bit of flour to prepare the tart lemon filling.
- Pour the lemon mixture over the pre-baked crust and bake for an additional 20-25 minutes until the filling is set.
- Allow the lemon bars to cool completely before cutting into squares and dusting with powdered sugar for a nice finish.
- Serve lemon bars chilled or at room temperature, perfect for gatherings and potlucks.
Top picks for "lemon bars recipe"
As an affiliate, we earn on qualifying purchases.
History

Lemon bars have a delightful history that dates back to the early 20th century, when they first appeared in American cookbooks. These tangy treats likely evolved from traditional lemon meringue pie, offering a simpler, more portable option.
You might find it interesting that lemon bars gained popularity during the Great Depression, as families sought affordable yet delicious desserts. Their bright flavor and easy preparation made them a favorite for gatherings and potlucks.
Over the years, variations emerged, incorporating different types of crusts and toppings, but the classic combination of tart lemon filling and buttery shortbread remains timeless.
Today, lemon bars continue to be a beloved dessert, cherished for their balance of sweet and sour, appealing to all ages.
Recipe

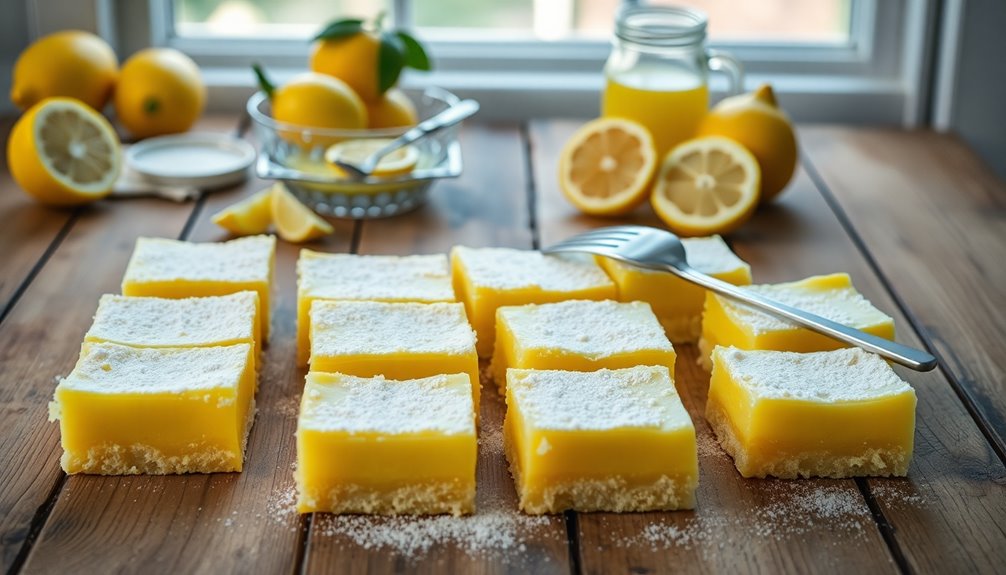
Lemon bars are a delightful dessert that perfectly balances sweet and tart flavors, making them a beloved treat for many. With a buttery shortbread crust and a zesty lemon filling, these bars aren't only delicious but also easy to make. They're perfect for any occasion, whether you're hosting a gathering, celebrating a special day, or simply craving a revitalizing dessert at home.
This classic recipe yields a bright and tangy lemon filling that contrasts beautifully with the crumbly crust. Topped with a dusting of powdered sugar, these lemon bars are as visually appealing as they're tasty. Follow this simple recipe to whip up a batch of lemon bars that will impress family and friends alike.
Ingredients:
- 1 cup unsalted butter, softened
- 1 cup granulated sugar
- 2 cups all-purpose flour
- 1/4 teaspoon salt
- 4 large eggs
- 1 cup granulated sugar (for filling)
- 1/2 cup freshly squeezed lemon juice
- 1 tablespoon lemon zest
- 1/4 cup all-purpose flour (for filling)
- Powdered sugar, for dusting
To prepare the lemon bars, preheat your oven to 350°F (175°C) and grease a 9×13-inch baking dish. In a mixing bowl, cream together the softened butter and 1 cup of granulated sugar until light and fluffy. Gradually add 2 cups of flour and 1/4 teaspoon of salt to the mixture, stirring until a crumbly dough forms.
Press this dough evenly into the bottom of the prepared baking dish. Bake for 15-20 minutes, or until the edges are lightly golden. Meanwhile, in another bowl, whisk together the eggs, 1 cup of granulated sugar, lemon juice, lemon zest, and 1/4 cup of flour until smooth.
Pour this lemon mixture over the baked crust and return it to the oven for an additional 20-25 minutes, or until the filling is set. Allow the bars to cool completely before cutting into squares and dusting with powdered sugar.
When making lemon bars, make certain that you use fresh lemon juice for the best flavor, as bottled juice can taste less vibrant. For a more intense lemon flavor, you can add an extra teaspoon of lemon zest to the filling.
Additionally, for a firmer texture, allow the bars to chill in the refrigerator for a few hours after baking. This will enhance the flavors and make cutting them easier. Enjoy your delicious lemon bars!
Cooking Steps

Let's get started on making those delicious lemon bars!
First, you'll want to preheat your oven to 350°F.
Then, you can mix the flour and sugar to set the foundation for your tasty treat.
Step 1. Preheat Oven to 350°F

Before diving into the delicious world of lemon bars, you need to preheat your oven to 350°F. This step is essential because it guarantees your bars bake evenly and develop that perfect texture.
To preheat, simply turn on your oven and set it to the desired temperature. Don't forget to give it a few minutes to reach the right heat before you start mixing your ingredients.
A properly preheated oven helps in achieving that delightful crispy crust while keeping the filling smooth and tangy. So, while you gather your ingredients, let the oven do its job.
Once it's ready, you'll be one step closer to enjoying those scrumptious lemon bars. Happy baking!
Step 2. Mix Flour and Sugar

As you immerse yourself in the mixing process, combine the flour and sugar in a large bowl to create a solid base for your lemon bars.
Make sure to use a whisk or a fork to blend them well, ensuring there are no lumps. This mixture will give your bars the perfect texture, so take your time.
Once the flour and sugar are evenly incorporated, you'll notice the light, fluffy consistency that's vital for a great crust.
It's essential to measure your ingredients precisely to achieve the desired sweetness and balance in flavor.
Keep an eye on the consistency; it should feel light yet cohesive, setting the stage for the next delightful steps in your baking adventure.
Step 3. Add Eggs and Zest

With the flour and sugar mixed to perfection, it's time to elevate your lemon bars by adding the eggs and zest.
Crack the eggs into a mixing bowl and whisk them until they're smooth. This will help create a rich, creamy texture for your filling.
Next, grab fresh lemons and zest them finely. You'll want about two tablespoons of zest to really pack in that citrus flavor.
Once you've zested the lemons, add both the eggs and zest into your dry mixture. Stir everything together gently, making sure all the ingredients are well combined.
This step is vital for achieving that delightful balance of sweetness and tartness in your lemon bars. Enjoy the fresh aroma filling your kitchen!
Step 4. Pour Mixture Into Pan

Carefully pour the lemon mixture into your prepared baking pan, ensuring an even distribution across the surface. Use a spatula to help guide the mixture if necessary, making sure it reaches the corners and edges. This step is essential for even cooking and achieving that perfect texture.
Once the mixture is settled, take a moment to check for any bubbles. If you see any, gently tap the pan on the counter to release them. This will help your lemon bars bake evenly and create a smooth finish.
After you're satisfied with the distribution and bubble removal, you're ready for the next step in your lemon bar journey. Just keep that excitement going; deliciousness is on the way!
Step 5. Bake for 20 Minutes

Now it's time to bake your lemon bars for 20 minutes. Preheat your oven to 350°F (175°C) if you haven't already.
Once your mixture is poured into the prepared pan, slide it into the oven. Set a timer and keep an eye on it. You want the edges to be slightly firm and the center to have a slight jiggle when you take it out. This is key to achieving that perfect, melt-in-your-mouth texture.
After 20 minutes, remove the pan from the oven and let it cool completely on a wire rack. Once cooled, you can dust the top with powdered sugar for a decorative touch.
Your lemon bars are now ready for slicing and enjoying!
Final Thoughts

As you reflect on the delightful experience of making lemon bars, it's clear that this treat combines simplicity with a burst of flavor.
You've created a dessert that not only impresses but also brings joy to every bite. The zesty lemon filling pairs perfectly with the buttery crust, making it a standout for any occasion.
Plus, the process is quick and straightforward, allowing you to enjoy your creation in no time. Whether you're serving them at a gathering or indulging solo, these lemon bars are sure to brighten your day.
Don't forget to share with friends or family—they'll love the tangy, invigorating taste.
Frequently Asked Questions
Can I Use Bottled Lemon Juice Instead of Fresh Lemons?
Yes, you can use bottled lemon juice instead of fresh lemons.
However, keep in mind that the flavor may not be as vibrant. Bottled juice often contains preservatives and isn't as fresh, so the taste might differ slightly.
If you decide to go this route, check the ingredients for any added sugars or flavorings.
For the best results, try to find a high-quality bottled juice to maintain a better taste in your dish.
How Do I Store Leftover Lemon Bars?
To store leftover lemon bars, cut them into squares and place them in an airtight container.
If you want to keep them fresh longer, layer parchment paper between the bars to prevent sticking.
You can store them in the fridge for up to a week or freeze them for up to three months.
Just make sure to let them cool completely before sealing them up.
Enjoy your delicious treats later!
Can I Freeze Lemon Bars for Later Use?
Yes, you can freeze lemon bars for later use!
Just make sure they're completely cooled before wrapping them tightly in plastic wrap and then placing them in an airtight container. This way, they'll stay fresh for up to three months.
When you're ready to enjoy them, simply thaw them in the refrigerator overnight.
You can also dust them with powdered sugar before serving for a delightful touch!
What Is the Best Way to Cut Lemon Bars?
To cut lemon bars effectively, you'll want to start with a sharp knife.
First, chill the bars in the fridge for a couple of hours to firm them up.
Once they're set, use the knife to score the top gently before cutting all the way through.
For clean edges, wipe the knife with a damp cloth after each cut.
This way, you'll get perfectly squared pieces that look great on a plate!
Are Lemon Bars Gluten-Free?
If you're wondering whether lemon bars are gluten-free, it really depends on the recipe.
Traditional lemon bars use flour in the crust, which contains gluten.
However, you can easily make gluten-free versions by substituting regular flour with alternatives like almond flour or gluten-free all-purpose flour.
Just make sure to check the labels on any ingredients you use, and you'll enjoy delicious lemon bars without the gluten!