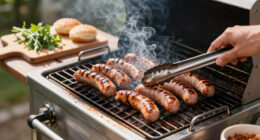
Garlic bread is like a warm hug for your taste buds, elevating any meal with its rich, savory aroma. You might think it's just a simple side, but the right recipe can transform it into a standout dish on your table. By mastering a few key ingredients and techniques, you'll discover how to balance flavors and textures that complement your main courses perfectly. What if you could take this classic favorite and add your own unique twist? Let's explore the nuances of crafting the ideal garlic bread together.
Key Takeaways
- Combine softened butter, minced garlic, and chopped parsley to create a garlic butter mixture for spreading.
- Spread the garlic butter evenly on slices of crusty Italian or French bread.
- Bake the prepared bread in a preheated oven at 425°F for 10-15 minutes until golden brown.
- Optional: Add grated Parmesan cheese during the last few minutes of baking for extra flavor.
- Serve warm as a delicious side dish to accompany pasta, salads, or soups.

Ninja DZ550 Foodi 10 Quart 6-in-1 DualZone Smart XL Air Fryer with 2 Independent Baskets, Smart Cook Thermometer for Perfect Doneness, Match Cook and Smart Finish to Roast, Dehydrate and More, Black
SMART COOK SYSTEM: Achieve the perfect doneness, from rare to well-done, at the touch of a button with...
As an affiliate, we earn on qualifying purchases.
History

Garlic bread's history is as rich as its flavor, rooted in ancient civilizations that combined bread and garlic for both taste and health benefits.
The modern version, especially popular in the United States, evolved from Italian bruschetta, featuring toasted bread topped with garlic and olive oil.
By the early 20th century, garlic bread became a staple in Italian-American cuisine, often served as a side dish to pasta and other Italian dishes.
The introduction of pre-packaged garlic bread in the late 20th century made it an easy option for home cooks, boosting its popularity.
Today, you can find garlic bread enjoyed globally, with various adaptations and recipes, including options that cater to different dietary preferences, like vegan garlic butter versions.
Ninja DZ401 Foodi 10 Quart 6-in-1 DualZone XL 2-Basket Air Fryer with 2 Independent Frying Baskets, Match Cook & Smart Finish to Roast, Broil, Dehydrate for Quick, Easy Family-Sized Meals, Grey
MAKE WHOLE MEALS AT ONCE: DualZone Technology allows you to choose between Smart Finish, which cooks 2 foods...
As an affiliate, we earn on qualifying purchases.
Recipe
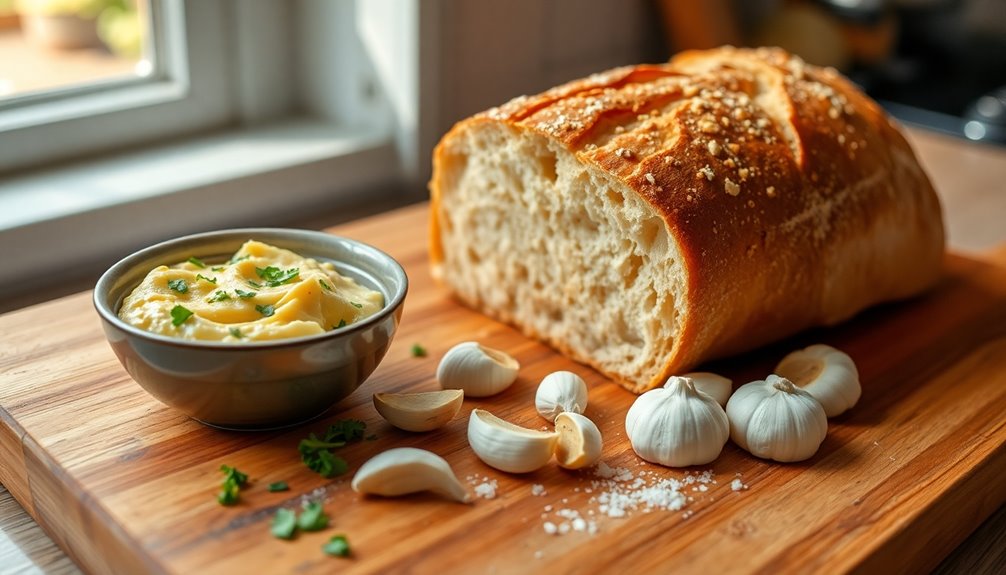
Garlic bread is a beloved side dish that perfectly complements a variety of meals, especially Italian cuisine. Its crispy exterior and buttery, garlicky flavor make it an irresistible addition to pasta, salads, and soups.
Whether you're hosting a dinner party or simply enjoying a cozy night in, homemade garlic bread is easy to prepare and brings a delightful aroma to your kitchen.
To create the perfect garlic bread, you'll want to start with a good quality loaf of crusty Italian or French bread. The key to success lies in the garlic butter mixture, which can be tailored to your taste preferences by adding fresh herbs or even some cheese.
Once you have your ingredients ready, the baking process is straightforward, resulting in a golden-brown, crunchy treat that will have everyone asking for seconds.
Ingredients:
- 1 crusty Italian or French loaf
- 1/2 cup softened butter
- 4-6 cloves fresh garlic, minced
- 1/4 cup fresh parsley, chopped
- Salt to taste
- Optional: 1/4 cup grated Parmesan cheese
Instructions:
Preheat your oven to 425°F. In a mixing bowl, combine the softened butter, minced garlic, chopped parsley, and salt until well blended.
Cut the loaf in half lengthwise and spread the garlic butter mixture generously over the cut sides of the bread. If using Parmesan cheese, sprinkle it on top.
Place the bread on a baking sheet and bake in the preheated oven for 10-15 minutes, or until the edges are golden brown. For an extra crispy finish, switch the oven to broil for an additional 2-5 minutes, keeping a close eye to prevent burning.
Extra Tips:
For a fun twist, feel free to experiment with different herbs and spices to elevate the flavor of your garlic bread. Adding a pinch of red pepper flakes can give it a nice kick, while dried oregano or basil can enhance the Italian flair.
If you're making garlic bread for a crowd, consider doubling the recipe and freezing any leftovers for a quick and tasty side dish ready to be baked whenever you need it. Just remember to wrap the bread well before freezing to maintain its freshness.
Enjoy your delicious homemade garlic bread!

Ninja Crispi 4 in 1 Glass Air Fryer, 450°F, Non Toxic, 4QT and 6 Cup Containers with Lids, Dishwasher Safe, Cyberspace Gray, 1 Count, FN101GY
ALL-IN-ONE SYSTEM: Includes the Ninja Crispi PowerPod, 4-qt and 6-cup borosilicate glass containers, and 2 snap-lock storage lids...
As an affiliate, we earn on qualifying purchases.
Cooking Steps

To get started on your garlic bread, you'll want to soften some unsalted butter first.
Next, grate fresh garlic cloves and mix them in with a bit of garlic powder for an extra kick.
Once you've got that ready, spread the mixture evenly on your bread before placing it in the oven.
Step 1. Soften Unsalted Butter First

Start by softening your unsalted butter to create a smooth and spreadable garlic butter. Leave the butter at room temperature for about 30-60 minutes until it reaches a spreadable consistency.
To speed up the process, cut the butter into smaller pieces and place them in a bowl, increasing the surface area for quicker softening. If you're in a hurry, grate the butter using a box grater; those thin shavings will soften in just a few minutes.
Using softened butter is crucial for evenly mixing in ingredients like minced garlic and herbs, ensuring a flavorful blend. After mixing, let the garlic butter sit for a few minutes to allow the flavors to meld before spreading it on your bread.
Step 2. Grate Fresh Garlic Cloves

Once the butter is softened and ready to go, it's time to prep the garlic. Start by peeling about 4 cloves and removing any brown spots for the best flavor.
Using a microplane or box grater, grate fresh garlic until it's finely shredded. This releases the natural oils, enhancing the flavor in your garlic bread. You can adjust the number of cloves based on your personal preference for garlic intensity—more cloves will give you a more robust flavor.
Once grated, mix the garlic directly into the softened butter, ensuring even distribution. This combination will maximize the taste when you spread it on your loaf of bread, creating the perfect garlic bread experience.
Enjoy the delicious aroma!
Step 3. Mix in Garlic Powder

Now, you'll want to mix in the garlic powder to elevate your garlic butter.
Add 1/2 teaspoon of garlic powder to your butter mixture along with the fresh minced garlic. This combo not only enhances the overall garlic flavor but also brings a savory flavor that's hard to resist.
Garlic powder adds a subtle touch, complementing the fresh garlic without overpowering it. Plus, it helps create a cohesive spread, ensuring even distribution of delicious garlic across every slice.
If you're craving a stronger garlic flavor, feel free to bump it up to 1 teaspoon.
Combining both fresh garlic and garlic powder makes your homemade garlic bread recipe even more delectable, delivering a layered flavor experience you'll love.
Step 4. Spread Evenly on Bread

With the garlic butter mixture ready, it's time to spread it evenly on the bread.
Start by using a serrated knife to slice your loaf of French bread in half lengthwise, keeping the cut sides facing up for easy access.
Take your garlic butter, made from softened butter, minced garlic, fresh parsley, and a pinch of sea salt, and generously spread it evenly over the cut sides.
Make sure every area is covered to ensure consistent flavor in each bite.
If you'd like to add cheese on top, sprinkle it evenly over the garlic butter for a delicious melt.
Finally, place the prepared bread halves on a lined baking sheet, ready for the oven to 400 degrees.
Step 5. Place in Oven

Preheat your oven to 425°F (220°C) to achieve that perfect golden-brown finish.
Once your garlic butter is spread evenly on the sliced bread, arrange the slices cut side up on a lined baking sheet. This prevents sticking and makes cleanup a breeze.
Now, it's time to bake your garlic bread! Place the baking sheet in the preheated oven and bake for 10-15 minutes.
Keep an eye on it, as you want the edges to turn golden brown and crispy. If you're adding cheese, sprinkle it on top during the last 2 minutes of baking for a deliciously melted finish.
Serve your garlic bread as a delightful side, and enjoy the compliments!
Final Thoughts

While many enjoy the convenience of store-bought garlic bread, making it at home offers a tastier and healthier alternative.
With this easy recipe, you can create fresh, delicious garlic bread using simple ingredients like Italian bread, butter, and parsley. It's all about personalizing the flavors—add your favorite herbs or even cheese to elevate your dish.
Properly preparing your baking sheet and adjusting the oven temperature ensures that your garlic bread comes out crispy and golden brown.
Plus, any leftovers can be stored at room temperature for a couple of days or frozen for up to three months.
This versatile side pairs beautifully with pasta, soups, or roasted veggies, enhancing your dining experience effortlessly.
Enjoy your homemade creation!