If you're looking for the best pancake recipe, you've come to the right place! Start with a blend of flour, sugar, baking powder, and salt for the dry ingredients. Gradually add milk, melted butter, and an egg while stirring gently to avoid lumps. To make them extra fluffy, let your batter rest for about 5-10 minutes. Cook on a preheated griddle until golden brown on both sides. Feel free to fold in fruits or chocolate chips for added flavor. With a few tips and techniques, you can turn these pancakes into your favorite breakfast treat. Discover more ways to customize them!
Key Takeaways
- Use a combination of flour, baking powder, sugar, salt, milk, egg, melted butter, and vanilla for a classic pancake batter.
- Gently mix wet and dry ingredients to avoid lumps, ensuring a light and fluffy texture.
- Allow the batter to rest for 5-10 minutes to enhance fluffiness by relaxing gluten.
- Preheat the griddle to medium heat and test readiness with water droplets before cooking.
- Customize your pancakes with fruits, chocolate chips, or toppings for unique flavors and experiences.
Top picks for "pancake recipe"
Open Amazon search results for this keyword.
As an affiliate, we earn on qualifying purchases.
History

Pancakes have a rich history that dates back thousands of years, showcasing their enduring popularity across cultures. You might be surprised to learn that ancient civilizations, like the Greeks and Romans, enjoyed similar flatbreads, often made from grains and water.
As you trace their journey through time, you'll find that various cultures adapted pancakes to suit local ingredients and tastes. In medieval Europe, for instance, pancakes became a staple dish, often flavored with spices and served with fruit.
Fast forward to today, and you can see how pancakes have evolved into countless varieties, from fluffy American stacks to delicate French crêpes. Each version tells a story, reflecting the culinary traditions and creativity of the people who make them.
Recipe
Pancakes are a classic breakfast dish loved by many for their fluffy texture and delicious flavor. Making pancakes from scratch is easy and rewarding, allowing you to customize them to your taste. Whether you enjoy them plain, topped with fruits, or drizzled with syrup, this recipe will help you create the perfect stack to start your day.
To achieve the best results, it's important to use fresh ingredients and not overmix the batter. Overmixing can lead to tough pancakes, so a gentle hand is key. Additionally, let the batter rest for a few minutes before cooking; this allows the gluten to relax, resulting in lighter pancakes. Incorporating scents like lavender during your cooking can also enhance your mood, promoting a sense of emotional well-being.
Now, let's get to the ingredients and cooking instructions!
Ingredients:
- 1 cup all-purpose flour
- 2 tablespoons sugar
- 2 teaspoons baking powder
- 1/2 teaspoon salt
- 1 cup milk
- 1 large egg
- 2 tablespoons melted butter
- 1 teaspoon vanilla extract
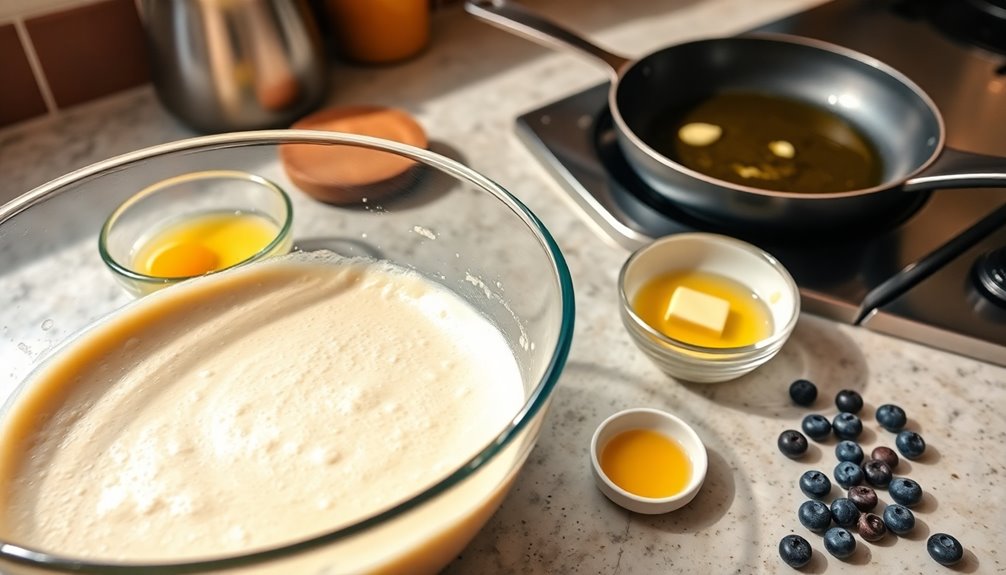
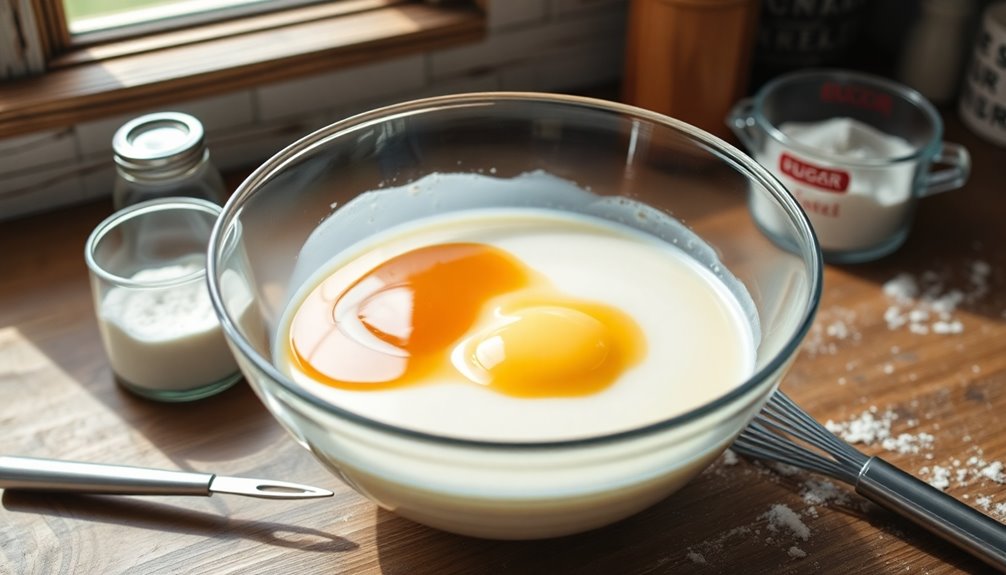
In a large mixing bowl, whisk together the flour, sugar, baking powder, and salt until well combined. In a separate bowl, mix together the milk, egg, melted butter, and vanilla extract.
Pour the wet ingredients into the dry ingredients and stir gently until just combined; it's okay if there are a few lumps—do not overmix. Heat a non-stick skillet or griddle over medium heat and lightly grease it with butter or cooking spray.
Pour about 1/4 cup of batter for each pancake onto the skillet and cook until bubbles form on the surface, about 2-3 minutes. Flip the pancakes and cook for an additional 1-2 minutes until golden brown. Serve warm with your favorite toppings.
For the best pancake experience, consider experimenting with add-ins like blueberries, chocolate chips, or nuts mixed into the batter. You can also keep the pancakes warm in a low oven while you cook the rest of the batch.
If you have leftover pancakes, they can be stored in the refrigerator and reheated in a toaster or microwave for a quick breakfast option. Enjoy your fluffy pancakes!
Cooking Steps

To make the best pancakes, start by mixing your dry ingredients thoroughly.
Then, add the wet ingredients gradually and fold in those chocolate chips for a tasty twist.
Let the batter rest briefly before heating the griddle properly for perfect results.
Step 1. Mix Dry Ingredients Thoroughly
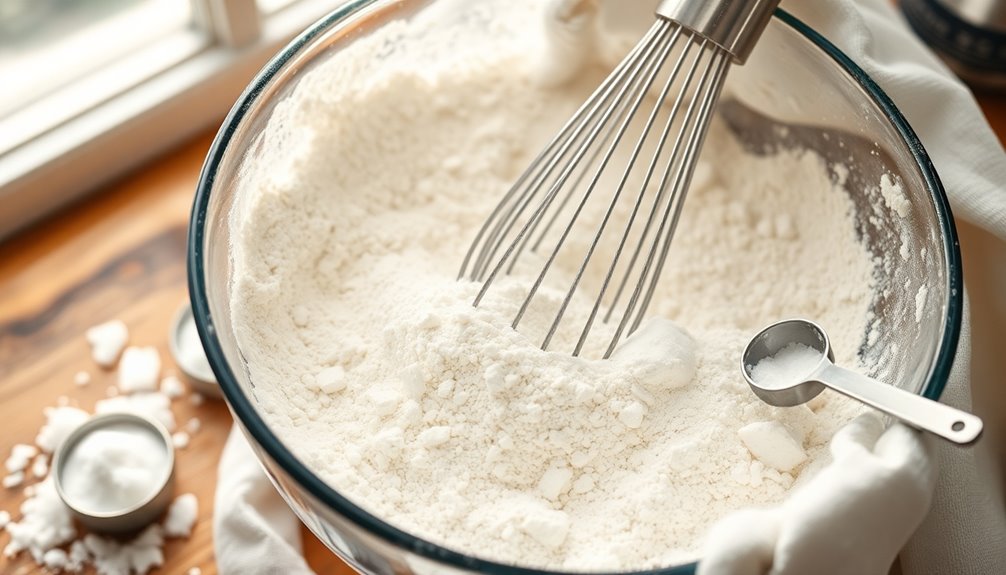
A well-mixed dry ingredient blend is essential for fluffy pancakes. Start by measuring your flour, baking powder, sugar, and salt accurately.
Use a whisk to combine these ingredients in a large bowl. Whisking aerates the mixture, helping to create the light texture you're aiming for. Make sure there are no clumps of baking powder or flour; clumps can lead to uneven rising and dense pancakes.
If you prefer, you can sift the dry ingredients together for an even finer blend. Once everything's well combined, you'll have a solid foundation for delicious pancakes.
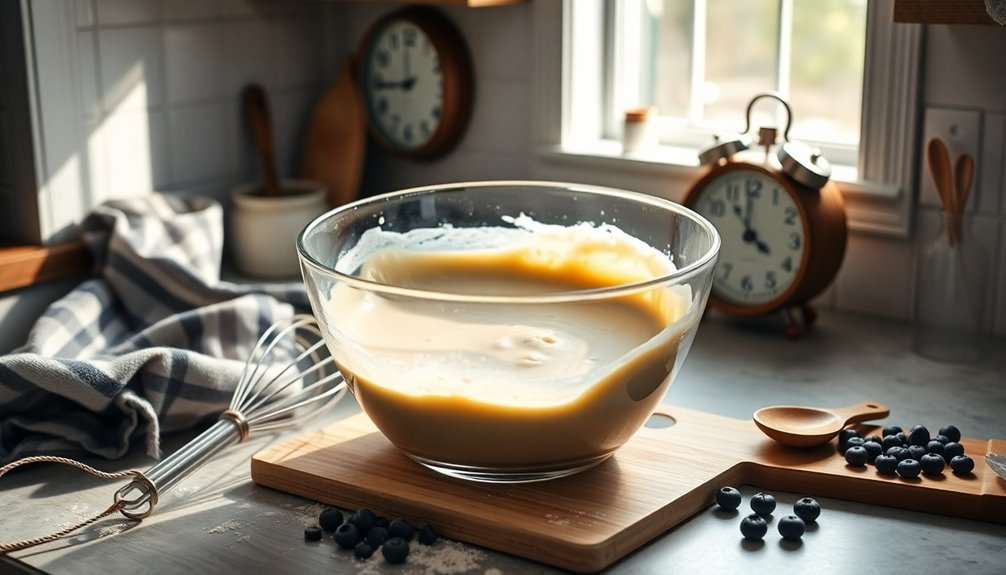
Step 2. Add Wet Ingredients Gradually
Once you've mixed your dry ingredients, it's time to add the wet ingredients gradually for the perfect batter consistency.
Start by pouring in your milk and melted butter slowly while stirring gently. This helps create a smooth mixture without lumps. You don't want to dump everything in at once; that can lead to an uneven batter.
As you mix, keep an eye on the consistency—it should be thick but pourable. If it looks too thick, you can add a splash more milk. Continue stirring until everything is just combined; a few small lumps are okay.
Step 3. Fold in Chocolate Chips

With your batter nicely mixed and ready, it's time to add a touch of sweetness by folding in chocolate chips.
Grab a handful of chocolate chips—about a cup should do—and sprinkle them evenly over your batter.
Using a spatula, gently fold the chips into the mixture. Be careful not to overmix; you want to keep the batter fluffy and light.
Just a few strokes will incorporate the chocolate without breaking down the batter's structure.
If you like a chocolatey surprise in every bite, feel free to add a few extra chips on top before cooking.
Now that your batter is deliciously enhanced, you're ready to move on to the next step in creating those perfect pancakes.
Step 4. Let Batter Rest Briefly
While your batter is ready to go, letting it rest briefly can make a big difference in the texture of your pancakes.
When you allow the batter to sit for about 5 to 10 minutes, it gives the flour time to hydrate fully, resulting in a smoother consistency.
This resting period also allows the gluten to relax, which can lead to lighter, fluffier pancakes.
You'll notice that the bubbles in the batter will start to settle, making it easier to pour onto the griddle.
Just don't let it sit too long, or you might lose some of that airy texture.
So, take a moment to let your batter rest before moving on to the cooking process.
Your pancakes will thank you!
Step 5. Heat the Griddle Properly
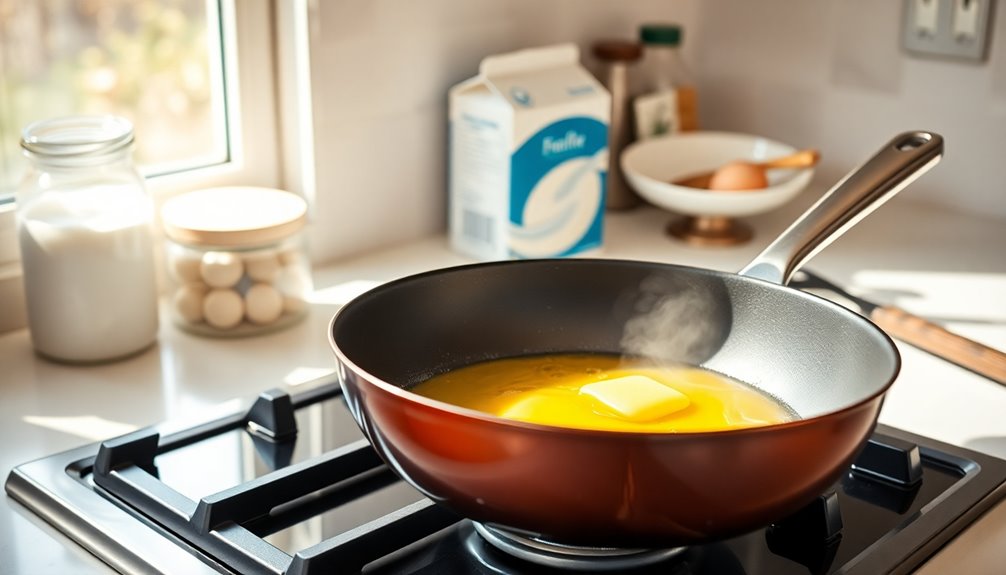
After letting your batter rest, it's time to focus on heating the griddle properly.
Start by preheating your griddle over medium heat. To check if it's hot enough, sprinkle a few drops of water on the surface. If they sizzle and evaporate quickly, you're ready to go.
Lightly grease the griddle with butter or oil, ensuring an even coat to prevent sticking. Remember, you don't want the griddle too hot; otherwise, your pancakes might burn on the outside while staying raw inside. If you notice any smoking, reduce the heat.
Once everything's set, you're ready to pour your batter and cook those delicious pancakes to golden perfection! Enjoy the process and watch them rise!
Final Thoughts

As you wrap up your pancake-making adventure, remember that the joy of cooking comes from experimentation and personal touches.
Don't be afraid to tweak the recipe to suit your taste. Whether you prefer chocolate chips, blueberries, or a hint of vanilla, each variation can elevate your pancakes to new heights.
Next time you whip up a batch, try different toppings or syrups to discover your favorites.
And if you have leftovers, freeze them for a quick breakfast on busy mornings.
Cooking is a journey, so enjoy every flip and sizzle along the way.
With practice, you'll master the perfect pancake.
Frequently Asked Questions
Can I Use Whole Wheat Flour Instead of All-Purpose Flour?
Absolutely, you can use whole wheat flour instead of all-purpose flour!
Just keep in mind that whole wheat flour has a denser texture, so your pancakes might turn out a bit heavier.
You might want to add a little extra liquid or baking powder to guarantee they rise well.
Experimenting with the ratios can help you find the perfect balance, so don't hesitate to adjust based on your taste preferences!
Enjoy your cooking!
How Can I Make Pancakes Vegan-Friendly?
To make pancakes vegan-friendly, you can replace eggs and dairy with plant-based alternatives.
Use flaxseed meal mixed with water as an egg substitute, or try mashed bananas or applesauce. Instead of milk, opt for almond, soy, or oat milk.
For butter, choose coconut oil or a vegan margarine. Mix these ingredients with your dry components, and you'll have delicious, fluffy pancakes that everyone can enjoy without animal products!
What Toppings Pair Best With Pancakes?
When it comes to toppings for pancakes, you've got plenty of delicious options. Fresh fruits like bananas, strawberries, or blueberries add a burst of flavor and nutrition.
Maple syrup is a classic choice, but you can also try honey or agave syrup for a twist. For something creamy, consider whipped cream or yogurt.
Nuts and chocolate chips can add crunch and sweetness, making your pancakes even more indulgent. Mix and match for your perfect stack!
Can I Freeze Leftover Pancakes?
Absolutely, you can freeze leftover pancakes!
Just let them cool completely, then stack them with parchment paper in between to prevent sticking.
Place the stack in an airtight container or freezer bag, squeezing out as much air as possible.
When you're ready to enjoy them again, simply reheat in the microwave or toaster.
They'll taste almost as fresh as the day you made them!
It's a great way to save time and reduce waste.
How Do I Store Leftover Pancake Batter?
To store leftover pancake batter, pour it into an airtight container or a resealable plastic bag.
Make sure it's sealed tightly to prevent any air from getting in. You can keep it in the refrigerator for up to 2 days.
If you want to store it longer, consider freezing it. Just remember to label the container with the date.
When you're ready to use it, give it a good stir before cooking!