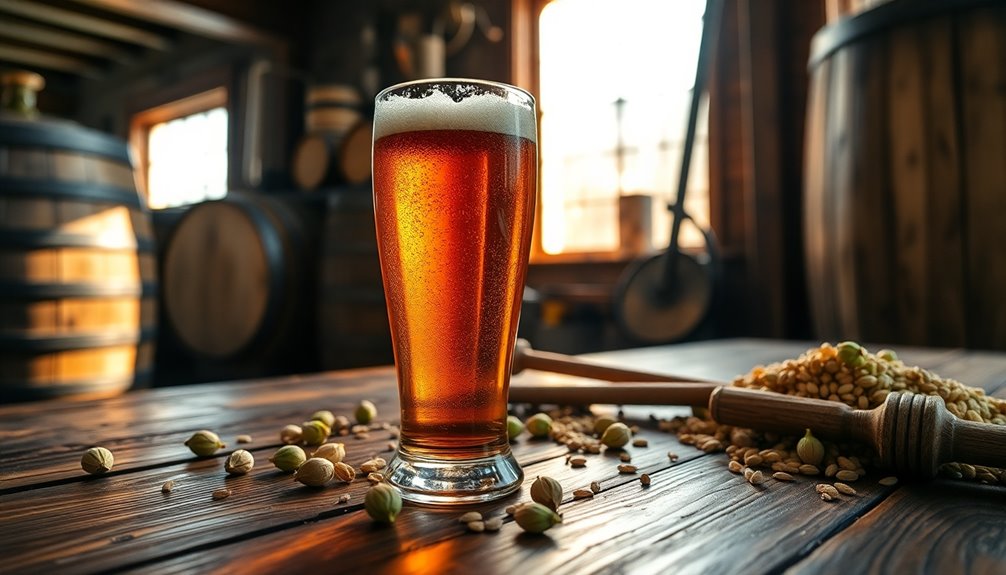
Mastering milk frothing is your gateway to café-quality drinks at home. Start by selecting the right equipment, like a steam wand or automatic frother. Use fresh, cold milk to achieve the best foam, ideally whole milk for its creamy texture. Remember to purify your steam wand before use. As you froth, incorporate air for the first few seconds, then create a vortex by submerging the wand. Watch the temperature; stop at around 160°F to avoid scalding. With practice, you'll perfect your technique and start crafting delicious beverages. Stick around to uncover tips for creating stunning latte art and troubleshooting common issues.
Key Takeaways
- Choose the right equipment, such as an espresso machine steam wand or a handheld electric frother, for optimal milk frothing results.
- Use fresh, cold milk with higher fat content for better foam quality and creaminess when frothing.
- Purge the steam wand before and after use to ensure cleanliness and prevent contamination affecting foam quality.
- Master aeration techniques by introducing air initially, then submerging the wand to create a vortex for fine microfoam texture.
- Monitor milk temperature closely, aiming for 140°F to 155°F, to achieve the desired froth without damaging the proteins.
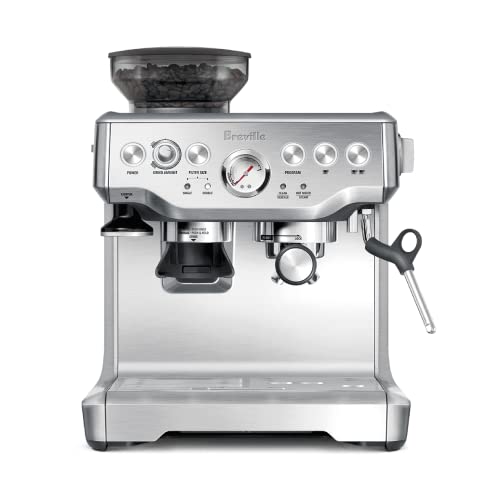
Breville Barista Express Espresso Machine BES870XL, Brushed Stainless Steel
- Third Wave Specialty Coffee: Brews high-quality coffee at home
- All-in-One Espresso Machine: Includes integrated grinder for convenience
- Fast Bean to Espresso: Brews in under one minute
As an affiliate, we earn on qualifying purchases.
Essential Equipment for Frothing

When it comes to frothing milk, having the right equipment makes all the difference. You can choose from various tools depending on your needs.
A French press is a great manual option that creates vigorous foam without electricity. However, it can't froth milk if you're brewing coffee simultaneously. This method is commonly owned by coffee drinkers because it requires minimal equipment.
If you prefer something faster, a handheld electric frother is compact and efficient, but it won't give you microfoam.
For those wanting high-quality results, automatic frothers offer hands-free operation and various foam settings, though they can be pricier.
Lastly, if you're serious about frothing, an espresso machine steam wand produces café-quality microfoam, perfect for latte art but comes with a steep learning curve and maintenance. This method is particularly effective for achieving fine, velvety microfoam, which is ideal for creating beautiful latte art.
Choose wisely based on your frothing goals!
Preparing for Frothing

Before you start frothing milk, it's crucial to prepare properly to achieve the best results.
First, choose the right milk; whole milk is ideal for its creamy texture, but don't hesitate to experiment with non-dairy options if you prefer. Always use fresh, cold milk straight from the refrigerator. Cold milk froths better, allowing you more time to create that perfect foam. Additionally, the fat content of the milk plays a significant role in determining the richness of your froth, so consider this factor when making your choice. Using a frothing thermometer helps ensure you reach the optimal temperature for frothing.
Additionally, keep an eye on the temperature; aim for 140°F to 155°F (60°C to 68°C) to maintain sweetness and avoid scalding.
Lastly, ensure your frother is clean. Milk residue can clog it and ruin your froth's texture. A clean frother is essential for achieving that velvety foam you're aiming for.
Initial Frothing Steps

With your milk prepared and your frother clean, you're ready to start frothing.
First, switch your espresso machine to steam mode, allowing it to heat water and activate the steam wand. Purge the wand by releasing any built-up water towards the drip tray, ensuring it's dry.
Fill your pitcher about a third full with cold milk, placing the steam wand just below the surface to draw air in for froth. Open the steam valve fully and listen for a ripping sound as you froth. Microfoam is essential for creating a rich texture in your espresso drinks.
Adjust the wand's position as the milk rises, maintaining a whirlpool motion. Lower the wand to heat the milk evenly, stopping when you reach a velvety texture and a temperature of around 160°F.
Mastering Frothing Technique

To master frothing technique, it's crucial to understand the role of the steam tip's position.
Place the steam tip just below the milk's surface to incorporate the right amount of air. Listen for occasional rips, signaling that small amounts of air are being drawn in. If the tip's too high, you'll get excess air; too low, and you won't get enough. Using fresh, whole milk will enhance the frothing process, producing a richer foam. Continue until the milk expands to double its volume. For a thick, foamy texture, aim for a consistency similar to whipped cream.
Knock and swirl the pitcher to break up larger bubbles, ensuring uniform foam.
Finally, remember to purge the steam wand after use to keep your equipment clean and ready for the next frothing session.
Heating and Texturing Milk

Perfecting your frothing technique naturally leads to understanding how to heat and texture milk properly.
Start by heating your milk to an ideal temperature between 55°C and 65°C. Temperatures above 70°C can damage the milk's proteins, so keep an eye on it.
Using a water bath technique in a stainless steel pitcher ensures even heating; just fill a pot with water and place the pitcher inside. Employ a thermometer to monitor the temperature closely.
For texturing, position the steam wand to create a whirlpool, incorporating air until you hear a 'chirping' sound. Finally, adjust the wand's depth for a denser micro-foam.
Tap the jug to eliminate surface bubbles, achieving that smooth texture you desire.
Creating Latte Art

Creating stunning latte art can elevate your coffee experience, and it all starts with the right equipment and technique.
You'll need an espresso machine, fresh whole milk, a chilled metal pitcher, and 6-ounce mugs. Store your pitcher in the fridge to keep the milk cold, and choose a jug with a lip for precise pouring. Quality espresso machines produce better steamed milk texture, which is essential for achieving perfect microfoam.
The key to great latte art is achieving the right microfoam, so position the steam tip just below the milk surface. Start with simple designs like hearts and tulips before moving to more intricate patterns.
Practice pouring slowly and confidently, using a consistent wiggling motion for designs like the rosetta. Tap and swirl the milk to break down bubbles for a smoother pour.
Serving Your Frothed Milk

Once you’ve frothed your milk to perfection, serving it properly is key to enhancing your coffee experience. One way to serve your frothed milk properly is to pour it into your coffee in a slow, steady stream to create a beautiful, layered effect. This not only adds to the aesthetic appeal of your coffee drink, but it also allows you to fully enjoy the creamy texture and rich flavor that the frothed milk provides. Additionally, utilizing coffee creamer benefits such as added sweetness and flavor can take your coffee experience to the next level, further enhancing the overall taste and indulgence of your favorite brew.
Start by ensuring your milk's temperature is between 60-70°C for the best texture and flavor. Remember to turn off the steam before reaching that temperature to avoid overshooting. It's important to purge the steam arm before frothing to ensure a clean start.
For a latte, incorporate air before the milk warms, while for a cappuccino, keep adding air until you achieve the desired volume.
Once you're ready, tap the jug's base to break surface bubbles and swirl the milk to distribute the foam evenly.
If you notice larger bubbles, knock and swirl the pitcher gently to break them up.
Finally, don't forget to clean the steam arm to maintain hygiene and efficiency for your next frothing session.
Alternative Frothing Methods

While many baristas rely on steam wands for frothing milk, there are several alternative methods you can try at home.
Whisking by hand in a saucepan can create foam, but it's physically demanding. If you prefer a simpler approach, heat milk and shake it in a jar, though be careful not to burn your hands. Using cold milk helps improve air incorporation, making your froth richer and creamier.
A French press is another option; just pump the plunger to froth, but it works best for larger quantities.
For a quick method, use a pitcher blender or an immersion blender, but both can be messy. An electric mixer also froths milk effectively.
Lastly, consider specialized tools like milk frothers or pump frothers for easy, creamy foam without extensive effort.
Troubleshooting Common Issues

Even with the right tools and methods for frothing milk, issues can still arise that affect your results. If your steam wand's positioned too low, you won't incorporate enough air, while holding it too high leads to messy large bubbles. Aim for just below the milk's surface, adjusting as necessary.
Watch your milk temperature, too; ideally, it should be between 140°F and 155°F. If it's too hot, it'll scald, and if it's too cool, you won't achieve good froth. Remember to purge the steam wand before and after steaming to prevent any contamination.
For aeration, introduce air for the first 3-5 seconds, then submerge the wand to create a vortex.
Lastly, don't forget to purge and clean the steam wand to maintain hygiene and performance. Happy frothing!
Frequently Asked Questions
Can I Use Non-Dairy Milk for Frothing?
Absolutely, you can use non-dairy milk for frothing! Options like soy, oat, and almond milk work well, each bringing unique textures and flavors.
Just be mindful of the temperature, as overheating can cause separation. Start by frothing at around 131°F to 149°F for the best results.
With a little practice, you'll create silky foam that's perfect for lattes or cappuccinos, making your non-dairy drinks just as delightful as their dairy counterparts.
How Do I Clean My Milk Frother Properly?
To clean your milk frother properly, first unplug it and disassemble all removable parts.
Soak them in equal parts water and white vinegar for 30 minutes.
For the frothing wand, immerse it in the vinegar solution and turn it on for a few seconds.
After rinsing all parts thoroughly, dry them completely before reassembling.
Wipe down the exterior with a damp cloth and perform regular cleaning to maintain its performance and hygiene.
What Milk Types Create the Best Froth?
When you're looking for the best milk types for frothing, whole milk stands out for its creamy, stable foam.
If you're cutting back on fat, 2% milk froths well and creates rich microbubbles.
For a lighter option, skim milk produces larger bubbles but maintains stability.
If you prefer non-dairy, oat milk is a fantastic choice, offering a creamy texture.
Experiment with these options to find what suits your taste and frothing needs!
Can I Froth Milk Without a Machine?
Yes, you can froth milk without a machine! You've got several options.
You can whisk by hand for a simple method or shake warmed milk in a jar for a quick froth.
If you prefer blending, using a blender or an immersion blender will give you nice foam.
The French press is great for latte art, while a manual frother offers control over the froth texture.
Get creative and enjoy your frothy drinks!
How Long Does Frothed Milk Last?
Frothed milk typically lasts about 30 minutes to an hour, depending on factors like temperature and milk type.
If you've used fresh, high-protein milk, your foam might hold up a bit longer.
However, as it cools, the bubbles start to collapse, causing the foam to lose its texture.
To get the best results, always aim to use your frothed milk soon after preparing it for that creamy, delightful experience.
Conclusion
Now that you've got the basics of milk frothing down, it's time to put your skills to the test. Remember, practice makes perfect, so don't hesitate to experiment with different techniques and equipment. Whether you're crafting a creamy latte or a stunning cappuccino, enjoy the process and have fun with it. With patience and persistence, you'll soon be impressing friends and family with your frothing prowess. Cheers to your coffee adventures!