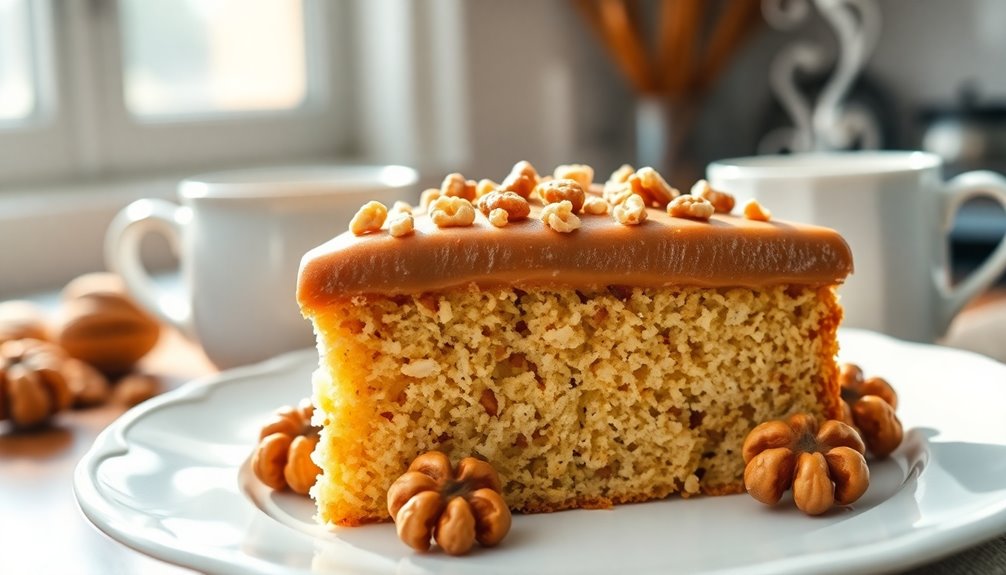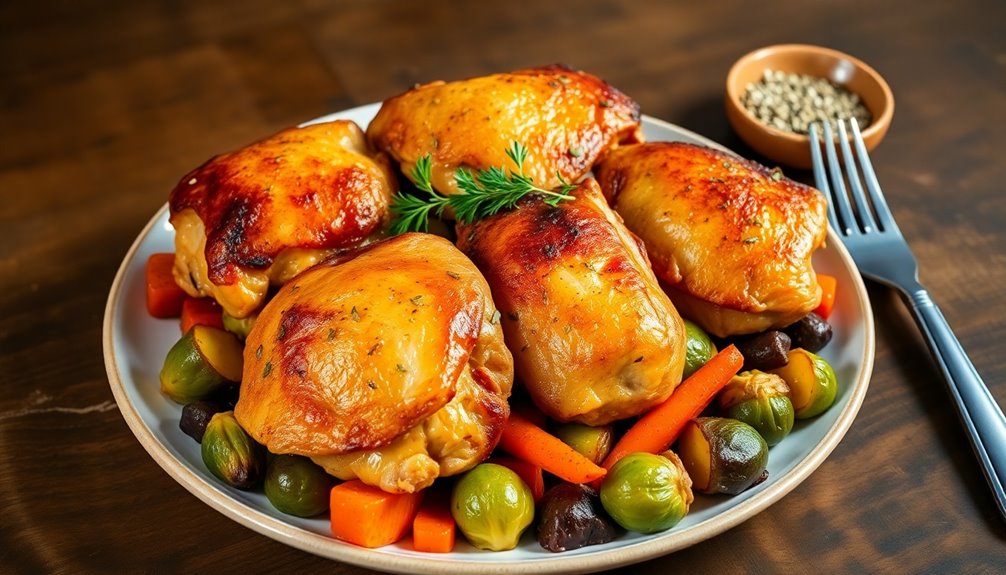

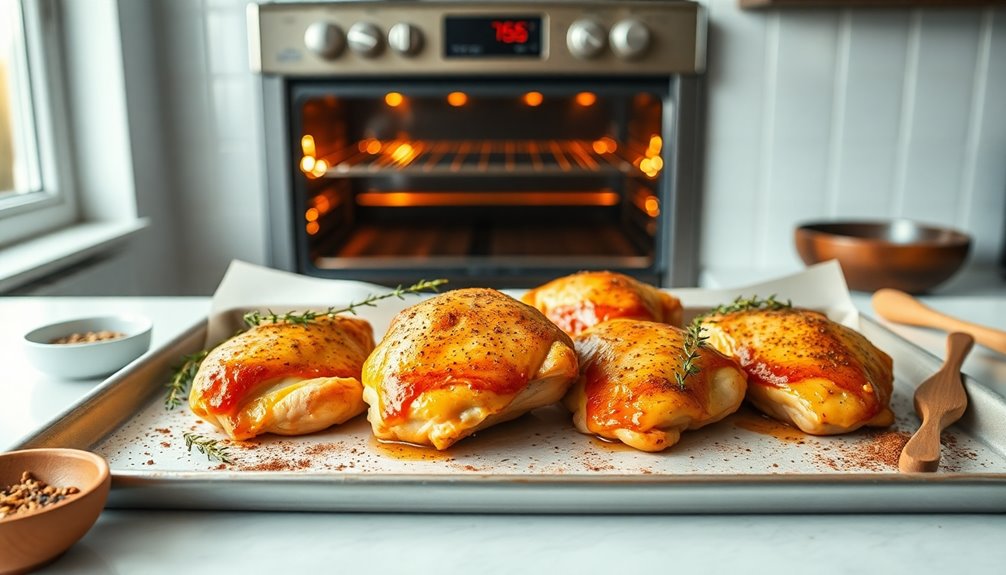
For a quick and tasty chicken thigh recipe, start with four bone-in, skin-on thighs. Pat them dry, then rub with olive oil and season with salt, pepper, garlic powder, and smoked paprika. You can marinate for better flavor if you have the time. Roast in a preheated oven at 400°F (200°C) for 35-45 minutes until golden and crispy, or grill for about 6-8 minutes per side. Let them rest before serving to keep them juicy. Pair with your favorite veggies, and you'll have a delightful meal. There's so much more to explore about this delicious dish!
Key Takeaways
- Chicken thighs can be roasted, grilled, or slow-cooked, offering versatile cooking methods to suit your preference.
- For enhanced flavor, marinate chicken thighs with olive oil, spices, and herbs for at least 30 minutes.
- Roast bone-in, skin-on thighs at 400°F for 35-45 minutes for a crispy exterior and juicy interior.
- Ensure chicken reaches an internal temperature of 165°F for safe consumption and optimal texture.
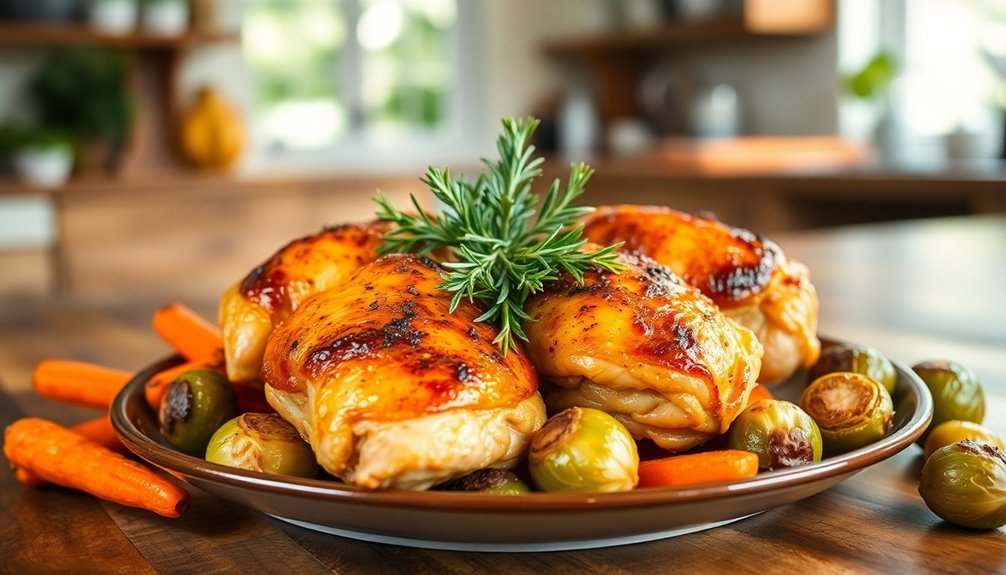
- Pair with seasonal vegetables or grains for a balanced, nutritious meal rich in protein and essential vitamins.
History
When you think about chicken thighs, you mightn't realize their rich culinary history.
These flavorful cuts have been enjoyed across cultures for centuries, often considered a staple in many households. In ancient times, people prized darker meat for its juiciness and depth of flavor, making thighs a popular choice.
As civilizations evolved, so did the methods of cooking them, from simple roasting over an open flame to complex braising techniques. In various cuisines, chicken thighs became synonymous with comfort food, embodying warmth and tradition.
Their versatility allowed them to adapt to regional spices and cooking styles, ensuring they remain a beloved ingredient.
Today, their popularity continues to grow, proving that chicken thighs have truly stood the test of time.
Recipe
Cooking chicken thighs is a delightful way to enjoy a tender and flavorful meal that's both simple and satisfying. Chicken thighs are known for their juicy texture and rich flavor, making them an excellent choice for various culinary preparations.
Whether you're grilling, baking, or sautéing, chicken thighs can easily absorb marinades and spices, enhancing their natural taste. This recipe focuses on a classic roasted chicken thigh dish that pairs wonderfully with vegetables or grains, making it an ideal option for both weeknight dinners and special occasions.
To achieve perfectly cooked chicken thighs, it's vital to balance seasoning and cooking time. The skin-on, bone-in thighs provide a crispy exterior while keeping the meat moist and tender.
Roasting them in the oven allows the flavors to meld beautifully, creating a dish that's sure to impress your family and friends. Follow this recipe for a delicious and hearty meal that everyone will love.
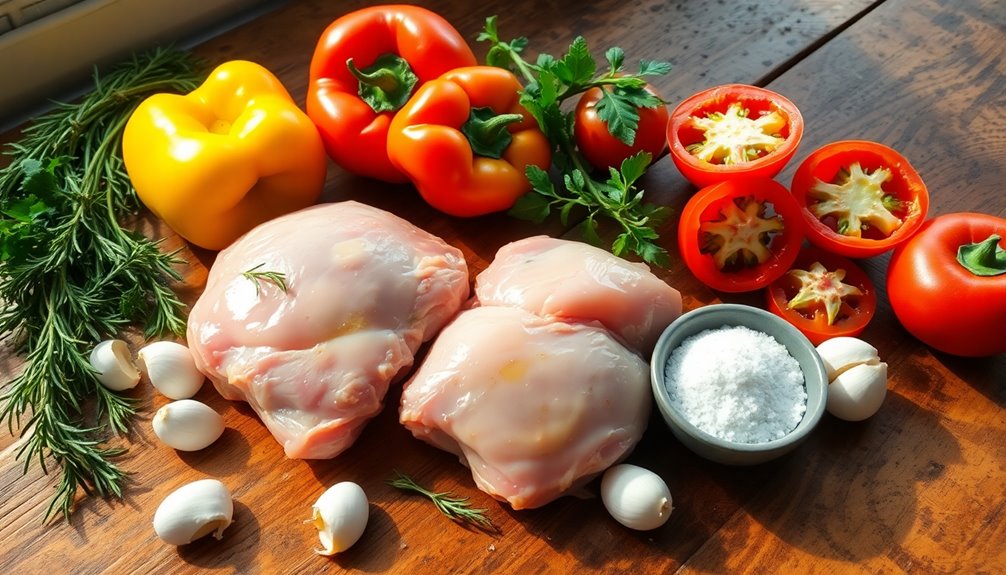
Ingredients:
- 4 bone-in, skin-on chicken thighs
- 2 tablespoons olive oil
- 1 teaspoon garlic powder
- 1 teaspoon onion powder
- 1 teaspoon smoked paprika
- 1 teaspoon dried thyme
- Salt and pepper to taste
- Fresh herbs for garnish (optional)
Cooking Instructions:
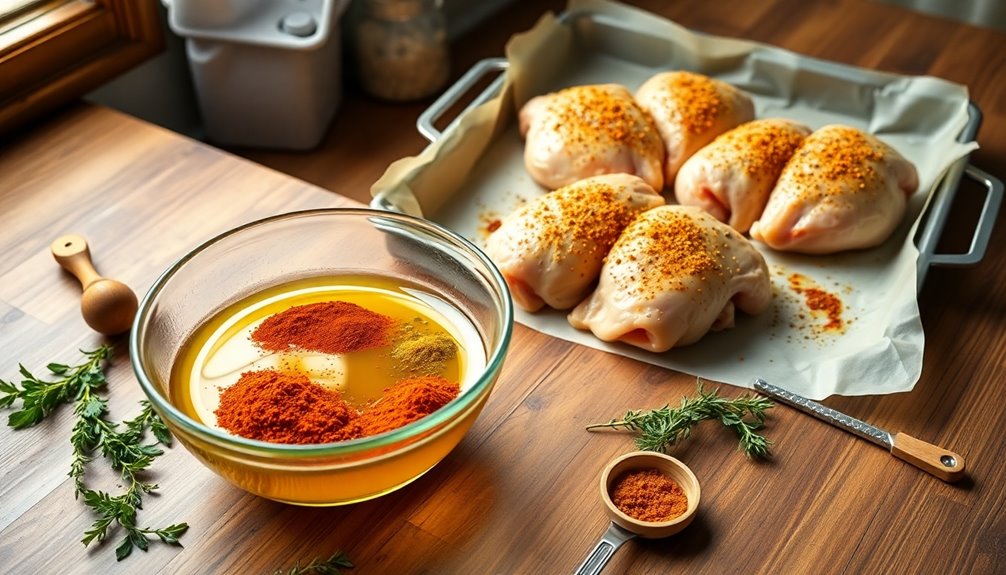
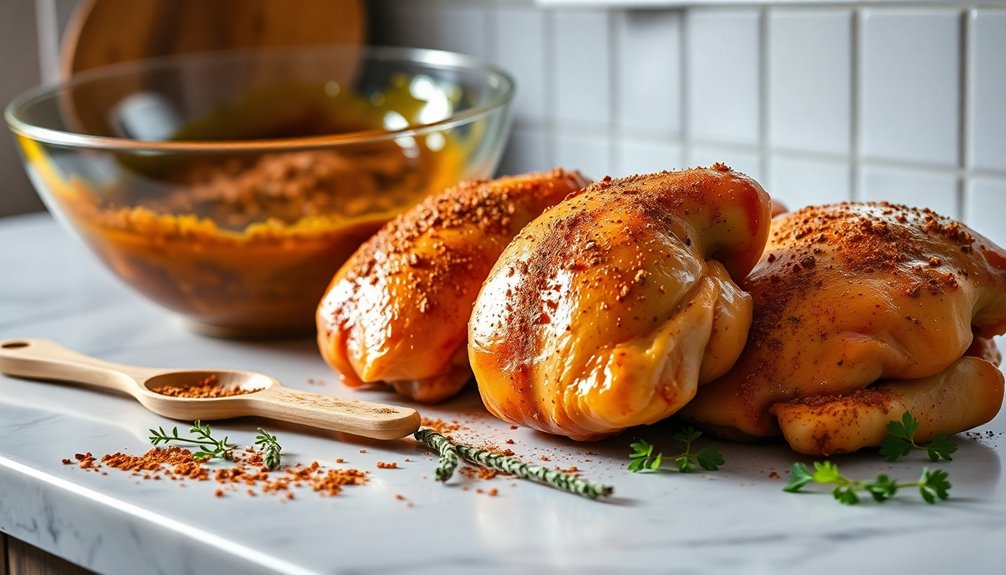
Preheat your oven to 425°F (220°C). In a large bowl, combine the olive oil, garlic powder, onion powder, smoked paprika, dried thyme, salt, and pepper.
Add the chicken thighs to the bowl, making sure they're well coated with the seasoning mixture. Place the thighs skin-side up on a baking sheet lined with parchment paper.
Roast in the preheated oven for 35-40 minutes, or until the skin is crispy and the internal temperature reaches 165°F (75°C). Let the chicken rest for a few minutes before serving.
Extra Tips:
For added flavor, marinate the chicken thighs in the seasoning mixture for a few hours or overnight before cooking.
You can also experiment with different herbs and spices to customize the dish to your taste. If you prefer a more golden and crispy skin, broil the chicken for the last few minutes of cooking.
Always let the chicken rest after cooking to make sure the juices redistribute, resulting in a more succulent bite. Enjoy your delicious chicken thighs with your favorite sides!
Cooking Steps

To get started on your chicken thighs, you'll want to prepare them thoroughly and marinate them in a mix of garlic and herbs for great flavor.
After that, sear them in a hot skillet to lock in those juices.
Finally, bake at 375°F and let them rest for 10 minutes before serving.
Step 1. Prepare Chicken Thighs Thoroughly
As you immerse yourself in preparing chicken thighs, make certain you've got all your ingredients and tools ready for a smooth cooking experience.
Start by rinsing the chicken thighs under cold water to remove any residual impurities. Pat them dry with paper towels, ensuring you eliminate excess moisture, which helps achieve a crispy skin later.
Next, trim off any excess fat or skin to your preference. Don't forget to check for any stray bone fragments. This step's vital for a tender bite.
Finally, place the thighs in a bowl or on a plate, ready for seasoning. Thoroughly preparing these chicken thighs lays the foundation for a delicious meal, ensuring they cook evenly and absorb all those amazing flavors you'll add next.
Step 2. Marinate in Garlic and Herbs
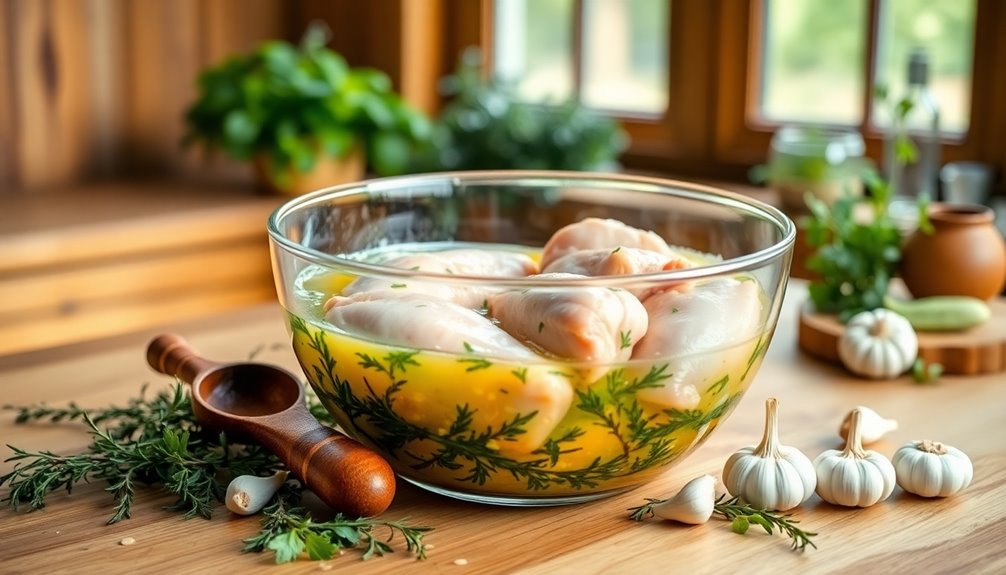
With the chicken thighs prepped and ready, it's time to infuse them with flavor through a delicious marinade.
In a mixing bowl, combine minced garlic, fresh herbs like rosemary and thyme, olive oil, lemon juice, salt, and pepper. Whisk until well blended. This fragrant mixture won't only enhance the taste but also tenderize the meat.
Place the chicken thighs in a resealable plastic bag or a shallow dish, then pour the marinade over them. Make sure each piece is well coated.
Seal the bag or cover the dish, then refrigerate for at least 30 minutes, or up to overnight for maximum flavor. This step is essential for a mouthwatering result, so don't skip it!
Step 3. Sear in Hot Skillet

Once the chicken thighs have marinated, heat a large skillet over medium-high heat until it's hot and shimmering.
Add a tablespoon of oil, letting it coat the bottom of the skillet. Carefully place the chicken thighs skin-side down in the pan, making sure not to overcrowd them.
You'll want to hear that satisfying sizzle as they hit the surface. Sear the thighs for about 5-7 minutes, or until the skin turns golden brown and crispy.
Resist the urge to move them around; let them cook undisturbed to achieve that perfect sear.
Once done, flip the chicken thighs and sear the other side for an additional 4-5 minutes.
This step locks in flavor and sets the stage for the next cooking phase.
Step 4. Bake at 375°F
Now that the chicken thighs are beautifully seared, preheat your oven to 375°F.
Transfer the thighs to a baking dish, skin-side up. You can add your favorite herbs, spices, or a drizzle of olive oil to enhance the flavor. Make sure they're spread out evenly, allowing for proper heat circulation.
Once your oven reaches the desired temperature, place the baking dish inside and let the chicken bake for about 25 to 30 minutes. You want the internal temperature to reach 165°F for perfectly cooked thighs.
Keep an eye on them, and if they're browning too quickly, cover them loosely with foil. When done, the skin should be crispy and golden, making your meal irresistible.
Enjoy the aroma wafting through your kitchen!
Step 5. Rest for 10 Minutes
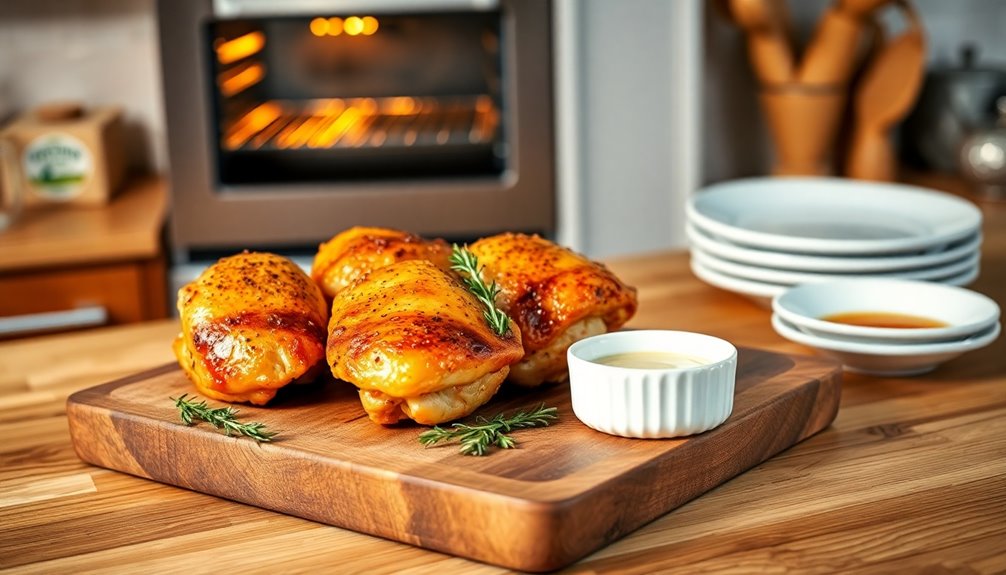
After baking the chicken thighs to crispy perfection, let them rest for 10 minutes before serving.
This step is vital; it allows the juices to redistribute throughout the meat, ensuring every bite is juicy and flavorful. If you cut into the thighs too soon, you'll lose all that delicious moisture, leaving you with dry chicken.
During this resting period, the residual heat continues to cook the thighs slightly, enhancing their tenderness. You can use this time to prepare your sides or set the table.
Cover the chicken loosely with foil to keep it warm, but don't wrap it too tightly, or the skin might lose its crispiness.
Trust me, waiting the extra minutes is well worth it!
Final Thoughts
As you wrap up your culinary adventure with this chicken thigh recipe, it’s clear that the right techniques can transform a simple dish into something exceptional. Whether you’re marinating the chicken in a flavorful blend of spices or carefully searing it to achieve that perfect golden brown, every step adds depth to the dish. As you follow the butter chicken cooking instructions, don’t forget to taste along the way, adjusting seasonings to suit your palate. The beauty of this recipe lies not only in its simplicity but also in its ability to bring comfort and satisfaction to your table.
You've learned the importance of marinating, seasoning, and cooking at the right temperature to achieve juicy, flavorful results.
Remember, it's not just about following the steps but also about making it your own. Feel free to experiment with spices or side dishes that complement your chicken.
Sharing this meal with friends or family makes it even more rewarding. Whether you serve it with rice, veggies, or a fresh salad, you'll impress everyone with your cooking skills.
Frequently Asked Questions
Can I Use Chicken Breast Instead of Thighs for This Recipe?
Yes, you can use chicken breast instead of thighs for your recipe.
Just keep in mind that chicken breasts cook faster and tend to be drier than thighs. To compensate, you might want to adjust your cooking time or add some extra moisture, like broth or marinade, to keep it juicy.
Experimenting with flavors and cooking techniques can yield delicious results, so don't be afraid to make those changes! Enjoy your cooking!
What Side Dishes Pair Well With Chicken Thighs?
When you're thinking about side dishes that pair well with chicken thighs, consider options that complement their rich flavor.
Roasted vegetables, like Brussels sprouts or carrots, add a nice crunch. Creamy mashed potatoes or garlic rice can balance the dish perfectly.
A fresh green salad with a tangy vinaigrette brings brightness, while a savory grain like quinoa or couscous rounds it all out.
Don't forget some crusty bread to soak up those delicious juices!
How Do I Store Leftover Chicken Thighs?
To store leftover chicken thighs, let them cool down to room temperature first.
Then, wrap them tightly in plastic wrap or aluminum foil, or place them in an airtight container.
Make sure to label the container with the date.
You can refrigerate them for up to four days or freeze them for up to three months.
When you're ready to enjoy them again, just reheat thoroughly before serving.
Can I Freeze Cooked Chicken Thighs?
Yes, you can freeze cooked chicken thighs!
Just make sure they're completely cooled before you wrap them tightly in freezer-safe bags or containers. Removing as much air as possible will help prevent freezer burn.
Label the bags with the date, and they'll be good for up to six months.
When you're ready to eat them, simply thaw in the fridge overnight and reheat thoroughly before serving.
Enjoy your meal!
What Are the Best Herbs for Seasoning Chicken Thighs?
When seasoning chicken thighs, you've got plenty of great herb options to enhance their flavor.
Basil, thyme, and rosemary work wonders, adding a fragrant touch. You can't go wrong with a sprinkle of oregano or parsley for freshness, either.
If you're feeling adventurous, try adding some smoked paprika or dill for a unique twist.
Don't forget to mix these herbs with olive oil, garlic, and lemon juice for an extra kick!

Arf, an author and an innovative enthusiast of coffee, coffee alternatives, and tea, plays a crucial role as a contributor to the esteemed Cappuccino Oracle platform. Renowned for his curiosity and passion for these captivating beverages, Arf has carved out a unique space for himself in the world of exploration and writing. He realized that coffee, coffee alternatives, and tea are not mere drinks to keep one awake, but universes of flavors and stories waiting to be explored.