Connect with us

Recipes

How to Make Homemade Iced Americano

Kindle your passion for a bold, refreshing coffee experience with this easy-to-follow guide on making a homemade iced Americano. To learn more, keep reading.

Published

on

brew chill serve enjoy

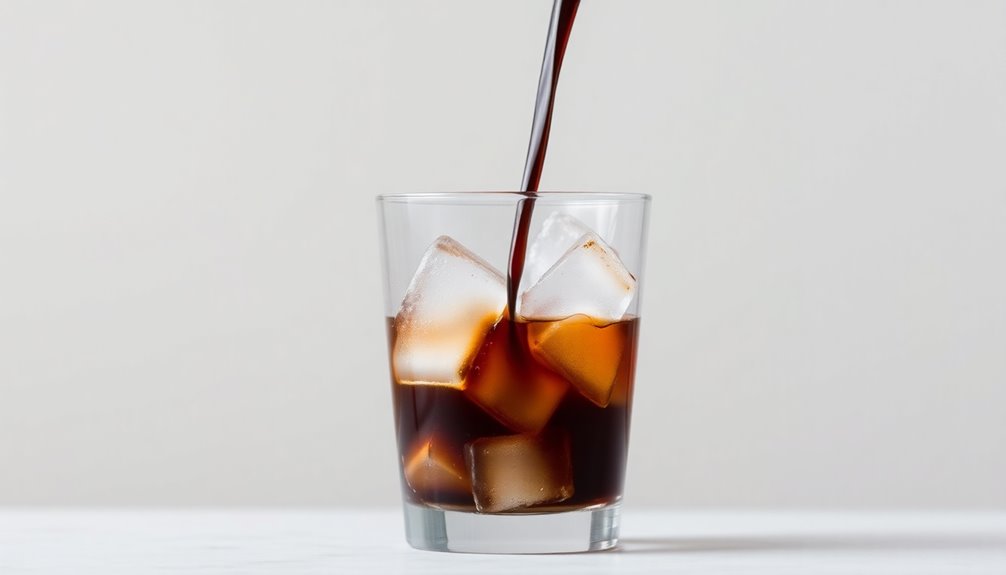
To make a homemade iced Americano, you’ll first brew two shots of fresh espresso. Pour the hot espresso over ice to chill it, then add cold water in a 1:2 ratio (water to espresso). Stir gently to combine, adjusting the water to your desired strength. Feel free to customize it with sweeteners, flavored syrups, or a twist of lemon peel. Serve immediately for a bold, refreshing coffee experience. And if you’re curious to learn more about the history and evolution of this versatile drink, keep reading. If you want to make a decaf Americano, simply substitute decaf espresso for the regular espresso in the recipe. You can also swap out the flavored syrups for sugar-free options or experiment with different types of sweeteners. The beauty of the Americano is its adaptability, so don’t be afraid to try out different variations until you find your perfect decaf Americano recipe.

History

historical events and timelines

The Iced Americano originated during World War II when American soldiers in Italy diluted strong espresso with water to create a milder coffee experience.

The drink's name, "Americano," comes from the term used to describe this American-style coffee.

Over the years, the Iced Americano has evolved, allowing for various customizations like sweeteners and flavorings while maintaining its bold espresso flavor.

Unlike traditional brewed iced coffee, an Iced Americano is made by pouring espresso and cold water over ice, creating a refreshing alternative, particularly in warmer climates.

The Iced Americano's history reflects its versatility, from its beginnings as a simple dilution to the customizable beverage we enjoy today.

Recipe

cooking instructions for dish

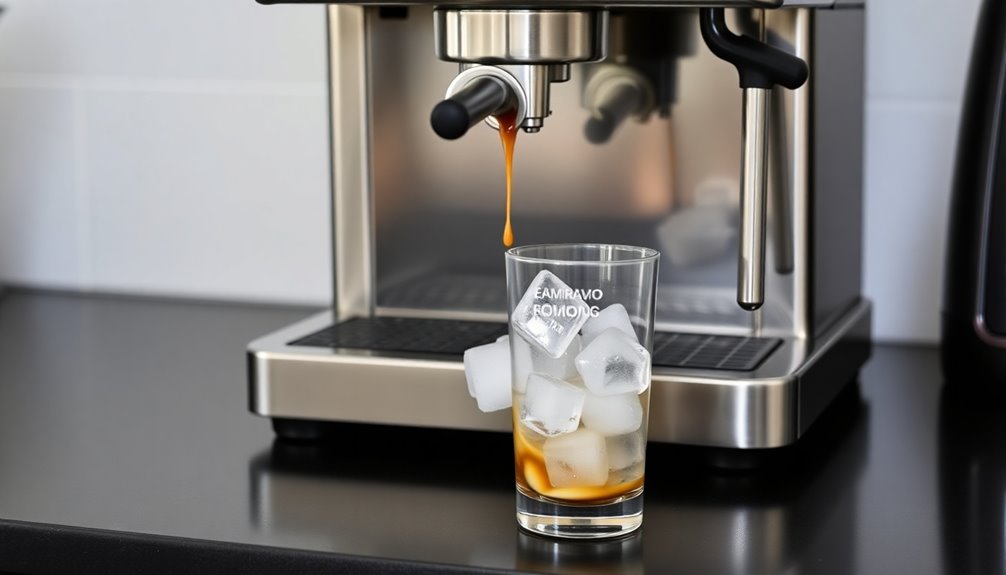
To make a refreshing homemade Iced Americano, start by brewing 2 shots (approximately 60ml) of espresso using an espresso machine or alternative brewing methods like a Moka pot or Aeropress.

The key is to use freshly brewed espresso, as this will enhance the overall flavor of the drink.

Next, fill an 8-ounce glass with about ½ cup of ice before pouring the hot espresso over the ice. This will quickly chill the espresso.

After the espresso is poured, add cold water to the glass, typically in a 1:2 ratio (e.g., 120ml of cold water for every 60ml of espresso) to achieve a balanced flavor profile.

Ingredients:

  • 2 shots (approximately 60ml) of freshly brewed espresso
  • ½ cup of ice
  • 120ml of cold water

Cooking Instructions:

Pour the freshly brewed espresso over the ice in an 8-ounce glass.

Then, add the cold water to the glass, stirring gently to combine.

Extra Tips:

Customize your Iced Americano by adding sweeteners, flavored syrups, or cream based on your taste preferences.

Serve the drink immediately for the best flavor and enjoyment.

Cooking Steps

cooking process in detail

Start by brewing a rich, double shot of espresso.

Next, pour the espresso over a glass filled with ice cubes to quickly chill the drink.

Then, add an equal amount of cold water to the espresso, stir gently, and customize with any desired sweeteners or cream.

Step 1. Brew Espresso Using Espresso Machine

brew espresso with machine

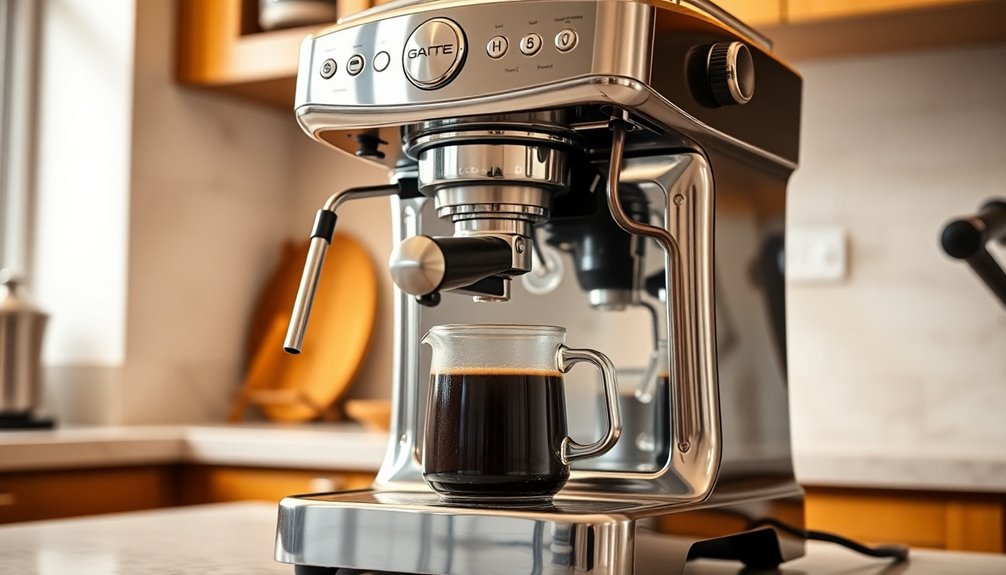
Begin by grinding 15 grams of quality espresso roast coffee beans using a precise burr grinder to achieve the fine consistency ideal for espresso preparation.

Preheat your espresso machine and ensure it's properly calibrated to maintain optimal pressure, typically around 9 bars, for extracting rich espresso shots.

Pack the ground coffee into the portafilter firmly but not excessively, ensuring an even surface to promote proper extraction during brewing.

Lock the portafilter into the machine and brew for about 25-30 seconds, resulting in approximately 30 grams of freshly brewed espresso with a rich crema on top.

Once brewed, immediately pour the chilled espresso over ice to preserve its flavor and aroma for your homemade iced Americano.

Step 2. Add Chilled Water to Espresso

chill espresso with water

After brewing the espresso, you'll want to pour it over ice to quickly cool it down. This allows the ice to begin melting and chill the strong coffee.

Then, add chilled water to the iced espresso in a 1:2 ratio. If you have 30 grams of espresso, you'll add 60 grams of cold water.

Stir the Iced Americano gently to combine the espresso and water, ensuring it's well mixed. You can adjust the water amount to suit your taste – more for a milder flavor, less for a bolder espresso profile.

The key is finding the perfect balance to create your ideal homemade Iced Americano drink.

Step 3. Add Ice to the Espresso

add ice to espresso

To create an iced Americano, you'll first want to brew a rich and concentrated shot of espresso.

Next, fill an 8-ounce glass with about half a cup of ice cubes.

Carefully pour the hot espresso directly over the ice, allowing the heat to start melting it and instantly chill the coffee.

Gently stir the mixture to ensure the espresso combines evenly with the melting ice for a consistent temperature and flavor.

Finally, adjust the strength of your homemade iced Americano by adding cold water, equal to the weight of the espresso shot or to your taste, to achieve a perfectly balanced flavor.

Step 4. Stir the Espresso and Water

mix espresso with water

Gently stir the espresso and cold water until they're thoroughly combined. This helps the flavors meld without losing the rich crema on top.

Aim to stir just enough to blend the mixture – a quick swirl will keep the espresso flavor more intense, while thorough mixing will dilute it further.

Taste your iced Americano after stirring and adjust by adding more cold water or sweeteners to reach your desired flavor. The crema adds body and richness, so be careful not to overstir and lose it.

Play around with the stirring time to customize your iced Americano just the way you like it.

Step 5. Garnish With Lemon Peel

garnish using lemon peel

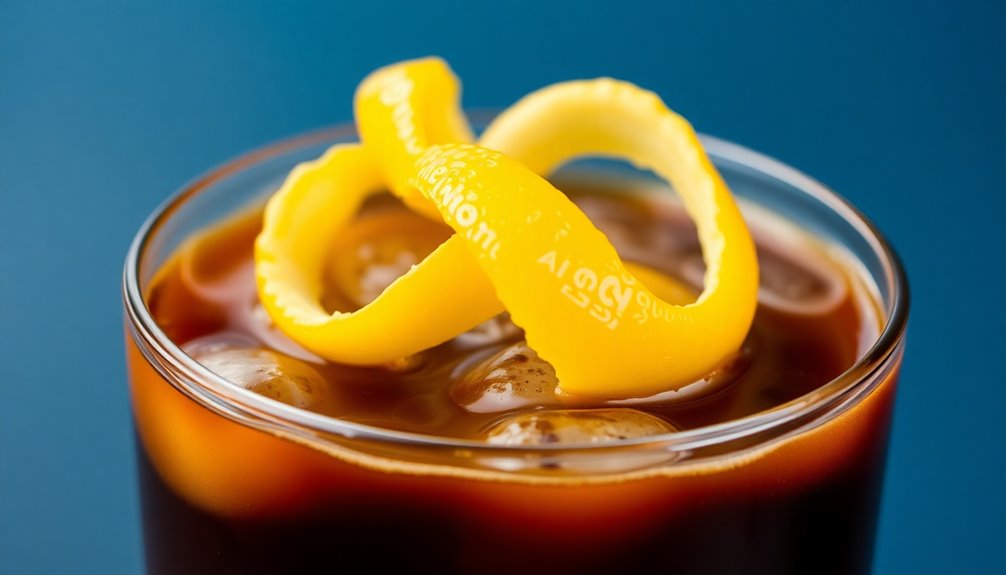
Once you've combined the espresso and cold water, it's time to garnish your homemade iced Americano.

Start by cutting a fresh lemon in half and using a zester or peeler to remove a thin strip of the peel, making sure to avoid the bitter white pith.

Twist the lemon peel over the drink to release its essential oils, enhancing the overall aroma and flavor profile of the iced Americano.

Place the twisted lemon peel on the rim of the glass for an elegant presentation, adding a touch of brightness.

For an extra refreshing flavor, consider squeezing a small amount of lemon juice from the peel into the iced Americano before serving.

Final Thoughts

reflecting on key insights

Although an Iced Americano is a simple and straightforward coffee drink, you can elevate it with a few personal touches.

The classic iced Americano recipe is easy to make at home – just brew 1-2 shots of espresso and pour it over ice. For a stronger or milder beverage, adjust the amount of brewed espresso and add cold water to customize the strength.

You can also get creative by incorporating flavorful syrups or sweeteners, though the espresso roast coffee should remain the star.

As a low-calorie beverage, the iced Americano is a healthier alternative to many coffee shop options, allowing you to enjoy a delicious and refreshing pick-me-up.

Frequently Asked Questions

How to Make an Americano at Home Without a Machine?

To make an Americano at home without a machine, you'll need a Moka pot or Aeropress.

For the Moka pot, use 15 grams of finely ground coffee and let it brew on medium heat.

With an Aeropress, combine 14-18 grams of coffee with hot water, stir, and press down slowly.

Then, mix the concentrated coffee with cold water in a 1:2 ratio for the classic Americano flavor.

Adjust sweetness or add flavorings as desired.

Is an Iced Americano Just Espresso and Water?

An iced americano is indeed just espresso and water.

The classic recipe calls for a 1:2 ratio of espresso to cold water, which gives you that perfectly balanced flavor.

Just brew your espresso shots, pour them over ice, and then add the cold water.

You can tweak the ratios to suit your taste, but that's the basic formula for making a delicious iced americano at home.

Is Iced Americano Just Cold Brew?

No, an iced americano isn't the same as cold brew coffee.

While both are cold coffee drinks, an iced americano is made by diluting espresso with cold water and ice, giving it a bolder, more concentrated flavor.

Cold brew, on the other hand, is brewed with cold water over an extended period, resulting in a smoother, less acidic taste.

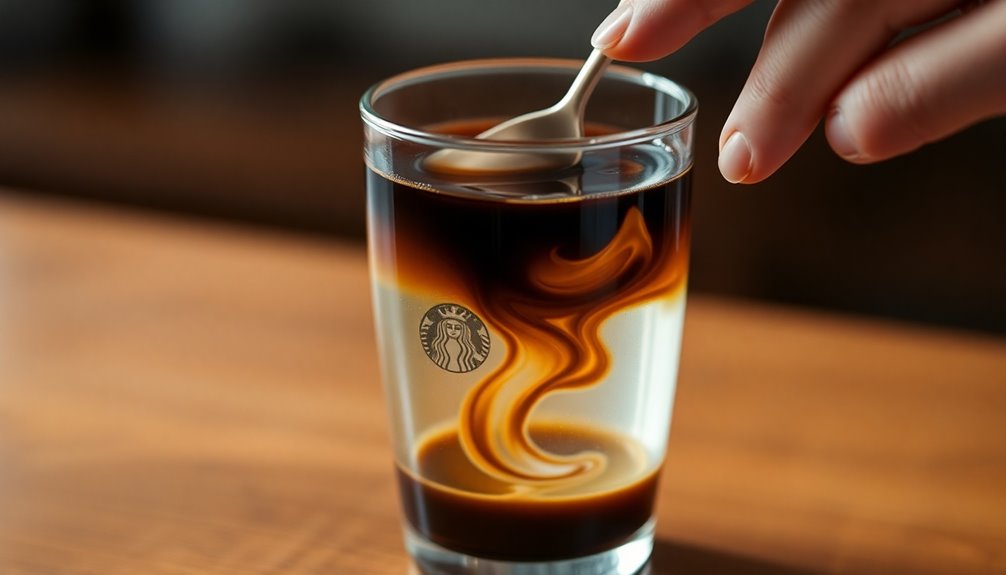
How Is an Iced Americano Made at Starbucks?

At Starbucks, an Iced Americano is made by brewing two shots of espresso and pouring them over ice.

Then, they add cold water to the espresso and ice mixture, typically in a 1:2 ratio.

You can customize your Iced Americano by requesting extra water, sweeteners, or flavored syrups.

It's served black, but you can also add milk or cream for a creamier texture.

Conclusion

You've learned how to make a delicious homemade iced americano! This classic coffee drink is perfect for hot summer days. Simply brew a strong espresso, add ice, and top with cold water. Customize it to your taste by adjusting the ratios or adding a bit of sweetener. Enjoy your refreshing iced americano and impress your friends with your barista skills!

Recipes

How Much Baking Soda Is 2 Teaspoons of Baking Powder

Not sure how to substitute baking powder with baking soda? Discover the perfect ratio and essential tips for your baking success!

Published

on

baking soda equivalent measure

If you're looking to substitute 2 teaspoons of baking powder, you'll need about 2/3 teaspoon of baking soda. Remember, baking soda is much more potent than baking powder, being three times stronger. To activate the baking soda, you'll also need to add an acid, like cream of tartar, vinegar, or lemon juice. Just mix the baking soda with the acid right before using it for the best results. This combination helps create those carbon dioxide bubbles that make your baked goods rise. Want to know more handy tips for baking substitutes? Keep on exploring!

Key Takeaways

  • To replace 2 teaspoons of baking powder, use 2/3 teaspoon of baking soda combined with an acid.
  • Common acids for activation include cream of tartar, vinegar, and lemon juice.
  • For 2 teaspoons of baking powder, mix 2/3 teaspoon baking soda with 1 teaspoon of your chosen acid.
  • Baking soda is stronger than baking powder, so precise measurements are crucial for desired results.
  • Always combine baking soda with acid just before baking for optimal leavening effects.

Understanding Leavening Agents

leavening agents in baking

When you immerse yourself in baking, understanding leavening agents like baking soda and baking powder is essential for achieving the perfect rise in your creations.

Baking soda is about three times stronger than baking powder, so if you need to substitute, you'll use less baking soda. For instance, to replace 2 teaspoons of baking powder, mix 2/3 teaspoon of baking soda with an acidic ingredient, such as 1 teaspoon of cream of tartar or 1 tablespoon of vinegar or lemon juice. This combination creates bubbles that help your batter rise.

Baking Soda Overview

baking soda properties and uses

Baking soda, or sodium bicarbonate, is a key ingredient in many baked goods, known for its powerful leavening properties.

It's a pure alkaline compound that requires an acidic ingredient to activate. When you mix baking soda with moisture and an acid, it produces carbon dioxide bubbles, causing your dough or batter to rise.

In recipes, you'll often see baking soda used in conjunction with ingredients like yogurt or vinegar to enhance leavening and avoid a metallic taste.

If you need to substitute baking powder, remember that 2 teaspoons of baking powder can be replaced with about 2/3 teaspoon of baking soda, as baking soda is three times stronger.

It's especially popular in quick breads, cookies, and pancakes for that perfect lift.

Baking Powder Basics

baking powder usage explained

Leavening agents play an essential role in achieving the right texture in baked goods, and baking powder is a key player in this process.

Baking powder typically contains baking soda, an acid like cream of tartar, and a moisture-absorbing agent, allowing it to activate without needing additional acidic ingredients. Most baking powder is double-acting, releasing carbon dioxide gas in two stages: once when mixed with liquid and again when heated.

For every 1 teaspoon of baking soda, you can substitute about 3 teaspoons of baking powder due to the extra acid. This leavening agent helps create a lighter texture in cakes, muffins, and biscuits, especially when recipes lack sufficient acidic ingredients.

Substituting Baking Powder

alternatives to baking powder

Substituting baking powder can be straightforward if you know the right ratios and ingredients. To create a baking powder substitute, you can mix baking soda with an acidic component. Here's a quick guide:

Baking Powder Substitute Amount of Baking Soda Acidic Component
Cream of Tartar 2/3 teaspoon 1 teaspoon of cream of tartar baking
Vinegar 2/3 teaspoon 1 teaspoon of vinegar
Lemon Juice 2/3 teaspoon 1 teaspoon of lemon juice

When you need to use baking soda for baking, always combine it with the acidic component just before use to maximize leavening action. Remember, you may need to adjust flavors if your recipe already includes acidic ingredients.

Calculating Baking Soda Amount

baking soda quantity calculation

When you need to calculate the right amount of baking soda for your recipe, it's important to remember that it has a much stronger leavening power compared to baking powder.

To substitute 2 teaspoons of baking powder, follow these steps:

  1. Use about 2/3 teaspoon of baking soda.
  2. Include an acid in your recipe, like vinegar or yogurt, to activate the baking soda.
  3. Adjust other ingredients, especially liquid components, to maintain the recipe's moisture balance.
  4. For accurate measurement, level off the baking soda to avoid an overly alkaline taste.

Tips for Successful Substitution

effective replacement strategies discussed

Successfully swapping baking soda for baking powder can make a big difference in your baking results. When you substitute, remember to mix the baking soda with an acid before adding it to your recipe. This guarantees proper activation and helps maintain the desired flavor and texture. If you're using yogurt or buttermilk, you'll need to adjust the liquid ingredients since they add extra moisture and acidity.

Here's a quick reference:

Substitute Type Amount of Baking Soda Acid Needed
Baking Powder (2 tsp) 2/3 tsp 1 tsp cream of tartar or lemon juice
Add Yogurt/Buttermilk Adjust liquid N/A
Monitor Baking Times Adjust as needed N/A

Keep a close eye on baking times; reactions may vary!

Common Baking Recipes

essential baking recipe guide

Understanding how baking soda and baking powder function is key when working with common baking recipes.

Here's a quick guide to help you navigate their use:

  1. Cakes: Often require baking powder for a light texture.
  2. Muffins: Use baking powder to achieve a fluffy rise.
  3. Biscuits: Rely on baking powder for that perfect airy effect.
  4. Substituting: To substitute 2 teaspoons of baking powder, use 2/3 teaspoon of baking soda and 1 teaspoon of cream of tartar.

Frequently Asked Questions

What Can I Substitute for 2 Teaspoons of Baking Powder?

If you need to substitute 2 teaspoons of baking powder, you've got a few options.

You can mix 2/3 teaspoon of baking soda with 1 teaspoon of cream of tartar.

Alternatively, try 1 teaspoon of baking soda plus 1 tablespoon of vinegar or lemon juice.

If you have self-rising flour, use 1 cup instead, adjusting your liquid and salt.

Just remember to include an acid when using baking soda for proper leavening!

How Much Baking Soda Is 1 Tsp of Baking Powder?

Ever wondered how to make your baked goods rise without baking powder?

To substitute 1 teaspoon of baking powder, you'll need 1/4 teaspoon of baking soda mixed with 1/2 teaspoon of an acidic ingredient like vinegar or lemon juice.

This combination activates the baking soda, creating carbon dioxide bubbles that help your treats rise.

Just remember, precision is key to achieving that perfect texture and lift in your delicious creations!

How to Make 2 Teaspoons of Baking Powder?

To make 2 teaspoons of baking powder, you'll need to mix 2/3 teaspoon of baking soda with 1½ teaspoons of cream of tartar.

If you prefer a quick alternative, combine 2 teaspoons of lemon juice or vinegar with the baking soda instead.

Always verify your cream of tartar is fresh for the best results.

Mix these ingredients just before using them to maintain their leavening power for your baking recipes.

How Do I Replace Baking Soda With Baking Powder?

Imagine your kitchen as an alchemist's lab, where ordinary ingredients transform into culinary magic.

To replace baking soda with baking powder, you'll need a slightly different approach. For every teaspoon of baking soda, use three teaspoons of baking powder.

If you're using liquid acids like vinegar, mix one teaspoon with a teaspoon of baking soda to achieve the desired rise.

Conclusion

When substituting baking powder, remember that it typically contains about one-third baking soda. So, for 2 teaspoons of baking powder, you'd need roughly ⅔ teaspoon of baking soda combined with an acid. Curiously, about 90% of all baked goods rely on these leavening agents to achieve that perfect rise. By understanding the balance between baking soda and baking powder, you can guarantee your recipes turn out just right every time you bake. Happy baking!

Continue Reading

Recipes

How to Make a Flavored Iced Americano

How to create a refreshing flavored iced Americano that tantalizes your taste buds—discover the simple steps to elevate your coffee experience!

Published

on

flavoring your iced americano

To make a flavored iced Americano, start by brewing a double shot of espresso using your preferred method. Fill a glass with ice cubes, then pour the hot espresso over the ice, stirring gently. Add 1-2 pumps of flavored syrup like vanilla or caramel, and mix in cold filtered water to achieve your desired strength. You can customize your drink further by incorporating spices like cinnamon or adjusting the syrup quantity. This simple process delivers a revitalizing and tasty beverage. If you're curious about other flavor combinations or variations, there's plenty more to explore.

Key Takeaways

  • Brew a double shot of espresso (30 grams) using an espresso machine or Aeropress for a robust flavor base.
  • Fill an 8-ounce glass with ice cubes to chill the drink without diluting it.
  • Pour the hot espresso over the ice and stir gently until chilled.
  • Add 1-2 pumps of your preferred flavored syrup (like vanilla or caramel) to enhance the taste.
  • Incorporate 30 grams of cold filtered water for a smoother drink, adjusting sweetness and flavor as desired.

What Is a Flavored Iced Americano?

flavored cold coffee beverage

A flavored iced Americano is a rejuvenating twist on the classic iced Americano, designed to elevate your coffee experience. By adding flavored syrups, like vanilla, caramel, or hazelnut, you can enhance the rich taste of espresso mixed with cold water and ice.

This drink maintains the same invigorating base as a traditional iced Americano but offers a more personalized flavor profile. You can easily adjust sweetness levels by choosing different syrup quantities or opting for sugar-free sweeteners, perfect for those mindful of calories.

With countless flavor combinations available, experimenting with various syrups and espresso roasts allows you to create unique variations that cater to your individual taste preferences, making every sip a delightful experience.

Essential Ingredients for Your Drink

key components for beverages

To craft a delicious flavored iced Americano, you'll need a few essential ingredients that come together to create a perfectly balanced drink.

Here's what you'll need:

  1. Espresso shots: Start with a double shot (30 grams) for robust flavor.
  2. Cold filtered water: Use 30 grams to dilute the espresso, ensuring smoothness.
  3. Ice cubes: Fill an 8-ounce glass to chill your drink and enhance that invigorating experience.
  4. Flavored syrups: Add 1-2 pumps or tablespoons of your favorite syrup, like vanilla or caramel, to elevate the taste.

Optional ingredients include sweeteners like sugar or agave, and dairy alternatives like almond milk or half-and-half for a creamier texture.

Additionally, the right training regimen can also improve your coffee-making skills.

Enjoy your iced Americano!

Tools You Will Need

essential equipment required here

Making a flavored iced Americano requires not just the right ingredients but also the right tools to bring your drink to life.

First, you'll need an espresso machine, Moka pot, or Aeropress to brew your espresso base. A precise burr grinder is essential for grinding your coffee beans, ensuring a rich flavor profile.

Don't forget a kitchen scale to accurately measure your coffee and water, maintaining a perfect 1:2 ratio for balance. Regular ice cubes are vital to chill your drink without diluting the flavor, so steer clear of coffee ice cubes.

Finally, an 8-ounce glass is ideal for serving your flavored iced Americano, providing enough room for ice and any additional flavorings you choose to add.

Step-by-Step Preparation

detailed preparation guide steps

Now that you have your tools ready, let's get into the step-by-step preparation of your flavored iced Americano.

You'll explore various flavoring options and learn how to customize sweetness to match your taste.

We'll also touch on different brewing techniques to help you achieve that perfect espresso base.

Flavoring Options Available

Flavoring your iced Americano opens up a world of taste possibilities that can elevate your coffee experience. Here are some flavoring options you can try:

  1. Flavored Syrups: Start with 1-2 tablespoons of vanilla, caramel, or hazelnut syrup to enhance sweetness.
  2. Splash of Milk: Add a splash of milk or a dairy alternative for a creamier texture—adjust to your taste.
  3. Spices: Sprinkle a pinch of spices like cinnamon or nutmeg on top to add a unique twist and elevate the aroma.
  4. Experiment: Don't hesitate to mix flavors or try new combinations to discover your perfect iced Americano.

Incorporating color accuracy into your flavor choices can also enhance your visual presentation and make your drink more appealing.

With these options, your coffee will never be boring again! Enjoy the journey of flavor exploration.

Customizing Sweetness Levels

How can you achieve the perfect sweetness in your iced Americano? Start by preparing your drink with a double shot of espresso over ice. To customize sweetness levels, use simple syrup, beginning with one teaspoon and adjusting to your taste. For flavored options, add flavored syrup—like vanilla or caramel—starting with half a pump. Experiment with sweeteners such as agave or stevia, measuring around 1/2 teaspoon initially.

Sweetener Type Starting Amount
Simple Syrup 1 teaspoon
Flavored Syrup 1/2 pump
Agave 1/2 teaspoon
Stevia 1/2 teaspoon
Other Sweeteners To taste

Remember to stir the mixture gently to enhance the overall flavor!

Brewing Techniques Explored

To create a flavorful iced Americano, you'll begin by brewing a double shot of espresso, which is essential for achieving a rich and balanced taste.

Here's how to prepare it step-by-step:

  1. Use an espresso machine to brew approximately 30 grams of espresso.
  2. Fill a tall glass with regular ice cubes to prevent dilution.
  3. Pour the hot espresso over the ice and stir gently until chilled.
  4. Add flavored syrups, like vanilla or caramel, adjusting the amount to your preference.

Finally, incorporate cold filtered water to reach your desired strength, usually a 1:2 ratio of espresso to water. A double shot of espresso contains about 120 mg of caffeine, which contributes to the energizing effect of the drink.

Serve immediately for the best flavor experience of your iced Americano!

Customization and Flavor Options

personalized taste preferences available

When it comes to customizing your iced Americano, sweetener choices and flavor syrup variations can make all the difference.

You can start with a flavored syrup like vanilla or caramel and adjust the sweetness with options like agave syrup or stevia.

This way, you'll create a drink that perfectly suits your taste buds!

Sweetener Choices

While you might think a classic iced Americano only needs coffee and ice, the right sweetener can transform it into a truly delightful experience.

Choosing the perfect sweetener not only enhances the flavor but also offers customization. Here are some great options to contemplate:

  1. Flavored syrups: Try vanilla, caramel, or hazelnut for an indulgent twist.
  2. Liquid sweeteners: Simple syrup or agave nectar dissolve easily in cold beverages.
  3. Healthier alternatives: Use stevia or monk fruit sweeteners for guilt-free sweetness.
  4. Spices: A sprinkle of cinnamon or nutmeg can elevate your drink's complexity. Adding anti-inflammatory herbs like turmeric or ginger can also provide health benefits alongside flavor.

Experimenting with these sweeteners lets you create a personalized iced Americano that perfectly matches your taste!

Flavor Syrup Variations

Flavor syrups offer endless possibilities for customizing your iced Americano, allowing you to explore a variety of taste sensations. You can add popular flavor syrups like vanilla, caramel, or hazelnut, using 1-2 tablespoons per serving to enhance sweetness.

If you prefer a personal touch, try making homemade syrups by dissolving equal parts sugar and water with your favorite flavoring. To elevate your drink further, consider incorporating spices like cinnamon or nutmeg, which complement the espresso's boldness without extra sweeteners.

For a creamier texture, opt for flavored creamers or dairy alternatives, introducing flavors like chocolate or almond. If you're looking for healthier options, sugar-free sweeteners like agave or stevia can still satisfy your customization cravings. Additionally, using sugar-free sweeteners can help reduce calorie intake while still allowing for delicious flavor enhancements.

Tips for Perfecting Your Drink

master your drink preparation

To create the perfect flavored iced Americano, start with high-quality, freshly ground espresso beans, as they lay the foundation for a rich, bold taste.

Here are some tips to elevate your drink:

  1. Experiment with flavored syrups like vanilla, caramel, or hazelnut—add about 1-2 tablespoons for a sweet twist.
  2. For a creamier texture, include a splash of milk or a dairy alternative, which complements the espresso beautifully.
  3. Adjust sweetness by starting with a small amount of syrup, gradually increasing it to find the right balance.
  4. Finish with a sprinkle of spices like cinnamon or nutmeg for an aromatic finish that enhances the flavor profile of your iced Americano.

Enjoy your delicious creation!

Storing Leftover Ingredients

leftover ingredient storage tips

After perfecting your flavored iced Americano, you might find yourself with some leftover ingredients. Properly storing these can enhance your future coffee drinks. Here's how to keep them fresh:

Ingredient Storage Method Duration
Leftover Espresso Store in the fridge 2-3 days
Flavored Syrups Store in a cool, dark place Several weeks (opened)
Ice Cubes (coffee) Store in the freezer Indefinitely

For ideal freshness, avoid freezing leftover espresso, as it alters the flavor. Flavored syrups can last longer when stored properly. Using ice cubes made from leftover coffee preserves taste while preventing dilution, enhancing flavor in your next iced Americano.

Related Coffee Recipes to Try

coffee recipe ideas to explore

While you're enjoying your flavored iced Americano, why not explore other delicious variations that can elevate your coffee experience?

Here are some enticing recipes to try:

  1. Vanilla Iced Americano: Add vanilla syrup for a sweet, aromatic twist that enhances the bold coffee flavor.
  2. Mocha Iced Americano: Incorporate chocolate syrup for a rich, indulgent chocolate flavor that pairs perfectly with your espresso.
  3. Caramel Iced Americano: Drizzle caramel sauce into your drink for a sweet, buttery flavor that balances the coffee's natural bitterness.
  4. Cinnamon Iced Americano: Stir in ground cinnamon or cinnamon syrup for a warm spice note that complements the drink's intensity.

Feeling adventurous?

Don't forget to try a invigorating Mint Iced Americano for a cool twist!

Frequently Asked Questions

Can You Add Flavor to Iced Americano?

Absolutely, you can add flavor to your Iced Americano!

Try incorporating flavored syrups like vanilla or caramel for a sweet twist. If you want a creamier texture, a splash of milk or cream does the trick.

You can also sprinkle spices like cinnamon for an aromatic touch. Don't forget to adjust the sweetness with options like agave or simple syrup.

Experimenting with different espresso roasts can also give you unique flavors without extra ingredients!

Can an Iced Americano Be Sweet?

Yes, an Iced Americano can definitely be sweet!

You can add sugar, flavored syrups, or natural sweeteners like agave or stevia to enhance its bold coffee flavor.

If you want to keep it smooth, try using simple syrup, as it dissolves easily in cold drinks.

A splash of milk or cream can also sweeten it while adding a creamy texture.

Just remember to stir gently for an even distribution of flavors!

Can You Add Cream to Iced Americano?

Yes, you can definitely add cream to your Iced Americano! It creates a creamier texture and balances the boldness of the espresso, making it more enjoyable for those who prefer a smoother taste.

Just a splash of half-and-half, whole milk, or a dairy alternative works well without overpowering the coffee flavor.

Keep in mind that adding cream will increase the calorie count, so consider that if you're watching your intake.

Enjoy your drink!

Why Do Koreans Like Iced Americanos so Much?

Koreans love iced Americanos for several reasons.

First, the bold, coffee-forward flavor provides a revitalizing boost, especially during hot, humid summers.

You'll appreciate the drink's low-calorie profile, making it a guilt-free choice for health-conscious individuals.

Plus, the vibrant café culture in South Korea encourages young professionals and students to enjoy it daily.

As the appreciation for high-quality coffee grows, iced Americanos fit perfectly into this evolving coffee scene.

Conclusion

Now that you know how to make a flavored iced Americano, it's time to get creative and personalize your drink. Remember, "variety is the spice of life," so don't hesitate to experiment with different flavorings and ingredients. Whether you prefer a hint of vanilla or a splash of caramel, each sip can be a delightful surprise. Enjoy your invigorating creation, and share it with friends to spread the coffee love! Cheers to your new favorite drink!

Continue Reading

Recipes

Christmas Crack Recipe

Prepare to indulge in the delightful layers of salty and sweet with this Christmas Crack Recipe that will leave you wanting more!

Published

on

festive holiday snack treat

You'll love making Christmas crack, a sweet and salty holiday treat that combines saltine crackers, buttery toffee, and rich chocolate. Start by preheating your oven to 350°F. Line a baking sheet with parchment paper, arranging the crackers in a single layer. Boil together 1 cup of unsalted butter and 1 cup of packed brown sugar for about three minutes, then pour it over the crackers. Bake for 5-7 minutes until bubbly. After pulling it out, sprinkle 2 cups of chocolate chips on top, allowing them to melt. If you're curious about variations and serving ideas, there's plenty more to explore!

Key Takeaways

  • Combine saltine crackers, butter, brown sugar, chocolate chips, and optional nuts to create the addictive layers of Christmas Crack.
  • Preheat your oven to 350°F (175°C) and prepare a lined baking sheet for even baking.
  • Boil butter and brown sugar for 3-4 minutes before pouring over the crackers for a delicious toffee layer.
  • Bake for 5-7 minutes, then sprinkle melted chocolate chips and optional toppings like nuts or sprinkles before cooling.
  • Break into pieces and serve, or package in decorative bags for gifting during the holiday season.

History

study of past events

The history of Christmas Crack is as delightful as the treat itself. Originating in the mid-20th century, this sweet and salty snack quickly became a holiday favorite. You might've heard it referred to as "Crack" due to its addictive nature, and it's easy to see why!

The treat typically combines saltine crackers, toffee, chocolate, and nuts, creating a uniquely satisfying experience. Many believe it was popularized through community cookbooks, where families shared their cherished recipes.

You'll find variations across different regions, with some adding seasonal spices or toppings. Over time, Christmas Crack has evolved into a holiday staple, often gifted in festive tins or served at parties.

Its rich history adds to the joy of enjoying this irresistible treat each year.

Recipe

delicious homemade meal preparation

Christmas Crack Recipe

Christmas Crack, also known as toffee or saltine cracker toffee, is a delightful holiday treat that combines sweet, salty, and crunchy flavors. This simple yet indulgent recipe is perfect for sharing with friends and family during the festive season. It features layers of buttery toffee and chocolate, all built upon a base of saltine crackers. The result is a delicious confection that's hard to resist, making it a popular choice for gift-giving or holiday parties.

Making Christmas Crack is a straightforward process that requires minimal ingredients and just a little bit of patience. The beauty of this dessert lies in its versatility; you can easily customize it with your favorite toppings, such as nuts, sprinkles, or holiday-themed candies. Once you try this recipe, you'll find yourself making it year after year as a holiday tradition. Additionally, enjoying your homemade treats can be enhanced by using the aromatic properties of essential oils to create a festive atmosphere.

Ingredients:

  • 1 sleeve saltine crackers
  • 1 cup unsalted butter
  • 1 cup packed brown sugar
  • 2 cups semi-sweet chocolate chips
  • 1 cup chopped nuts (optional)
  • Sea salt (for sprinkling)

Instructions:

Preheat your oven to 350°F (175°C) and line a baking sheet with parchment paper. Arrange the saltine crackers in a single layer on the baking sheet, ensuring they cover the entire surface.

In a saucepan over medium heat, melt the butter and brown sugar together, stirring constantly until the mixture comes to a boil. Let it boil for 3 minutes without stirring, then pour the hot toffee mixture evenly over the saltine crackers.

Bake in the preheated oven for 5-7 minutes until bubbly. Remove from the oven and immediately sprinkle the chocolate chips on top. Allow them to sit for a few minutes to melt, then spread the melted chocolate evenly over the toffee.

If desired, sprinkle chopped nuts and sea salt on top before letting it cool completely. Once set, break into pieces and enjoy!

Extra Tips:

When preparing Christmas Crack, make sure to watch the toffee closely as it cooks to prevent it from burning.

If you're using toppings, feel free to get creative; crushed candy canes, M&M's, or holiday-themed sprinkles can add a festive touch.

For easier breaking, chill the completed crack in the refrigerator for about 30 minutes before cutting or breaking it apart.

Store the pieces in an airtight container at room temperature to maintain their freshness. Enjoy your delicious homemade treat!

Cooking Steps

cooking instructions provided here

To start making your Christmas Crack, you'll need to preheat your oven to 400°F.

Next, spread the Saltine crackers evenly on a baking sheet.

Once that's done, you can move on to adding the melted butter mixture for that delicious flavor.

Step 1. Preheat Oven to 400°F

preheat oven to 400 f

Before diving into the deliciousness of your Christmas Crack, you'll want to verify your oven is preheated to 400°F. This step is essential, as it guarantees the butter and sugar mixture melts perfectly, creating that irresistible caramel layer.

Take a moment to adjust your oven settings, checking that the temperature is accurate. If your oven has a built-in thermometer, use it to verify the heat level.

While you wait for the oven to reach the right temperature, gather your ingredients and prep your baking sheet.

Once the oven signals that it's ready, you'll be all set to take the next steps. A properly preheated oven makes all the difference in achieving that perfect crispy and chewy texture.

Step 2. Spread Saltine Crackers Evenly

evenly spread saltine crackers

Start by lining your baking sheet with a single layer of Saltine crackers, ensuring they're spread evenly across the surface.

Make sure the crackers are touching but not overlapping, as this helps create a uniform base for your Christmas Crack. If you have a larger sheet, you can fit more crackers; just remember to maintain that single layer.

This step is essential because an even distribution of crackers allows for consistent coverage of the sweet topping you'll add later.

Take your time here—rushing can lead to uneven areas, which might result in some bites missing that delicious flavor.

Once you've got them laid out perfectly, you're ready to move on to the next part of your festive treat!

Step 3. Add Melted Butter Mixture

combine melted butter mixture

Melt the butter in a saucepan over medium heat, allowing it to become bubbly and fragrant.

Once melted, carefully stir in the brown sugar until it's fully combined.

Keep cooking the mixture, stirring constantly, until it comes to a gentle boil.

Let it boil for about three minutes without stirring, watching closely to prevent burning.

You want it to thicken slightly and develop a rich color.

After three minutes, remove the saucepan from the heat and let it cool for a moment.

Then, pour the bubbly butter mixture evenly over the Saltine crackers.

Make sure to spread it out gently with a spatula, ensuring every cracker is coated.

This step is essential for achieving that delicious caramel flavor in your Christmas Crack.

Step 4. Sprinkle With Chocolate Chips

sprinkle chocolate chips evenly

Once you've poured the butter mixture over the Saltine crackers, it's time to sprinkle a generous layer of chocolate chips on top.

Grab your bag of chocolate chips and sprinkle them evenly across the surface. You want to cover every inch, so don't hold back! The heat from the crackers will help them melt slightly, creating a deliciously gooey layer.

Depending on your preference, you can use semi-sweet, milk, or even dark chocolate chips. If you're feeling adventurous, mix in some white chocolate chips or peanut butter chips for added flavor.

Once you've got your chocolate layer set, let it sit for a few minutes to allow the chips to soften before moving on to the next step.

Enjoy the sweet aroma!

Step 5. Drizzle With Caramel Sauce

drizzle caramel sauce generously

As the chocolate chips begin to soften, it's the perfect moment to drizzle your caramel sauce over the top.

Grab your prepared caramel sauce, whether homemade or store-bought, and give it a gentle stir to guarantee it's smooth. Using a spoon or a squeeze bottle, start at one end and slowly drizzle the caramel back and forth across the chocolate layer.

Make sure to cover as much of the surface as possible for that delightful sweet contrast. Don't worry if it isn't perfect; the rustic look adds charm!

Once you've finished drizzling, let it cool for a few minutes to allow the caramel to set slightly. Then, pop it into the fridge for a deeper set before cutting into pieces.

Enjoy!

Final Thoughts

reflecting on key insights

While enjoying your homemade Christmas Crack, you might find it hard to believe how simple and delicious this treat is. This easy recipe combines the perfect balance of sweet and salty, making it a crowd-pleaser at any holiday gathering.

You'll love how quickly it comes together, allowing you to spend more time creating memories with loved ones. Plus, it's incredibly versatile; feel free to experiment with different toppings or flavorings to suit your taste.

Whether you package it up as gifts or keep it for yourself, Christmas Crack is sure to bring joy and satisfaction. So, gather your ingredients, embrace the festive spirit, and indulge in this delightful treat that's bound to become a holiday tradition in your home. Enjoy!

Frequently Asked Questions

Can I Use Gluten-Free Crackers for the Recipe?

Absolutely, you can use gluten-free crackers for the recipe!

Just make sure to choose a brand that holds up well under heat, as some gluten-free options can be a bit fragile.

You'll still get that delicious crunch and flavor you want.

By using gluten-free crackers, you're accommodating dietary needs without sacrificing taste.

How Should I Store Leftover Christmas Crack?

To store your leftovers, you'll want to keep them in an airtight container to maintain freshness.

Line the container with parchment paper to prevent sticking, then layer the pieces carefully. If you've got a lot, consider separating them with more parchment.

You can store it at room temperature for a few days, or in the fridge for a week. Just make sure it's completely cool before sealing.

Enjoy your tasty treat later!

Can I Add Different Toppings to the Christmas Crack?

Absolutely, you can add different toppings!

Get creative with your favorite ingredients. Consider using crushed pretzels for a salty crunch, or sprinkle on some nuts for added texture.

You might try drizzling melted chocolate or caramel for a decadent touch. Experiment with colorful sprinkles or even dried fruit for a unique twist.

Just remember to let your imagination guide you, and have fun customizing it to suit your taste!

Is There a Dairy-Free Version of Christmas Crack?

Yes, you can definitely make a dairy-free version!

Simply substitute the traditional butter with a dairy-free alternative, like coconut oil or a plant-based butter. For chocolate, opt for dairy-free chocolate chips or a vegan chocolate bar.

You'll still enjoy that delicious crunch and sweetness without the dairy. Just be sure to check labels for any hidden dairy ingredients.

With these swaps, you'll have a tasty treat everyone can enjoy!

How Long Does Christmas Crack Typically Last?

Typically, treats like this can last about two weeks when stored properly.

You'll want to keep it in an airtight container to maintain its freshness. If you refrigerate it, it might last even longer, up to a month.

Just make sure to let it come to room temperature before enjoying again.

If you notice any changes in texture or smell, it's best to toss it for safety.

Enjoy your treats while they're at their best!

Continue Reading

Trending