
To make a delicious bone broth, start by roasting 2-3 pounds of high-quality bones at 400°F for extra flavor. Next, add chopped vegetables like onion, carrots, and celery, along with some garlic, bay leaves, and a splash of apple cider vinegar to help extract nutrients. Cover with water and simmer gently for 12-24 hours on the stovetop or use a slow cooker or Instant Pot for faster results. When done, strain the broth and store it in airtight containers. This nutritious base is perfect for various dishes or simply as a warm drink. There's much more to explore!
Key Takeaways
- Use 2-3 pounds of high-quality bones (beef, chicken, or mix) for maximum collagen extraction and flavor.
- Roast bones at 400°F before simmering to enhance the broth's flavor profile.
- Combine bones with aromatic vegetables like onions, carrots, and celery, along with apple cider vinegar for added nutrients.
- Simmer the mixture for 12-24 hours to extract nutrients, then strain out solids for a clear broth.
- Store broth in the refrigerator for up to one week or freeze for up to six months in labeled containers.
History

Bone broth has a rich history that dates back thousands of years, as people have long recognized its nutritional benefits and culinary versatility.
Ancient civilizations, from the Egyptians to the Chinese, used bones to create hearty broths, believing they provided strength and healing. It was a staple in many households, often made from leftover bones and scraps, reflecting a resourceful approach to cooking.
In medieval Europe, broth became a fundamental part of diets, especially for the sick or elderly.
Fast forward to today, and you'll find bone broth gaining popularity again, thanks to its collagen content and gut-healing properties. Many people are now seeking out options like indexed annuities to ensure their health and nutrition needs are supported long-term.
You can appreciate how this age-old recipe has evolved, yet its core purpose remains the same: nourishing both body and soul.
Recipe

Bone broth is a nutritious and flavorful liquid made by simmering bones and connective tissue from animals. This ancient recipe has gained popularity in recent years for its health benefits, including improved gut health, joint support, and rich mineral content. Making bone broth at home isn't only economical but also allows you to control the ingredients and flavors.
Whether you prefer a classic beef bone broth or a lighter chicken broth, the general process remains the same.
To begin, you'll want to select high-quality bones, preferably from pasture-raised animals. Roasting the bones beforehand enhances the flavor and adds depth to the broth. You can also customize your broth by adding vegetables, herbs, and spices to create a rich and aromatic base.
Once prepared, the broth can be enjoyed on its own, used as a base for soups and stews, or incorporated into various recipes.
Ingredients:
- 2-3 pounds of bones (beef, chicken, or a mix)
- 2 tablespoons apple cider vinegar
- 1 onion, quartered
- 2 carrots, chopped
- 2 celery stalks, chopped
- 4-5 cloves garlic, crushed
- 1-2 bay leaves
- 1 teaspoon black peppercorns
- Water (enough to cover the bones)
- Optional: fresh herbs (parsley, thyme)
To cook the bone broth, begin by preheating your oven to 400°F (200°C). Place the bones on a baking sheet and roast them in the oven for about 30 minutes until they're browned.
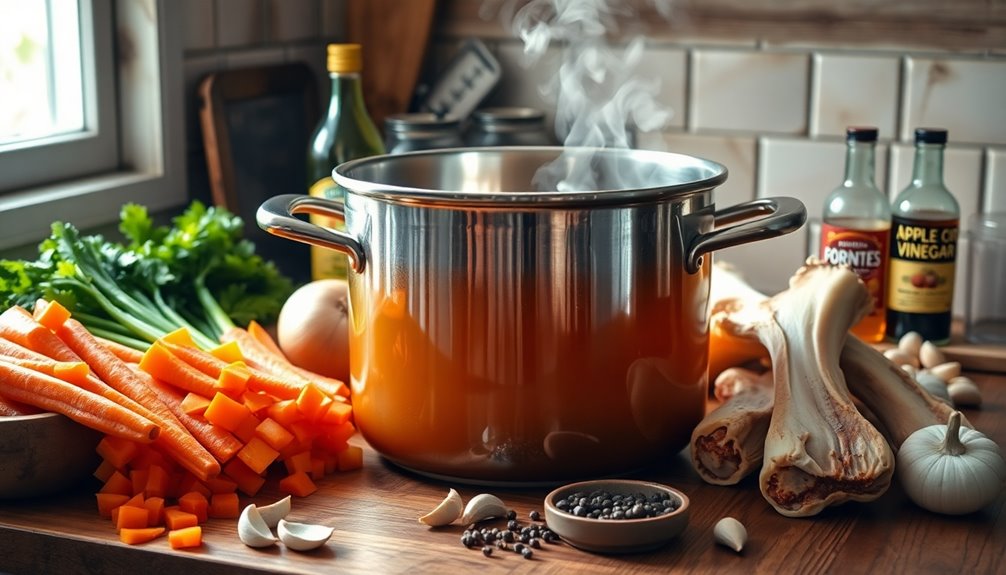
Transfer the roasted bones to a large stockpot or slow cooker and add the apple cider vinegar, vegetables, garlic, bay leaves, and peppercorns. Fill the pot with enough water to cover the bones completely.
Bring the broth to a boil, then reduce the heat to low and let it simmer for at least 12-24 hours. The longer it simmers, the more flavor and nutrients will be extracted from the bones.
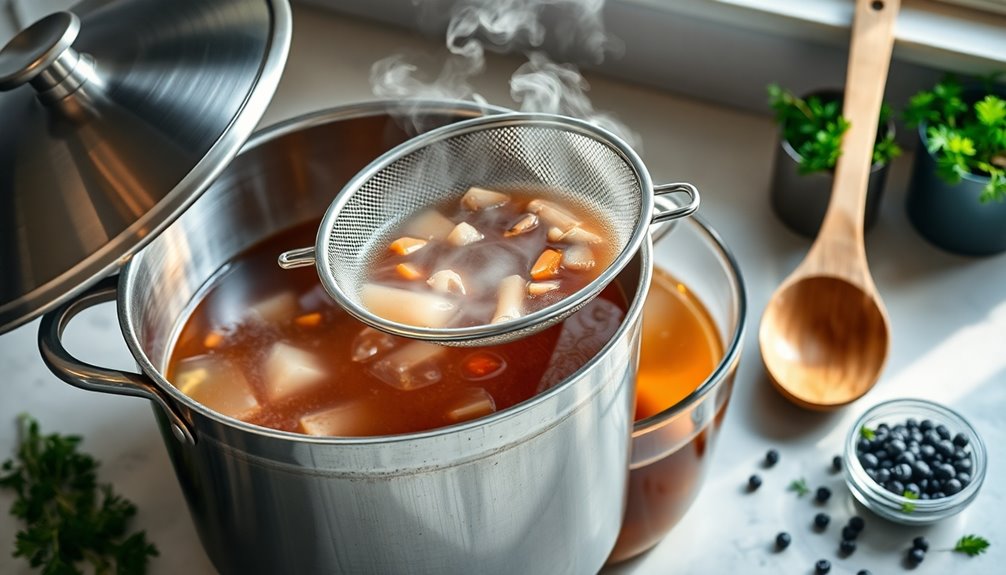
Once finished, strain the broth through a fine-mesh sieve and discard the solids.
When making bone broth, it's vital to recognize that you can adjust the cooking time based on your preference for flavor and richness. If you prefer a stronger taste, aim for a longer simmering time, but be sure to check the liquid levels occasionally and add more water if needed.
Additionally, storing the broth in glass jars can help preserve its flavor, and it can be frozen for future use. You can also experiment with different types of bones and additional ingredients for a unique twist on this classic recipe.
Cooking Steps

To make a rich and flavorful bone broth, you'll start by preparing your bones for simmering.
Next, you'll add vegetables and herbs to enhance the taste.
After that, just strain the mixture and let it simmer for 12 to 24 hours for the best results.
Step 1. Prepare Bones for Simmering
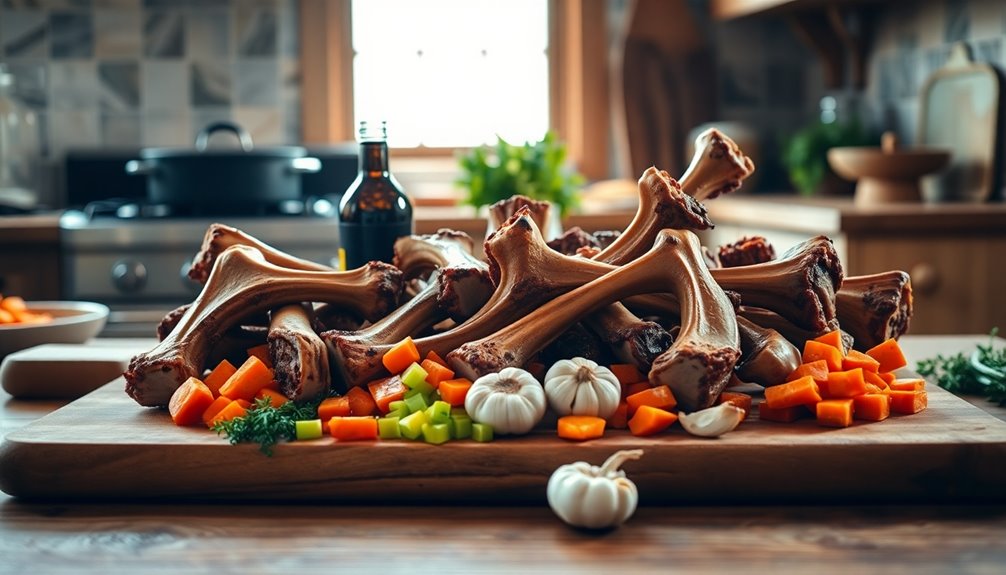
Preparing your bones for simmering is an essential step in making rich and flavorful bone broth. Start by choosing high-quality bones, such as beef, chicken, or pork.
If you're using raw bones, roasting them in the oven at 400°F for about 30 minutes will enhance the flavor. Once roasted, place the bones in a large pot or slow cooker.
If you have any leftover meat, feel free to add that too, as it will contribute to the broth's richness. Don't forget to include any gelatinous bones, like knuckles or joints, since they add great texture.
Finally, rinse the bones under cold water to remove any impurities. Now, you're ready for the next steps in your broth-making journey!
Step 2. Add Vegetables and Herbs

Adding vegetables and herbs is an essential step that elevates your bone broth's flavor profile.
Begin by chopping up aromatic vegetables like onions, carrots, and celery, which form the classic mirepoix. Toss them into your pot along with the bones.
Don't forget to include garlic for added depth! Fresh herbs like thyme, parsley, or bay leaves can enhance the broth's aroma; add a handful for a fragrant touch. If you prefer, you can also use dried herbs, but adjust the quantity accordingly.
To balance the flavors, consider adding a splash of apple cider vinegar, which helps extract nutrients from the bones.
Stir everything together, and let those flavors meld beautifully during the simmering process!
Step 3. Strain the Broth Mixture
After allowing your broth to simmer and the flavors to meld, it's time to strain the mixture.
Grab a large bowl or pot and place a fine-mesh strainer over it. Carefully ladle the broth through the strainer, allowing the liquid to flow into the bowl while catching the solid ingredients.
You might want to press down on the solids with a spoon to extract every last drop of flavor. Discard the solids once you're done; they've served their purpose.
If you prefer a clearer broth, consider straining it a second time through cheesecloth.
Once strained, let the broth cool before transferring it to storage containers. Your delicious, nutrient-rich bone broth is now ready for use or freezing!
Step 4. Simmer for 12-24 Hours

To achieve a rich and flavorful bone broth, you'll want to simmer it for anywhere between 12 to 24 hours. This long cooking time allows the bones to release their nutrients and collagen, resulting in a silky texture and deep flavor.
Start by bringing your broth to a gentle boil, then reduce the heat to low, allowing it to simmer steadily. Keep an eye on it, adding water if it reduces too much. You can also skim off any foam or impurities that rise to the surface during the first few hours.
The longer you simmer, the more depth your broth will have, so don't rush this step. Trust the process; your patience will pay off with a delicious, nourishing broth.
Step 5. Cool and Store Broth

Once your broth has finished simmering, let it cool slightly before transferring it to storage containers.
Use a fine-mesh strainer to pour the broth into a large bowl, removing any solids. If you want, you can strain it again for an ultra-smooth texture.
Once strained, let the broth cool at room temperature for about 30 minutes. After that, you can ladle it into airtight containers or jars, leaving some space at the top, as the broth will expand when frozen.
If you plan to use it within a week, store it in the refrigerator. For longer storage, freeze the broth, and it'll keep for several months.
Label your containers for easy identification later!
Final Thoughts

As you reflect on your bone broth journey, it's clear that this nourishing elixir goes beyond just a recipe; it's a way to connect with the wholesome flavors of your kitchen and the benefits of homemade nutrition.
Each simmering pot holds the essence of time, patience, and care, providing you with a rich, flavorful base for countless meals.
You've likely discovered the joy of customizing your broth with herbs and spices, making it uniquely yours. Plus, you're nourishing your body with vitamins and minerals.
So, as you sip on your creation, remember that you're not just enjoying a warm bowl; you're embracing a tradition that's been cherished for generations.
Keep experimenting, and let your kitchen become a haven of health and flavor.
Frequently Asked Questions
Can I Use Any Type of Bones for Broth?
You can use various types of bones for broth, depending on the flavor and nutrients you want.
Beef, chicken, pork, and even fish bones work well. Each type will give your broth a unique taste and richness.
Just make sure to include a mix of meaty and cartilaginous bones for the best results.
Don't hesitate to experiment with different combinations to find the perfect flavor for your broth!
How Long Can Bone Broth Be Stored in the Fridge?
You can store bone broth in the fridge for about 4 to 5 days.
Just make sure it's in an airtight container to maintain its freshness.
If you want to keep it longer, consider freezing it; it can last for several months in the freezer.
When you're ready to use it, just thaw it in the fridge overnight or heat it directly from frozen.
Enjoy your nutritious broth whenever you like!
Is Bone Broth Suitable for a Vegan Diet?
Bone broth isn't suitable for a vegan diet since it's made from animal bones and connective tissues.
If you're looking for a flavorful, plant-based alternative, consider vegetable broth or mushroom broth. They can deliver depth and richness without compromising your dietary choices.
You can also enhance these broths with herbs and spices for added flavor.
What Are the Health Benefits of Bone Broth?
Bone broth offers several health benefits that you might find intriguing.
It's packed with collagen, which supports joint health and skin elasticity. The amino acids present can aid in digestion and gut health.
Additionally, bone broth contains minerals like calcium and magnesium, which are essential for bone strength.
You'll also appreciate its potential to boost your immune system, helping you feel better during cold and flu season.
It's a nutrient-dense option worth considering!
Can I Freeze Bone Broth for Later Use?
Yes, you can freeze bone broth for later use!
Just let it cool completely before transferring it to airtight containers or freezer bags. Make sure to leave some space at the top, as liquids expand when frozen.
Label the containers with the date, and you'll be set for months.
When you're ready to use it, simply thaw it in the fridge or warm it up on the stove.
Enjoy your delicious broth whenever you want!

Arf, an author and an innovative enthusiast of coffee, coffee alternatives, and tea, plays a crucial role as a contributor to the esteemed Cappuccino Oracle platform. Renowned for his curiosity and passion for these captivating beverages, Arf has carved out a unique space for himself in the world of exploration and writing. He realized that coffee, coffee alternatives, and tea are not mere drinks to keep one awake, but universes of flavors and stories waiting to be explored.