
Espresso
Gaggia Vs Rancilio: The Ultimate Espresso Showdown
When it comes to home espresso machines, Gaggia and Rancilio are two of the most respected and well-known brands in the industry. Both have a reputation for producing high-quality and reliable machines that can make a delicious cup of espresso. However, with so many models to choose from, it can be challenging to decide which one is the best fit for your needs.
| Criteria | Gaggia | Rancilio |
|---|---|---|
| Build Quality | Known for sturdy build and durable construction | Renowned for high-quality materials and excellent craftsmanship |
| Performance | Consistent extraction and good temperature stability | Precise temperature control for optimal espresso extraction |
| Espresso Quality | Produces rich and flavorful espresso with good crema | Known for producing excellent espresso with strong crema |
| Boiler Type | Typically equipped with single or dual boilers | Equipped with a single boiler or heat exchange system |
| Steaming Capability | Offers reliable steam power for frothing milk | Provides powerful steam for effective milk frothing |
| User-Friendliness | User-friendly interface and straightforward operation | Requires some learning curve but offers more control |
| Price Range | Generally more affordable with a range of budget options | Tends to be higher in price, catering to more advanced users |
| Durability | Known for long-lasting performance and reliability | Built to withstand heavy use and frequent brewing |
| Maintenance | Requires regular cleaning and descaling for optimal results | Regular cleaning and maintenance is necessary for longevity |
| Aesthetics | Offers sleek and modern designs with a variety of options | Features a classic and timeless aesthetic |
When it comes to the Gaggia vs Rancilio espresso machine showdown, both brands have their own strengths and features to offer. Gaggia machines are often praised for their build quality, consistent performance, and affordability.
They provide reliable espresso extraction and offer user-friendly interfaces. On the other hand, Rancilio machines are renowned for their high-quality materials, precise temperature control, and excellent espresso quality. They may require a bit more skill to operate but are favored by advanced users who appreciate the control they provide.
Ultimately, the choice between Gaggia and Rancilio depends on individual preferences, budget, and desired features. Both brands have a strong reputation in the espresso machine market and are known for producing high-quality machines that can deliver a fantastic cup of espresso.
In this article, we will compare two popular models, the Gaggia Classic Pro and the Rancilio Silvia, in a head-to-head showdown to determine which one reigns supreme in the world of home espresso machines. We will examine each machine’s features, performance, and overall value to help you make an informed decision about which one is right for you.

, 0.3 liters")
From the steam wand to the size and capacity of each machine, we will cover it all in this ultimate espresso showdown. Whether you’re a seasoned barista or just starting, our comprehensive comparison will provide you with everything you need to know to make the best choice for your home espresso needs.
So, without further ado, let’s dive into the world of Gaggia vs Rancilio and find out which one comes out on top.
Key Takeaways
- Gaggia Classic Pro and Rancilio Silvia are both home espresso machines for entry-level and high-efficiency users respectively.
- Gaggia Classic Pro has a budget-friendly price, larger water tank, and efficient temperature control. However, Rancilio Silvia has a large steam capacity, durable body, and flexible steam wand for latte art.
- Rancilio Silvia wins in the steam wand and size and capacity categories, while ease of use is a tie between the two.
- Final verdict declares Rancilio Silvia as the winner, but recommendations for purchasing are based on individual preferences.
Features of Gaggia Classic Pro
The Gaggia Classic Pro is a popular entry-level semi-automatic espresso machine that offers a rapid heating boiler, large water reservoir capacity, and budget-friendly stainless steel construction. It comes with single and double shot filter baskets as well as a pressurized double shot filter basket, making it a versatile option for home baristas.

However, it does have some limitations, such as a subpar milk frother that may not produce the desired texture for latte art. For those considering the Gaggia Classic Pro as a potential purchase, it is important to note that there are other alternatives on the market, such as the Rancilio Silvia.
While the Gaggia Classic Pro has its limitations, it is still a solid choice for those on a budget or looking for a space-saving option. Ultimately, the choice between the Gaggia Classic Pro and other options will come down to personal preference and individual needs.
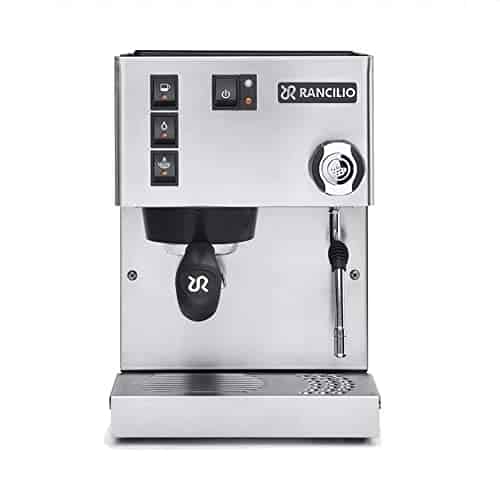
Features of Rancilio Silvia
With a large steam capacity and professional-grade internal parts, the Rancilio Silvia boasts a boxy stainless steel housing that not only looks sleek but is also easy to repair and replace internal parts. The boiler is made of brass and stainless steel, weighing 12 ounces, and has a larger capacity than the Gaggia Classic Pro.
However, unlike the Gaggia Classic Pro, the Rancilio Silvia does not have a water level indicator and has a smaller drip capacity which can be a downside for some users.
In terms of design durability, the Rancilio Silvia is a reliable and sturdy machine that can last for years. Its boxy stainless steel housing and professional-grade internal parts make it easy to maintain and repair. However, it requires patience to master its heating and temperature control as it does not have the same rapid heating technology as the Gaggia Classic Pro. Ultimately, the choice between the two machines will depend on personal preferences and priorities.
| Features | Gaggia Classic Pro | Rancilio Silvia |
|---|---|---|
| Boiler Materials | Aluminum | Brass and Stainless Steel |
| Design Durability | Stainless Steel | Stainless Steel |
| Water Level Indicator | Yes | No |
| Drip Capacity | Large | Small |
| Steam Wand | Traditional Panarello | Commercial-Style with 2-hole tip |
Comparison Winner in Key Categories
In terms of key categories, a comparison winner can be determined between the Gaggia Classic Pro and Rancilio Silvia espresso machines. The Rancilio Silvia wins in terms of steam wand and size/capacity, while the ease of use is a tie between the two machines.
The Rancilio Silvia boasts a flexible steam wand that allows for latte art, making it a favorite among baristas. Its large boiler capacity also allows for efficient steam production, making it a top choice for those who prioritize milk-based drinks.
On the other hand, the Gaggia Classic Pro is a more budget-friendly option that still offers a rapid heating boiler and commercial-style steam wand. It also has a larger water reservoir capacity and is more lightweight, making it an ideal choice for those who prioritize portability and space-saving.
Ultimately, personal preferences will determine the best choice between the two machines. Those who prioritize milk-based drinks and latte art may find the Rancilio Silvia to be the better option, while those who prioritize budget and portability may prefer the Gaggia Classic Pro. It is important to note that both machines have their pros and cons, and it is important to consider these factors before making a purchase decision.
Frequently Asked Questions
What is the price range of the Gaggia Classic Pro and Rancilio Silvia?
When comparing the prices of the Gaggia Classic Pro and Rancilio Silvia, the Gaggia Classic Pro is the more budget-friendly option, with a price range between $450-$500, while the Rancilio Silvia has a higher price range of $700-$800.
However, when it comes to which machine offers better value for money, it ultimately depends on the individual’s needs and preferences. While the Gaggia Classic Pro may be more affordable, the Rancilio Silvia offers a larger steam capacity, higher quality internal parts, and a more durable stainless steel body.
Ultimately, it is up to the consumer to decide which machine aligns with their priorities and budget.
Can the Gaggia Classic Pro and Rancilio Silvia be used for commercial purposes?
When considering the commercial viability of the Gaggia Classic Pro and Rancilio Silvia espresso machines, it is important to compare their durability and overall performance.
Both machines are designed for home use, but their robust construction and high-quality internal parts make them suitable for commercial purposes as well.
The Rancilio Silvia, with its large capacity boiler and flexible steam wand, is the more durable and reliable option for commercial use.
However, the Gaggia Classic Pro’s rapid heating boiler and pressurized filter basket make it a great choice for a small café or restaurant with lower volume.
Ultimately, the decision to use these machines for commercial purposes will depend on individual preferences and the specific needs of the business.
What types of coffee beans are recommended for these machines?
When it comes to selecting coffee beans for the Gaggia Classic Pro and the Rancilio Silvia espresso machines, it is important to consider the roast comparisons and flavor profiles.
The Gaggia Classic Pro and the Rancilio Silvia are both capable of producing high-quality espresso shots, but the flavor profile and intensity of the coffee can be affected by the type of beans used.
For both machines, it is recommended to use medium to dark roast coffee beans, as they offer a balance between acidity and bitterness, and tend to have a more intense and complex flavor profile.
Additionally, it is recommended to use freshly roasted beans, as they will have a better aroma and flavor.
Ultimately, the choice of coffee beans will depend on personal preference, but using high-quality beans that are suited for espresso can enhance the overall coffee experience.
How long does it take for each machine to heat up?
When comparing the heat-up time of the Gaggia Classic Pro and Rancilio Silvia, it’s important to note that both machines have rapid heating boilers.
The Gaggia Classic Pro boasts a fast heating time, thanks to its aluminum boiler, and offers efficient temperature control.
The Rancilio Silvia, on the other hand, has a larger capacity boiler made of brass and stainless steel, which takes a bit longer to heat up but is capable of maintaining the optimal brewing temperature for a longer period of time.
While the exact heating times may vary depending on the specific model and factors such as ambient temperature and altitude, both machines are capable of heating up relatively quickly and achieving the optimal brewing temperature for a great cup of espresso.
Are there any additional accessories that come with the Gaggia Classic Pro or Rancilio Silvia?
When it comes to accessories comparison, the Gaggia Classic Pro and Rancilio Silvia both come with a set of standard accessories such as single and double shot filter baskets, a tamper, and a measuring scoop.
However, the Rancilio Silvia does not come with a steam pitcher, which is an essential accessory for frothing milk.
As for maintenance tips, both machines require regular cleaning to ensure their longevity and optimal performance.
Descaling the boilers every few months is necessary to remove mineral buildup, and backflushing the group head is recommended to prevent clogs.
Overall, choosing between these two machines depends on personal preferences and priorities, but it’s important to keep in mind the additional accessories needed for each.

In the vast and diverse world of coffee, coffee alternatives, and tea, Olivia has found her calling. As an author and a dedicated coffee and tea aficionado, her work for Cappuccino Oracle reflects her profound love and understanding of the intricate complexities found within these beverages. Olivia’s passion for the subject serves as both a catalyst for her creativity and a connection point with her audience.
Olivia’s appreciation for coffee, coffee alternatives, and tea blossomed at an early age. She discovered that these beverages invigorated her senses and stimulated her creative spirit. From the nuanced flavors of single-origin roasts to the captivating narratives intertwined with coffee, coffee alternatives, and tea trade and culture, Olivia found an unlimited source of inspiration in her daily cup.
Her love for these beverages and her talent for storytelling eventually converged at Cappuccino Oracle. As an author, Olivia’s mission is to illuminate the intricate tapestry that makes up the world of coffee, coffee alternatives, and tea. Her articles span a diverse range of topics, encompassing everything from the unique flavors of different brews to the sociocultural history intertwined with their cultivation and consumption.

Have you ever pondered what makes a mochaccino so irresistibly delicious? Let me share with you that it’s the impeccable combination of bold espresso, creamy chocolate, and frothy milk.
And the best part? You can easily make this indulgent treat right in the comfort of your own home. In this article, I’ll guide you through the history, ingredients, and step-by-step process of creating the perfect homemade mochaccino.
Get ready to impress your taste buds and become your very own barista!
Key Takeaways
- The mochaccino originated in Italy in the 17th century as a combination of espresso and hot chocolate.
- The flavors of the mochaccino have evolved over time, with variations including caramel, vanilla, and peppermint.
- The cultural significance of the mochaccino varies in different countries.
- To make a homemade mochaccino, you will need strong brewed coffee, cocoa powder, milk, sugar, and whipped cream for topping.
History of the Mochaccino
I’ve read about the history of the mochaccino, and it’s fascinating how this delightful drink has evolved over the years.
The mochaccino, also known as a mocha, originated in Italy in the 17th century. It started as a combination of espresso and hot chocolate, creating a rich and indulgent beverage.
As time went on, the flavors of the mochaccino began to evolve. Today, you can find variations with added flavors like caramel, vanilla, or even peppermint.
In different countries, the cultural significance of the mochaccino varies. In Italy, it’s a staple in their coffee culture, while in the United States, it has become a popular choice among coffee enthusiasts.
The mochaccino has truly become a global favorite, adapting to different tastes and preferences around the world.
Ingredients for a Homemade Mochaccino
I can make a delicious homemade mochaccino with just a few simple ingredients and a little bit of time.
The key to a perfect mochaccino is combining the rich flavors of coffee and chocolate. For this, you’ll need strong brewed coffee, cocoa powder, milk, sugar, and whipped cream for topping.
To start, mix cocoa powder with a small amount of hot water to create a smooth paste. Then, heat milk on the stovetop until hot but not boiling. Add the cocoa paste and sugar to the milk, stirring until dissolved.
Next, pour the coffee into a mug and slowly pour the milk mixture over it. Finally, finish with a dollop of whipped cream. It’s a delightful treat that combines the best of both worlds – coffee and chocolate.
And if you’re looking for coffee alternatives or health benefits, a homemade mochaccino is a perfect choice.
Step-by-Step Guide to Making a Mochaccino at Home
With just a few simple steps and some common ingredients, you can easily make a delicious mochaccino at home. Here’s how:
-
Start by brewing a strong cup of coffee using your preferred method. You can use a traditional drip coffee maker, a French press, or even try alternative brewing methods like pour-over or cold brew for a unique flavor profile.
-
While your coffee is brewing, warm up some milk on the stove or in the microwave. You can use any type of milk you prefer, such as dairy milk, almond milk, or oat milk.
-
Once your coffee is ready, pour it into a mug and add a tablespoon or two of cocoa powder. Mix until the cocoa powder is fully dissolved.
-
Finally, pour the warm milk into the mug and stir well. You can also top it off with some whipped cream or chocolate shavings for an extra indulgent touch.
Making your own mochaccino at home not only allows you to control the quality of ingredients but also offers health benefits. The coffee provides a boost of energy and can improve cognitive function, while cocoa powder is rich in antioxidants and can boost mood. Additionally, using alternative milk options can cater to dietary preferences or restrictions.
Variations and Additions to the Classic Mochaccino Recipe
There are many ways to elevate the classic mochaccino recipe, such as adding a dash of cinnamon or a drizzle of caramel syrup for a hint of sweetness. But have you ever considered exploring different types of mochaccinos for their unique flavors and health benefits? Let’s take a look at some interesting variations:
| Type | Flavor Profile | Health Benefits |
|---|---|---|
| Matcha Mochaccino | Earthy and Creamy | High in antioxidants |
| Coconut Mochaccino | Rich and Nutty | Boosts metabolism |
| Protein Mochaccino | Creamy and Filling | Provides muscle recovery |
These different types of mochaccinos not only offer a diverse range of flavors but also come with their own set of health benefits. Now that we’ve explored the possibilities, let’s move on to some tips and tricks for perfecting your homemade mochaccino.
Tips and Tricks for Perfecting Your Homemade Mochaccino
To achieve the perfect homemade mochaccino, don’t forget to froth the milk until it reaches a creamy consistency. Frothing the milk adds that luxurious touch to your drink, creating a velvety texture that perfectly complements the rich flavors of chocolate and espresso.
Here are some tips and tricks to help you perfect your homemade mochaccino:
-
Use high-quality coffee beans: The best coffee beans for a mochaccino are those with a bold flavor profile. Look for beans with a rich, chocolaty undertone to enhance the chocolate flavor in your drink.
-
Experiment with homemade coffee alternatives: If you’re looking to switch things up, try using alternative coffee options like cold brew or espresso powder. These can add a unique twist to your mochaccino.
-
Adjust the sweetness: Mochaccinos are typically sweet, but you can adjust the sweetness to your preference. Add more or less chocolate syrup or sweetener to achieve the perfect balance for your taste buds.
-
Get creative with toppings: Don’t forget the finishing touches! Whipped cream, chocolate shavings, or a sprinkle of cinnamon can elevate the presentation and add an extra layer of flavor to your homemade mochaccino.
Frequently Asked Questions
Can I Use Regular Coffee Instead of Espresso in a Homemade Mochaccino?
Yes, you can use regular coffee instead of espresso in a homemade mochaccino. However, using espresso will give your drink a stronger and richer flavor, which is one of the benefits of using it.
How Many Calories Are in a Homemade Mochaccino?
I made a homemade mochaccino with whole milk and dark chocolate syrup. It has around 200 calories, but the nutritional value may vary depending on the ingredients used.
Can I Use Almond Milk Instead of Cow’s Milk in a Homemade Mochaccino?
Yes, almond milk can be used as a dairy-free alternative in a homemade mochaccino. It provides a creamy texture and a nutty flavor that complements the coffee and chocolate.
What Type of Cocoa Powder Is Best for Making a Mochaccino at Home?
When making a mochaccino at home, it’s important to choose the best cocoa powder. Look for high-quality brands, like Ghirardelli or Valrhona, for a rich and delicious flavor. Don’t forget to consider alternative milk options, like almond milk, for a dairy-free version.
Can I Make a Mochaccino Without a Milk Frother?
Sure, you can make a mochaccino without a milk frother. There are alternative methods like using a whisk or a handheld frother. These frothing techniques will give you a similar creamy texture.
Conclusion
In conclusion, the mochaccino is a beloved coffee beverage that combines the rich flavors of chocolate and espresso.
By following the step-by-step guide and using high-quality ingredients, you can easily make a delicious mochaccino at home.
Don’t be afraid to get creative with variations and additions to suit your taste.
With a little practice and a few tips and tricks, you’ll be able to perfect your homemade mochaccino and enjoy this indulgent treat whenever you like.

Justin is a seasoned author, coffee and tea enthusiast, and an essential member of the Cappuccino Oracle team. With a keen appreciation for the complexities of coffee, coffee alternatives, and tea, Justin has dedicated his professional career to exploring these realms and sharing his insights with readers worldwide.
Justin’s immersion in the world of coffee, coffee alternatives, and tea began at a young age, kindling a passion that extended beyond mere consumption. This love for these beverages led him to combine his talent for writing with his devotion to coffee and tea, bringing him to Cappuccino Oracle as a dedicated author.
I enjoy a delicious iced macchiato on a warm summer day. Were you aware that it’s surprisingly simple to prepare at home? With just a few basic ingredients and some knowledge, you can savor this invigorating coffee drink whenever you desire.
In this article, I’ll share with you the secrets to making the perfect iced macchiato, from brewing the espresso to frothing the milk.
So grab your favorite mug and let’s get started!
Key Takeaways
- Iced macchiato originated in Italy as a variation of traditional macchiato.
- The base ingredients of an iced macchiato are espresso, milk, sweetener (optional), and ice.
- Brewing espresso for an iced macchiato requires precision and consideration of factors like grind size, brewing time, and water temperature.
- Frothing milk for an iced macchiato involves using techniques like using cold milk, alternative milk options, and a steam wand or frother.
The Origins of Iced Macchiato
I’ve always been curious about the origins of the iced macchiato. This popular coffee beverage has its roots in Italy, where the term ‘macchiato’ means ‘stained’ or ‘marked.’ Traditionally, a macchiato is made by adding a small amount of espresso to a cup and then ‘staining’ it with a dollop of frothed milk.
The iced macchiato, however, is a variation that emerged in recent years. It’s made by pouring espresso over a glass filled with ice and then adding a small amount of milk or milk foam. The result is a refreshing and flavorful drink, perfect for hot summer days.
Nowadays, there are many variations of the iced macchiato, with different flavors and toppings added to enhance the taste. From caramel to vanilla to chocolate, there’s an iced macchiato for every coffee lover’s preference.
Understanding the Ingredients
Understanding the ingredients is essential for making a delicious iced macchiato at home. When it comes to flavor profiles, the combination of sweet and bitter is what makes an iced macchiato so enticing. Here are some key ingredients to consider:
- Espresso: The base of an iced macchiato, providing a strong and rich flavor.
- Milk: Adds creaminess and balances out the espresso’s intensity.
- Sweetener: Optional, but commonly used to enhance the overall taste.
- Ice: Keeps the drink refreshing and cold.
- Optional flavorings: Vanilla, caramel, or chocolate syrups can be added for extra flavor.
Understanding different brewing methods is also important. Whether you prefer using an espresso machine, a French press, or a moka pot, each method can influence the taste and strength of your iced macchiato. Experimenting with different brewing techniques and ratios will help you find the perfect balance of flavors for your homemade iced macchiato.
The Art of Brewing Espresso
Brewing espresso is an intricate process that requires precision and skill. To achieve the perfect cup, espresso brewing techniques and the importance of water temperature can’t be overlooked.
When it comes to espresso brewing techniques, there are various methods to choose from. Some popular ones include the classic manual espresso machine, the convenient pod-based system, and the modern espresso machine with advanced features. Each technique requires careful consideration of factors such as grind size, brewing time, and pressure.
However, one common factor that’s crucial in all techniques is water temperature. The ideal water temperature for brewing espresso is between 195°F and 205°F. This range ensures proper extraction of flavors and oils from the coffee grounds, resulting in a rich and balanced espresso shot.
Transitioning to the next section, after perfecting the espresso shot, the focus shifts to perfecting the milk froth.
Perfecting the Milk Froth
I absolutely love experimenting with different techniques to perfect the milk froth for my iced macchiatos. It’s an art form in itself, and getting that perfect creamy texture on top of my espresso is essential for a delicious drink.
When it comes to creating the perfect milk froth, there are a few things to consider. Here are some tips to help you explore alternative milk options and troubleshoot common frothing issues:
- Use cold milk: Starting with cold milk will help create a better froth.
- Choose the right milk: Experiment with different types of milk, such as almond, oat, or soy, to find the one that froths best for you.
- Froth the milk properly: Use a steam wand or a frother to create a creamy and velvety texture.
- Watch the temperature: Overheating the milk can result in a burnt taste, so make sure to stop frothing when the milk reaches around 150°F.
- Clean and maintain your equipment: Regularly clean your steam wand or frother to ensure optimal frothing performance.
By following these tips, you’ll be on your way to creating the perfect milk froth for your iced macchiatos, and exploring alternative milk options along the way.
Happy frothing!
Step-by-Step Guide to Making Iced Macchiato at Home
To make an iced macchiato at home, I followed a simple step-by-step guide using a shot of espresso, a splash of milk, and a drizzle of caramel syrup.
First, I brewed a strong shot of espresso and let it cool.
Then, I filled a glass with ice and poured the espresso over it.
Next, I added a splash of milk, using almond milk as an alternative option for a creamy and nutty flavor.
To enhance the taste, I drizzled caramel syrup over the top, giving it a sweet and indulgent twist.
The beauty of making an iced macchiato at home is that you can get creative with variations.
You can experiment with different types of milk, such as oat milk or coconut milk, to suit your preferences.
Additionally, you can add flavored syrups like vanilla or hazelnut to customize your macchiato even further.
Enjoy this refreshing and satisfying beverage right in the comfort of your own home.
Frequently Asked Questions
What Is the Nutritional Content of an Iced Macchiato?
The nutritional content of an iced macchiato depends on the ingredients used. It can provide benefits such as a boost of energy from caffeine, but may also have health concerns like added sugars or high calorie content.
Can I Use Any Type of Milk to Make an Iced Macchiato?
I can use any type of milk to make an iced macchiato. Options like almond, oat, or soy milk can be used as alternatives. Additionally, different types of sweeteners can enhance the flavor.
How Long Does It Take to Brew Espresso for an Iced Macchiato?
To brew espresso for an iced macchiato, I recommend using an espresso machine and grinding fresh coffee beans. It typically takes about 25-30 seconds to extract the espresso. Froth the milk using a frother or steam wand until it reaches a creamy consistency.
Can I Use a Regular Blender to Froth the Milk for an Iced Macchiato?
Yes, you can use a regular blender to froth the milk for an iced macchiato. It’s a convenient and cost-effective alternative. You can also explore different milk options like almond, oat, or soy for a unique twist.
Can I Customize the Flavor of an Iced Macchiato by Adding Syrups or Toppings?
Yes, you can customize the flavor of an iced macchiato by adding syrups or toppings. It’s a great way to experiment with different milk alternatives and create your own unique and delicious drink.
Conclusion
In conclusion, making an iced macchiato at home is a simple process that can be mastered with practice. By understanding the origins of this popular drink, familiarizing oneself with the ingredients, and perfecting the art of brewing espresso and frothing milk, anyone can enjoy a delicious iced macchiato from the comfort of their own home.
Fun fact: Did you know that iced macchiatos are the most popular coffee choice among millennials, accounting for 40% of their coffee orders?

Noah, the Editor-in-Chief at Cappuccino Oracle, plays a pivotal role in shaping the voice and vision of our renowned platform. With an unwavering passion for coffee, coffee alternatives, and tea, Noah leads Cappuccino Oracle towards new horizons in the realm of coffee journalism.
Beyond his professional responsibilities, Noah serves as a mentor and guiding force for his team. His dedication to journalistic excellence and genuine love for coffee, coffee alternatives, and tea continue to inspire and motivate the Cappuccino Oracle family. In the ever-evolving world of these beverages, Noah’s leadership ensures that our platform remains at the forefront, delivering enlightening and enjoyable content to our readers worldwide.
Espresso
Learn Espresso Making And The Fine Craft Of Coffee – Milk Designed Specifically For Barista
Do you realize that more than 2.25 billion cups of coffee are consumed across the globe on a daily basis?
Hi, I’m your coffee enthusiast guide, here to introduce you to the world of espresso making and the fine craft of coffee. Join me on this journey as we dive into the secrets of mastering the perfect espresso, exploring the art and science behind barista milk.
Get ready to enhance your coffee experience and become a true coffee connoisseur. Let’s get brewing!
Key Takeaways
- Precision and skill are essential in espresso making techniques, including adjusting grinder settings and monitoring extraction time.
- Roasting beans and different brewing techniques impact the final flavor of the coffee.
- Milk temperature and frothing techniques are crucial for creating a velvety texture and rich flavor in lattes.
- Specialty milk brands and alternative milk options provide unique twists to lattes and play a significant role in latte art.
The Art of Espresso Making
I love the art of making espresso and how it requires precision and skill.
Espresso brewing techniques are a delicate balance of water temperature, grind size, and extraction time. It’s fascinating how these factors can greatly affect the flavor profile of the final cup.
As a barista, I take great pride in mastering these techniques to create the perfect shot of espresso. From adjusting the grinder to achieve the ideal consistency to carefully monitoring the extraction time, every step is crucial.
And let’s not forget about latte art techniques! The ability to create beautiful designs with steamed milk adds an artistic touch to each cup. It’s a meticulous process that requires practice and patience, but the end result is truly a work of art.
Exploring the Craft of Coffee
While exploring the craft of coffee, I’ve discovered the intricate process of roasting beans and the impact it has on the final flavor.
Coffee brewing techniques play a crucial role in extracting the desired flavors from the beans. From the classic pour-over method to the innovative AeroPress, each technique offers a unique taste experience. It’s fascinating to see how slight variations in water temperature, grind size, and extraction time can create nuanced flavors in the cup.
And let’s not forget about the art of latte making. To achieve those Instagram-worthy designs, baristas employ various latte art tips, from mastering the perfect milk froth consistency to creating intricate patterns with the espresso crema. The combination of technique and creativity truly takes coffee to another level.
Speaking of mastering the perfect espresso, let’s delve into the art of espresso making and unlock the secrets to brewing the perfect shot.
Mastering the Perfect Espresso
After hours of practice, I can finally say that I’ve mastered the perfect espresso. It’s a skill that requires precision, dedication, and a deep understanding of the craft. But once you get it right, the reward is beyond words.
One aspect of espresso making that I’ve recently delved into is mastering latte art. It adds a touch of elegance and creativity to each cup, allowing me to showcase my skills and express my passion for coffee. From delicate hearts to intricate rosettas, each design tells a story and enhances the overall coffee experience.
Additionally, troubleshooting espresso shots has become second nature to me. Identifying factors like grind size, water temperature, and extraction time has allowed me to consistently produce shots that are rich, balanced, and full of flavor.
The journey to mastering the perfect espresso is never-ending, but the joy it brings is immeasurable.
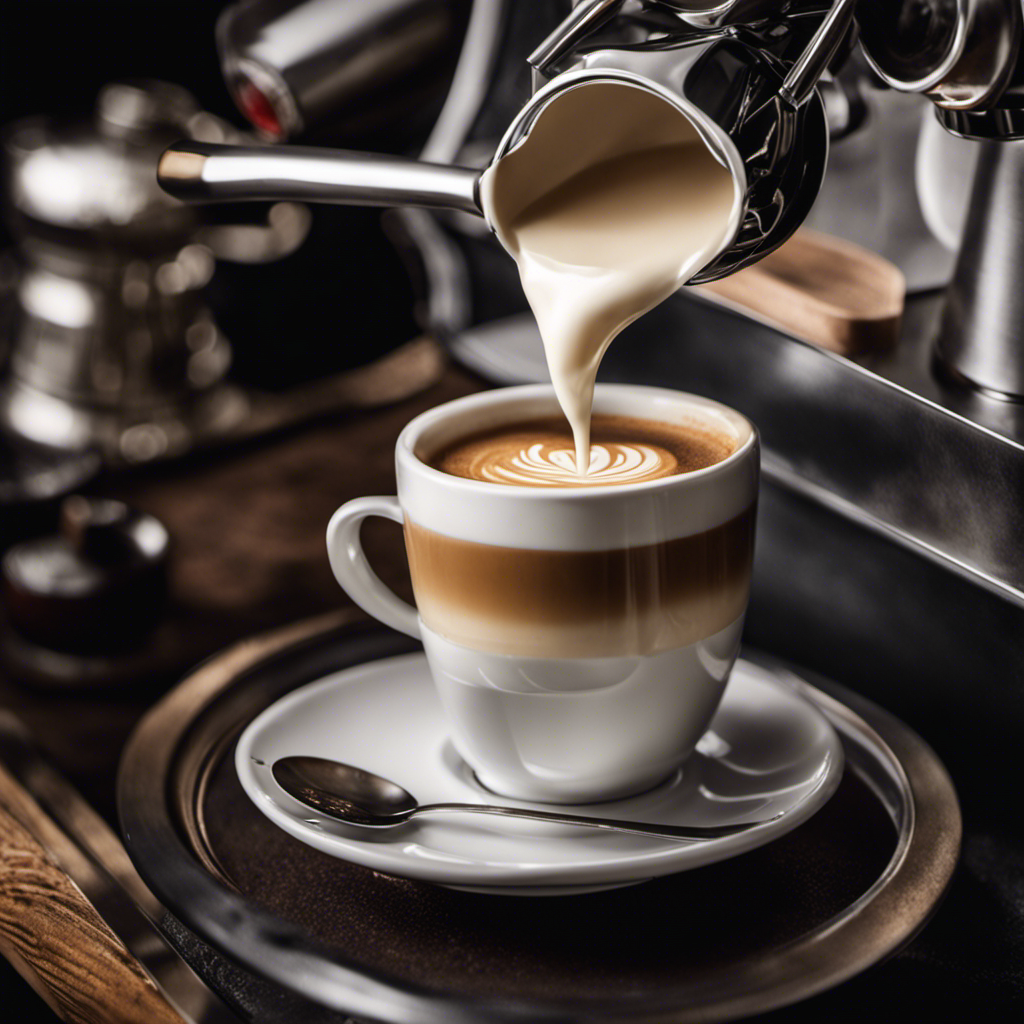
The Secret Ingredient: Milk for Baristas
As a coffee enthusiast and barista, I understand the importance of the secret ingredient that makes a perfect cup of coffee: milk. The temperature of the milk plays a crucial role in achieving that velvety texture and rich flavor in your espresso-based beverages.
Additionally, mastering the art of frothing techniques is essential for beginners to create those beautiful latte art designs.
And for those looking for milk alternatives, there are a variety of options available that can give your lattes a unique twist.
Let’s explore the world of milk for baristas and discover the key to crafting the perfect coffee experience.
Perfect Milk Temperature
I carefully steam the milk to achieve the perfect temperature for my espresso. The ideal milk temperature is crucial in creating a smooth and velvety texture that blends harmoniously with the rich flavors of the coffee. As a barista, I understand the importance of achieving the right milk texture to enhance the overall coffee experience.
The silky texture of properly steamed milk adds a luxurious mouthfeel to the espresso.
The ideal milk temperature ensures that the flavors aren’t compromised and allows for a balanced taste.
The precise temperature creates microfoam, which adds a beautiful latte art presentation.
To achieve the perfect milk temperature, I pay close attention to the thermometer, ensuring that it reaches around 150°F (65°C). This meticulous approach guarantees a consistently excellent cup of coffee.
Now, let’s dive into frothing techniques for beginners, where we’ll explore the art of creating creamy, frothy milk for a variety of espresso-based beverages.
Frothing Techniques for Beginners
Let’s start by practicing the swirling technique to create a beautiful whirlpool of frothy milk in our espresso. When it comes to frothing techniques for beginners, it’s important to start with the basics.
One common mistake that beginners make isn’t properly aerating the milk. To avoid this, make sure to position the steam wand just below the surface of the milk, creating a gentle hissing sound. As the milk begins to froth, slowly lower the pitcher to allow the steam wand to continue incorporating air.
Another mistake to avoid is overheating the milk. Keep a close eye on the thermometer and aim for a temperature between 150-155°F for a perfect balance of sweetness and texture.
With practice and attention to detail, you’ll soon master the art of frothing milk for a delicious cup of espresso.
Milk Alternatives for Lattes
How can I incorporate almond milk and coconut milk into my lattes for a creamy and dairy-free alternative? As a barista, I’m always looking for new and exciting ways to elevate the coffee experience for my customers. Milk alternatives have become increasingly popular, offering a variety of flavors and textures that can enhance the taste of a latte.
Here are three ways to incorporate almond milk and coconut milk into your lattes:
- Experiment with different frothing techniques to achieve the perfect texture and consistency.
- Consider the flavor profile of your chosen milk alternative and how it complements the taste of espresso.
- Pay attention to the temperature of the milk alternative, as overheating can affect the overall taste and quality of the latte.
The Science Behind Barista Milk
The science behind barista milk fascinates me as I explore the intricate chemical reactions that occur when it’s steamed and frothed. Understanding the chemistry of milk frothing is crucial in achieving the perfect texture and taste for a latte or cappuccino.
When milk is heated, the proteins in it denature and unravel, forming a network that traps air bubbles created during the frothing process. This gives the milk its creamy texture and allows it to hold its shape when poured onto espresso.
Additionally, the impact of milk on espresso flavor can’t be underestimated. The fats and sugars in milk can help balance the bitterness of espresso, resulting in a harmonious and well-rounded taste.
It’s fascinating to witness how the chemistry of milk and espresso interact to create the ultimate coffee experience.
Enhancing Flavor With Specialty Milk
I love experimenting with different types of specialty milk to enhance the flavor of my coffee, and it always brings a unique and enjoyable twist to my morning routine. The world of specialty milk brands is vast, each offering their own distinct flavors and textures. When I use specialty milk in my coffee, I experience a multitude of benefits that elevate my coffee-drinking experience.
Here are a few reasons why I’m passionate about using specialty milk:
-
Creaminess: Specialty milk adds a rich and creamy texture to my coffee, making each sip incredibly smooth and satisfying.
-
Flavor Enhancer: From oat milk to almond milk, each specialty milk brand brings its own unique flavor profile that complements the coffee perfectly, adding depth and complexity to every cup.
-
Dietary Considerations: Specialty milk offers options for those with dietary restrictions or preferences, such as lactose-free or vegan alternatives, allowing everyone to enjoy delicious coffee without compromise.
Exploring the world of specialty milk brands has truly revolutionized my coffee routine, taking it from ordinary to extraordinary. The benefits of using specialty milk extend far beyond enhancing the flavor; it’s about creating an experience that’s both indulgent and mindful of personal preferences.
The Barista’s Guide to Milk Selection
When selecting milk as a barista, it’s important to consider the various factors that can impact the taste and texture of the coffee. As a coffee enthusiast, I am always on the lookout for alternative milk options that can elevate the flavor of cappuccinos and enhance the overall coffee experience. From almond milk to oat milk, the choices are abundant, each with its unique characteristics that can complement or detract from the coffee’s profile.
In addition to taste, the right milk can also make a significant difference in latte art. As a barista, I take pride in creating beautiful and intricate designs on the surface of the latte. The milk’s texture plays a crucial role in achieving those perfect microfoam bubbles that allow for precise and delicate latte art.
To make an informed decision, I have created a table outlining the different alternative milk options for cappuccinos and their suitability for latte art:
| Milk Option | Taste Profile | Latte Art Suitability |
|---|---|---|
| Almond Milk | Nutty and creamy | Good microfoam texture |
| Oat Milk | Creamy and slightly sweet | Excellent for latte art |
| Soy Milk | Creamy and neutral | Good for basic latte art |
| Coconut Milk | Rich and tropical | Challenging for latte art |
Frequently Asked Questions
Are There Any Specific Techniques or Tips for Frothing Milk to Achieve the Perfect Texture for Latte Art?
To achieve perfect texture for latte art, there are a few tips to keep in mind. First, make sure to use cold milk and a clean, properly sized pitcher. Avoid overheating the milk and create a whirlpool motion while frothing for a smooth, creamy result.
How Can I Properly Store and Handle Milk to Ensure Its Freshness and Quality for Making Espresso?
To ensure the freshest and highest quality milk for espresso, I store it in airtight containers in the refrigerator, handle it with care, and never let it sit out at room temperature for too long.
Are There Any Alternative Milk Options for Those Who Are Lactose Intolerant or Have Dietary Restrictions?
There are several milk alternatives available for those with dietary restrictions or lactose intolerance. These alternatives, such as almond milk or oat milk, offer various benefits such as being dairy-free and providing unique flavors to enhance coffee experiences.
What Is the Ideal Temperature for Steaming and Frothing Milk to Achieve the Best Flavor in Espresso Drinks?
The ideal milk temperature for achieving the best flavor in espresso drinks depends on the frothing technique used. It’s important to find the perfect balance, allowing the milk to steam and froth at around 150-155°F for a creamy and velvety texture.
Can I Use Regular Store-Bought Milk or Is It Necessary to Use Specialty Milk Designed Specifically for Baristas?
Using regular store-bought milk may work, but for the best results in crafting the perfect espresso, specialty milk designed for baristas is essential. It enhances the flavor, creates the ideal texture, and elevates the overall coffee experience.
Conclusion
After delving into the art of espresso making and the craft of coffee, it’s clear that there’s a secret ingredient that truly elevates the barista’s skills: milk. But not just any milk will do.
The science behind barista milk is fascinating, and its ability to enhance the flavor of specialty coffees is truly remarkable.
So, fellow coffee enthusiasts, let’s raise our cups to the baristas who meticulously select the perfect milk for our daily dose of caffeinated bliss. Cheers!
Noah, the Editor-in-Chief at Cappuccino Oracle, plays a pivotal role in shaping the voice and vision of our renowned platform. With an unwavering passion for coffee, coffee alternatives, and tea, Noah leads Cappuccino Oracle towards new horizons in the realm of coffee journalism.
Beyond his professional responsibilities, Noah serves as a mentor and guiding force for his team. His dedication to journalistic excellence and genuine love for coffee, coffee alternatives, and tea continue to inspire and motivate the Cappuccino Oracle family. In the ever-evolving world of these beverages, Noah’s leadership ensures that our platform remains at the forefront, delivering enlightening and enjoyable content to our readers worldwide.

Unveiling the Best: Top 10 Subscription Boxes for Matcha Tea Lovers
Sipping Through the Best: Top 10 Must-Try Tea Subscription Boxes
Unveiling the Secrets of a Tea Subscription Box
Tea Lover’s Dream: Top 10 Must-Try Subscription Boxes for Pu-erh Tea
Unveil the Secret Behind Drastic Weight Reduction: The Magic of Brewed Tea!
Your Ultimate Guide to Ryze Mushroom Coffee: 9 Things to Know
Unveiling the Puzzle: Top 10 Alternatives to Ryze Mushroom Coffee Revealed
Unveiling the Mysteries of Ryze Mushroom Coffee: Top 10 Questions Answered

PuroAir HEPA 14 Air Purifier Review
3 Best Techniques to Brew Ryze Mushroom Coffee

Discover the Power of KOS Mushroom Coffee

Top 10 Rated Mushroom Coffee Brands for a Boost

What Makes Caffeine-Free Mushroom Coffee Unique?

Rooibos Tea: A Guide to Safe Breastfeeding Practices

What Mushroom Can I Use as a Coffee Replacement?

-
Mushroom Coffee1 week ago
Your Ultimate Guide to Ryze Mushroom Coffee: 9 Things to Know
-
Mushroom Coffee1 week ago
Unveiling the Puzzle: Top 10 Alternatives to Ryze Mushroom Coffee Revealed
-
Mushroom Coffee1 week ago
Unveiling the Mysteries of Ryze Mushroom Coffee: Top 10 Questions Answered
-
Cappuccino Oracle Selected Reviews4 weeks ago
PuroAir HEPA 14 Air Purifier Review
-
Mushroom Coffee1 week ago
3 Best Techniques to Brew Ryze Mushroom Coffee
-
 Coffee Basics2 weeks ago
How Do Starbucks’ Seasonal Specialties Appeal to Customers?
-
 Rooibos6 days ago
9 Essential Steps to Perfect Rooibos Tea: A Brewing Guide
-
 Turmeric Tea1 day ago
Turmeric Ginger, Cinnamon, Lemon, Honey Tea Benefits
