
Espresso
The Art Of Latte Art: How To Create Beautiful Designs On Your Espresso Drinks
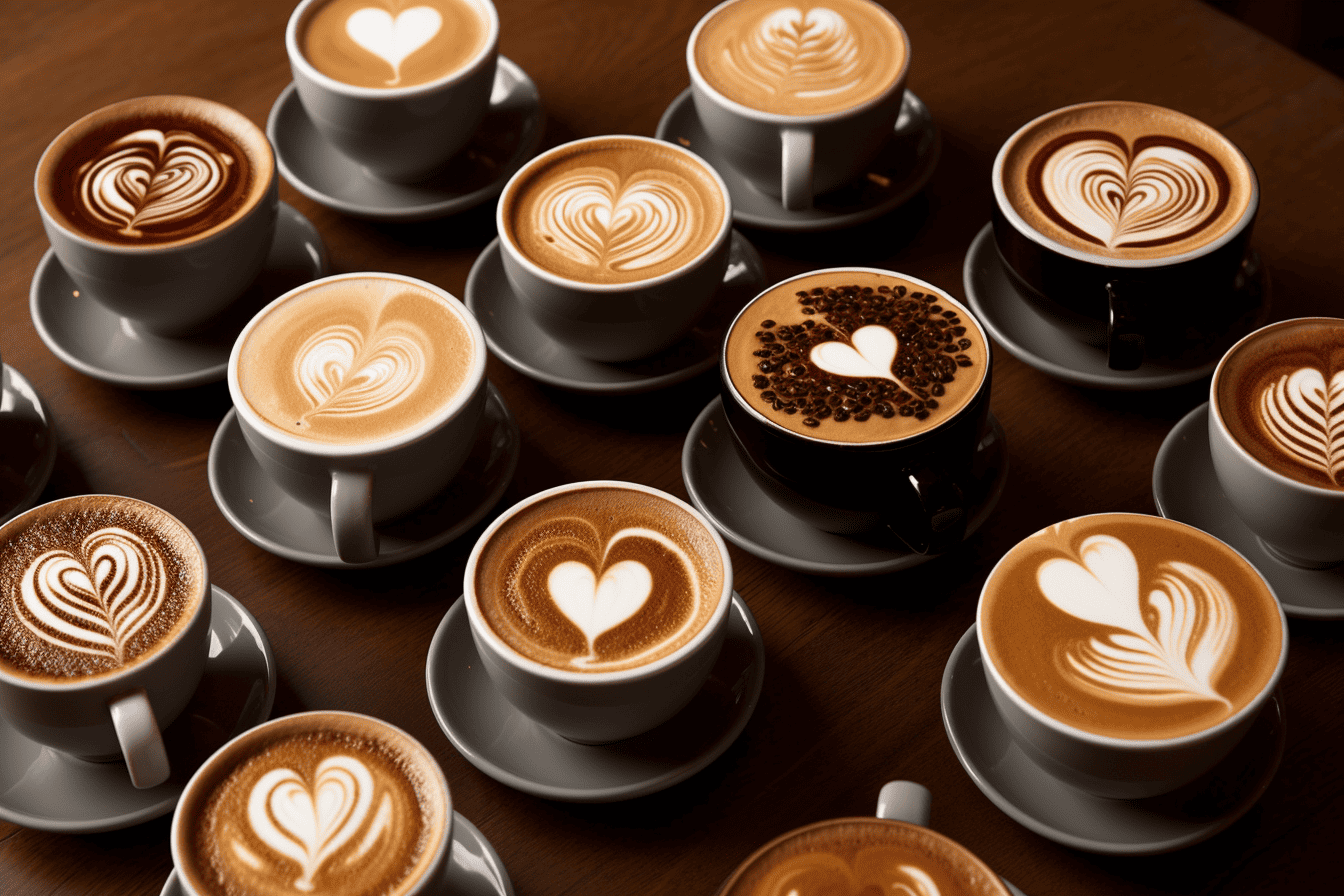
I’m absolutely obsessed with latte art. There’s something truly magical about watching a barista skillfully create intricate designs on the surface of a perfectly poured espresso drink. It’s like watching a painter at work, but with coffee as their canvas.
In this article, I’ll be sharing my knowledge and passion for the art of latte art, as well as providing you with all the tips and techniques you’ll need to start creating your own beautiful designs.
So grab a cup of coffee and let’s dive in!
Key Takeaways
- Latte art competitions showcase the skill and creativity of baristas worldwide.
- Different types of milk produce distinct textures and tastes in latte art.
- Mastery of various latte art techniques is crucial.
- Layered designs create beautiful contrasting colors and add depth and complexity to the art.
The History of Latte Art: From Its Origins to Modern Techniques
I’ve always been fascinated by the history of latte art, from its humble origins to the modern techniques used today.
Latte art competitions have become a global phenomenon, showcasing the incredible skill and creativity of baristas around the world. But the cultural significance of latte art goes beyond just a competition. It has become a form of self-expression, a way for baristas to showcase their artistry and connect with their customers on a deeper level.
The intricate designs and patterns created on the surface of a latte not only enhance the visual appeal of the drink but also elevate the overall coffee experience. From the early days of simple heart or tulip designs to the more complex and intricate designs we see today, the evolution of latte art is truly remarkable.

Now, let’s delve into the essential tools and materials for creating these beautiful designs.
Essential Tools and Materials for Latte Art
As a passionate latte artist, I know that having the right tools and materials is essential for creating beautiful designs on my espresso drinks.
Some of the key items include different types of milk, as each one produces a distinct texture and taste in the final latte art.
Additionally, the coffee brewing method can greatly impact the outcome, whether it’s a smooth espresso machine or a manual pour-over technique.
Lastly, mastering various latte art techniques, such as free pouring or etching, is crucial for achieving intricate and visually appealing designs.
Let’s delve into these points and explore the world of latte art together.
Types of Milk
Sometimes I use almond milk instead of regular milk for my latte art designs. Almond milk has a slightly nutty flavor that adds a unique touch to my creations. However, it can be a bit tricky to froth properly due to its lower fat content. To achieve the perfect froth, I use a slightly different frothing technique for almond milk. Instead of plunging the steam wand deep into the milk, I keep it near the surface and create small whirlpools to incorporate air. This helps to achieve a creamy, velvety texture that is essential for creating intricate latte art designs. Here is a comparison table of different types of milk and their frothing techniques:
| Milk Type | Frothing Technique |
|---|---|
| Whole Milk | Plunge steam wand deep into milk to create a creamy, velvety texture. |
| Almond Milk | Keep steam wand near the surface and create small whirlpools to incorporate air. |
| Soy Milk | Similar to almond milk, keep steam wand near the surface and create small whirlpools to incorporate air. |
| Oat Milk | Plunge steam wand deep into milk to create a creamy texture. |
| Coconut Milk | Plunge steam wand deep into milk to create a creamy texture. |
Coffee Brewing Methods
I always prefer using a French press when brewing my coffee for latte art. It allows me to fully control the extraction process, resulting in a rich and flavorful coffee that serves as the perfect canvas for my latte art creations.
When it comes to coffee bean origins, I believe that understanding where your beans come from is crucial in achieving the best flavor profile. Single-origin beans from specific regions can offer unique and distinct flavors that can enhance the overall experience of your latte art.
Additionally, participating in latte art competitions has been a great way for me to showcase my skills and learn from other talented baristas. These competitions push me to explore new techniques and constantly improve my craft.
Speaking of techniques, let’s dive into the world of latte art and explore some of the fundamental techniques that can help you create stunning designs on your espresso drinks.
Latte Art Techniques
To create intricate latte art designs, you’ll need a steady hand and the right tools, such as a milk pitcher, espresso machine, and a fine-tipped latte art pen.
Latte art has become so much more than just a way to make your morning coffee Instagram-worthy. It has evolved into a true art form, with baristas around the world pushing the boundaries of what’s possible.
In recent years, latte art trends have taken the coffee world by storm, with innovative designs and techniques constantly emerging. And with the rise of latte art competitions, baristas are showcasing their skills and creativity on a global stage.
These competitions not only inspire baristas to refine their craft but also provide a platform for them to connect and learn from each other.
Mastering the Basics: Pouring Techniques for Latte Art
During my shift at the coffee shop this morning, I practiced different pouring techniques to master the basics of latte art. As a barista, I understand the importance of creating visually appealing designs on top of espresso drinks. Advanced pouring techniques can elevate a simple latte into a work of art. To troubleshoot common mistakes, it is crucial to focus on the angle and speed of the pour. By using a steady hand and maintaining a consistent flow, intricate patterns can be achieved. To further illustrate the impact of pouring techniques, here is a table showcasing the different designs that can be created with various pouring methods:
| Pouring Technique | Design Created |
|---|---|
| Free Pour | Rosetta |
| Heart Pour | Heart |
| Etching | Leaf |
| Layering | Tulip |
| Swirl Pour | Swan |
Mastering these pouring techniques will enable you to create stunning latte art that will impress your customers and showcase your skills as a barista.
Creating Classic Designs: Hearts, Rosettas, and Tulips
Creating classic designs like hearts, rosettas, and tulips is a true art form that requires precision and technique. These designs aren’t only visually stunning but also add a touch of elegance to any latte.
To achieve these designs, it’s important to understand the design techniques involved and choose the right tools, such as a fine-tipped milk pitcher and a steady hand, to ensure the perfect execution.
Design Techniques Explained
I love experimenting with different design techniques in my latte art. Perfecting the art of pouring hearts, rosettas, and tulips is a passion of mine. These designs not only add an aesthetic appeal to the coffee but also bring joy to the customers who appreciate the effort and skill that goes into creating them.
When it comes to color blending, I find that using multiple shades of espresso and carefully pouring them onto the milk creates a beautiful and vibrant design. The blending of colors adds depth and visual interest to the latte art.
Foam consistency is crucial in achieving the desired outcome. The foam provides the canvas for the design, so it must be the right amount and texture. Too much foam can make the design look messy, while too little foam may not hold the design’s shape. The right amount of foam ensures that the colors blend smoothly and the design holds its shape.
Now, let’s discuss the importance of choosing the right tools for creating these intricate designs. Having the right tools, such as a milk pitcher with a pointed spout and a fine-tipped pen or toothpick for detailing, can make a significant difference in the precision and overall quality of the latte art. The tools allow for greater control and make it easier to create intricate designs with precision.
Overall, creating latte art is a creative and enjoyable process that requires skill, practice, and the use of the right techniques and tools. It adds a special touch to the coffee experience and brings delight to both the creator and the customer.
Choosing the Right Tools
The key to creating classic designs like hearts, rosettas, and tulips is choosing the right tools for the job. When it comes to creating foam art in your espresso drinks, the milk pitcher you use plays a vital role.
Choosing the right milk pitcher can make all the difference in achieving the perfect consistency and texture for your latte art. Look for a pitcher with a pointed spout, as this allows for more precision when pouring and creating intricate designs. Additionally, consider the size and shape of the pitcher, as this can affect the overall control and flow of the milk.
Experimenting with different foam art techniques is also essential. From the classic free pour method to etching and layering, each technique offers its own unique charm and challenge.
Advanced Latte Art: Layering, Etching, and Free Pouring
During my latte art practice, I love experimenting with layering, etching, and free pouring. These techniques allow me to create stunning designs on top of my espresso drinks, turning them into works of art. Here are three advanced techniques that I’ve been exploring recently:
-
Layered designs: By carefully pouring the milk at different heights and speeds, I can create beautiful layers of contrasting colors in my latte art. This technique adds depth and complexity to the design, making it visually appealing.
-
Advanced etching techniques: Etching involves using a tool, such as a toothpick or a latte art pen, to create intricate details and patterns on the milk foam. With practice and precision, I can etch elaborate designs like flowers, hearts, or even portraits on the surface of my latte.
-
Free pouring: This technique requires skill and control as I pour the milk directly into the espresso, without using any tools or stencils. By mastering the art of free pouring, I can create beautiful, free-flowing patterns like hearts, rosettas, or even more complex designs, all with just the movement of my hand.
As a passionate latte artist, these techniques have allowed me to take my creations to the next level. With each practice session, I’m constantly pushing my boundaries and exploring new ways to bring art into my coffee.
Experimenting With Colors and Flavors in Latte Art
One of the most exciting aspects of latte art is experimenting with a variety of colors and flavors to create unique and vibrant designs.
Color blending allows baristas to showcase their creativity by combining different shades and hues to bring their designs to life. By carefully pouring the milk and espresso, an array of colors can be seamlessly blended together, creating visually stunning patterns and images on top of the latte.
Additionally, flavor infusion adds an extra dimension to the artistry of latte making. Baristas can incorporate various syrups, extracts, or even spices to infuse the drink with different flavors, enhancing the overall taste experience.
From lavender-infused lattes to matcha green designs, the possibilities are endless when it comes to experimenting with colors and flavors in latte art.
Showcasing Your Latte Art: Tips for Photography and Presentation
I’ve learned a few helpful tips for capturing and presenting my latte art beautifully through photography. As a coffee enthusiast and amateur latte artist, I believe that showcasing the intricate designs and patterns in my espresso drinks is just as important as creating them.
Here are three photography techniques and styling tips that have worked wonders for me:
-
Lighting is key: Natural light is the best option for capturing the true colors and details of your latte art. Position your drink near a window or take it outside to maximize the lighting effect.
-
Composition matters: Experiment with different angles and perspectives to create visually appealing shots. Play around with the placement of your latte art in the frame, and consider using props such as coffee beans or a vintage saucer to add interest.
-
Editing magic: Enhance the beauty of your latte art with photo editing tools. Adjust the brightness and contrast to bring out the details, and use filters sparingly to maintain the authenticity of the image.
Frequently Asked Questions
What Are Some Common Mistakes to Avoid When Starting Out With Latte Art?
When starting out with latte art, it’s important to avoid common mistakes. Some tips for beginners include: not overheating the milk, using fresh espresso, and practicing proper pouring technique.
Are There Any Alternative Tools or Materials That Can Be Used for Latte Art?
When it comes to latte art, think outside the box! Get creative with alternative tools and materials. I’ve used cinnamon, chocolate syrup, even food coloring to create unique designs that surprise and delight customers.
How Can I Achieve More Intricate Designs in My Latte Art?
To achieve more intricate designs in my latte art, I’ve been exploring advanced techniques. By practicing with different pouring methods, experimenting with milk consistency, and using tools like etching needles, I’ve been able to create stunning and detailed designs.
What Are Some Tips for Creating Latte Art With Non-Dairy Milk Alternatives?
Creating latte art with non-dairy milk alternatives can be challenging, but with the right techniques, you can achieve beautiful designs. Here are some tips for achieving perfect foam with alternative milk options.
Are There Any Specific Techniques for Creating Latte Art on Different Types of Coffee Drinks, Such as Cappuccinos or Lattes?
When it comes to creating latte art on different types of coffee drinks like cappuccinos or lattes, there are specific techniques to master. Troubleshooting common issues can also help achieve beautiful designs.
Conclusion
Latte art isn’t just a trendy addition to your morning coffee, but a skill that requires practice, patience, and creativity.
From its humble origins to modern techniques, the art of latte art has evolved into a form of self-expression.
With the right tools and techniques, you can create beautiful designs like hearts, rosettas, and tulips.
Advanced techniques like layering, etching, and free pouring allow for even more intricate designs.
And don’t forget to experiment with colors and flavors to truly showcase your latte art.
So grab your espresso and get creative!

Noah, the Editor-in-Chief at Cappuccino Oracle, plays a pivotal role in shaping the voice and vision of our renowned platform. With an unwavering passion for coffee, coffee alternatives, and tea, Noah leads Cappuccino Oracle towards new horizons in the realm of coffee journalism.
Beyond his professional responsibilities, Noah serves as a mentor and guiding force for his team. His dedication to journalistic excellence and genuine love for coffee, coffee alternatives, and tea continue to inspire and motivate the Cappuccino Oracle family. In the ever-evolving world of these beverages, Noah’s leadership ensures that our platform remains at the forefront, delivering enlightening and enjoyable content to our readers worldwide.

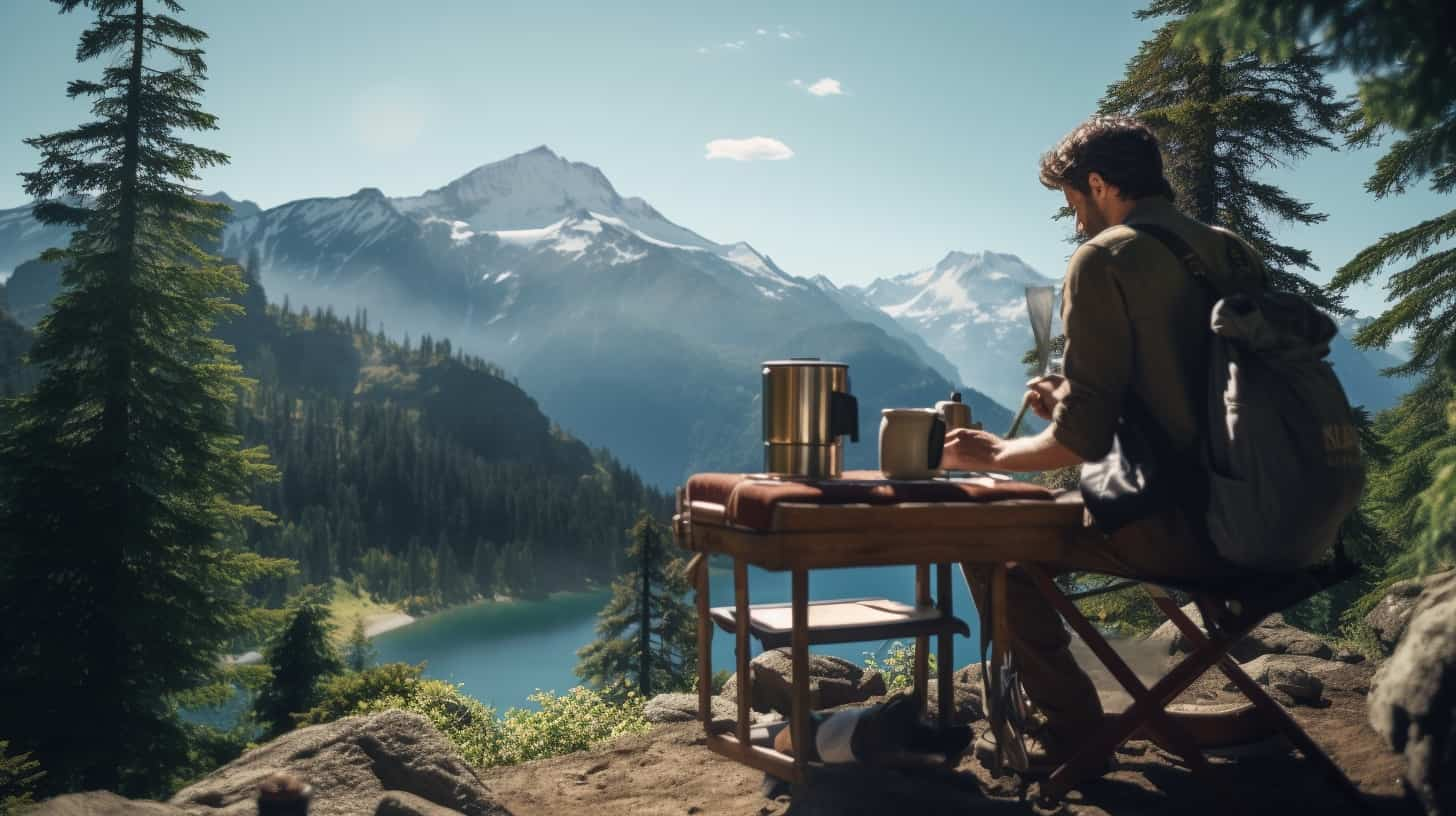
Are you tired of the boring routine of making your morning coffee inside? We have a new and exciting experience for you! Picture waking up to the tranquil beauty of nature, with stunning views all around, while savoring the delicious taste of gourmet coffee.
In this article, we’ll guide you on how to unleash your inner barista and brew espresso in the great outdoors. So, grab your equipment and join us on this exciting journey of becoming a barista in nature’s embrace.
Let’s get brewing!
Key Takeaways
- Brewing espresso outdoors allows you to experience peace and tranquility, connect with nature, and appreciate the brewing process.
- To enhance your outdoor espresso brewing experience, adjust the grind size using the Flair Royal hand grinder and pre-measure your coffee beans for consistency.
- It is important to be responsible in the outdoors by packing out used coffee grounds and trash, following local waste disposal regulations, and incorporating sustainable practices.
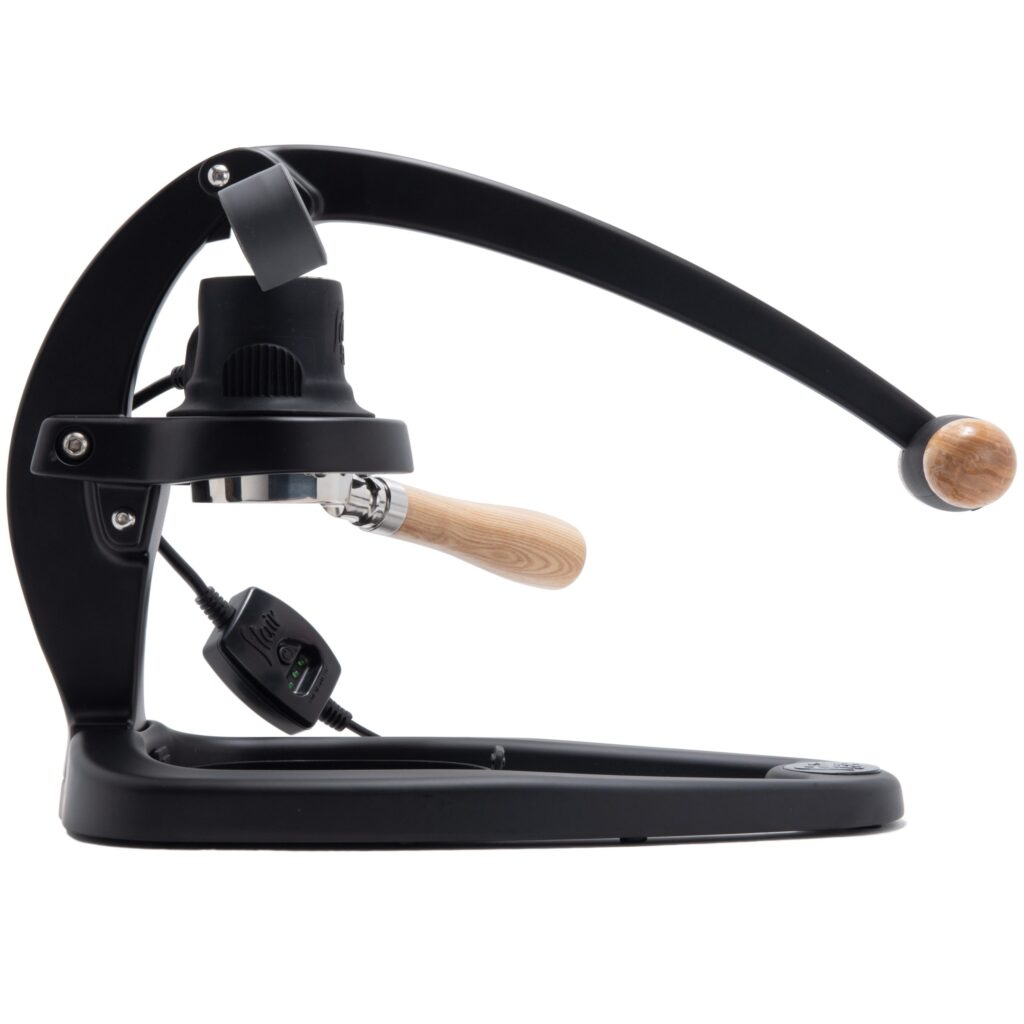
- The Flair PRO 2 Manual Espresso Maker offers easy maintenance, versatile brewing techniques, and complete control over the brewing process, resulting in exceptional espresso quality.
The Equipment You’ll Need
First, let’s talk about the equipment you’ll need to brew espresso in the great outdoors. When it comes to brewing espresso outside, choosing the right location is key. Find a serene spot, surrounded by nature’s beauty, where you can immerse yourself in the process.
Now, let’s not forget the importance of water quality. For a truly exceptional espresso, start with pristine water. Consider using filtered or bottled water to ensure the purest flavor.
As for the equipment, you’ll need a reliable water heating system, like the JetBoil Flash, to achieve the perfect temperature. Pair it with the Flair PRO 2 Manual Espresso Maker and the Flair Royal Hand Grinder for precision grinding and extraction.
With these tools in hand, you’ll be ready to unleash your inner barista and create a magical espresso experience in the great outdoors.
Benefits of Brewing Outside
Why should we choose to brew espresso outside and experience the benefits it offers? Brewing espresso in the great outdoors allows us to embrace nature while indulging in our passion. It is a truly immersive experience that brings us closer to the process and the flavors we love. Imagine waking up to the peaceful escape and tranquility of nature, surrounded by spectacular views and breathtaking landscapes.
As we brew our espresso, we feel connected to the earth, mindful of our actions, and grateful for the moment. The whole process becomes a mindful experience, where we savor each step and each sip.
Brewing outside creates memorable moments, allowing us to appreciate the beauty of nature while enjoying our favorite drink. It’s an intimate journey that combines the art of brewing with the wonders of the natural world.
Benefits of Brewing Outside Embracing Nature While Brewing Peaceful Escape and Tranquility Feel the serenity of nature while brewing your espresso. Spectacular Views and Breathtaking Landscapes Surround yourself with the beauty of the outdoors as you enjoy your drink. Embracing the Process and Connection with Nature Connect with the earth and the brewing process, feeling grounded and in harmony. Mindful Experience and Indulging in Flavors Engage your senses, appreciating every sip and the flavors that nature provides. Creating Memorable Moments Forge lasting memories as you combine your love for brewing with the wonders of nature.
Tips for Outdoor Espresso Brewing
Here are some essential tips to enhance our outdoor espresso brewing experience:
-
Grind Size Adjustment: The key to a perfect espresso lies in the grind size. With the Flair Royal hand grinder, we’ve the flexibility to adjust the grind size to our preference. Whether we prefer a fine grind for a bold and intense flavor or a coarser grind for a smoother taste, the choice is in our hands.
-
Pre-Measuring Coffee Beans: To ensure consistency and convenience in our outdoor brewing, it’s essential to pre-measure our coffee beans. By weighing and pre-dosing the coffee, we can eliminate guesswork and achieve the perfect coffee-to-water ratio every time. This step not only saves time but also guarantees a delicious cup of espresso.
-
Practicing Patience and Enjoying the Journey: Outdoor espresso brewing is more than just making a cup of coffee. It’s about embracing the process, being mindful of our surroundings, and immersing ourselves in the experience. Take a moment to appreciate the aroma, savor each sip, and create lasting memories in the great outdoors.

With these tips, we can elevate our outdoor espresso brewing to new heights of flavor and enjoyment.
Being Responsible in the Outdoors
Let’s talk about the importance of being responsible in the outdoors when brewing espresso.
As passionate coffee enthusiasts, it’s crucial that we prioritize sustainable practices and leave no trace behind. When enjoying our outdoor brewing adventures, we must remember to pack out used coffee grounds and trash, minimizing our impact on the environment.
It’s essential to be environmentally aware and follow local waste disposal regulations, preserving the beauty of nature for future visitors. By incorporating sustainable practices, such as using reusable coffee filters and opting for biodegradable packaging, we can make a positive difference.
Let’s embrace our love for espresso while also being mindful of the impact we’ve on the outdoors. Together, we can create memorable moments and protect the environment we cherish.
Introducing the Flair PRO 2 Manual Espresso Maker
We are excited to introduce the Flair PRO 2 Manual Espresso Maker, a compact and portable coffee maker that allows us to brew high-quality espresso in the great outdoors. With its sleek design and exceptional performance, the Flair PRO 2 is a must-have for coffee enthusiasts who crave a rich and flavorful espresso experience.

Here are three reasons why the Flair PRO 2 is the perfect companion for your outdoor brewing adventures:
-
Easy Maintenance: The Flair PRO 2 is built to last, with durable materials and a simple cleaning process. Its removable brew head and portafilter make maintenance a breeze, ensuring that your espresso maker stays in top shape.
-
Versatile Brewing Techniques: The Flair PRO 2 offers a wide range of brewing techniques, allowing you to experiment and tailor your espresso to your taste. From manual pre-infusion to pressure profiling, this espresso maker gives you complete control over every aspect of the brewing process.Exceptional Espresso Quality: The Flair PRO 2 is designed to deliver exceptional espresso shots, with its precise temperature control and pressure regulation. Whether you prefer a smooth and balanced flavor or a bold and intense shot, the Flair PRO 2 will consistently produce espresso of the highest quality.
With the Flair PRO 2 Manual Espresso Maker, you can elevate your outdoor brewing experience to new heights. From maintenance to brewing techniques, this espresso maker has everything you need to unleash your inner barista in the great outdoors.
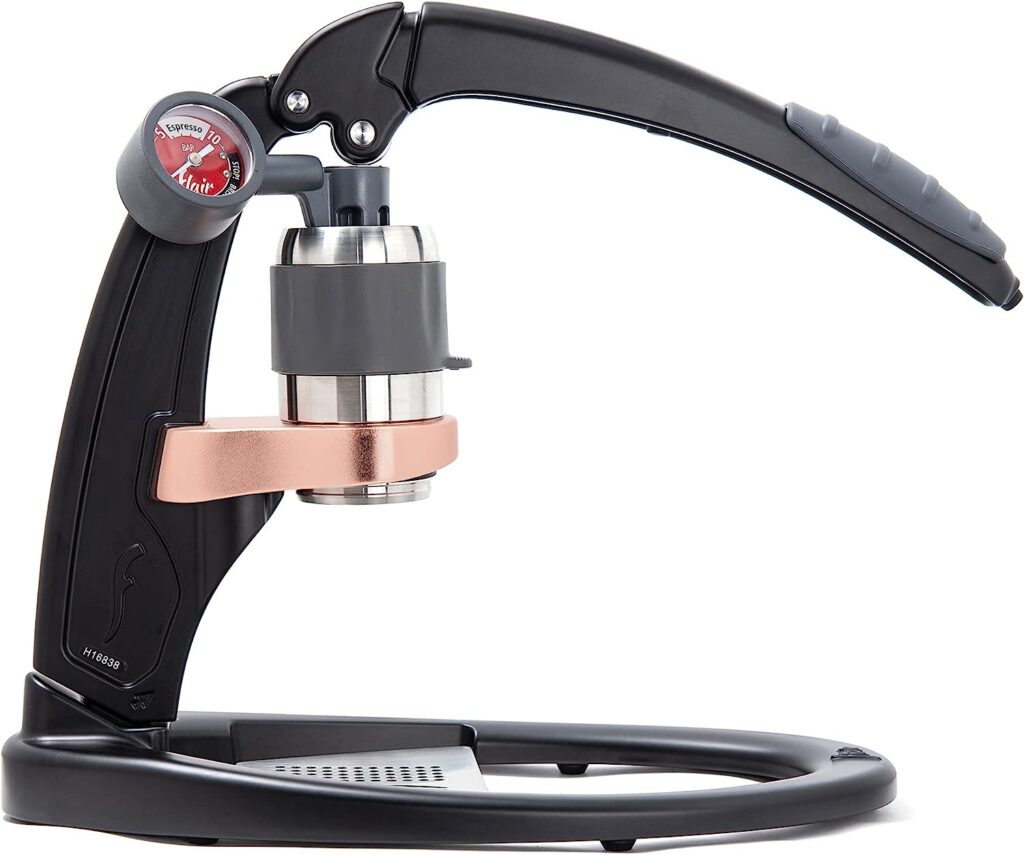
Compact and Portable Design
With its compact and portable design, the Flair PRO 2 Manual Espresso Maker is the perfect espresso machine to take on your outdoor adventures.
This sleek and lightweight espresso maker is specifically designed to be easily transported, allowing you to enjoy your favorite espresso wherever your explorations may take you. Its compact size ensures that it won’t take up much space in your backpack or camping gear, making it an ideal companion for any outdoor enthusiast.
The Flair PRO 2 Manual Espresso Maker’s portability doesn’t compromise on performance either. It’s equipped with high-quality components and features that deliver exceptional espresso shots, ensuring that you can savor the rich flavors and aromas of specialty coffee even in the great outdoors.
Precision Grinding With the Flair Royal Hand Grinder
To achieve the perfect grind size for your outdoor espresso brewing, we recommend using the Flair Royal Hand Grinder and carefully adjusting the settings to ensure precision and consistency. The grind size adjustment feature of the Flair Royal Hand Grinder allows you to have full control over the extraction process, maximizing the flavors and aromas in your espresso.
Here’s why the Flair Royal Hand Grinder is the ideal choice for precision grinding:
-
Consistent Grind: The grinder’s high-quality burrs ensure a uniform grind size, resulting in a balanced extraction and a rich, flavorful espresso.
-
Easy Adjustment: With its simple and intuitive grind size adjustment mechanism, you can easily switch between fine, medium, and coarse settings to match your desired brewing method.
-
Maximizing Extraction: By dialing in the grind size, you can optimize the extraction process, ensuring that the water extracts the desired flavors from the coffee grounds, resulting in a well-balanced and delicious cup of espresso.
The Flair Royal Hand Grinder is the perfect companion for outdoor espresso brewing, providing the precision necessary to create a truly exceptional coffee experience.
Using Specialty Coffee for Optimal Flavor
For the best flavor experience, we recommend brewing your outdoor espresso with specialty coffee. Specialty coffee beans are carefully selected and roasted to bring out the unique flavors and characteristics of each variety. When choosing the right beans for your outdoor brewing, consider factors such as origin, roast level, and flavor profile. Experiment with different varieties to find your preferred taste.
To further enhance the flavor of your outdoor espresso, it’s important to use brewing techniques that bring out the best in your chosen beans. Adjusting the grind size, water temperature, and extraction time can all impact your espresso’s flavor profile.
Try using a coarser grind and a higher water temperature for a bright and fruity espresso. For a more balanced and chocolaty flavor, opt for a finer grind and a slightly lower water temperature.
Table: Brewing Techniques for Different Flavors
Flavor Profile Grind Size Water Temperature Bright and Fruity Coarser Higher Balanced and Chocolaty Finer Slightly Lower
Reliable Water Heating System for Quick Boiling
We rely on a portable and efficient water heating system, like the JetBoil Flash, to quickly boil water for our outdoor espresso brewing. When it comes to brewing espresso in the great outdoors, having a reliable water heating system is crucial. Here’s why the JetBoil Flash is our go-to choice:
-
Speed: With its powerful burner, the JetBoil Flash can bring water to a rolling boil in just a matter of minutes. This means we can enjoy our espresso without any unnecessary waiting around.
-
Convenience: The JetBoil Flash is compact and lightweight, making it easy to transport and set up wherever we go. Its simple and intuitive design allows for effortless operation, even in the most remote locations.
-
Versatility: While the JetBoil Flash excels at boiling water, it also offers alternative heating options, such as simmering and frying. This versatility allows us to expand our outdoor cooking options beyond espresso, making it a valuable addition to our camping gear.
With the JetBoil Flash by our side, we can confidently brew our espresso in the great outdoors, knowing that we’ve a reliable and efficient water heating system at our disposal.
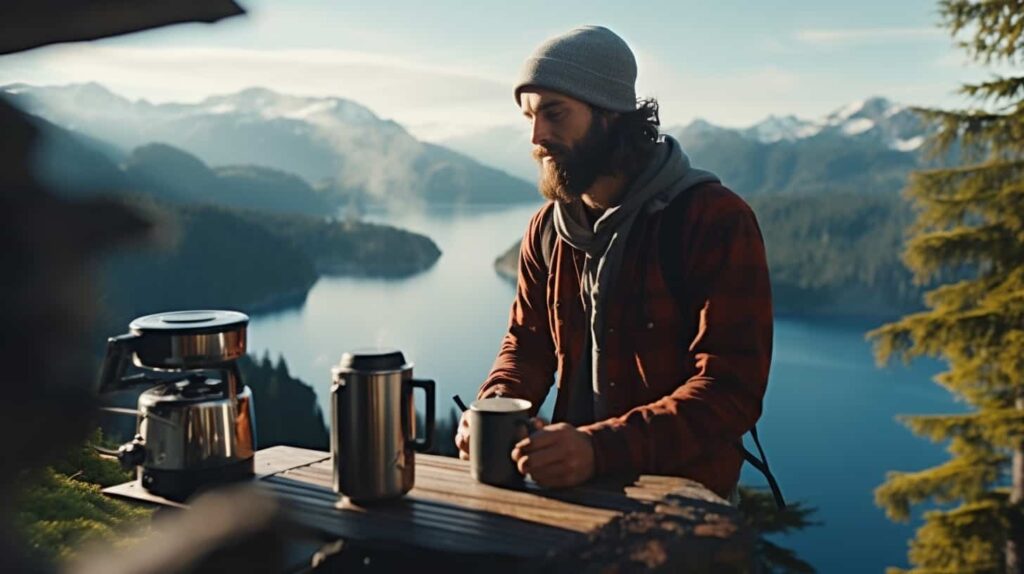
Embrace Your Inner Barista in the Great Outdoors
As coffee enthusiasts, experiencing the great outdoors allows us to embrace our inner barista and connect with the art of brewing espresso. There’s something truly magical about being surrounded by nature, with the soothing sounds of birds chirping and the gentle breeze caressing our faces, as we prepare our favorite cup of coffee.
It’s a moment of tranquility and connection with the world around us. Mindful coffee brewing in the outdoors allows us to fully appreciate the process, from weighing and pre-dosing the coffee beans to carefully adjusting the grind size. We can take our time, savoring the aroma and flavors, while immersing ourselves in the beauty of our surroundings.
It’s a chance to create lasting memories and indulge in the simple pleasures of life. So, let’s grab our equipment, find a serene spot, and let nature inspire our inner barista.
Frequently Asked Questions
Can I Use a Different Manual Espresso Maker for Outdoor Brewing?
Yes, you can use a different manual espresso maker for outdoor brewing. There are many portable espresso makers for camping that offer the convenience and quality you need to enjoy a delicious espresso in the great outdoors.
How Do I Determine the Ideal Grind Size for My Outdoor Espresso Brewing?
To determine the ideal grind size for outdoor espresso brewing, we carefully adjust the grind while considering the desired brew time. This ensures a rich and flavorful cup of espresso that perfectly captures the essence of the outdoors.
Are There Any Specific Types of Specialty Coffee That Work Best for Outdoor Espresso Brewing?
The best coffee beans for outdoor brewing techniques should be specialty beans from reputable local roasters. They offer optimal flavors that enhance the outdoor espresso experience, creating a truly indulgent and memorable moment.
Can I Use a Different Water Heating System Instead of the Jetboil Flash?
Yes, there are alternative water heating systems you can use instead of the Jetboil Flash. We have found success with other portable options like the MSR PocketRocket or the Primus Lite+.
What Are Some Additional Ways to Minimize My Impact on the Environment While Brewing Espresso Outdoors?
To minimize our impact on the environment while brewing espresso outdoors, we can prioritize eco-friendly coffee bean sourcing and opt for sustainable packaging options. It’s important to make conscious choices that align with our values and protect the planet we love.
Conclusion
As we bid farewell to the comforting routine of brewing espresso indoors, we embark on a thrilling journey of becoming outdoor baristas.
With the Flair PRO 2 Manual Espresso Maker as our trusty companion, we unlock a world of rich flavors and breathtaking views.
Let nature’s serenity and specialty coffee’s aroma awaken your senses and ignite your passion for the art of outdoor brewing.
So, grab your gear, embrace your inner barista, and let’s make memories in the great outdoors!

In the vast and diverse world of coffee, coffee alternatives, and tea, Olivia has found her calling. As an author and a dedicated coffee and tea aficionado, her work for Cappuccino Oracle reflects her profound love and understanding of the intricate complexities found within these beverages. Olivia’s passion for the subject serves as both a catalyst for her creativity and a connection point with her audience.
Olivia’s appreciation for coffee, coffee alternatives, and tea blossomed at an early age. She discovered that these beverages invigorated her senses and stimulated her creative spirit. From the nuanced flavors of single-origin roasts to the captivating narratives intertwined with coffee, coffee alternatives, and tea trade and culture, Olivia found an unlimited source of inspiration in her daily cup.
Her love for these beverages and her talent for storytelling eventually converged at Cappuccino Oracle. As an author, Olivia’s mission is to illuminate the intricate tapestry that makes up the world of coffee, coffee alternatives, and tea. Her articles span a diverse range of topics, encompassing everything from the unique flavors of different brews to the sociocultural history intertwined with their cultivation and consumption.

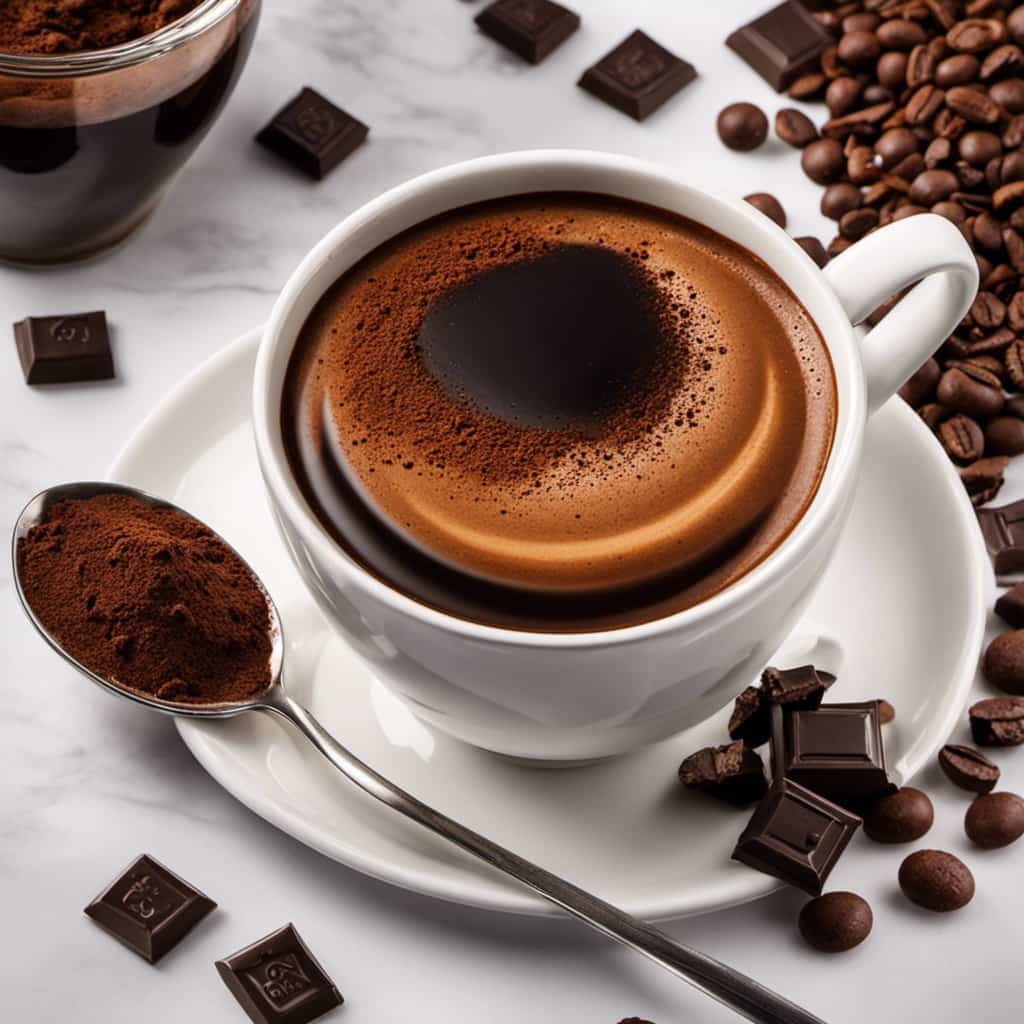
Have you ever pondered what makes a mochaccino so irresistibly delicious? Let me share with you that it’s the impeccable combination of bold espresso, creamy chocolate, and frothy milk.
And the best part? You can easily make this indulgent treat right in the comfort of your own home. In this article, I’ll guide you through the history, ingredients, and step-by-step process of creating the perfect homemade mochaccino.
Get ready to impress your taste buds and become your very own barista!
Key Takeaways
- The mochaccino originated in Italy in the 17th century as a combination of espresso and hot chocolate.
- The flavors of the mochaccino have evolved over time, with variations including caramel, vanilla, and peppermint.
- The cultural significance of the mochaccino varies in different countries.
- To make a homemade mochaccino, you will need strong brewed coffee, cocoa powder, milk, sugar, and whipped cream for topping.
History of the Mochaccino
I’ve read about the history of the mochaccino, and it’s fascinating how this delightful drink has evolved over the years.
The mochaccino, also known as a mocha, originated in Italy in the 17th century. It started as a combination of espresso and hot chocolate, creating a rich and indulgent beverage.
As time went on, the flavors of the mochaccino began to evolve. Today, you can find variations with added flavors like caramel, vanilla, or even peppermint.
In different countries, the cultural significance of the mochaccino varies. In Italy, it’s a staple in their coffee culture, while in the United States, it has become a popular choice among coffee enthusiasts.
The mochaccino has truly become a global favorite, adapting to different tastes and preferences around the world.
Ingredients for a Homemade Mochaccino
I can make a delicious homemade mochaccino with just a few simple ingredients and a little bit of time.
The key to a perfect mochaccino is combining the rich flavors of coffee and chocolate. For this, you’ll need strong brewed coffee, cocoa powder, milk, sugar, and whipped cream for topping.
To start, mix cocoa powder with a small amount of hot water to create a smooth paste. Then, heat milk on the stovetop until hot but not boiling. Add the cocoa paste and sugar to the milk, stirring until dissolved.
Next, pour the coffee into a mug and slowly pour the milk mixture over it. Finally, finish with a dollop of whipped cream. It’s a delightful treat that combines the best of both worlds – coffee and chocolate.
And if you’re looking for coffee alternatives or health benefits, a homemade mochaccino is a perfect choice.
Step-by-Step Guide to Making a Mochaccino at Home
With just a few simple steps and some common ingredients, you can easily make a delicious mochaccino at home. Here’s how:
-
Start by brewing a strong cup of coffee using your preferred method. You can use a traditional drip coffee maker, a French press, or even try alternative brewing methods like pour-over or cold brew for a unique flavor profile.
-
While your coffee is brewing, warm up some milk on the stove or in the microwave. You can use any type of milk you prefer, such as dairy milk, almond milk, or oat milk.
-
Once your coffee is ready, pour it into a mug and add a tablespoon or two of cocoa powder. Mix until the cocoa powder is fully dissolved.
-
Finally, pour the warm milk into the mug and stir well. You can also top it off with some whipped cream or chocolate shavings for an extra indulgent touch.
Making your own mochaccino at home not only allows you to control the quality of ingredients but also offers health benefits. The coffee provides a boost of energy and can improve cognitive function, while cocoa powder is rich in antioxidants and can boost mood. Additionally, using alternative milk options can cater to dietary preferences or restrictions.
Variations and Additions to the Classic Mochaccino Recipe
There are many ways to elevate the classic mochaccino recipe, such as adding a dash of cinnamon or a drizzle of caramel syrup for a hint of sweetness. But have you ever considered exploring different types of mochaccinos for their unique flavors and health benefits? Let’s take a look at some interesting variations:
| Type | Flavor Profile | Health Benefits |
|---|---|---|
| Matcha Mochaccino | Earthy and Creamy | High in antioxidants |
| Coconut Mochaccino | Rich and Nutty | Boosts metabolism |
| Protein Mochaccino | Creamy and Filling | Provides muscle recovery |
These different types of mochaccinos not only offer a diverse range of flavors but also come with their own set of health benefits. Now that we’ve explored the possibilities, let’s move on to some tips and tricks for perfecting your homemade mochaccino.
Tips and Tricks for Perfecting Your Homemade Mochaccino
To achieve the perfect homemade mochaccino, don’t forget to froth the milk until it reaches a creamy consistency. Frothing the milk adds that luxurious touch to your drink, creating a velvety texture that perfectly complements the rich flavors of chocolate and espresso.
Here are some tips and tricks to help you perfect your homemade mochaccino:
-
Use high-quality coffee beans: The best coffee beans for a mochaccino are those with a bold flavor profile. Look for beans with a rich, chocolaty undertone to enhance the chocolate flavor in your drink.
-
Experiment with homemade coffee alternatives: If you’re looking to switch things up, try using alternative coffee options like cold brew or espresso powder. These can add a unique twist to your mochaccino.
-
Adjust the sweetness: Mochaccinos are typically sweet, but you can adjust the sweetness to your preference. Add more or less chocolate syrup or sweetener to achieve the perfect balance for your taste buds.
-
Get creative with toppings: Don’t forget the finishing touches! Whipped cream, chocolate shavings, or a sprinkle of cinnamon can elevate the presentation and add an extra layer of flavor to your homemade mochaccino.
Frequently Asked Questions
Can I Use Regular Coffee Instead of Espresso in a Homemade Mochaccino?
Yes, you can use regular coffee instead of espresso in a homemade mochaccino. However, using espresso will give your drink a stronger and richer flavor, which is one of the benefits of using it.
How Many Calories Are in a Homemade Mochaccino?
I made a homemade mochaccino with whole milk and dark chocolate syrup. It has around 200 calories, but the nutritional value may vary depending on the ingredients used.
Can I Use Almond Milk Instead of Cow’s Milk in a Homemade Mochaccino?
Yes, almond milk can be used as a dairy-free alternative in a homemade mochaccino. It provides a creamy texture and a nutty flavor that complements the coffee and chocolate.
What Type of Cocoa Powder Is Best for Making a Mochaccino at Home?
When making a mochaccino at home, it’s important to choose the best cocoa powder. Look for high-quality brands, like Ghirardelli or Valrhona, for a rich and delicious flavor. Don’t forget to consider alternative milk options, like almond milk, for a dairy-free version.
Can I Make a Mochaccino Without a Milk Frother?
Sure, you can make a mochaccino without a milk frother. There are alternative methods like using a whisk or a handheld frother. These frothing techniques will give you a similar creamy texture.
Conclusion
In conclusion, the mochaccino is a beloved coffee beverage that combines the rich flavors of chocolate and espresso.
By following the step-by-step guide and using high-quality ingredients, you can easily make a delicious mochaccino at home.
Don’t be afraid to get creative with variations and additions to suit your taste.
With a little practice and a few tips and tricks, you’ll be able to perfect your homemade mochaccino and enjoy this indulgent treat whenever you like.

Justin is a seasoned author, coffee and tea enthusiast, and an essential member of the Cappuccino Oracle team. With a keen appreciation for the complexities of coffee, coffee alternatives, and tea, Justin has dedicated his professional career to exploring these realms and sharing his insights with readers worldwide.
Justin’s immersion in the world of coffee, coffee alternatives, and tea began at a young age, kindling a passion that extended beyond mere consumption. This love for these beverages led him to combine his talent for writing with his devotion to coffee and tea, bringing him to Cappuccino Oracle as a dedicated author.
I enjoy a delicious iced macchiato on a warm summer day. Were you aware that it’s surprisingly simple to prepare at home? With just a few basic ingredients and some knowledge, you can savor this invigorating coffee drink whenever you desire.
In this article, I’ll share with you the secrets to making the perfect iced macchiato, from brewing the espresso to frothing the milk.
So grab your favorite mug and let’s get started!
Key Takeaways
- Iced macchiato originated in Italy as a variation of traditional macchiato.
- The base ingredients of an iced macchiato are espresso, milk, sweetener (optional), and ice.
- Brewing espresso for an iced macchiato requires precision and consideration of factors like grind size, brewing time, and water temperature.
- Frothing milk for an iced macchiato involves using techniques like using cold milk, alternative milk options, and a steam wand or frother.
The Origins of Iced Macchiato
I’ve always been curious about the origins of the iced macchiato. This popular coffee beverage has its roots in Italy, where the term ‘macchiato’ means ‘stained’ or ‘marked.’ Traditionally, a macchiato is made by adding a small amount of espresso to a cup and then ‘staining’ it with a dollop of frothed milk.
The iced macchiato, however, is a variation that emerged in recent years. It’s made by pouring espresso over a glass filled with ice and then adding a small amount of milk or milk foam. The result is a refreshing and flavorful drink, perfect for hot summer days.
Nowadays, there are many variations of the iced macchiato, with different flavors and toppings added to enhance the taste. From caramel to vanilla to chocolate, there’s an iced macchiato for every coffee lover’s preference.
Understanding the Ingredients
Understanding the ingredients is essential for making a delicious iced macchiato at home. When it comes to flavor profiles, the combination of sweet and bitter is what makes an iced macchiato so enticing. Here are some key ingredients to consider:
- Espresso: The base of an iced macchiato, providing a strong and rich flavor.
- Milk: Adds creaminess and balances out the espresso’s intensity.
- Sweetener: Optional, but commonly used to enhance the overall taste.
- Ice: Keeps the drink refreshing and cold.
- Optional flavorings: Vanilla, caramel, or chocolate syrups can be added for extra flavor.
Understanding different brewing methods is also important. Whether you prefer using an espresso machine, a French press, or a moka pot, each method can influence the taste and strength of your iced macchiato. Experimenting with different brewing techniques and ratios will help you find the perfect balance of flavors for your homemade iced macchiato.
The Art of Brewing Espresso
Brewing espresso is an intricate process that requires precision and skill. To achieve the perfect cup, espresso brewing techniques and the importance of water temperature can’t be overlooked.
When it comes to espresso brewing techniques, there are various methods to choose from. Some popular ones include the classic manual espresso machine, the convenient pod-based system, and the modern espresso machine with advanced features. Each technique requires careful consideration of factors such as grind size, brewing time, and pressure.
However, one common factor that’s crucial in all techniques is water temperature. The ideal water temperature for brewing espresso is between 195°F and 205°F. This range ensures proper extraction of flavors and oils from the coffee grounds, resulting in a rich and balanced espresso shot.
Transitioning to the next section, after perfecting the espresso shot, the focus shifts to perfecting the milk froth.
Perfecting the Milk Froth
I absolutely love experimenting with different techniques to perfect the milk froth for my iced macchiatos. It’s an art form in itself, and getting that perfect creamy texture on top of my espresso is essential for a delicious drink.
When it comes to creating the perfect milk froth, there are a few things to consider. Here are some tips to help you explore alternative milk options and troubleshoot common frothing issues:
- Use cold milk: Starting with cold milk will help create a better froth.
- Choose the right milk: Experiment with different types of milk, such as almond, oat, or soy, to find the one that froths best for you.
- Froth the milk properly: Use a steam wand or a frother to create a creamy and velvety texture.
- Watch the temperature: Overheating the milk can result in a burnt taste, so make sure to stop frothing when the milk reaches around 150°F.
- Clean and maintain your equipment: Regularly clean your steam wand or frother to ensure optimal frothing performance.
By following these tips, you’ll be on your way to creating the perfect milk froth for your iced macchiatos, and exploring alternative milk options along the way.
Happy frothing!
Step-by-Step Guide to Making Iced Macchiato at Home
To make an iced macchiato at home, I followed a simple step-by-step guide using a shot of espresso, a splash of milk, and a drizzle of caramel syrup.
First, I brewed a strong shot of espresso and let it cool.
Then, I filled a glass with ice and poured the espresso over it.
Next, I added a splash of milk, using almond milk as an alternative option for a creamy and nutty flavor.
To enhance the taste, I drizzled caramel syrup over the top, giving it a sweet and indulgent twist.
The beauty of making an iced macchiato at home is that you can get creative with variations.
You can experiment with different types of milk, such as oat milk or coconut milk, to suit your preferences.
Additionally, you can add flavored syrups like vanilla or hazelnut to customize your macchiato even further.
Enjoy this refreshing and satisfying beverage right in the comfort of your own home.
Frequently Asked Questions
What Is the Nutritional Content of an Iced Macchiato?
The nutritional content of an iced macchiato depends on the ingredients used. It can provide benefits such as a boost of energy from caffeine, but may also have health concerns like added sugars or high calorie content.
Can I Use Any Type of Milk to Make an Iced Macchiato?
I can use any type of milk to make an iced macchiato. Options like almond, oat, or soy milk can be used as alternatives. Additionally, different types of sweeteners can enhance the flavor.
How Long Does It Take to Brew Espresso for an Iced Macchiato?
To brew espresso for an iced macchiato, I recommend using an espresso machine and grinding fresh coffee beans. It typically takes about 25-30 seconds to extract the espresso. Froth the milk using a frother or steam wand until it reaches a creamy consistency.
Can I Use a Regular Blender to Froth the Milk for an Iced Macchiato?
Yes, you can use a regular blender to froth the milk for an iced macchiato. It’s a convenient and cost-effective alternative. You can also explore different milk options like almond, oat, or soy for a unique twist.
Can I Customize the Flavor of an Iced Macchiato by Adding Syrups or Toppings?
Yes, you can customize the flavor of an iced macchiato by adding syrups or toppings. It’s a great way to experiment with different milk alternatives and create your own unique and delicious drink.
Conclusion
In conclusion, making an iced macchiato at home is a simple process that can be mastered with practice. By understanding the origins of this popular drink, familiarizing oneself with the ingredients, and perfecting the art of brewing espresso and frothing milk, anyone can enjoy a delicious iced macchiato from the comfort of their own home.
Fun fact: Did you know that iced macchiatos are the most popular coffee choice among millennials, accounting for 40% of their coffee orders?
Noah, the Editor-in-Chief at Cappuccino Oracle, plays a pivotal role in shaping the voice and vision of our renowned platform. With an unwavering passion for coffee, coffee alternatives, and tea, Noah leads Cappuccino Oracle towards new horizons in the realm of coffee journalism.
Beyond his professional responsibilities, Noah serves as a mentor and guiding force for his team. His dedication to journalistic excellence and genuine love for coffee, coffee alternatives, and tea continue to inspire and motivate the Cappuccino Oracle family. In the ever-evolving world of these beverages, Noah’s leadership ensures that our platform remains at the forefront, delivering enlightening and enjoyable content to our readers worldwide.

When Is the Best Time During the Day to Drink Kombucha Tea
How Much Loose Leaf Tea to Make 1 Gallon of Kombucha
What Happens if I Don’t Add Sugar to Kombucha Tea
How Much Kombucha Tea to Drink a Day
What Ratio of Green to Black Tea Is Ideal for Kombucha

How to Make Americano With Moka Pot

How to Make Korean Iced Americano

How to Make Iced Americano With Instant Coffee

How to Make Americano With Bialetti

How to Make Dutch Bros Americano

Discover the Power of KOS Mushroom Coffee

Top 10 Rated Mushroom Coffee Brands for a Boost

What Makes Caffeine-Free Mushroom Coffee Unique?

Rooibos Tea: A Guide to Safe Breastfeeding Practices

What Mushroom Can I Use as a Coffee Replacement?

-
 Americano4 weeks ago
How to Make Americano With Moka Pot
-
 Americano2 weeks ago
How to Make Korean Iced Americano
-
 Americano4 weeks ago
How to Make Iced Americano With Instant Coffee
-
 Americano4 weeks ago
How to Make Americano With Bialetti
-
 Americano4 weeks ago
How to Make Dutch Bros Americano
-

 Americano6 days ago
How to Make an Iced Americano With Nespresso
-

 Americano2 weeks ago
How Many Shots of Espresso for 16 Oz Americano
-
 Turmeric Tea1 week ago
Turmeric Saffron Tea