Connect with us

FAQs

How to Roast Chicory Root for Coffee: Oven Degrees

I discovered the perfect method to roast chicory root for coffee, but there’s a secret to achieving the ultimate flavor that you won’t want to miss.

Published

on

roasting chicory root coffee

To roast chicory root for coffee, preheat your oven to 220°F. Spread your chopped chicory roots on a baking sheet in a single layer and roast them for 30 minutes. After that, lower the oven temperature to 180°F and continue roasting for an additional 10 to 15 minutes until they're dark brown. If you're after a deeper flavor, boost the temperature up to 300°F to 350°F and roast for 90 minutes to 2 hours, but keep a close eye on them. Once done, let them cool before grinding to maximize flavor. There's even more to discover about brewing and enjoying chicory coffee.

Key Takeaways

  • Preheat the oven to 220°F and roast sliced chicory roots for 30 minutes to begin the roasting process.
  • Lower the temperature to 180°F and continue roasting for an additional 10-15 minutes until roots turn dark brown.
  • For a deeper flavor, consider roasting at 300°F to 350°F for 90 minutes to 2 hours, monitoring closely.
  • Make sure the roots are completely dry and snap easily before removing them from the oven.
  • Allow the roasted chicory roots to cool completely before grinding for optimal coffee preparation.

Overview of Chicory

chicory plant characteristics overview

Chicory, a versatile plant belonging to the dandelion family, is known for its striking blue flowers and robust roots. One of its standout features is the roasted chicory root, which serves as a popular coffee substitute.

If you're looking for a caffeine-free alternative, chicory root's distinct bitter flavor adds a unique touch to your brews. The roots take about 2.5 months to mature, requiring water about twice a week, and can yield around 100 grams of roasted chicory root. This amount is enough for approximately seven cups of coffee, making it a practical choice for those wanting to explore new flavors.

Plus, chicory root is rich in inulin, a prebiotic fiber that promotes digestive health, enhancing its appeal.

Harvesting Chicory Roots

chicory root harvesting techniques

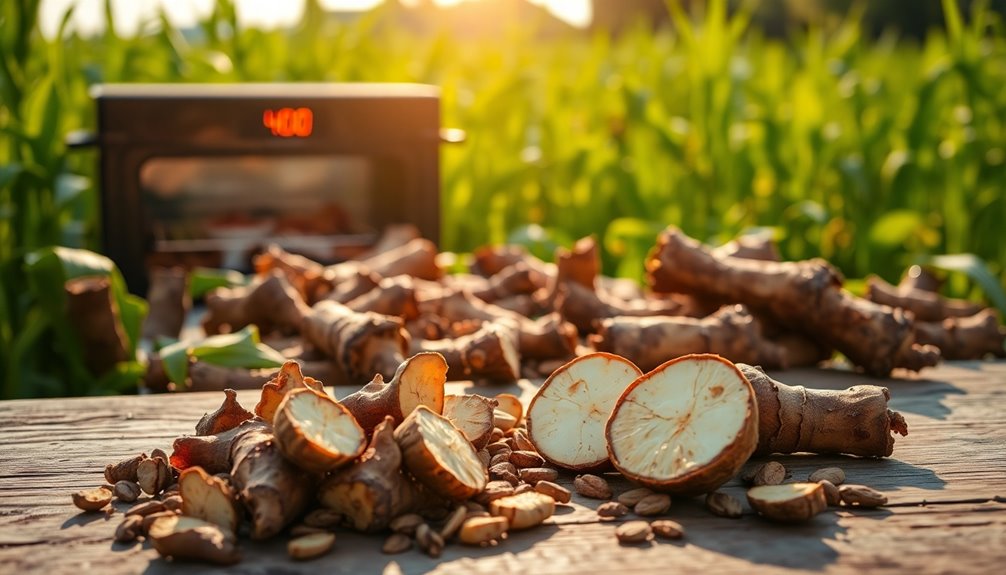
When the first killing frost arrives in fall, it's the perfect time to harvest chicory roots for the best flavor and quality. Avoid plants with flower stalks, as these indicate maturity and may render the roots unsuitable. Carefully dig up the roots, which can reach up to 30 inches deep, and be sure not to break them. After you've harvested the chicory, wash the roots thoroughly to remove dirt and debris, then cut the roots from the green tops, which can be composted. It's essential to harvest from organic, low-traffic areas to guarantee your dried chicory roots are free from pesticides and pollutants.

Step Action Note
1 Choose frost time Harvested in the fall
2 Dig roots carefully Prevent breakage
3 Wash thoroughly Remove dirt
4 Cut the roots Compost green tops

Preparing Chicory for Roasting

chicory roasting preparation steps

After you've harvested and cleaned the chicory roots, the next step is to prepare them for roasting.

Start by cutting off the green tops and washing the roots thoroughly with a brush and water to remove any dirt.

Once cleaned, chop the roots into uniform pieces; this helps them dry evenly and aids in the roasting process.

Spread the chopped roots in a thin layer on baking sheets.

Allow them to dry in the sun for one day to eliminate moisture.

This drying step is essential for achieving that rich flavor in your roasted chicory coffee.

Once dried, you're ready to move on to roasting, ensuring those roots are perfectly prepared for that delicious brew.

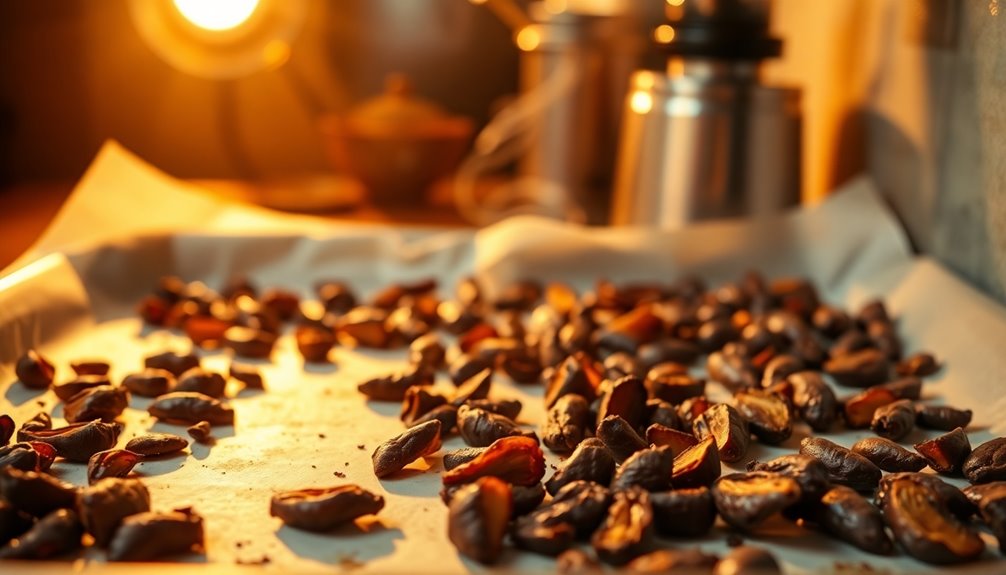
Roasting Chicory Process

chicory roasting technique explained

To get the perfect roast, you'll want to start by preheating your oven to 220°F and roasting the sliced chicory roots for about 30 minutes.

After that, lower the temperature to 180°F and keep an eye on them for another 10-15 minutes until they turn dark brown.

Roasting Temperature Guidelines

Roasting chicory root requires careful attention to temperature to achieve that perfect flavor and texture. Start by preheating your oven to 220°F for the initial roasting phase. Keep an eye on the roots to prevent burning due to moisture. After 30 minutes, lower the temperature to 180°F for another 10-15 minutes to reach the ideal dark brown color. For deeper flavor, some recommend roasting chicory at 300°F to 350°F for 90 minutes to 2 hours.

Temperature Range Initial Time Final Time
220°F 30 minutes 10-15 minutes
180°F
300°F – 350°F 90 minutes 2 hours

Monitor closely; the roots should snap easily when dry.

Roasting Time Considerations

While roasting chicory root, timing plays an essential role in achieving your desired flavor profile.

Start by preheating your oven to 250°F for the initial drying phase, where you should roast the chicory for several hours. Stir the roots periodically to guarantee even drying and browning.

Keep a close eye on the roasting time, as it can vary from 40 minutes to 1.5 hours depending on how dark and dry you want them.

After this phase, you can increase the temperature to 300°F for a bolder flavor. Watch for smoke as an indicator of readiness, but focus on checking for dryness and brittleness.

Once roasted, let the chicory cool to room temperature before grinding to preserve its flavor.

Grinding Techniques

effective material removal methods

When you’re ready to grind roasted chicory root for coffee, using the right technique can make all the difference in flavor. Aim for a fine medium-coarse powder consistency to enhance extraction. Verify the chicory is completely cooled after roasting to prevent moisture interference. Understanding different roast levels is also important when grinding chicory root for coffee. Lighter roasts will have a brighter, more acidic flavor, while dark roasts will be richer and more full-bodied. Experiment with different roast levels to find the perfect balance of flavor and aroma for your chicory coffee.

Grinding Method Notes
Coffee Grinder Quick, but may yield uneven grounds
Mortar and Pestle Manual method for a more uniform grind
Separate Grinding Grind coffee beans to coarse before mixing
Ratio Experimentation Start with 30% chicory to 70% coffee

Manual grinders often provide a more consistent grind than electric ones, impacting your final brew. Experiment with different grinding techniques to find your perfect blend of ground chicory and coffee!

Brewing Chicory Coffee

chicory coffee brewing process

After grinding your roasted chicory root, it's time to brew a flavorful cup of chicory coffee. For a strong flavor, use about 1/4 cup of ground roasted chicory per press pot.

A recommended brewing ratio is 70% coffee to 30% chicory, but feel free to adjust this based on your taste preference for a stronger or milder brew.

Steep the ground chicory in boiling water for 5 to 8 minutes to extract its unique flavor without bringing out excessive bitterness.

You can brew chicory coffee using methods like a French press, drip coffee maker, or pour-over.

To enhance the flavor, consider adding milk, cream, or sweeteners like sugar or molasses for a delicious finish.

Storage Tips for Chicory

chicory storage best practices

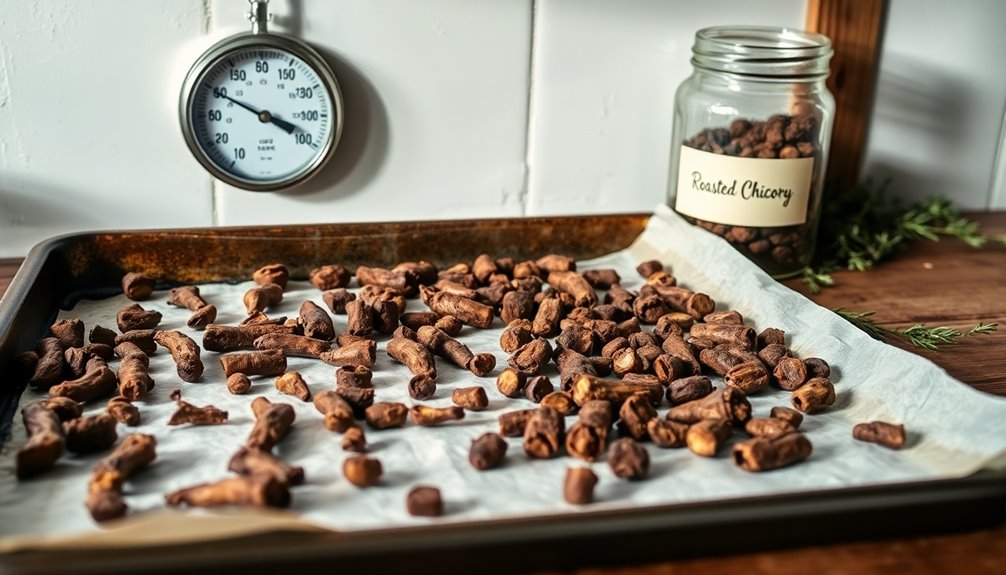
To keep your chicory fresh, you'll want to choose the right storage containers.

Airtight jars or vacuum-sealed bags work best to prevent moisture damage and maintain flavor.

With proper storage, your chicory can last for years, so you can enjoy that rich aroma whenever you brew.

Ideal Storage Containers

For preserving the flavor and freshness of dried chicory roots, choosing the right storage containers is essential.

Opt for airtight containers to keep your roasted chicory and ground chicory in prime condition. Here are some tips for effective storage:

  • Use glass jars with sealed lids.
  • Keep the containers in a cool, dry place.
  • Consider vacuum sealing for long-term storage.
  • Regularly check for signs of moisture or spoilage.
  • Avoid exposure to light and air.

Preventing Moisture Damage

While you might think that storing chicory is straightforward, preventing moisture damage is essential for maintaining its quality.

To keep your stored chicory in prime condition, always use airtight containers like mason jars. This helps shield your chicory from moisture that can compromise its flavor and usability.

Additionally, make sure your storage area is cool, dark, and dry; these conditions prolong the life of your roasted chicory.

If you want to go the extra mile, consider vacuum sealing your chicory to keep out both air and moisture.

Regularly check your stored chicory for any signs of moisture or spoilage, and don't hesitate to discard affected portions.

Properly stored, your chicory can retain its quality for years. It's important to remember that just like with air purifier maintenance, ensuring a dry environment is crucial to prevent degradation.

Shelf Life Considerations

When it comes to shelf life considerations for chicory, proper storage can make all the difference.

Dried chicory roots can last for years when stored correctly in airtight containers. Using Mason jars with sealed lids is a great way to protect your roasted chicory from light and moisture, which can greatly shorten its shelf life.

Ground chicory also benefits from this method. To keep your chicory fresh and flavorful, follow these tips:

  • Store in an airtight container
  • Keep in a cool, dark place
  • Minimize exposure to moisture
  • Label containers with the date
  • Enjoy the aroma while you brew

Frequently Asked Questions

What Temperature to Roast Chicory Root?

When you're roasting chicory root, aim for around 300°F. This temperature gives you better control and helps prevent burning.

You'll notice the initial browning within the first 20 minutes, but keep an eye on the smoke; it's a good indicator of readiness.

Depending on your flavor preference, the total roasting time can range from 40 minutes to 1.5 hours, with longer, lower roasting yielding a deeper, richer flavor.

How Do You Prepare Chicory Root for Coffee?

To prepare chicory root for coffee, you'll want to start by harvesting mature roots, preferably after the first frost.

Rinse them well to remove dirt, then slice them into uniform pieces.

Spread these pieces on a baking sheet lined with parchment for ideal airflow.

Let them dry out completely before roasting.

Once they're dark brown and snap easily, cool them off and grind them into a fine powder for brewing your unique coffee blend!

How Long Does It Take to Steep Chicory Root?

When you steep chicory root, aim for about 5 to 8 minutes. This timing helps you achieve a balanced flavor without overwhelming bitterness.

If you prefer a stronger taste, feel free to experiment with longer steeping times. Just remember that boiling water enhances chicory's natural sweetness and chocolatey notes.

Adjust your chicory-to-water ratio based on your personal preferences, typically around 1 teaspoon to 1 tablespoon per cup.

Enjoy your brew!

Is 60/40 Coffee Stronger Than 80/20?

Yes, a 60/40 coffee-to-chicory blend is stronger than an 80/20 blend.

With 60% coffee, you'll experience a more intense coffee flavor, while the additional chicory adds richness and earthiness.

In contrast, the 80/20 blend, with 80% coffee, tends to be smoother and less robust.

If you're looking for a bolder taste, you might prefer the 60/40 mix, but if you enjoy milder flavors, the 80/20 could be your go-to.

Conclusion

Roasting chicory root for coffee is a rewarding journey that opens up a world of rich flavors. By following the steps to harvest, prepare, and roast, you'll transform simple roots into a delightful brew that's both unique and satisfying. Remember, just like a hidden gem, chicory can elevate your coffee experience in unexpected ways. So, embrace the process, enjoy the aroma, and savor every sip of your homemade chicory coffee!

FAQs

How to Prounounce Americano

Discover the secrets to pronouncing “Americano” correctly and elevate your coffee conversations—your friends will be impressed!

Published

on

pronunciation of americano explained

To pronounce "Americano," emphasize the third syllable: uh-mer-i-CAH-no. In American English, it sounds like /əˌmer.ɪˈkɑː.noʊ/, while in British English, you'd say /əˌmer.ɪˈkɑː.nəʊ/. Practice saying it slowly, focusing on the distinct vowel sounds. Avoid common mistakes like rushing or slurring the syllables. You can also listen to native speakers or record yourself to improve. Remember, getting the pronunciation right enhances your coffee conversations. If you're curious about more tips and variants of this popular drink, there's plenty more to explore!

Key Takeaways

  • The correct pronunciation of "Americano" emphasizes the "mer" syllable, pronounced as /əˌmer.ɪˈkɑː.noʊ/ in US English and /əˌmer.ɪˈkɑː.nəʊ/ in UK English.
  • Break the word into four syllables: a-mer-i-ca-no, with primary stress on the third syllable "ca."
  • Common mispronunciations include "Americanno" or "Americanoo"; clarity is essential for effective communication.
  • Practice by repeating the word, listening to native speakers, or recording your pronunciation for feedback.
  • Be aware of regional variations and avoid rushing to maintain clear and accurate pronunciation.

Pronunciation Variants

pronunciation differences in language

When you're learning to pronounce "Americano," it's important to recognize the differences between UK and US pronunciations. The UK version sounds like /əˌmer.ɪˈkɑː.nəʊ/, while the US version is /əˌmer.ɪˈkɑː.noʊ/.

Both accents emphasize the "mer" syllable, but the vowel sounds differ slightly. To master the pronunciation, focus on the phonetic breakdown: uh + merr + uh + kaa + noh.

Practicing these individual sounds consistently will help you articulate "Americano" more clearly. Recording yourself can enhance your confidence and clarity, allowing you to compare your pronunciation with native speakers.

Definition of Americano

coffee brewed with water

An Americano is a popular coffee drink that combines espresso with hot water, creating a brew similar in strength to traditional brewed coffee.

This beverage originated in the United States during World War II, as American soldiers sought to replicate the coffee they missed from home.

  • Offers a milder taste than straight espresso
  • Gained popularity in cafes worldwide
  • Can be customized with milk or sugar
  • Often enjoyed at breakfast or as a midday pick-me-up
  • A versatile choice for coffee lovers

With its rich history and customizable options, the Americano has become a favorite for those seeking a flavorful, yet balanced coffee experience.

Understanding the definition and significance of this drink adds to your coffee knowledge!

Preparation Method

cooking instructions and techniques

To prepare an Americano, start by brewing one or two shots of espresso, then dilute it with hot water to reach your preferred strength.

This preparation method mimics the richness of brewed coffee while allowing for customization. You can adjust the amount of hot water based on how strong you like your drink.

Americanos are versatile and can be served in various cup sizes, perfect for any occasion. If you want to enhance the flavor, feel free to add milk or sugar according to your taste.

This simplicity makes the Americano a favorite among coffee lovers who enjoy a milder coffee experience without sacrificing depth.

Enjoy experimenting until you find your perfect balance!

Cultural Significance

cultural importance and impact

The Americano holds a special place in American coffee culture, offering a milder option for those who find traditional espresso too intense.

Its popularity grew among American soldiers in Italy, who craved a familiar taste while adapting to local customs.

Today, it's a staple in coffee shops around the world, bridging the gap between espresso and drip coffee.

American Coffee Culture

While many coffee enthusiasts savor the boldness of espresso, the Americano has carved out its own niche in American coffee culture, representing a blend of tradition and modern taste.

Originating during World War II, American soldiers sought a coffee experience reminiscent of home. The Americano bridges the gap between strong espresso and milder brewed coffee, making it a beloved drink in coffee shops everywhere.

  • A breakfast staple for many
  • A smoother, less intense coffee option
  • A reflection of American preferences
  • Widely available globally
  • Gaining popularity in Italian cafes

Its cultural significance continues to grow, as the Americano serves not only as a comforting beverage but also as a symbol of American coffee innovation. The drink's popularity has contributed to the growth of regional water parks, which often feature coffee shops offering a variety of beverages.

Espresso Alternative Popularity

As coffee lovers seek alternatives to traditional espresso, the Americano has emerged as a popular choice, offering a milder yet flavorful experience.

Originating during World War II, American soldiers diluted espresso with hot water to create a drink that resembled what they were used to back home. This adjustment paved the way for the Americano's rise in cafes, where it became a breakfast staple and a go-to midday beverage.

Its popularity reflects a shift in coffee culture, accommodating diverse preferences while bridging the gap between the rich taste of espresso and the lighter profile of brewed coffee.

Today, you'll find the Americano embraced worldwide, showcasing its global appeal and versatility in the ever-evolving coffee landscape.

Variations of Americano

different types of americano

When it comes to Americanos, you'll find plenty of exciting variations to explore.

From Iced Americanos perfect for hot days to flavored options that satisfy your sweet tooth, there's something for everyone.

Whether you prefer it black, topped with whipped cream, or infused with nitrogen, each type offers a unique take on this classic coffee drink.

Types of Americano Variations

If you're looking to explore the delicious world of Americanos, you'll find several exciting variations that cater to different tastes and preferences.

Here are a few to take into account:

  • Iced Americano: A revitalizing variation served over ice, perfect for warm days.
  • Black Americano: Served without milk or sugar, it highlights the pure espresso flavor.
  • Americano con Panna: This decadent twist is topped with whipped cream for a rich texture.
  • Flavored Americanos: Incorporate syrups or flavorings for a customized taste experience.
  • Nitro Americano: Infused with nitrogen, it offers a creamy mouthfeel and unique aesthetic appeal.

Whether you're craving something bold or sweet, there's an Americano variation to suit your mood!

Flavor Enhancements and Additions

Exploring flavor enhancements can elevate your Americano experience to new heights.

You can customize your drink with flavored Americanos by adding syrups like vanilla, caramel, or hazelnut. If you prefer a bold taste, try a Black Americano, which showcases the rich flavor of espresso without any milk or sugar.

For a touch of indulgence, the Americano con Panna features a delightful topping of whipped cream, creating a creamy texture that complements the coffee.

If you're looking for something unique, Nitro Americanos offer a smooth, creamy mouthfeel thanks to nitrogen infusion.

Each variation allows you to discover new dimensions of flavor, making your Americano experience truly yours. Enjoy experimenting!

Serving Temperature Differences

While most people associate an Americano with a hot, rich flavor, there are several temperature variations that can enhance your coffee experience.

Consider these options for your next Americano:

  • Traditional Americano with hot water
  • Iced Americanos for a revitalizing cold drink
  • Americano con Panna topped with whipped cream
  • Nitro Americanos infused with nitrogen
  • Brewed coffee-inspired temperature adjustments

The classic Americano is served hot, blending robust espresso with hot water, similar to brewed coffee.

If you're looking for something cooler, iced Americanos are perfect for warm days.

For a creamy twist, enjoy an Americano con Panna, while Nitro Americanos serve a unique chilled experience without milk.

Adjusting the serving temperature can truly transform your Americano experience!

Breaking Down Pronunciation

understanding pronunciation nuances clearly

Pronouncing "americano" can be simplified by breaking it down into manageable sounds: uh + merr + uh + kaa + noh. Focus on the "mer" syllable, as it's essential for both UK and US pronunciations.

To enhance clarity, practice exaggerating each individual sound during your initial attempts. Repetition is key; the more you repeat these sounds, the more comfortable you'll become with your pronunciation.

Additionally, record yourself to listen for clarity, word stress, and intonation. This self-assessment allows for targeted improvement, ensuring you accurately pronounce "americano" over time.

With consistent practice and attention to these details, you'll master the pronunciation and impress others with your skills.

Frequently Asked Questions

How Do You Pronounce Americano in English?

When you want to pronounce "Americano" in English, focus on breaking it down phonetically. Start with "uh" followed by "mer," then "uh," and finish with "kaa" and "noh."

In US English, the emphasis is on "mer," while in UK English, it shifts slightly.

Practicing out loud and recording yourself can really help you refine your pronunciation.

Don't forget to check out online resources for extra guidance!

How Do You Pronounce Cafe Americano?

When you order a café Americano, you'll want to pronounce it as /ˌkæ.feɪ ə.məˈrɪ.kɑː.noʊ/.

Break it down into sounds: kay, fay, uh, mer, ih, kah, and noh. Emphasizing the "mer" syllable helps make it clear.

Just saying "Americano" works too, and most baristas will understand. Knowing the right pronunciation can make your coffee shop visits smoother and more enjoyable.

Why Is Americano Coffee Called Americano?

Imagine soldiers in a sun-soaked Italian café, craving a taste of home.

That's where the Americano was born.

You'll find it gets its name from American soldiers during World War II who diluted espresso with hot water, trying to recreate the milder coffee they loved back home.

This drink quickly became a favorite for those who found traditional espresso too intense, bridging the gap between espresso and drip coffee.

How Do You Say Americano in Australia?

In Australia, you say "Americano" with an emphasis on the "mer" syllable, sounding like /əˌmer.ɪˈkɑː.nəʊ/.

When ordering in a café, just ask for an Americano, and you'll likely get a strong, black coffee, as Australians prefer it with minimal additions.

You'll find that this pronunciation aligns closely with the UK variant, though your local accent might add a unique twist to it.

Enjoy your coffee experience!

Conclusion

Now that you've mastered the pronunciation of "Americano," you're ready to impress everyone from baristas to coffee aficionados! Picture yourself confidently ordering this delightful drink, and watch as jaws drop in awe, like you've just performed a magic trick. You'll become the coffee connoisseur of your circle, and friends will flock to you like moths to a flame, enthusiastic to bask in your caffeinated wisdom. So go ahead, sip that Americano, and let your barista dreams unfold!

Continue Reading

FAQs

How to Find Out Mac Address of Ecovacs

Check your Ecovacs device settings or router interface to uncover the MAC address, but there are even more methods worth exploring!

Published

on

locate ecovacs mac address

To find the MAC address of your Ecovacs device, check the device settings in the companion app. Open the app and look for network information or device details, where the MAC address will be displayed. Alternatively, access your router's admin interface by entering your router's IP address in a browser. Locate the list of connected devices, identify your Ecovacs by name, and you'll see the MAC address next to it. If you're having trouble, using network scanning tools like nmap can also help detect your device and its MAC address on the network. There's more to explore on this topic!

Key Takeaways

  • Check the Ecovacs app settings on your smartphone; the MAC address is usually displayed in the device information section.
  • Locate the MAC address on the Ecovacs device label, typically found on the bottom or back of the unit.
  • Access your router's admin interface to view connected devices; the MAC address will be listed next to the Ecovacs device.
  • Use network scanning tools like nmap to detect devices on your network and identify the MAC address of your Ecovacs device.
  • Refer to the manufacturer's documentation or website for specific instructions on locating the MAC address for your Ecovacs model.

Understanding MAC Addresses

identifying unique network identifiers

A MAC address is like a fingerprint for your devices on a network. It's a unique identifier assigned to network interfaces, consisting of six pairs of hexadecimal digits, such as 74:C2:46:DB:E6:73.

Each manufacturer has a specific range of MAC addresses, so you can use a MAC address lookup tool to identify the vendor, like Ecovacs.

To find your Ecovacs device's MAC address, check the settings or network information in its companion app or user interface.

Alternatively, you can use network scanning tools like nmap to detect all devices on your local network, including their MAC addresses.

Many routers also display connected devices with their MAC addresses in the router's admin interface, helping you identify your Ecovacs device.

Connecting Your Ecovacs Device

ecovacs device connection guide

When you're ready to connect your Ecovacs device, start by following the setup process in the app.

Make sure your Wi-Fi is ready, as the robot will need to connect to your network.

Once everything's set up, you'll be able to find the MAC address easily for future reference.

Device Setup Process

To successfully connect your Ecovacs device to your Wi-Fi network, start by ensuring that you have the Ecovacs app installed on your smartphone.

Open the app and follow the on-screen instructions to begin the setup process. During this setup, your device will be linked to your network, and the MAC address will be assigned to its network interface.

Once connected, you can often find the MAC address displayed in the device settings within the app. Alternatively, check the label on the bottom or back of your Ecovacs vacuum for the MAC address.

If your device is already connected, you can access your router's admin interface to view a list of connected devices, including the MAC address for your Ecovacs device.

Wi-Fi Connection Steps

Connecting your Ecovacs device to Wi-Fi is straightforward, especially if you have the Ecovacs app handy. Follow these steps to guarantee a smooth connection:

  • Make sure your smartphone is connected to the same Wi-Fi network.
  • Open the Ecovacs app and follow the on-screen instructions to add your device.
  • Once connected, check the settings or device information section for your device's MAC address.

If you can't find the MAC address in the app, look for a label on the device, usually found on the bottom or back.

Alternatively, access your router's admin interface to see a list of connected devices, where your Ecovacs robot's MAC address will be listed.

Accessing Router Admin Interface

router admin interface access

To access your router's admin interface, you'll first need to locate its IP address, which is usually 192.168.1.1 or 192.168.0.1.

Once you've got that, enter it into your web browser and log in using your username and password.

After you're in, you can easily find the connected devices and their MAC addresses.

Locate Router IP Address

Finding your router's IP address is essential for accessing its admin interface, which allows you to manage connected devices and settings.

Here are a few ways to locate it:

  • Check the default gateway setting in your computer's network configuration, often listed as '192.168.0.1' or '192.168.1.1'.
  • Use the command prompt (Windows) or terminal (macOS/Linux) and type 'ipconfig' or 'ifconfig' to find the default gateway.
  • Look for a sticker on your router that displays the default IP address, username, and password.

Once you have the IP address, you can enter it in a web browser's address bar while connected to your network and get ready to manage your router's settings!

Log Into Admin Panel

Before you can locate the MAC address of your Ecovacs device, you need to log into your router's admin panel.

Open a web browser and enter your router's IP address, which is typically 192.168.1.1 or 192.168.0.1. You'll need your router's admin credentials, often found on the back of the router or in the user manual if you haven't changed them.

Once logged in, look for the "Connected Devices" or "Device List" section. Here, you can see all devices currently connected to your network.

Find your Ecovacs device, which may be identified by its hostname or device type. The MAC address will be shown alongside the device name and IP address, formatted as pairs of alphanumeric characters separated by colons.

Locating Connected Devices

finding linked electronic devices

How can you easily locate your Ecovacs device among all the connected gadgets on your network? Start by accessing your router's admin interface.

You'll find a list of connected devices, where your Ecovacs will be displayed along with its MAC address.

To help you visualize the process, consider these steps:

  • Look for a dedicated section labeled "Connected Devices."
  • Identify your Ecovacs model, often listed by name or IP address.
  • Note the MAC address next to it for your records.

If you prefer, network scanning tools like nmap can also help you identify connected devices.

This way, you'll quickly find your Ecovacs device and its MAC address without much hassle.

Finding MAC Address in App

locate mac address app

Wondering where to find the MAC address of your Ecovacs device? Start by opening the Ecovacs app on your smartphone. Navigate to the device settings, where you'll likely find the "About" or "Device Info" section. This area usually displays the MAC address along with other important network details. You can also check the Wi-Fi settings in the app, as the MAC address might be listed next to the device's IP address.

Here's a quick overview:

Step Action
1. Open Ecovacs app Launch the app on your phone
2. Go to settings Navigate to device settings
3. Find "About" Look for the "About" section
4. Check Wi-Fi settings Verify the MAC address there
5. Look at the device Check the label on your Ecovacs

Using Manufacturer Resources

utilizing manufacturer s available resources

If you're still having trouble locating the MAC address of your Ecovacs device, manufacturer resources can be a great help.

Here are a few options you can explore:

  • Check the Settings Menu: Look under 'About' or 'Network' sections for the MAC address.
  • Scan QR Codes: Some models have a QR code on the device or packaging that leads directly to the MAC address.
  • Consult the User Manual: Your manual or the official website may provide model-specific instructions.

These resources can guide you effectively in finding the MAC address, ensuring your device connects smoothly to your home network.

Don't hesitate to utilize these tools for a hassle-free experience!

Troubleshooting Connection Issues

resolving network connectivity problems

While troubleshooting connection issues with your Ecovacs device, it's essential to first verify it's within range of your Wi-Fi network.

If your device isn't connecting, check that you've entered the correct Wi-Fi credentials. A simple typo could prevent a successful connection.

If it's still not working, consider resetting your Wi-Fi router and reconnecting your Ecovacs device.

You can also access your router's management interface to see if the device is listed among connected devices.

If you're tech-savvy, utilizing network scanning tools like nmap can help identify your device's MAC address, provided it's on the network.

Finally, confirm that any physical obstructions aren't interfering with the signal.

Monitoring Device Behavior

tracking device performance metrics

Monitoring the behavior of your Ecovacs device is essential for ensuring it operates efficiently and effectively. Keeping an eye on its performance can help you identify potential issues early.

Here are a few ways to monitor your device:

  • Check the mobile app: Regularly review the app for updates on cleaning cycles and battery status.
  • Inspect physical indicators: Look for lights or alerts on the device that may signal its operational state.
  • Use network scanning tools: Tools like nmap can help you track connectivity and confirm the MAC address, ensuring your device stays connected.

Additionally, incorporating early socialization techniques can promote a well-adjusted device performance in varying environments.

Enhancing Network Security

strengthening cybersecurity measures effectively

Enhancing network security is essential to protect your Ecovacs device and other connected gadgets from unauthorized access.

Start by regularly monitoring connected devices and their MAC addresses to spot any intruders. Utilize network scanning tools like nmap or Fing to map out all devices, ensuring you maintain a secure environment.

Change your default network name (SSID) and password to lower the risk of unauthorized connections. Implement MAC address filtering on your router to allow only your Ecovacs and other trusted devices.

Finally, keep your router's firmware updated and disable unnecessary services to close potential vulnerabilities.

Frequently Asked Questions

Is the Wifi Address the Same as the MAC Address?

Yes, the Wi-Fi address is the same as the MAC address.

It's a unique identifier assigned to your device's network interface, allowing it to communicate on the network.

You'll often see it formatted as six pairs of hexadecimal digits, separated by colons or hyphens.

Understanding this can help you manage your network effectively, ensuring that your devices connect properly and maintain secure communication with your router and other devices.

How to Connect Ecovacs Deebot to Wifi?

To connect your Ecovacs Deebot to Wi-Fi, start by ensuring it's fully charged and powered on.

Download the Ecovacs Home app and log in or create an account.

Tap "Add Device," select your Deebot model, and follow the prompts to enter your Wi-Fi credentials.

Make sure your smartphone's connected to the same 2.4 GHz network.

Once connected, the app will confirm the pairing, allowing you to manage your Deebot remotely.

How Do I Find the MAC Address of My Router Interface?

To find your router's MAC address, start by logging into its web interface using its IP address, usually 192.168.1.1 or 192.168.0.1.

Enter your admin credentials when prompted.

Once logged in, look for the "Status" or "Network" section; the MAC address is typically listed there.

You can also check specific sections for wired or wireless interfaces.

If you have physical access, the MAC address might be printed on a label on the router itself.

Conclusion

Now that you know how to find the MAC address of your Ecovacs device, you can easily manage your network and enhance security. Isn't it reassuring to have control over the devices connected to your Wi-Fi? Whether you're accessing your router's admin interface or checking within the Ecovacs app, you're empowered to monitor your device's behavior. Stay proactive and guarantee your smart home runs smoothly while keeping potential intruders at bay.

Continue Reading

FAQs

How to Factory Reset Ecovacs Deebot

Just follow these simple steps to factory reset your Ecovacs Deebot and restore its settings, but there’s more to discover for optimal performance!

Published

on

factory reset ecovacs deebot

To factory reset your Ecovacs Deebot, first make certain it's powered on and docked. Press and hold the "Power" button for about five seconds until you hear a voice prompt indicating the reset has started. Once you hear that, release the button. This process will erase your personalized settings and schedules, allowing you to set it up as a new device. If you run into any connection issues afterward, verify your Wi-Fi is on a 2.4GHz network and check for obstructions. There's much more you can optimize for your Deebot, so stick around for more tips!

Key Takeaways

  • Ensure the DEEBOT is powered on and docked before starting the reset process.
  • Press and hold the "Power" button for 5 seconds until you hear a voice prompt.
  • Release the "Power" button to initiate the factory reset.
  • After the reset, set up the DEEBOT as a new device.
  • For connectivity issues, ensure you are using a 2.4GHz Wi-Fi network.

Understanding Factory Reset

factory reset process explained

When you notice your ECOVACS DEEBOT N79 acting up or if you're planning to pass it on, understanding a factory reset is crucial.

A factory reset restores your robot vacuum to its original settings, erasing all customized preferences and schedules. This process is particularly useful if you're experiencing persistent issues like connectivity problems or the DEEBOT frequently entering circle mode due to mechanical malfunctions.

By resetting it, you can eliminate these frustrating glitches. If you're giving away or selling your DEEBOT, performing a factory reset guarantees all personal settings are cleared.

Just remember, after the reset, you'll need to reconnect it to your Wi-Fi and set up any cleaning schedules again, including using the auto button for convenience.

Step-by-Step Reset Process

reset procedure instructions explained

To reset your ECOVACS DEEBOT N79, follow these simple steps to guarantee a smooth process.

First, make sure your device is powered on and connected to its charging dock.

Next, press and hold the "Power" button for about 5 seconds. You'll hear a voice prompt indicating that the reset process has started.

Once you hear the prompt, release the "Power" button, and the DEEBOT will begin the factory reset.

Allow a few moments for the reset to complete; it'll revert to its original factory settings.

After the process is finished, you can set up the DEEBOT again as if it were a new device, ready to tackle your cleaning needs.

Troubleshooting Post-Reset Issues

post reset troubleshooting guidance needed

Even after successfully resetting your ECOVACS DEEBOT N79, you might encounter some issues that need addressing.

If it won't connect to Wi-Fi, make sure you're using a 2.4GHz network, as it doesn't support 5GHz.

If your DEEBOT enters circle mode, check for any mechanical obstructions or clean the driving wheels.

If the bumper doesn't click, inspect for blockages obstructing its function.

If the main brush isn't spinning, confirm it's correctly reinstalled and free from hair or debris.

Finally, if the side brushes aren't working well, clean them and their slots to remove dirt buildup.

Taking these steps can help you get your DEEBOT back to ideal performance after a reset.

Benefits of Factory Reset

restores device performance efficiency

After addressing any post-reset issues, you might consider the advantages of performing a factory reset on your ECOVACS DEEBOT N79.

A factory reset can effectively resolve persistent software issues, restoring your robot to its original settings and enhancing its performance. It clears stored schedules and preferences, giving you a clean slate to configure your DEEBOT as you like.

If you're facing Wi-Fi connectivity problems, a reset can help re-establish a stable connection to your network. Additionally, it eliminates glitches caused by previous user settings or updates.

Finally, if you're transferring ownership, a factory reset guarantees all personal data and settings are removed, providing the new user with a fresh start.

When to Contact Support

when to reach support

If your ECOVACS DEEBOT continues to act up despite a factory reset, it's time to reach out to customer support. Persistent issues might indicate deeper problems that need expert attention.

Here are some signs it's best to contact support:

  • The DEEBOT doesn't respond to commands or displays ongoing errors.
  • Cleaning efficiency remains low, even after regular maintenance and a reset.
  • The device frequently enters circle mode or has driving wheel issues that can't be resolved through cleaning.
  • You have concerns about warranty or product performance that troubleshooting hasn't addressed.

Don't hesitate to connect with customer support for tailored guidance and solutions to get your DEEBOT back in top shape.

Frequently Asked Questions

How to Factory Reset DEEBOT Vacuum?

To factory reset your DEEBOT vacuum, first, power it off completely.

Wait about 5 seconds, then turn it back on to start the reset process.

Make sure your DEEBOT is on a flat surface during this time for the best results.

Keep in mind that this will erase all your custom schedules and preferences, returning the vacuum to its default settings.

If problems continue, reach out to customer support for help.

How Do I Reset My Robot Vacuum to Factory Settings?

Did you know that over 40% of robot vacuum owners encounter issues that require a reset?

To reset your robot vacuum to factory settings, first, power it off and wait for 5 seconds.

Turn it back on, ensuring it's fully charged to avoid interruptions.

Remember, this will erase all previous settings, so you'll need to reconnect it to your Wi-Fi and set up your preferences again.

If problems persist, check troubleshooting steps or contact support.

How to Reset DEEBOT Without Remote?

To reset your DEEBOT without a remote, start by making sure it's powered on.

Press and hold the "Home" button for about five seconds until you hear a voice prompt indicating the reset process has begun.

Once you hear that prompt, release the button.

Your DEEBOT will then power off and back on, restoring its original factory settings.

You'll need to reconnect it to Wi-Fi and set your preferences again afterward.

How Do You Soft Reset Ecovacs?

To soft reset your ECOVACS, you'll first need to power off the device by pressing the power button.

Wait about 5 seconds until it fully shuts down.

Once it's off, press the power button again to turn it back on.

This simple process can help resolve minor issues without losing your settings.

You'll often find that this quick reset restores your robot vacuum's functionality and improves its performance.

Conclusion

So, you've factory reset your Ecovacs Deebot, thinking it'll magically solve all its quirks, right? It's almost like believing a cat will actually listen when you call it. While a reset can clear up some issues, remember that your robotic companion might still have its moments of rebellion. If it starts dancing around the room instead of cleaning, just smile and accept that even robots have a mind of their own.

Continue Reading

Trending