
TL;DR
A closet makes a decent vocal booth when paired with good placement and treatment. Moving your rig away from your workspace is the most effective noise reduction, and proper ventilation is crucial to prevent overheating. Acoustic dampening helps with reflections, but sealing gaps and decoupling are key for soundproofing.
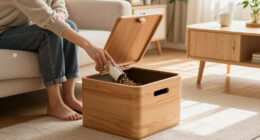
Ever tried to record vocals in a tiny closet and wondered why your voice sounds muddy or why the noise from your computer keeps sneaking in? The truth is, a closet can be a surprisingly good spot—if you know how to treat it. The secret isn’t just slapping foam everywhere; it’s about smart placement, understanding what noise is, and managing heat and sound leaks. You can learn more about acoustic dampening, placement, and the ‘Rig in the Closet’ setup.
This guide will walk you through the real essentials: how to dampen reflections, where to position your mic, and how to keep your rig cool. Get these right, and your closet becomes a cozy, quiet haven for voice work or even a tiny AI rig. Ready to turn that small space into a sound sanctuary? Let’s dive in.
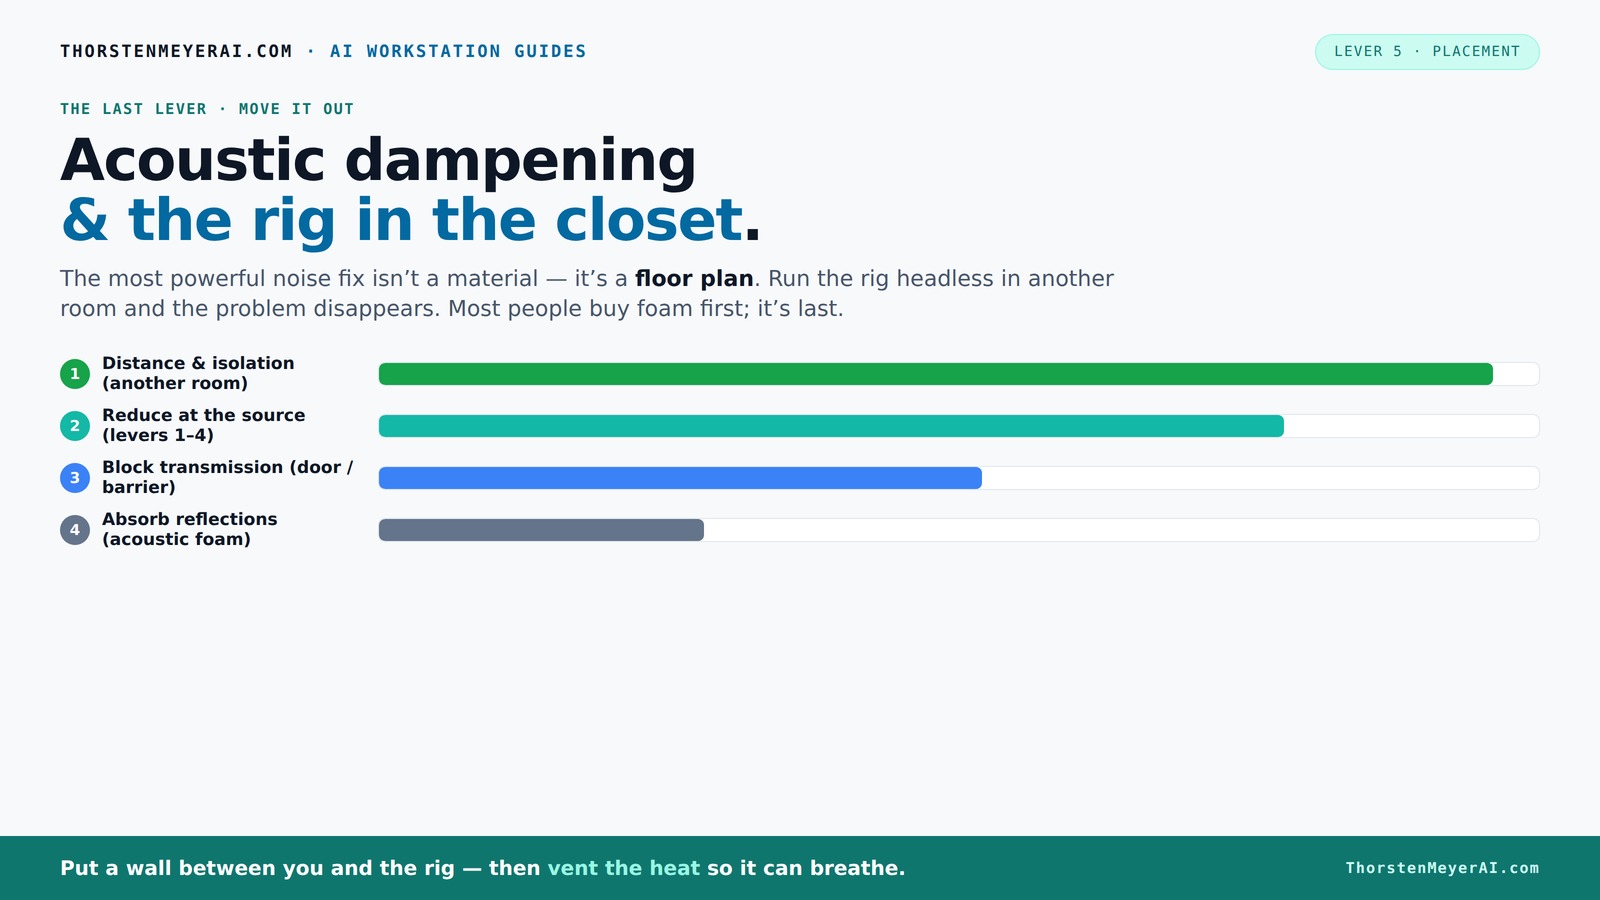
Acoustic dampening
& the rig in the closet.
The most powerful noise fix isn’t a material — it’s a floor plan. A rig you can’t hear because it’s in another room beats any amount of foam. Tap the approaches in Part 1 to see what actually works.
(another room)
(levers 1–4)
(door / barrier)
(acoustic foam)
Contain the noise, not the heat
Key Takeaways
- Moving your rig away from your workspace into another room is the most effective noise reduction method.
- Use a combination of acoustic dampening inside the closet and sealing gaps to prevent sound leaks.
- Proper placement of the mic and treatment materials dramatically improves recording clarity.
- Ventilation is critical—overheating ruins your setup, so plan for airflow if your closet is sealed.
- Bass traps are often overlooked but essential for controlling low-end muddiness in small spaces.

Focusound 52 Pack Acoustic Foam Panels 1" x 12" x 12" Sound Proof Foam Panles Soundproofing Noise Cancelling Wedge Panels for Home Office Recoding Studio with 300PCS Double-Side Adhesive
- Soundproofing Design: Triangular grooves for noise absorption
- Includes Adhesive Tape: 300pcs double-sided adhesive for easy installation
- Easy Shape Recovery: Soak in water to restore foam shape
As an affiliate, we earn on qualifying purchases.
As an affiliate, we earn on qualifying purchases.
What a 'Rig in the Closet' Really Means and Why It Works
When you hear 'rig in the closet,' think of a small, enclosed space transformed into a mini studio. It’s not just about hiding your gear; it’s about controlling how sound behaves inside that space. Closets are naturally sealed, which helps contain reflections and echoes, making the sound clearer. Plus, they're often away from your main workspace, reducing noise disturbance. For more tips, see acoustic dampening, placement, and the 'Rig in the Closet' setup.
Imagine recording vocals in a tiny closet—your voice bounces off the walls, creating a tight, warm sound. Or, if you’re running a high-power AI rig, placing it in a closet isolates the noise, so your workspace stays silent. It’s all about using the space smartly, with attention to reflection points and ventilation.
Why Closets Can Be Your Best Friend for Sound & Noise Control
Closets are naturally good for reducing sound reflections because of their small, enclosed volume. They trap echoes, creating a more controlled acoustic environment. Think of it like a tiny, natural echo chamber—perfect for vocal recordings. Plus, they keep noise from leaking out, especially if you add sealing materials. You can find more about this in acoustic dampening, placement, and the 'Rig in the Closet' setup.
But it’s not just about trapping sound; it’s about managing how sound escapes. If you position your mic correctly—close to your mouth and away from the door—you minimize leakage. Rugs on the floor and foam on the walls help tame unwanted reflections, making your recordings clearer and more professional. For detailed guidance, see acoustic dampening, placement, and the 'Rig in the Closet' setup.
Acoustic Dampening vs. Soundproofing — What’s the Difference and Why It Matters
Acoustic dampening and soundproofing are often confused, but they serve different purposes. Acoustic dampening reduces echo and harsh reflections within a space. Think of it like softening the sound so it doesn’t bounce around wildly. Materials like foam panels, blankets, and rugs absorb the sound waves, making your voice or recordings sound warmer and less echoey.
Soundproofing, on the other hand, blocks sound from escaping or entering the space. It’s about sealing gaps, adding mass to walls, and creating barriers that prevent noise leaks. You can have a room that sounds great inside but still leaks noise if it’s not sealed properly.
In a closet setup, focus on both: use foam to dampen reflections and weatherstripping or mass-loaded barriers to prevent sound leakage. According to experts, acoustic panels absorb sound but don’t block transmission; sealing gaps is what keeps sound confined.
Where to Place Your Microphone, Panels, and Blankets for Best Results
Placement is everything. Start by positioning your mic close to your mouth—about 6-12 inches—aimed at your voice, not the walls. This minimizes room reflections bouncing back into the mic. Next, treat the reflection points: the wall behind you, the ceiling, and the side walls.
Use acoustic panels on the wall behind your mic—this is often where the most echo occurs. For small closets, thick panels (2-inch or more) help tame low frequencies that build up in corners. Reflection filters around the mic can also reduce bounce-back, making your recordings clearer.
Don’t forget the floor! Placing a thick rug or carpet underneath your chair helps reduce reflections from the hard floor. And if your closet door leaks sound, add blankets or foam to seal gaps, preventing noise from escaping.
Handling Doors, Gaps, and Floor Reflections — Don’t Let Sound Escape or Bounce
Doors are often the weak point in a closet setup. A simple door creates a big sound leak. Seal gaps with weatherstripping or acoustic door seals—these can cut noise transmission significantly. For more tips, visit acoustic dampening, placement, and the 'Rig in the Closet' setup.
Small gaps around vents or electrical outlets also let sound escape. Use acoustic sealant to close these tiny openings. On the floor, hard surfaces reflect sound and contribute to boxiness. A thick rug or foam tiles absorb these reflections, smoothing out your sound.
In a real-world example, a YouTuber used a heavy blanket over the closet door and placed foam panels on the back wall. The result? A much cleaner, more contained sound with minimal leakage.
When and Why You Should Add Bass Traps in a Closet
Bass traps are crucial if your recordings sound boomy or muddy. Closets, especially small ones, tend to amplify low frequencies because of standing waves. If your voice or rig has a lot of low-end buildup, adding bass traps in the corners makes a big difference. Learn more about how to improve your sound at acoustic dampening, placement, and the 'Rig in the Closet' setup.
In small closets, thicker traps (4 inches or more) are best. They absorb the low frequencies that cause muddiness. You’ll notice clearer vocals and more balanced sound. If you’re recording instruments or using a high-power rig, bass traps help prevent that 'boxy' sound from taking over.
For example, a hobbyist added bass traps in two closet corners and saw an immediate drop in low-frequency boom, making vocals sound more natural and less muffled.
Common Mistakes That Ruin Your Closet Soundproofing & How to Fix Them
Many DIYers make simple errors that sabotage their setup. The biggest is relying solely on foam panels — they only dampen echo, not block sound leaks. Seal all gaps around doors, vents, and electrical outlets to prevent noise escape.
Another mistake is ignoring ventilation. Without proper airflow, your rig overheats. Use quiet fans or ducted ventilation to keep temperatures safe. Also, placing your mic too close to reflective surfaces causes harsh, boxy recordings.
Lastly, don’t forget about low-frequency buildup. If your sound is muddy or boomy, add bass traps. Small changes—like a thick rug or sealing gaps—can dramatically improve your results.
FAQs: Your Top Questions About Closet Rigs Answered
- Can I turn any closet into a vocal booth? Yes, but size, door sealing, and ventilation matter. Small closets work well if you treat reflection points and seal gaps.
- Is acoustic foam enough, or do I need panels and blankets? Foam dampens reflections but doesn’t block sound leaks. Combine with blankets or weatherstripping for best results.
- Where should I place panels in a closet recording setup? Focus on reflection points: behind you, ceiling, and side walls. Use thick panels in corners for low frequencies.
- Should I treat the corners, the door, or the wall behind the mic first? Prioritize the reflection points behind the mic, then corners for bass trapping, and finally the door for leakage.
- How do I stop sound from leaking through the closet door? Seal gaps with weatherstripping or acoustic door seals. Hang blankets or foam for extra sound blocking.
Conclusion
Turning a closet into a quiet, effective recording space isn’t magic — it’s about understanding sound behavior and making smart choices. Your best move? keep noise away from your workspace by relocating your rig if possible. If not, treat reflection points, seal gaps, and manage heat.
Think of your closet as a tiny, controlled environment. With some tweaks, it can deliver clear vocals and keep your noise where it belongs — outside your ears and out of your room. Now, go set up that perfect, quiet corner for your voice or your AI rig. The sound of success is just a few adjustments away.