Pour-over brewing's an art that elevates your coffee experience. Start with essential equipment like a burr grinder for consistent grounds, a gooseneck kettle for precision, and a pour-over brewer like the Hario V60. Use a standard 16:1 water-to-coffee ratio, adjusting based on your taste preferences. Rinse the filter to avoid unwanted flavors and measure about 30 grams of coffee, grinding it to a medium-fine texture. Master the blooming process by saturating the grounds first, allowing CO2 to escape for better flavor. Follow these steps, and you're on your way to brewing like a pro while discovering more nuances along the way!
Key Takeaways
- Invest in essential equipment like a burr grinder, pour-over brewer, and gooseneck kettle for optimal brewing results.
- Use a standard water-to-coffee ratio of 16:1 for balanced flavor, adjusting based on personal preference.
- Rinse filters with hot water before brewing to eliminate paper taste and preheat the brewer.
- Master the blooming process by allowing coffee to release trapped CO2 for even extraction and enhanced flavor.
- Maintain water temperature between 195°F and 205°F, using precise pouring techniques for consistent saturation.

Tea Kettle for Stovetop, Barista's Choice Gooseneck Pour Over with Flow Control, Food Grade Stainless Steel Water Kettle, Tea Pot for Home & Kitchen - Small 28oz, Silver
PERFECT GOOSENECK SPOUT: Chefbar pour over tea kettle is designed with a precise gooseneck spout nozzle to help...
As an affiliate, we earn on qualifying purchases.
Essential Equipment for Brewing

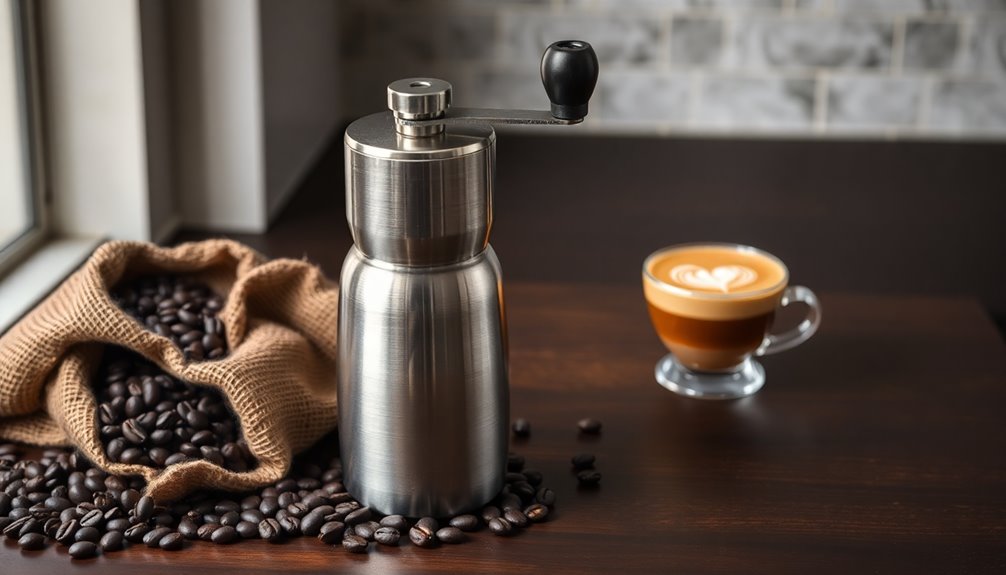
To brew the perfect pour-over coffee, having the right equipment is essential. Start with a burr grinder for consistent, even coffee grounds; it prevents uneven extraction and bitterness. The Baratza Encore is a solid, budget-friendly choice, while the Comandante C40 MK4 offers exceptional performance for those willing to invest. Additionally, investing in a quality grinder significantly impacts the final cup quality.
Next, choose a pour-over brewer like the Hario V60 or Chemex—consider size and flow control for even extraction. A gooseneck kettle is vital for precise water flow; stainless steel models retain heat well.
Finally, a digital scale and timer help you measure coffee and water accurately, ensuring a refined brewing process. With this equipment, you're on your way to crafting excellent pour-over coffee.

De'Longhi La Specialista Touch Espresso Machine with Grinder & Milk Frother – Cold Brew & Iced Coffee Maker, Burr Grinder, 10 Drink Presets, Compact Bean to Cup, Award-Winning Italian Design
Crafted by You. Perfected with Guidance: The La Specialista Touch semi-automatic espresso machine grinds, doses, brews, and froths...
As an affiliate, we earn on qualifying purchases.
Coffee and Water Ratios

Now that you have the right equipment, understanding coffee and water ratios is essential to brewing your ideal cup of pour-over coffee.
A standard starting point is a 16:1 water-to-coffee ratio—16 grams of water for every 1 gram of coffee. You can adjust this ratio between 15:1 and 17:1 based on your taste preferences. This method relies solely on gravity for extraction, ensuring a clean and flavorful cup of coffee.
Remember, a lower ratio yields a stronger cup, while a higher ratio produces a milder flavor. Specialty coffee standards advise using ratios from 1:15 to 1:17.
Feel free to experiment with different ratios to find what you love most.
Keep in mind that grind size and brew time also play a vital role in achieving your perfect taste.
Happy brewing!

ICEVIVAL Fully Automatic Coffee Machine, 20 Bar Coffee Maker with Grinder, Automatic Espresso Machine with 15 Grinding Levels, Touch Control for Cappuccino & Latte, Auto Self-Cleaning
Effortless Cafe Creations: Enjoy a wide selection of café favorites - from creamy latte to smooth Americano, all...
As an affiliate, we earn on qualifying purchases.
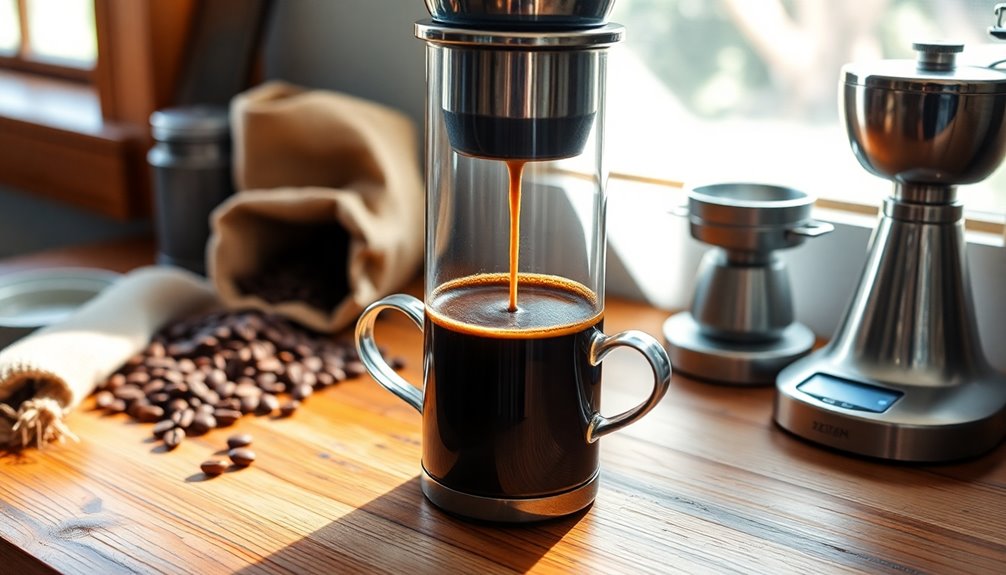
Step-by-Step Preparation

Starting your pour-over coffee journey involves a few essential steps that guarantee a flavorful brew.
First, gather your equipment: a grinder, a pour-over brewer like a Hario V60, a filter, a gooseneck kettle, and a digital scale. Rinse the filter with hot water to eliminate paper taste and preheat your brewer. Measure out about 30 grams of coffee, grinding it to a medium-fine texture. Attention to detail in measurements is crucial for enhancing brew quality. After measuring the coffee, place it in the filter and level it out. Then, begin the process of carefully pouring hot water over the grounds, making sure to saturate them consistently. This method of pour-over brewing allows for optimal extraction of flavors and aromas from the coffee. For those interested in brewing coffee with a moka pot, it involves a different process that produces a strong and rich flavor.
Place the brewer on the scale and zero it out. Heat your water to around 205°F. Begin with a small initial pour to saturate the grounds evenly. Maintain a steady pouring technique and total about 600 grams of water.
Use a timer to track the brewing process, ensuring it completes in 2-3 minutes.

Cafe Bueno Super Automatic Espresso Machine For Home - Coffee Machine With Grinder & Milk Frother For Latte, Cappuccino, Macchiato - Auto Wake & Sleep – All Milk Types
BARISTA QUALITY COFFEE - You can now make barista quality coffee, cappuccinos, lattes, espresso, and more in the...
As an affiliate, we earn on qualifying purchases.
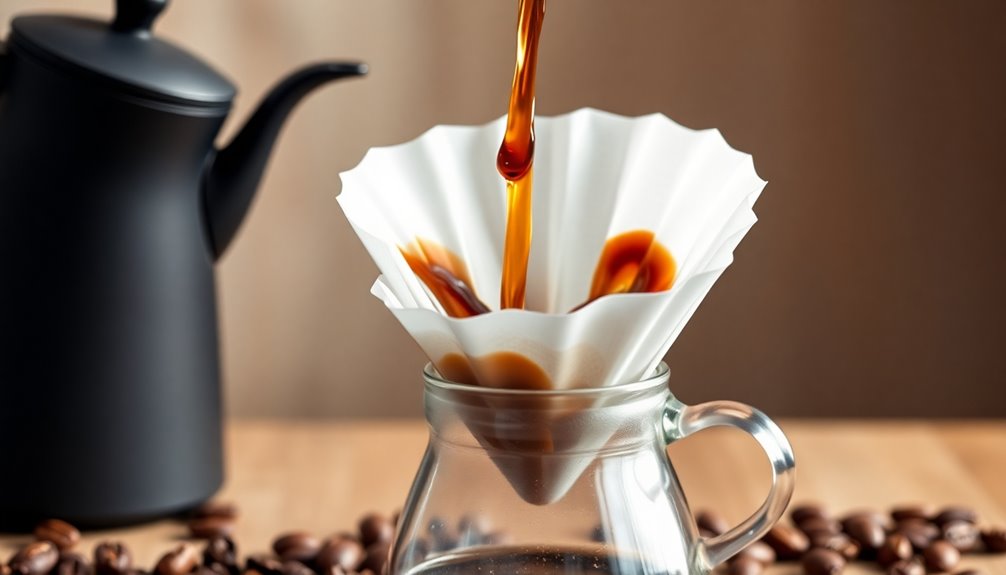
Mastering the Blooming Process

Why is the blooming process so essential in pour-over coffee brewing?
Blooming releases trapped CO2 in your coffee beans, a byproduct of roasting. If you skip this step, that gas can create unwanted bubbles, leading to uneven extraction and a less tasty cup. By ensuring your coffee grounds are evenly saturated, blooming helps prevent channeling, which can result in astringent flavors. Additionally, it allows volatile compounds that contribute to off-flavors to escape, enhancing the coffee's overall flavor and aroma. With blooming, you'll notice a richer and fuller taste compared to un-bloomed coffee. This controllable phase typically lasts 30 seconds to a minute, giving you the chance to fine-tune your brewing process for ideal results. The blooming process also creates a pre-infusion effect, ensuring uniform extraction of flavors and aromas.
Tips for Perfecting Your Brew

To achieve the perfect pour-over brew, paying attention to your equipment and technique is essential.
Start with a gooseneck kettle for precise pouring and maintain a temperature between 195°F and 205°F. Use filtered water to enhance flavor and rinse your paper filter to eliminate any unwanted taste. Utilizing filtered water is crucial for achieving the best flavor profiles.
A burr grinder is key; grind your beans just before brewing for freshness.
Pour in a steady, slow circular motion, focusing on even saturation. Aim for a total brew time of 2.5 to 4 minutes, adjusting grind size as needed.
For consistency, divide your pours into increments, beginning with the bloom phase. With practice, you'll refine your technique and enjoy the perfect cup every time.
Frequently Asked Questions
What Type of Coffee Beans Are Best for Pour-Over?
For pour-over, you'll want to choose freshly roasted coffee beans, ideally light to medium roasts. These preserve unique flavors and offer a balanced cup.
Look for beans roasted within a few weeks, allowing a degassing period if necessary. Experiment with different origins, like Ethiopian for fruity notes or Central American for chocolatey undertones.
Grinding them to a medium-fine consistency will enhance your brewing experience, so opt for whole beans and grind just before brewing.
How Long Should I Let My Coffee Brew?
You should let your coffee brew for about 3:00 minutes, but it can vary depending on grind size and bean type.
If you're using finer grinds, aim for 2:30 to 3:00 minutes; coarser grinds might need 3 to 4 minutes.
Adjusting the brew time helps balance flavors, so keep an eye on it.
Monitor your coffee bed and test different times to find what works best for your taste.
Can I Reuse Coffee Grounds for Brewing?
You shouldn't reuse coffee grounds for brewing.
When you do, you end up with a bitter, weak flavor that resembles dirty water. The best flavors and caffeine get extracted in the first brew, leaving little for a second attempt.
Instead, consider repurposing those used grounds for gardening or skincare. It's a much better option than trying to salvage them for another cup of coffee.
Trust me, your taste buds will thank you!
What Grind Size Is Best for Different Coffee Types?
The best grind size for different coffee types really depends on your brewing method.
For a V60, aim for a grind resembling fine sea salt.
Chemex works well with a medium-coarse grind, while the Kalita Wave is similar to the V60 but slightly coarser.
How Do I Clean My Pour-Over Equipment?
To clean your pour-over equipment, start by rinsing it with hot water after each use.
Wipe down the brewer with a clean towel, dispose of the filter and coffee grounds, and rinse any removable parts.
For deeper cleaning, mix one part vinegar with two parts water and run it through a brewing cycle.
Let it soak, then rinse thoroughly.
Always dry your equipment to prevent water spots and maintain its longevity.
Conclusion
Now that you've learned the essentials of pour-over brewing, it's time to put your skills into practice. Remember, experimenting with different coffee beans and water ratios can lead to your perfect cup. Don't rush the blooming process; it's key to revealing the flavors. With a little patience and practice, you'll be brewing like a pro in no time. Enjoy the journey and savor every sip of your delicious, handcrafted coffee!