Connect with us

Brewing Guides and Equipment

Nespresso Vertuo Vs Original Detailed Comparison

Get ready to discover the key differences between Nespresso Vertuo and Original lines that will transform your coffee experience—there’s much more to uncover!

Published

on

nespresso machine comparison guide

When comparing the Nespresso Vertuo and Original lines, think about what drinks you enjoy most. The Original offers classic espresso options, while the Vertuo caters to a variety of sizes, up to 14 oz. Both have unique designs; the Original is compact and portable, while the Vertuo is larger and incorporates advanced technology. Regarding flavor, Originals deliver a robust espresso, whereas Vertuos use Centrifusion for a smoother taste. Capsule compatibility differs too: Original allows for third-party options, but Vertuo locks you into Nespresso's exclusive capsules. There's so much more to explore, so keep going to find the perfect fit for you!

Key Takeaways

  • Drink Variety: Vertuo offers a wider range of drink sizes, while the Original line focuses on classic espresso drinks with limited customization.
  • Machine Size: Original machines are compact and portable, whereas Vertuo machines are larger and heavier, making them less space-efficient.
  • Extraction Method: Original uses a 19-bar system for rich espresso, while Vertuo employs Centrifusion technology for smoother coffee with less bitterness.
  • Capsule Compatibility: Original capsules are widely available from various vendors, while Vertuo capsules are exclusive to Nespresso, limiting user choices.
  • Milk Frothing: Vertuo requires an external frother like the Aeroccino, while some Original models may have built-in frothers for added convenience.

Types of Drinks Offered

variety of beverage options

When it comes to the types of drinks offered, Nespresso's Original and Vertuo lines cater to different preferences.

The Original line focuses on classic espresso drinks, including ristretto, espresso, lungo, and americano, with no options for larger beverages without manual water addition. You get a consistent flavor profile and a more authentic espresso experience, but customization is limited. Additionally, the Original machines are established for smaller cups, making them ideal for espresso and cappuccinos.

On the other hand, the Vertuo line provides a wider range of drink sizes, from espresso to 14 oz alto. It features pre-programmed settings and automatic adjustments based on pod barcodes, allowing for quicker and more versatile brewing. While the flavor profile leans towards a fruitier taste, the Original line remains the go-to for traditional espresso lovers. Vertuo's unique design and barcode system enhance brewing consistency, making it a great choice for those who enjoy a variety of coffee styles.

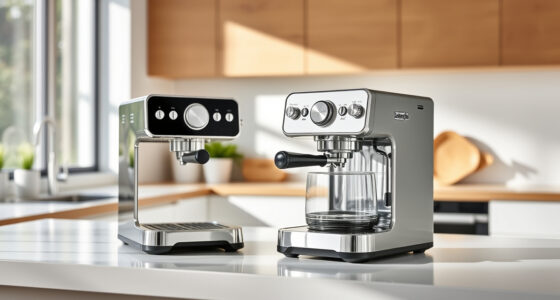
Machine Size and Design

machine dimensions and structure

While considering the right Nespresso machine for your kitchen, the differences in size and design between the Vertuo and Original lines play a crucial role.

Vertuo machines, like the Vertuo Next, are slightly larger and heavier, measuring H12.4 x W5.5 x D16.9 inches and weighing 8.8 lbs.

In contrast, the Original machines, such as the Essenza Mini, are compact, with dimensions of H12.8 x W3.3 x D8 inches and a weight of just over 5 lbs.

This makes Original machines more portable and ideal for smaller spaces. Additionally, Original machines are generally more affordable, making them a cost-effective choice for those with limited kitchen space.

While both lines feature stylish designs, Originals are more streamlined, whereas Vertuo machines incorporate advanced brewing technology, resulting in a bulkier build.

Consider your kitchen space carefully before deciding.

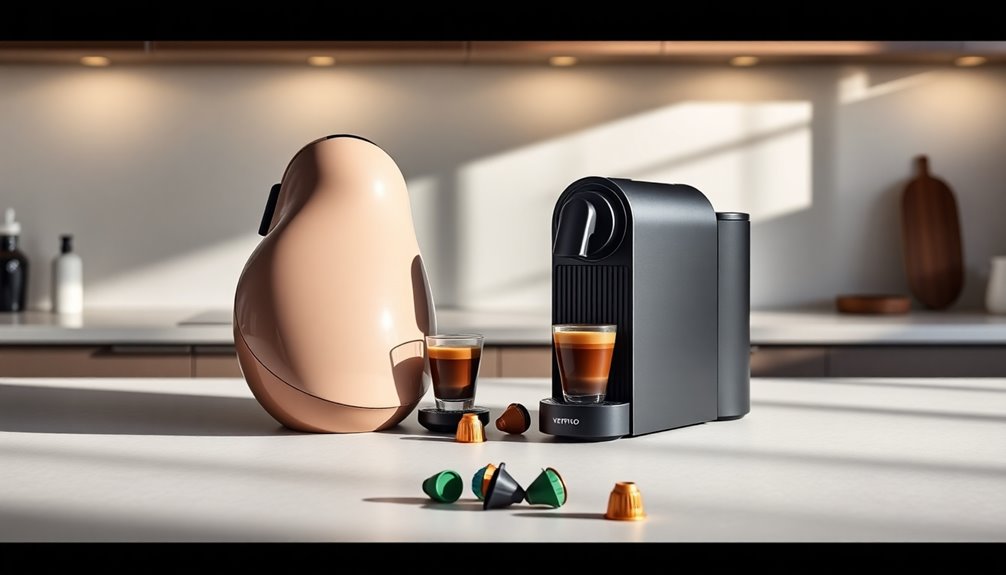
Extraction Method and Taste

extraction method influences taste

Understanding the extraction methods of Nespresso's Vertuo and Original lines can greatly impact your coffee experience.

The Original line employs a high-pressure 19-bar system, producing a rich, full-bodied espresso with a creamy crema in about 20 seconds. This method delivers a strong, intense flavor, ideal for traditional espresso lovers. Additionally, the Original line's capsules are over 35% cheaper than those used in the Vertuo line, making it a cost-effective choice for regular espresso drinkers.

In contrast, the Vertuo line uses Centrifusion technology, spinning the capsule at 7,000 RPM to create a smoother coffee with less bitterness. This results in a more versatile flavor profile, perfect for larger drinks.

Each line offers a distinct taste: Original for robust espresso and Vertuo for a subtler, richer coffee experience. Your choice will depend on your preferred flavor intensity and drink size.

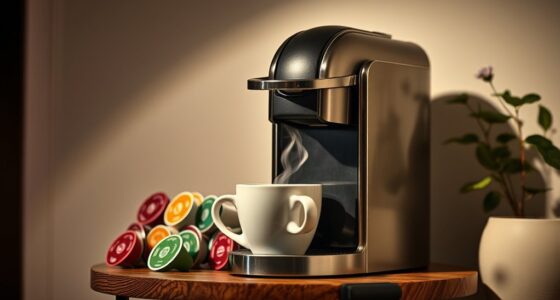
Capsule Variety and Compatibility

capsule types and compatibility

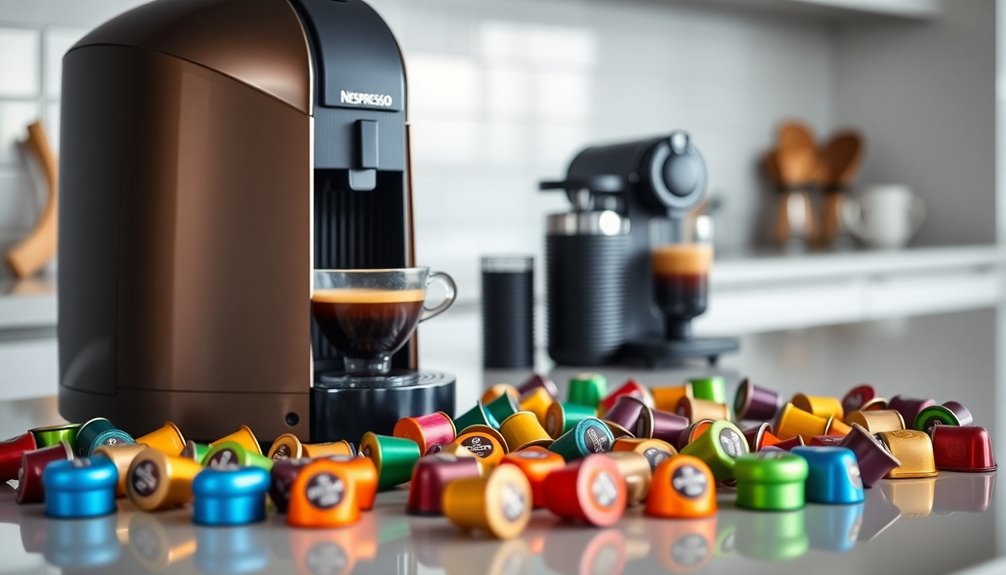
After appreciating the differences in extraction methods and taste, it's important to contemplate the variety and compatibility of coffee capsules for each Nespresso line.

With the OriginalLine, you enjoy a wide selection of capsules from Nespresso and numerous third-party vendors, including local roasters. This means you can find organic, Fair Trade, and even fill your own capsules. The expired patent has opened up the market for various options, making alternative capsules readily available for OriginalLine users. Additionally, the ability to choose from a range of investment options can enhance your coffee experience, similar to how diversifying investments can lead to better financial outcomes.

In contrast, VertuoLine capsules are exclusive to Nespresso, limiting your choices and locking you into their ecosystem. You can't use VertuoLine capsules in OriginalLine machines, and filling them with your own coffee isn't possible.

If variety's essential, OriginalLine is the clear winner.

Milk Frothing Options

milk frothing techniques available

When it comes to milk frothing options, Nespresso Vertuo models stand out for their flexibility, even though they don't include built-in frothers.

You'll need to pair your machine with an external frother, like the Aeroccino. This compact accessory can whip up both hot and cold foam in just 15 seconds, offering multiple temperature and consistency settings.

The Aeroccino operates independently, so you can heat milk without frothing it or create delightful froth for iced coffee. Simply fill it to the indicated line, press the button, and watch it work its magic. Additionally, the Vertuo models' ability to create hot milk foam enhances milk beverages for a creamier texture.

Plus, it's dishwasher-safe for easy cleanup. While Original models may offer built-in frothers, the Aeroccino makes the Vertuo experience versatile and convenient.

Frequently Asked Questions

How Do I Clean and Maintain Nespresso Machines?

To clean and maintain your Nespresso machine, start with external cleaning using a soft, damp cloth.

Clean the water tank and other removable parts with warm soapy water.

Regularly run the internal cleaning cycle by pressing the coffee button three times.

Descale your machine every three months or after 300 pods using a Nespresso descaling solution.

Finally, create a cleaning schedule to keep everything in top shape and guarantee great-tasting coffee.

Can I Use Third-Party Capsules With Vertuo Machines?

No, you can't use third-party capsules with Vertuo machines.

The proprietary design includes a barcode on each Vertuo pod that the machine reads, ensuring only Nespresso capsules work.

This means you're limited to what Nespresso offers, which can be frustrating if you're looking for more variety or better prices.

If you're interested in exploring different brands and flavors, you might want to contemplate an OriginalLine machine instead.

What Is the Warranty Period for Nespresso Machines?

The warranty period for Nespresso machines usually lasts 1 or 2 years, depending on the model you choose. It starts from the purchase date, so keep your receipt handy! Don’t forget to register your Nespresso machine warranty online to ensure that you are eligible for any repairs or replacements within the warranty period. The Nespresso machine warranty registration process is quick and easy, and can be completed on the Nespresso website. Once registered, you can have peace of mind knowing that your machine is covered in case of any issues during the warranty period.

The warranty covers defects in materials and workmanship but doesn't apply if you've misused the machine or failed to follow instructions.

How Long Does It Take to Brew a Cup?

When you're brewing a cup of coffee, the time it takes can vary.

For a quick espresso, you might wait around 35 to 52 seconds. If you opt for a larger coffee, expect it to take about 90 to 105 seconds.

Heating the machine adds another 20 to 30 seconds, so overall, you'll usually be enjoying your drink in just a couple of minutes.

It's all about what you choose!

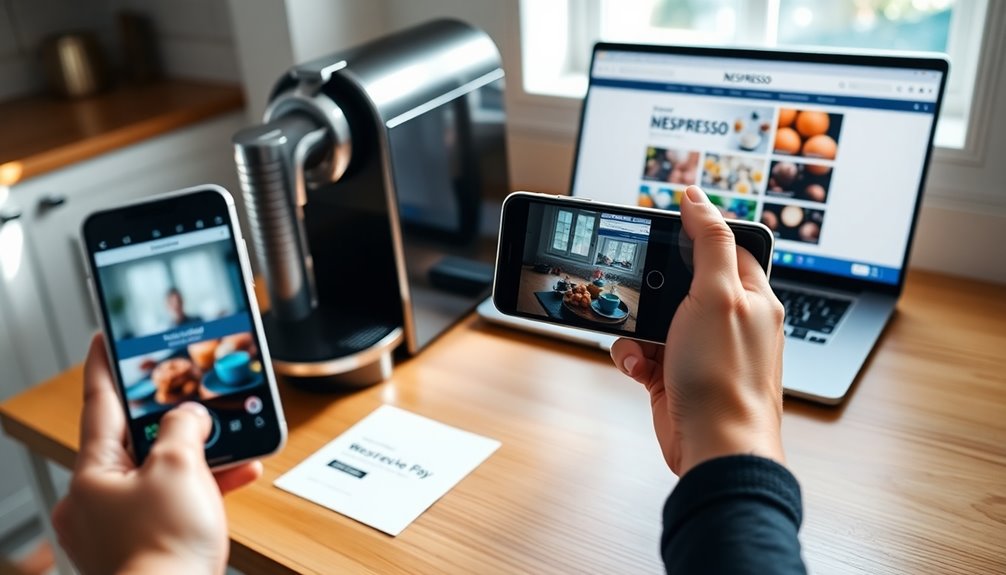
Are There Subscription Services for Nespresso Capsules?

Yes, there are subscription services for Nespresso capsules.

You can choose Nespresso's official subscription, which offers discounts on coffee capsules, or explore third-party options from companies like Unique Coffee Roasters and illy.

Many subscriptions even provide trial options, allowing you to test their service.

Deliveries are tailored to your consumption, so you won't run out of coffee.

Just remember to check compatibility with your machine before signing up!

Conclusion

In choosing between the Nespresso Vertuo and Original, it really comes down to your personal preferences. If you love a variety of drinks and a sleek design, the Vertuo might be your best bet. However, if you prefer classic espresso and more capsule options, the Original could be the way to go. Consider your drink choices, space, and frothing needs, and you'll find the perfect machine to elevate your coffee experience at home.

Brewing Guides and Equipment

The Perfect Milk Frothing Pitcher for Latte Art

Navigate the world of milk frothing pitchers to discover the key features that elevate your latte art—your creativity awaits a perfect match!

Published

on

ideal pitcher for frothing

To find the perfect milk frothing pitcher for your latte art, consider size, design, and material. A 15oz stainless steel pitcher is ideal for 6 to 10oz drinks, balancing control and capacity. Look for a conical shape to enhance steam circulation, and choose a pitcher with a well-designed spout to help you create intricate patterns. Regular maintenance is essential, so clean it after each use and air dry it upside down. With the right tools and techniques, you'll reveal your potential in latte artistry. There's much more to explore on how to master your frothing skills and elevate your creations.

Key Takeaways

  • Choose a pitcher size based on your drink servings; 15oz is versatile for 6-10oz drinks, while 22oz suits larger beverages.
  • Select a pitcher made of #304 stainless steel for durability and optimal heat retention during frothing.
  • Look for ergonomic designs and specialized spouts for enhanced pouring control and intricate latte art creation.
  • Ensure the pitcher has a conical shape to promote better steam circulation and achieve silky microfoam.
  • Regular maintenance, including cleaning and drying techniques, is essential for maintaining the pitcher's performance and longevity.

Understanding Pitcher Sizes

pitcher size variations explained

When it comes to milk frothing pitchers, sizes matter. Choosing the right size can make all the difference in your coffee experience.

If you're working with smaller cups, a 10oz milk pitcher is perfect for 6oz servings. For slightly larger cups, the 15oz option accommodates 6-10oz drinks nicely.

When crafting lattes or cappuccinos, the 17oz pitcher works well for 8-12oz cups, ensuring you achieve that creamy texture.

If you often serve larger beverages or multiple drinks, the 22oz pitcher is your go-to for 12-16oz cups.

Having a variety of milk pitchers is essential for handling different drink orders efficiently while maintaining quality.

Key Design Features

essential design characteristics highlighted

When choosing a milk frothing pitcher, the shape of the spout plays an essential role in your pouring technique and the art you create.

You'll also want to take into account the material for durability and how the size fits your frothing needs.

Understanding these key design features can elevate your latte art to the next level.

Spout Shape Importance

The spout shape of a milk frothing pitcher plays an essential role in your ability to create stunning latte art. A well-designed spout allows for precision and control, which are important for intricate designs.

For example, the Kimera Tri-Spout innovation enhances your pouring techniques, enabling you to craft high-definition latte art with ease. If you're aiming for dramatic flow and versatility, a wide spout design is key for contrasting colors and defined patterns.

Additionally, pitchers with a conical trunk shape promote better steam circulation and milk texture, significant for successful frothed milk.

Ultimately, choosing a specialized milk frothing pitcher gives you greater sensitivity during pouring, helping you achieve those complex designs requiring skill and precision.

Material and Durability

Choosing the right material for your milk frothing pitcher considerably impacts its durability and performance. For best results, look for a pitcher made from #304 stainless steel, which is rust-proof, stain-proof, and crash-proof. A non-stick Teflon coating simplifies cleaning, preventing milk residue from accumulating.

Feature Description
Material #304 Stainless Steel
Coating Non-stick Teflon
Dishwasher Safe Yes

An ergonomic design enhances comfort, allowing you to maintain control while pouring. Plus, a well-shaped spout is essential for crafting intricate latte art, making a high-quality milk pitcher a key tool in your barista arsenal. Invest wisely for lasting performance!

Size Versatility Considerations

A milk frothing pitcher's size can greatly impact your latte art experience. Choosing the right size guarantees you can create beautiful designs while maintaining efficiency.

Consider these options when selecting your milk frothing pitchers:

  1. 10oz – Perfect for single espresso shots or small cappuccinos.
  2. 15oz – Ideal for frothing milk for 6-10oz cups, striking a balance between size and control.
  3. 17oz – Offers flexibility for both medium drinks and quick service.
  4. 22oz – Best for larger 12-16oz servings, accommodating busy environments.

The conical shape of these pitchers enhances frothing and pouring control, elevating your latte art's quality.

Having multiple sizes at your disposal lets you respond quickly to varied customer demands, guaranteeing you always deliver the perfect cup.

Maintenance Tips

regular upkeep and care

To keep your milk frothing pitcher in top shape, clean it with soap and warm water after every use.

Make certain to air dry it upside down to prevent any residual moisture from causing issues.

Cleaning After Each Use

Cleaning your milk frothing pitcher right after use is crucial for its longevity and performance. By doing so, you prevent milk fats, proteins, and sugars from hardening inside, which can lead to corrosion.

Follow these steps for effective cleaning:

  1. Rinse the pitcher with warm water to remove any milk residue.
  2. Use a few drops of soap and a non-abrasive sponge to clean the interior thoroughly.
  3. Rinse again with warm water to guarantee no soap remains.
  4. Air dry the pitcher upside down to avoid water spots and enhance its lifespan.

Regular cleaning not only guarantees hygiene but also keeps your pitcher free from lingering odors, preserving the quality of your future beverages.

Proper Drying Techniques

While it might be tempting to simply toss your milk frothing pitcher in the cupboard after washing, proper drying techniques are vital for maintaining its condition. Always air dry your milk frothing pitchers upside down to prevent water spots and promote thorough drying. This method helps extend the pitcher's longevity and avoids buildup that can harden over time. Here's a quick guide to drying your pitcher:

Step Description
1. Air Dry Place pitcher upside down on a rack.
2. Wipe Exterior Use a clean cloth to remove moisture.
3. Check Moisture Verify there's no remaining moisture.
4. Store Properly Keep in a dry, well-ventilated area.
5. Regular Checks Inspect before each use for hygiene.

Following these tips will keep your pitcher in top shape!

Avoiding Milk Residue

Maintaining a clean milk frothing pitcher is key to avoiding milk residue that can affect your latte art and flavor. Here are some essential tips to keep your pitcher in top shape:

  1. Clean immediately: Rinse your pitcher with warm water and soap right after use to eliminate milk fats, proteins, and sugars.
  2. Inspect the spout: Regularly check and clean the spout to guarantee no residual milk affects your drinks.
  3. Air dry upside down: Allow your pitcher to dry upside down to prevent water spots and extend its lifespan.
  4. Use dedicated pitchers: Consider having separate pitchers for different types of milk to maintain flavor integrity and avoid cross-contamination.

Innovative Pitching Techniques

creative presentation strategies explored

To master innovative pitching techniques, you need to explore the unique design features of specialized pitchers like the Kimera Tri-Spout. This pitcher enhances your control, allowing for intricate latte art designs.

Using a high flow rate pitcher, such as the WPM #30, lets you achieve dramatic pouring styles that improve definition and contrast in your art. The conical trunk shape of frothing pitchers promotes efficient milk frothing, essential for crafting the perfect microfoam texture.

Additionally, advanced pitchers are ergonomically designed for both free pouring and etching techniques, enabling you to create complex designs with precision.

With continuous practice using various pouring angles and pitcher shapes, you'll refine your skills and develop a unique latte art style that stands out.

Pricing and Availability

cost and stock information

When you're looking to elevate your latte art game, understanding pricing and availability for milk frothing pitchers is essential.

Here are some great options to evaluate:

  1. 15oz Stainless Steel Latte Art Pitcher – Priced at $36.50, it's perfect for both professionals and home baristas.
  2. Blankenberg Latte Art Pitcher Bundle – Available for $40.00, this bundle includes multiple pitchers of different sizes for versatility.
  3. Latte Art Gift Set – Currently on sale for $71.00 (regularly $74.00), it's ideal for gifting or personal use.
  4. Monochrome Handleless Pitchers – Featuring shimmering coatings and colors like Cinder and Creamsicle, these stylish options will enhance your collection.

With these choices, you'll find the perfect pitcher to suit your needs.

Essential Tools for Latte Artists

latte art essential tools

As you plunge into the world of latte art, having the right tools at your disposal can make all the difference in perfecting your technique.

Start with high-quality milk frothers to create silky microfoam, essential for that ideal texture. Invest in specialized milk frothing pitchers, available in various sizes, to enhance your pouring control.

The Cyclone WDT Tool guarantees perfect espresso extraction, while the Force Tamper assures consistency in your coffee preparation.

To take your art further, consider advanced pitchers with unique spout designs, like the Kimera Tri-Spout, for intricate pouring techniques.

Finally, practice using wooden latte art etching pens to refine your ability to create complex designs like swans and geometric shapes.

Trends in Latte Art

latte art design trends

Latte art is evolving rapidly, influenced by various trends that reflect both consumer preferences and barista creativity.

As you explore these trends, you'll notice how they shape the way you enjoy your coffee:

  1. Plant-based Milks: Oat and almond milks are changing how we froth, with specialized pitchers improving texture.
  2. Social Media Influence: Platforms like Instagram inspire baristas to craft eye-catching designs to attract followers.
  3. Barista Competitions: These events showcase intricate latte art, pushing innovations in pitcher design for complex techniques.
  4. Customization: Personalized latte art is on the rise, allowing baristas to express individuality while catering to consumer tastes.

These trends highlight how latte art continues to blend creativity with consumer demands, making each cup a unique experience.

Frequently Asked Questions

What Pitcher Is Good for Latte Art?

When you're looking for a pitcher that's great for latte art, consider one that holds around 15oz. This size works well with 6-10oz cups, giving you enough control for detailed designs.

A pitcher made from 304 stainless steel is durable and maintains milk temperature. Look for features like a conical shape for ideal frothing and pouring, and if you're in a busy café, color-coded pitchers can help streamline your workflow.

How Do You Froth the Perfect Milk for Latte Art?

Did you know that using high-fat milk can increase the creaminess of your microfoam by up to 30%?

To froth the perfect milk for latte art, start with high-fat milk and heat it to around 150-155°F (65-68°C).

Use a conical frothing pitcher for better control, and employ the free pouring technique to layer your milk.

Practice consistently to improve your hand stability and speed, mastering intricate designs like rosettas and tulips.

What Size Milk Pitcher for Latte Art?

When choosing a milk pitcher for latte art, consider the size based on your cup dimensions.

A 15oz pitcher works great for 6oz or 10oz cups, while a 17oz pitcher suits 8oz to 12oz cups, giving you versatility.

If you're serving larger drinks, a 22oz pitcher is best for 12oz to 16oz cups.

Each size helps you create intricate designs without overflow, so pick one that matches your serving style!

What Is the Best Shape for a Milk Frothing Pitcher?

The best shape for a milk frothing pitcher is a conical trunk design.

This shape gives you better control over the milk flow, which is essential for pouring. A narrower spout allows for precise pouring, enabling you to create detailed designs.

You'll also want a wide base for ideal frothing and a rounded body to help achieve that creamy microfoam.

An ergonomic handle will guarantee you maintain comfort and stability while pouring.

Conclusion

In the world of latte art, the right frothing pitcher transforms a simple cup of coffee into a masterpiece. While a larger pitcher offers room for creativity, a smaller one demands precision and control. You can elevate your skills with the perfect balance of size and design, turning each pour into a stunning visual treat. Embrace innovation and tradition, and let your passion for latte art shine through every meticulously crafted cup. Your journey awaits—so pour with purpose!

Continue Reading

Brewing Guides and Equipment

How to Use Nespresso Aeroccino

Learn the simple steps to master your Nespresso Aeroccino and unlock the secret to perfect milk froth for your coffee creations.

Published

on

make frothy milk quickly

Using a Nespresso Aeroccino is easy and fun. Start by pouring cold, pasteurized milk into the jug, filling it to the lower line for hot froth. Press the button, and in about 15 seconds, you'll have creamy foam ready to enhance your coffee. For cold foam, fill it only to the upper line, and enjoy the results. Experiment with different milk types for varied flavors and textures. Clean your frother after each use, ensuring it remains in great shape. There's plenty more to discover about the Aeroccino to help you master your milk frothing experience.

Key Takeaways

  • Fill the Aeroccino jug with cold, pasteurized milk up to the designated indicator line for optimal frothing results.
  • For Aeroccino3, press the button to heat and froth the milk, achieving creamy foam in about 15 seconds.
  • Use the Barista Milk Frother app to select frothing options for diverse beverages, including both hot and cold milk froth.
  • Clean the Aeroccino after each use by rinsing the jug and whisk under running water; avoid using abrasive materials.
  • Regularly maintain the Aeroccino by ensuring all components are dry and properly assembled before storing to prevent technical issues.

Overview of Nespresso Aeroccino

nespresso milk frother overview

The Nespresso Aeroccino is your gateway to effortlessly crafting café-quality beverages at home. This compact milk frother is designed to create both hot and cold creamy foam, elevating your espresso drinks in just moments.

With a simple push of a button, you can achieve light, velvety froth in only 15 seconds for hot milk, or hold the button longer for cold foam. Its impressive max capacity of 8.2 oz for hot milk and 4 oz for froth accommodates various coffee beverage sizes.

Plus, the Aeroccino is compatible with any Nespresso machine, making it a versatile accessory for coffee lovers. Forget bulky cappuccino machines—this sleek design brings the barista experience right into your kitchen, no skills required.

Types of Nespresso Frothers

nespresso frother variations available

Nespresso frothers come in three main types, each catering to different preferences and frothing needs.

The Aeroccino3 is perfect for those seeking quick results, allowing you to prepare both hot milk and cold foam with just a button press.

If you want more versatility, the Aeroccino4 offers two types of hot milk froth and cold foam options, along with an ergonomic design for easy handling.

For the adventurous, the Barista Milk Frother pairs with an app, letting you explore a variety of recipes and frothing techniques.

  • Aeroccino3: Fast and user-friendly
  • Aeroccino4: Versatile with ergonomic design
  • Barista Milk Frother: App integration for creativity
  • All frothers: Compatible with various milk types

Choosing the Right Milk

selecting the best dairy

When it comes to choosing the right milk for your Nespresso Aeroccino, the type you pick can make a big difference in your drink's texture and flavor.

Whole dairy milk creates a rich, creamy foam, while low-fat or skim milk gives you a lighter option.

If you prefer non-dairy alternatives, options like soy, almond, and oat milk can also froth beautifully—just make sure they're cold for the best results.

Best Milk Types

Choosing the right milk can greatly enhance your frothing experience with the Nespresso Aeroccino. The type of milk you choose affects the texture and richness of your cold milk froth.

Here are some options to take into account:

  • Whole milk: Produces thick, creamy foam ideal for lattes and cappuccinos.
  • Low-fat and skim milk: Creates lighter froth with larger bubbles for a less rich texture.
  • Pasteurized milk: Recommended for stable foam consistency and better results.
  • Non-dairy alternatives: Soy, almond, and oat milk can also be frothed; opt for refrigerated versions for best performance.

Experimenting with different milk types lets you customize your beverage experience and discover your perfect frother match!

Non-Dairy Alternatives

If you're looking to explore non-dairy alternatives for frothing, you'll find a range of options that can elevate your coffee experience.

Soy milk is a standout choice, creating a creamy foam similar to whole dairy milk. Just make sure to choose barista-style soy milk for the best frothing results.

Almond milk can also work, but it generally produces a lighter foam with larger bubbles, so testing different brands is essential.

Oat milk provides a rich, creamy texture that froths beautifully and adds natural sweetness to your drink.

When selecting non-dairy alternatives, avoid options with added sugars or stabilizers, as they can hinder foam quality.

Additionally, using raw food diets can enhance your overall health, making your coffee experience even more enjoyable.

Enjoy your frothy creations with these delightful alternatives!

Using Aeroccino3 for Hot Milk

aeroccino3 hot milk preparation

To prepare milk for frothing with the Aeroccino3, fill the jug to the lower indicator line and make sure it's dry and properly positioned on the base.

Once you're set, press the button to start heating and frothing—watch for the red light to know it's working.

In just about 15 seconds, you'll have light, creamy hot foam ready for your coffee.

Preparing Milk for Frothing

For the perfect frothy milk, start by filling your Aeroccino3 to the lower indicator line with cold, pasteurized milk.

Using the right milk is essential for the best results. Remember to:

  • Fill the milk frother carefully to avoid spills.
  • Use cold, pasteurized milk for ideal froth quality.
  • Position the jug correctly in the base for proper heating.
  • Press the button to activate the frothing process.

Once you've added the milk and positioned everything correctly, just press the button, and watch as the Aeroccino3 efficiently creates light, creamy foam in about 15 seconds.

It's quick and easy, making your beverage preparation a breeze! Enjoy your delicious frothy milk!

Operating the Aeroccino3

Now that you've prepared your milk for frothing, operating the Aeroccino3 for hot milk is straightforward.

First, fill the jug to the maximum line indicated inside. This guarantees ideal frothing and steaming.

If you're using milk at refrigerated temperature, pour it in and then press the button on the device. The red light will illuminate, indicating that the milk is heating.

In just 15 seconds, you'll have light, creamy foam ready for your favorite beverage.

Once you're done, don't forget to clean the Aeroccino3 after each use. This prevents milk residue buildup, which can affect performance and flavor.

Enjoy your perfectly heated milk with ease!

Using Aeroccino4 for Hot Milk

frothing milk with aeroccino4

If you're looking to create perfectly heated milk for your favorite beverages, using the Aeroccino4 is a simple and efficient option.

Start by filling the container to the maximum capacity of 8.2 ounces, ensuring you don't exceed the line for ideal hot milk without froth.

Press the button once, and the red light will show that heating has started, achieving warm milk in about 70 seconds.

Once heated, the Aeroccino4 automatically stops, allowing you to pour the hot milk directly into your drink for a creamy texture.

  • Use fresh, cold milk for the best flavor.
  • The maximum capacity is 8.2 ounces.
  • It heats milk without froth.
  • Enjoy your beverages with the perfect cream texture.

Using Barista Milk Frother

frothing milk with barista

While enjoying your favorite coffee drinks, the Barista Milk Frother makes it easy to achieve barista-quality froth at home. Simply pour your milk to the indicated level, choose your frothing option on the app, and hit start for quick results. This frother prepares both hot and cold milk froth, perfect for cappuccinos and lattes.

Frothing Option Milk Type Result
Hot Froth Whole Milk Creamy & Thick
Cold Froth Almond Milk Light & Airy
Hot Froth Oat Milk Rich & Velvety
Cold Froth Soy Milk Smooth & Silky
Hot Froth Skim Milk Light & Fluffy

Cleaning is easy, as all parts except the base are dishwasher safe. Enjoy your frothy creations!

Frothing Techniques and Tips

frothing milk for beverages

When it comes to frothing, choosing the right milk is key to achieving your desired foam texture.

You'll want to take into account the temperature of your milk as well, since colder milk often leads to better frothing results.

Plus, mastering techniques for latte art can elevate your coffee experience, so let's explore how to perfect your frothing skills.

Optimal Milk Selection

Selecting the right milk is essential for achieving the perfect froth with your Nespresso Aeroccino. Whole dairy milk is your best option for a thick, creamy foam thanks to its higher fat content.

If you prefer non-dairy alternatives, consider soy, almond, or oat milk, but make sure they're refrigerated for ideal frothing.

  • Fill the milk to the indicated level on the jug to prevent overflow.
  • Experiment with different milk types for unique frothing results.
  • Pour the frothed milk immediately after preparation to maintain its quality.
  • Remember, low-fat and skim milk produce lighter foam with larger bubbles.

With these tips, you'll enjoy the best frothed milk for your coffee creations!

Frothing Temperature Considerations

To achieve the finest froth with your Nespresso Aeroccino, it's crucial to start with cold, pasteurized milk. The temperature of your milk greatly impacts the foam quality; colder milk creates denser, creamier froth.

Whole milk is your go-to for richness, while low-fat and skim options will yield lighter foam with larger bubbles. If you prefer non-dairy alternatives, soy, almond, and oat milk can be frothed, but results vary based on their formulations.

For best results, fill the frother up to one of the indicated levels and froth for about 15 seconds. Remember to pour immediately after frothing to maintain the ideal texture and temperature, ensuring your coffee drinks taste their best.

Techniques for Latte Art

Creating beautiful latte art is an exciting way to elevate your coffee experience, and with the right techniques, you can make stunning designs that impress.

Start by using cold, fresh whole dairy milk for a thicker, creamier foam. Pour slowly into your espresso at a slight angle, beginning high and lowering as you fill the cup.

Practice various pouring techniques to master your skills:

  • Use circular motions for rosettas
  • Try a straight pour for hearts
  • Experiment with different heights for diverse effects
  • Always clean the Aeroccino after use to maintain froth quality

With patience and practice, you'll create delightful latte art that showcases your barista skills! Additionally, using high-performance models can enhance your overall coffee experience by ensuring the best milk frothing quality.

Don't forget the whisk and spring for perfect frothing!

Cleaning the Aeroccino3

cleaning the aeroccino3 device

Cleaning the Aeroccino3 after each use is essential to prevent milk residue buildup and guarantee peak performance.

Start by rinsing the jug and whisk under running water. Use a non-abrasive cloth to wipe down the jug, making certain no milk remains. Since the whisk and jug aren't dishwasher safe, handwashing is the best method to maintain their integrity.

To thoroughly clean, disassemble the whisk from the jug by gently twisting it to remove any stuck milk particles.

After cleaning, make certain the jug is completely dry before placing it back on the base to avoid electrical issues or mold growth.

For detailed cleaning instructions, consult the user manual to guarantee proper maintenance and longevity of your Aeroccino3.

Cleaning the Aeroccino4

clean the aeroccino4 thoroughly

Although maintaining your Aeroccino4 might seem challenging, regular cleaning is essential for ideal performance and hygiene.

Make it a habit to clean the Aeroccino4 after each use to prevent milk residue buildup. All components, except for the base, are dishwasher safe, making cleanup a breeze. For thorough maintenance, handwash with warm water and non-abrasive detergent.

Here are some key cleaning tips:

  • Confirm the jug is completely dry before returning it to the base.
  • Refer to the manufacturer manual for detailed cleaning instructions.
  • Regular cleaning helps avoid technical diagnosis issues down the line.
  • Avoid using abrasive materials that could damage the surfaces.

Maintaining the Barista Milk Frother

proper care and cleaning

After taking care of your Aeroccino4, it's time to focus on maintaining the Barista Milk Frother. To guarantee peak performance and hygiene, clean the frother after each use to prevent milk residue buildup.

Most parts, except the base, are dishwasher safe at a maximum temperature of 70℃ for easy maintenance. However, handwashing with warm water and a gentle detergent is recommended for thorough cleaning.

Regularly check the frothing whisk and other components for wear and tear; replace any damaged parts to maintain frothing quality.

Finally, store the Barista Milk Frother in a dry location to prevent moisture accumulation, which can impact its longevity.

Simple maintenance will keep your frother working beautifully for all your milk frothing needs!

Frequently Asked Questions

How Do I Use My Nespresso Aeroccino?

To use your Nespresso Aeroccino, first fill the jug to the appropriate level for your desired outcome—lower for froth, maximum for heated milk.

Press the button once for hot froth (red light) or hold it down for cold foam (blue light). For best results, use cold, pasteurized milk.

After each use, rinse the jug and whisk, and make sure everything's dry before placing it back on the base to avoid issues.

Enjoy your creamy creation!

How Do You Make Hot Milk in Nespresso Aeroccino?

Pouring perfectly, you'll fill the Aeroccino jug to the max line with cold, pasteurized milk.

Press the button and watch for the red light; that means it's heating. In about 80 seconds, your milk will transform into a creamy concoction.

Once it's done, pour it right away into your coffee creation for a delightful drink.

Enjoy the smooth texture and rich flavor that elevates your morning routine to a whole new level!

What Are the Two Max Lines in Aeroccino?

The two max lines in the Aeroccino are essential for your frothing and heating tasks.

The lower line indicates the maximum level for frothing milk, which is 4 oz, ensuring you get that perfect foam consistency.

The upper line marks the limit for heating milk without froth, set at 8.2 oz.

Following these lines helps prevent overflow and guarantees excellent results, so always keep an eye on them during use!

How Much Milk Do You Put in a Nespresso Aeroccino?

When you're frothing milk with a Nespresso Aeroccino, you should fill it to the lower indicator line if you want froth.

For heating milk without froth, go up to the maximum line.

Remember, the Aeroccino 3 froths up to 4 oz, while the Aeroccino 4 handles 8.2 oz of hot milk.

Always avoid exceeding these lines to prevent overflow and achieve that perfect frothing consistency you desire!

Conclusion

Using the Nespresso Aeroccino can transform your coffee experience, making every cup feel like a café treat right at home. You'll find that the right milk and frothing technique make all the difference, coincidentally revealing your inner barista. As you experiment with different styles and flavors, you might just stumble upon your new favorite drink. So, embrace the frothing journey, and let your creativity flow with each delightful sip!

Continue Reading

Brewing Guides and Equipment

Breville Barista Express Espresso Machine Review

I discovered why coffee lovers rave about the Breville Barista Express, but what unique features set it apart from other espresso machines?

Published

on

espresso machine performance review

The Breville Barista Express is a fantastic choice for coffee enthusiasts like you. With its built-in grinder and dual boiler system, you can brew and steam simultaneously, ensuring a rich espresso flavor every time. It's compact and stylish, perfect for smaller kitchens. The machine's customizable settings make it easy to tailor your brews to your taste. Users rave about its performance and consistent quality at an affordable price of $699.95. Maintenance is straightforward, ensuring your machine stays in top shape. Want to learn more about what makes this espresso machine stand out?

Key Takeaways

  • The Breville Barista Express combines an integrated grinder and dual boiler system for efficient espresso brewing and steaming.
  • It features 18 grind settings and customizable brewing parameters for a tailored coffee experience.
  • Users appreciate its compact design, making it ideal for smaller kitchens without sacrificing performance.
  • Regular maintenance, including cleaning and descaling, is essential for optimal machine longevity and performance.
  • Priced at $699.95, it offers professional-grade features at an affordable cost compared to competitors.

Overview of the Breville Barista Express

espresso machine with grinder

When you're searching for a high-quality espresso machine that combines convenience and performance, the Breville Barista Express stands out as a top contender.

This all-in-one espresso machine features a built-in grinder, allowing you to grind fresh beans while brewing. With its PID temperature control, you can choose from six adjustable settings for peak extraction.

The dual boiler system lets you brew and steam simultaneously, making your coffee preparation quick and efficient. Plus, the 8-ounce bean hopper and 18 grind settings provide customizable grind sizes, ensuring you get the perfect shot every time.

It also comes with a stainless steel milk pitcher, catering to home baristas who appreciate both functionality and style in their coffee-making experience.

Key Features and Benefits

features and advantages summary

The Breville Barista Express packs a punch with its integrated grinder, making it easy for you to enjoy freshly ground coffee at home.

You can customize your brewing parameters to achieve the perfect espresso, while its compact and stylish design saves space in your kitchen.

Let's explore how these features enhance your coffee-making experience.

Integrated Grinder Convenience

Not only does the Breville Barista Express streamline your espresso-making experience, but its integrated grinder also elevates the quality of your brew.

Featuring a stainless steel conical burr grinder with an 8-ounce bean hopper, it lets you grind fresh coffee beans right before brewing, ensuring ideal flavor. You can customize the grind size with 18 adjustable settings, achieving perfect extraction tailored to your taste.

The automatic dosing function dispenses the precise amount of coffee into the portafilter, enhancing convenience and consistency. With its user-friendly interface, the integrated grinder simplifies the process for both beginners and experienced baristas.

This all-in-one design saves counter space and eliminates the hassle of managing multiple coffee-making devices, making your espresso journey enjoyable.

Adjustable Brewing Parameters

By offering adjustable brewing parameters, the Breville Barista Express empowers you to craft the perfect espresso tailored to your taste.

With features like customizable shot volume and PID temperature control, you can fine-tune your brewing experience. Adjust the pre-infusion time to enhance extraction, ensuring every cup is rich and flavorful.

You'll appreciate the 16 grind fineness settings, allowing you to achieve the ideal grind for various espresso styles. Plus, with an adjustable coffee dosage range between 18 and 22 grams, you can effortlessly switch between single and double shots.

  • Customize shot volume to suit your preference
  • Control PID temperature for optimal extraction
  • Modify pre-infusion time for better flavor
  • Adjust coffee dosage for tailored brewing

Additionally, regular maintenance such as cleaning the machine's components can greatly enhance its longevity and performance.

Compact and Stylish Design

Crafting the perfect espresso isn't just about the brew; the machine's design plays a significant role in your overall experience. The Breville Barista Express combines a compact design with a stylish, polished stainless steel exterior that elevates your kitchen decor. Its dimensions of 12.5 x 15.9 x 13.8 inches guarantee it fits comfortably on your countertop without overwhelming the space.

Feature Benefit Description
Integrated Grinder Streamlined process Eliminates extra equipment
Illuminated Control Panel User-friendly Enhances visibility in low light
Rugged Construction Durability assures longevity without sacrificing style
Compact Design Space-saving Fits easily on most countertops

With its rugged construction, this machine appeals to both novice and experienced coffee enthusiasts alike.

Design and Build Quality

stylish and durable construction

The Breville Barista Express is a standout in both design and build quality, featuring a polished stainless steel finish that not only enhances its upscale look but also guarantees durability for your kitchen.

With its compact design, measuring 12.5 x 15.9 x 13.8 inches and weighing 27 lbs, it fits perfectly in smaller spaces without compromising on sturdiness.

  • A 67-ounce water tank with a sturdy handle makes refilling easy.
  • The illuminated control panel guarantees you can navigate settings effortlessly.
  • The high-quality portafilter adds a substantial feel, enhancing the overall premium build quality.
  • Its sleek design complements any kitchen aesthetic, making it a stylish addition to your countertop.

Performance and Brewing Capabilities

brewing performance and capabilities

When it comes to performance, the Breville Barista Express truly shines in espresso quality and flavor.

You'll appreciate the impressive grinding and extraction efficiency, thanks to the conical burr grinder and high-pressure extraction.

With precise control over brewing temperature and pre-infusion settings, you can craft each cup to your liking.

Espresso Quality and Flavor

With its high-pressure extraction system and a professional-style portafilter, the Breville Barista Express guarantees you get rich, balanced espresso shots every time.

The adjustable PID temperature control lets you fine-tune brewing temperatures between 187°F and 205°F, directly impacting espresso quality and flavor. The built-in conical burr grinder with 16 grind settings guarantees precise adjustments, optimizing flavor extraction.

Plus, the pre-infusion feature dampens coffee grounds for 10 seconds, enhancing saturation and flavor development.

  • Achieve the perfect shot with real-time feedback from the pressure gauge.
  • Enjoy consistent flavor profiles with automatic dosing.
  • Experiment with grind settings for tailored taste.
  • Savor balanced espresso with the machine's superior extraction capabilities.

Grinding and Extraction Efficiency

Achieving exceptional espresso isn't just about flavor; it also hinges on grinding and extraction efficiency.

The Breville Barista Express features a built-in conical burr grinder with 18 adjustable settings, enabling you to customize the grind size for ideal coffee extraction. Its precise PID temperature control keeps water between 187°F and 205°F, ensuring stable brewing conditions.

The pre-infusion feature dampens coffee grounds before extraction, enhancing flavor extraction for a balanced shot. With the capability to generate 15 bars of pressure, this machine delivers rich, flavorful espresso.

Plus, the automatic dosing function allows for precise coffee measurement, ensuring consistent extraction efficiency across brews. Together, these elements make your espresso experience both customizable and rewarding.

Maintenance and Care Requirements

maintenance and care guidelines

To keep your Breville Barista Express running smoothly, regular maintenance and care are vital. After each use, disassemble and clean the portafilter and basket with hot water to guarantee peak performance.

Don't forget to wipe the steam wand to prevent milk residue buildup. Pay attention to the drip tray indicator; empty it when prompted for consistent upkeep.

For longer-term maintenance, follow the manual for descaling, especially if you use hard water.

Here are some key maintenance tips:

  • Rinse the portafilter and basket after each use.
  • Clean the group head and shower screen regularly.
  • Use cleaning tablets and brushes for deep cleaning.
  • Monitor the drip tray to avoid overflow.

Cost Efficiency and Savings

maximizing budget and resources

Investing in the Breville Barista Express can pay off quickly, especially when you consider the cost of coffee from cafes. By choosing homemade coffee, you can greatly boost your cost efficiency and savings. After about 120 cups, you'll break even compared to coffee shop prices, which range from $5 to $10. With lattes and cappuccinos, the savings increase, needing around 200 cups for maximum value. Plus, using freshly roasted beans at approximately $6 per pound not only enhances flavor but keeps your cost per cup low.

Coffee Type Coffee Shop Price Homemade Cost
Regular Coffee $5 – $10 $0.50 – $1.00
Lattes $5 – $7 $1.00 – $1.50
Cappuccinos $5 – $7 $1.00 – $1.50
Specialty Drinks $6 – $10 $1.50 – $2.00
Total Savings $$$$$

Comparison With Competing Models

model performance evaluation criteria

When comparing the Breville Barista Express to its competitors, you'll find it strikes an impressive balance between features and affordability. Priced at $699.95, it offers significant advantages over other Breville Espresso Machines.

While the Barista Pro and Barista Touch come with advanced features, they also demand higher price points.

Here's how the Barista Express stands out:

  • Built-in grinder guarantees fresh grounds every time.
  • Automatic dosing simplifies the brewing process.
  • Competes well against budget models like the Gevi, which lacks quality.
  • Offers a compact design, unlike the Rancilio Silvia M.

If you're looking for a solid home espresso machine that blends quality and convenience, the Barista Express is a strong contender among competing models.

User Experiences and Reviews

user feedback and insights

Many users have shared their experiences with the Breville Barista Express, highlighting its impressive ability to deliver high-quality espresso that rivals more expensive machines.

The integrated grinder is often praised for providing fresh coffee grounds, eliminating the hassle of additional equipment.

You'll appreciate the intuitive control panel and adjustable settings, making it easy to dial in your perfect espresso shots.

Users frequently mention the compact design, which fits seamlessly into smaller kitchens without sacrificing functionality.

Additionally, customer insights consistently note the value for money, as many feel the Barista Express offers professional-level features at a relatively affordable price.

Frequently Asked Questions

What Is the Lifespan of a Breville Barista Express?

The lifespan of a Breville Barista Express can vary, but with proper care, you can expect it to last between 5 to 10 years.

Regular cleaning, descaling, and maintaining the grinder play essential roles in its longevity. Many users report that their machines stay functional and effective even after years of daily use when maintained well.

Which Is Better, Barista Pro or Barista Express?

Choosing between the Barista Pro and Barista Express is like picking a favorite coffee blend—each has its unique flavor.

If you want speed and versatility, the Barista Pro's powerful grinder and faster heat-up time make it a standout.

However, if you're looking for a budget-friendly option that still delivers great espresso, the Barista Express shines.

It's really about your needs: convenience versus cost.

Whichever you choose, you'll enjoy brewing delicious coffee at home.

Why Is Breville so Popular?

Breville's popularity stems from its commitment to quality and innovation.

You'll love the robust construction and user-friendly designs that make their products accessible for everyone, from beginners to seasoned baristas.

The combination of functionality and style in their machines allows you to enjoy a premium coffee experience at home.

Plus, the extensive customization options let you tailor your brews exactly how you like them, enhancing your overall coffee journey.

Does Starbucks Use Breville?

You might think Starbucks uses Breville machines to whip up their iconic lattes, but that's a common misconception!

Instead, they rely on custom machines from brands like La Marzocco and Mastrena, built for the hustle and bustle of high-volume coffee production.

Breville's machines shine in home settings, where their user-friendly features cater to aspiring baristas like you.

Conclusion

To sum up, the Breville Barista Express offers an impressive blend of performance and convenience, making it a top choice for coffee lovers. Did you know that 80% of users report a significant improvement in their home espresso quality after switching to this machine? With its user-friendly design and consistent results, you'll find yourself enjoying café-quality drinks right in your kitchen. Investing in the Barista Express not only elevates your coffee experience but also saves you money in the long run.

Continue Reading

Trending