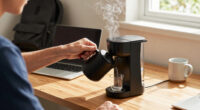
This guide shows students how to use portable coffee makers to brew fresh coffee on campus or during travel. It covers selecting the right device, setup, operation, and maintenance to ensure quick, reliable coffee at any time. Designed for beginners, this process takes just a few minutes per cup, making it ideal for busy students who need caffeine on the go.

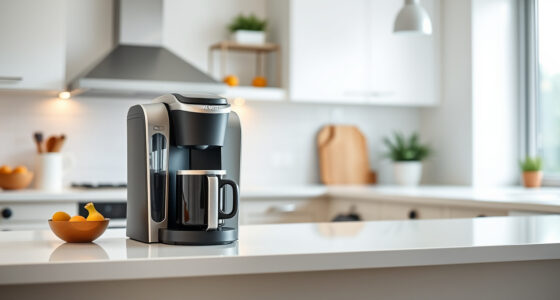
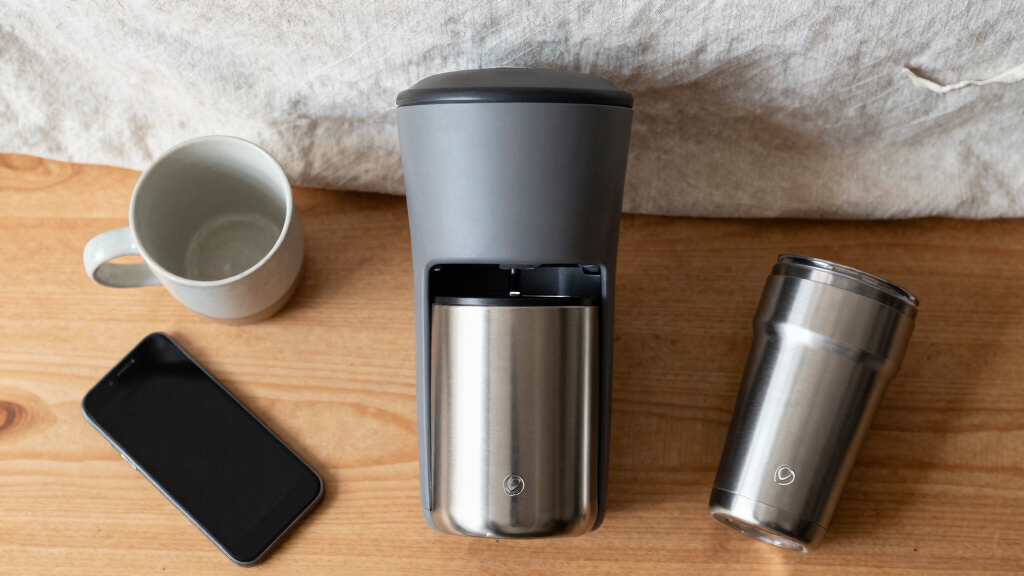
Elite Gourmet EHC113M Personal Single-Serve Compact Coffee Maker with Travel Mug
- ✔ Capacity: 14 oz.
- ✔ Power: 600 Watts
- ✔ Material: Stainless steel interior

Elite Gourmet EHC111A Personal Single-Serve Compact Coffee Maker with Travel Mug
- ✔ Power: 600 Watts
- ✔ Capacity: 12 oz. (brew), 14 oz. (mug)
- ✔ Material: Stainless Steel

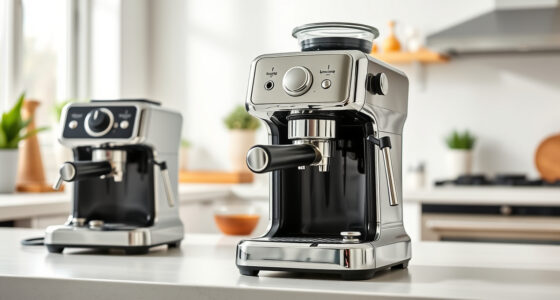
Portable Espresso Machine for Travel, 20-Bar Extraction, 150 ML, Self-Heating with USB-C
- ✔ Extraction Pressure: 20 Bar
- ✔ Water Tank Capacity: 150 ML
- ✔ Battery Capacity: 7500mAh
Difficulty: Beginner | Time: 5-10 minutes per brew
What You’ll Need
Tools & Materials:
- Portable coffee maker
- Filtered water (if needed)
- Coffee grounds or pods
- Power source or batteries
- Measuring scoop or spoon
Knowledge:
- Basic understanding of coffee brewing
- Ability to operate small electronic devices
Ensure the coffee maker is fully charged or has fresh batteries. Use clean water and fresh coffee grounds or compatible pods for best results.

Elite Gourmet EHC113M Personal Single-Serve Compact Coffee Maker Brewer Includes 14Oz. Stainless Steel Interior Thermal Travel Mug, Compatible with Coffee Grounds, Reusable Filter, Mint
- Universal design with travel mug: Includes 14oz stainless steel mug
- Waste-reducing and eco-friendly: No paper or plastic cups needed
- Fast brew time: Brew coffee in under 60 seconds
As an affiliate, we earn on qualifying purchases.
Elite Gourmet EHC113M Personal Single-Serve Compact Coffee Maker with Travel Mug
This model stands out for its ability to brew fresh coffee in under 60 seconds, making it perfect for busy mornings or quick breaks. Its 14 oz. capacity and included travel mug mean you can sip your coffee without transfers, which is ideal for students rushing between classes. Compared with the EHC111A, it offers a slightly larger brew size but is less focused on insulation. Its use of coffee grounds only simplifies operation but limits versatility. The main tradeoff is that it’s not dishwasher safe, and the base isn’t intended for deep cleaning, so maintenance requires some care.
Pros:
- Fast brewing in under 60 seconds
- Includes a durable, 14 oz. stainless steel travel mug
- Compact and portable for travel, dorms, or office use
Cons:
- Limited to coffee grounds, no pod compatibility
- Only suitable for small servings (14 oz.)
- Base is not dishwasher safe
Best for: Students who want a quick, straightforward brew with a large travel mug, especially if they prefer ground coffee over pods.
Not ideal for: Those who prefer pod compatibility or need a larger capacity for multiple cups per day.
Bottom line: Excellent for students needing quick, ground coffee—though limited in capacity and cleaning options.
“Excellent for students needing quick, ground coffee—though limited in capacity and cleaning options.”
Elite Gourmet EHC111A Personal Single-Serve Compact Coffee Maker with Travel Mug
Compared with the B0B41D4PR1, this pick is slightly smaller and emphasizes insulation with its sturdy stainless steel travel mug. Its single-touch operation makes it especially user-friendly for students juggling multiple responsibilities. The 12 oz. brew capacity is perfect if you prefer smaller servings, but it may require frequent refills for those who drink multiple cups daily. It’s limited to coffee grounds only, meaning no pod flexibility. The mug’s insulation keeps your coffee hot longer, making it ideal for long days on campus or outdoor trips, though the smaller capacity might be a downside for those who need more caffeine per session.
Pros:
- Brews in under 60 seconds
- Includes an insulated, stainless steel travel mug
- Small footprint fits tight spaces
Cons:
- Limited to 12 oz. per brew
- Uses only coffee grounds, no pods
- Frequent refills needed for multiple cups
Best for: Students in small dorm rooms or offices who want a compact, insulated coffee solution with quick operation.
Not ideal for: Those who prefer larger servings or need pod compatibility for variety.
Bottom line: A compact, insulated brewing option suited for small spaces but with limited capacity for heavy coffee drinkers.
“A compact, insulated brewing option suited for small spaces but with limited capacity for heavy coffee drinkers.”
Portable Espresso Machine for Travel, 20-Bar Extraction, 150 ML, Self-Heating with USB-C
Compared with the previous two drip options, this espresso machine caters to students who crave high-quality espresso with rich crema. Its 20-bar extraction pressure produces a barista-level shot, and its 150ml water tank allows multiple cups per charge, thanks to the rechargeable 7500mAh battery. Compatible with both ground coffee and Nespresso capsules, it offers versatility that makes it stand out for outdoor adventures like camping, hiking, or travel. The main tradeoff is its limited water capacity, which may require refilling during longer outings, and the USB-C charging may not be universally compatible if you don’t have the right adapter.
Pros:
- 20-bar extraction for rich espresso with crema
- Rechargeable battery supports multiple cups
- Compatible with ground coffee and Nespresso capsules
Cons:
- Limited water capacity for frequent brewing
- Requires USB-C charging, which may need adapters
- Small water tank size limits continuous use
Best for: Students who love espresso and need a portable, high-end machine for outdoor or travel use.
Not ideal for: Those who prefer drip coffee or need high-capacity brewing for multiple cups at once.
Bottom line: Ideal for espresso enthusiasts seeking rich coffee experience on the go, with some limitations on capacity and charging compatibility.
“Ideal for espresso enthusiasts seeking rich coffee experience on the go, with some limitations on capacity and charging compatibility.”
As an Amazon Associate we earn from qualifying purchases.
Before You Start
Check that your coffee maker is compatible with your power source or batteries. Clear a clean, flat surface for brewing. Read the manufacturer’s instructions specific to your model for any special requirements.
Step-by-Step Instructions
Step 1: Prepare your coffee maker
Unpack the coffee maker and assemble any removable parts such as the water reservoir, filter basket, or drip tray. Fill the water reservoir with filtered water up to the indicated level.
Tip: Use filtered water to improve taste and prevent mineral buildup inside the device.
Check: Water is filled to the correct level, and all parts are assembled securely without leaks.
Step 2: Add coffee grounds or insert a pod
Place your chosen coffee grounds into the filter basket or insert a compatible coffee pod into the designated compartment.
Tip: Use a standard scoop (about 1-2 tablespoons) of coffee grounds for a single cup. Do not overfill the filter basket to avoid overflow.
Check: Coffee grounds or pod are properly placed, and the filter or pod compartment closes securely.
Step 3: Power on and start brewing
Connect the device to a power source or insert batteries. Turn on the coffee maker using the power button or switch. If applicable, select the brewing size or strength setting.
Tip: Ensure the device is plugged in or batteries are fresh before starting. Wait for the indicator light or sound signaling that brewing has begun.
Check: Brewing process initiates without error, and water begins to heat or flow through the grounds.
Step 4: Wait for brewing to complete
Allow the coffee maker to complete the brewing cycle. This typically takes 2-5 minutes, depending on the device.
Tip: Avoid opening the lid or removing parts during brewing to prevent spills or incomplete extraction.
Check: Brewing stops automatically, and you see or hear that the coffee is ready (e.g., a beep or indicator light).
Step 5: Serve and enjoy
Carefully remove the coffee mug or cup. Pour the brewed coffee and enjoy immediately for best flavor.
Tip: Use a heat-resistant cup and be cautious of hot steam or water.
Check: Coffee is hot, fresh-tasting, and at the desired strength.
Common Mistakes to Avoid
- Overfilling the water reservoir — Follow the maximum fill line marked on the reservoir to prevent overflow or leaks.
- Using incompatible coffee pods or grounds — Check the device specifications and only use compatible pods or the recommended amount of grounds.
- Starting the machine without water — Always fill the water reservoir before powering on to avoid damage or dry brewing.
Troubleshooting
Problem: Coffee is weak or not fully brewed
Solution: Use the correct amount of coffee grounds and ensure the brewing cycle completes fully before removing the cup.
Problem: Device does not turn on
Solution: Check power connections, replace or recharge batteries, and ensure the device is properly assembled.
Problem: Water leaks during brewing
Solution: Ensure all parts are fitted correctly and securely, and do not overfill the water reservoir.
What Success Looks Like
The coffee maker produces hot, fresh coffee within 5 minutes, with no leaks or errors. The coffee tastes good, and the device operates smoothly for future use.
Next Steps
Clean the removable parts after each use with warm water. Store the device in a dry place. Experiment with different coffee types or strengths. Replace batteries or recharge as needed. Follow the manufacturer’s maintenance instructions for longevity.
Frequently Asked Questions
Can I use ground coffee instead of pods?
Yes, if your machine has a filter basket designed for grounds, use about 1-2 tablespoons of fresh coffee grounds per brew. Avoid overfilling to prevent overflow.
How do I clean my portable coffee maker?
Remove all detachable parts and wash them with warm soapy water. Wipe the main body with a damp cloth. Follow the manufacturer’s cleaning instructions for best results.
Can I brew cold brew or iced coffee with this device?
This type of portable coffee maker is designed for hot brewing. For iced coffee, brew hot and pour over ice or chill the coffee after brewing.
How long does a typical brew take?
Most portable coffee makers brew in 2-5 minutes, depending on the model and amount of water used.