
Use this guide to froth milk with a handheld electric frother or a countertop model, then clean it for the next use. It is for beginners making hot or cold foam for coffee, tea, or other drinks. Allow about 5–10 minutes, including cleanup; exact timing varies by device and milk.

Get coffee and tea gear delivered free with Prime
- Fast, free delivery on millions of items
- Prime Video, Amazon Music and more included
- Member-only deals all year
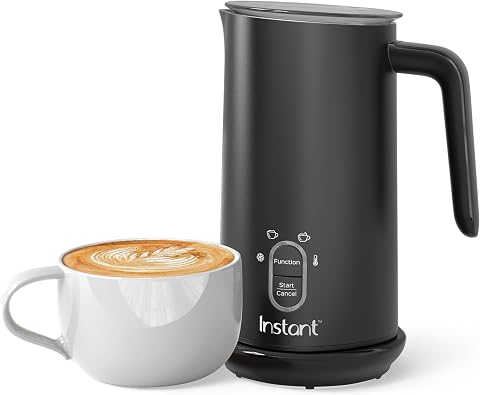
Instant Pot 4-in-1 Milk Frother and Steamer, 10 oz, Black
- ✔ Capacity: 10 oz (295 ml)
- ✔ Power: 500 W
- ✔ Functions: Cold foam, light warm foam, dense warm foam, milk warming

Ecoflarix 4-in-1 Electric Milk Frother and Steamer, 350 ml
- ✔ Warming capacity: 350 ml
- ✔ Frothing capacity: 180 ml
- ✔ Power: 450 W

ELMWAY Battery-Operated Handheld Milk Frother, Pink
- ✔ Power source: 2 AA batteries
- ✔ Style: Wand-style
- ✔ Mixing head: 304 stainless steel
Difficulty: Beginner | Time: 5–10 minutes
What You’ll Need
Tools & Materials:
- Electric milk frother with its whisk or lid
- Milk or a suitable milk alternative
- Cup or jug sized to leave room for foam
- Mug or glass for serving
- Clean cloth or sponge
Knowledge:
- Basic ability to operate a small kitchen appliance
- Ability to follow the device’s fill, heating, and cleaning instructions
Read the frother’s manual before use. Models vary: some heat and froth milk in a jug, while handheld models usually froth milk in a separate vessel and may not heat it. Check whether the whisk or jug is dishwasher-safe; do not assume it is.
Instant Pot 4-in-1 Milk Frother and Steamer, 10 oz, Black
The Instant Pot 4-in-1 is our best overall pick because it covers the broadest everyday drink routine without asking us to choose between foam and warming. It makes cold foam, light warm foam, dense warm foam, and warmed milk, giving it a practical advantage over ELMWAY, which can mix and foam but does not heat milk. Its two-button controls also keep the options approachable if we want a quick cup rather than a more involved appliance routine.Its 10 oz capacity is useful for a single drink or a modest amount of milk, but it may require another cycle when serving several people. Ecoflarix can warm a larger stated volume, so that model makes more sense when warming capacity is the priority. Instant Pot’s cool-touch exterior, handle, and pouring spout support careful serving, though the plastic construction feels less substantial on paper than Ecoflarix’s stainless steel interior. Dishwasher-safe care is a meaningful convenience compared with Ecoflarix’s guidance to rinse and wipe its interior.
Pros:
- Four modes cover cold foam, two warm-foam textures, and milk warming.
- Two-button controls make mode selection straightforward.
- Cool-touch exterior, ergonomic handle, and spout support serving and pouring.
- Dishwasher-safe care can simplify cleanup.
Cons:
- The 10 oz capacity may be limiting for multiple servings.
- Plastic construction may be less appealing than Ecoflarix’s stainless steel interior.
Best for: Coffee and cocoa drinkers who want several hot and cold options from one easy-to-operate countertop frother.
Not ideal for: Households that regularly prepare larger batches, or buyers who specifically want a stainless steel interior.
Bottom line: Choose the Instant Pot when we want the most balanced mix of foam styles, milk warming, and simple operation.
“Choose the Instant Pot when we want the most balanced mix of foam styles, milk warming, and simple operation.”
Ecoflarix 4-in-1 Electric Milk Frother and Steamer, 350 ml
Ecoflarix is the better fit when we want to warm more milk at once and prefer a stainless steel interior. Its 350 ml warming capacity is higher than the Instant Pot’s listed 295 ml overall capacity, which can make it more convenient for preparing warmed milk for more than one drink. It offers hot dense foam, hot airy foam, cold froth, and milk warming, so it keeps pace with Instant Pot on the range of listed drink modes.There is an important distinction between warming and frothing: Ecoflarix’s frothing capacity is 180 ml. Buyers focused on foam should use that smaller limit to judge whether a serving will fit, rather than relying on the larger headline volume. Its SUS304 stainless steel interior, non-stick coating, automatic shut-off, and dry-boil protection make a compelling feature set, but the care instructions call for rinsing and wiping rather than immersing the unit. That makes cleanup less hands-off than the Instant Pot’s stated dishwasher-safe care. Compared with ELMWAY, Ecoflarix occupies more counter space but heats and treats milk automatically.
Pros:
- Four modes support hot dense foam, hot airy foam, cold froth, and milk warming.
- 350 ml warming capacity can suit multiple servings.
- SUS304 stainless steel interior and non-stick coating are designed for food contact and easier wiping.
- Automatic shut-off, dry-boil protection, and thermal fuse are specified safety features.
Cons:
- Frothing capacity is limited to 180 ml, well below its warming capacity.
- The interior should be rinsed and wiped rather than immersed.
- At 450 W, it has less listed power than the Instant Pot’s 500 W.
Best for: People who want an automatic frother with a larger milk-warming capacity and a stainless steel interior.
Not ideal for: Anyone who needs to froth more than 180 ml in one cycle or wants dishwasher-style cleanup.
Bottom line: Pick Ecoflarix when warming volume and an interior made of stainless steel matter more than a larger foam batch or easier dishwasher cleanup.
“Pick Ecoflarix when warming volume and an interior made of stainless steel matter more than a larger foam batch or easier dishwasher cleanup.”
ELMWAY Battery-Operated Handheld Milk Frother, Pink
The ELMWAY is the clear choice when counter space and portability matter more than heating functions. This lightweight wand is cordless, takes two AA batteries, and can foam or mix milk, coffee, matcha, protein powder, and hot chocolate. Unlike the Instant Pot and Ecoflarix, it does not warm milk or offer separate automatic foam modes; we operate it directly in the drink. That simplicity can suit a single mug and a small drawer, but it asks for more hands-on use.Its 304 stainless steel mixing head can be rinsed in water, an easy cleanup step after use, provided we keep liquid away from the handle. Neither automatic frother has the same compact, battery-powered format. In return, both countertop models can heat milk and run their listed modes without us manually mixing. ELMWAY also leaves battery replacement to us, and the provided details do not specify a foam capacity or automatic shutoff. Choose it for occasional, quick foam or mixing; skip it if the main goal is repeatable heated drinks with less involvement.
Pros:
- Cordless wand design is compact and lightweight.
- 304 stainless steel mixing head can be rinsed directly.
- Can mix or foam ingredients for coffee, matcha, protein drinks, and hot chocolate.
- Requires little storage space compared with the countertop models.
Cons:
- Requires two AA batteries.
- Does not warm milk or provide automatic hot and cold modes.
- The handle interior must be kept dry.
Best for: Someone who makes one drink at a time, wants a small cordless tool, and is comfortable frothing or mixing by hand.
Not ideal for: Buyers who want warmed milk, defined automatic drink modes, or a countertop appliance that handles a serving on its own.
Bottom line: Choose ELMWAY for compact, hands-on foam and mixing, but choose either countertop model when milk warming is essential.
“Choose ELMWAY for compact, hands-on foam and mixing, but choose either countertop model when milk warming is essential.”
As an Amazon Associate we earn from qualifying purchases.
Before You Start
Set the frother on a stable, dry surface and keep its electrical base and plug away from water. Use only the amount of milk permitted by the device. Frothing increases the milk’s volume, and overfilling can cause spills or interfere with operation. If making hot foam, handle the jug carefully and keep your face and hands clear of escaping steam.
Step-by-Step Instructions
Step 1: Choose the milk and foam style
Select milk that suits your drink and frother. Dairy milk, oat milk, soy milk, and other alternatives can foam differently; results depend on the product and its ingredients. Use cold milk for a cold drink or if your device’s manual calls for it. For hot foam, use the heating function only if your model has one.
Tip:For a first try, use the milk recommended in the frother’s instructions. Barista-style alternatives are formulated for drinks, but they still vary by brand.
Check: You have milk appropriate for the recipe and the device’s stated temperature range.
Step 2: Set up the frother and vessel
Attach a handheld frother’s whisk securely to its shaft, then pour milk into a tall, narrow cup or jug. Leave enough empty space for the milk to expand. For a countertop model, set the jug on its base and fit the lid, whisk, and any attachments as the manual directs.
Tip:Use the fill marks on the jug. If there are separate maximum marks for heating and frothing, follow the lower applicable limit.
Check: The appliance is assembled, stable, and filled below the correct maximum line.
Step 3: Start the frother
Lower a handheld model’s whisk into the milk before switching it on, and keep the whisk submerged to reduce splashing. For a countertop model, select the setting for hot or cold foam, or the closest option listed in its manual, then start the cycle.
Tip:Do not run a handheld whisk in an empty cup. Keep the frother upright, and do not immerse its handle or motor housing.
Check: The whisk turns smoothly or the countertop cycle begins, with no unusual noise or spill.
Step 4: Froth the milk to the desired texture
Move a handheld whisk slowly through the milk, keeping it just below the surface at first to draw in air. As foam forms, lower the whisk farther into the milk and move it gently to blend larger bubbles. Stop when the volume and texture suit your drink. For a countertop model, let the selected cycle finish.
Tip:Short bursts can help you control a handheld frother. Too much time near the surface can create large, dry bubbles; too much whisking can make foam that is difficult to pour.
Check: The milk has a visible layer of foam with a texture suited to your drink. For a latte, aim for smooth, pourable foam; for a cappuccino-style drink, a thicker layer may suit your preference.
Step 5: Heat the milk if your model requires it
Warm the milk separately using a microwave or saucepan if your handheld frother does not heat milk, and follow the appliance and container instructions. Avoid boiling it. If your countertop frother heats milk, select its hot setting and wait for the cycle to end before opening the lid.
Tip:Hot milk and steam can burn. Lift lids away from your face, and use the handle when moving a heated jug.
Check: The milk is warm enough for your drink without boiling over, scorching, or producing excessive steam.
Step 6: Pour the foam into your drink
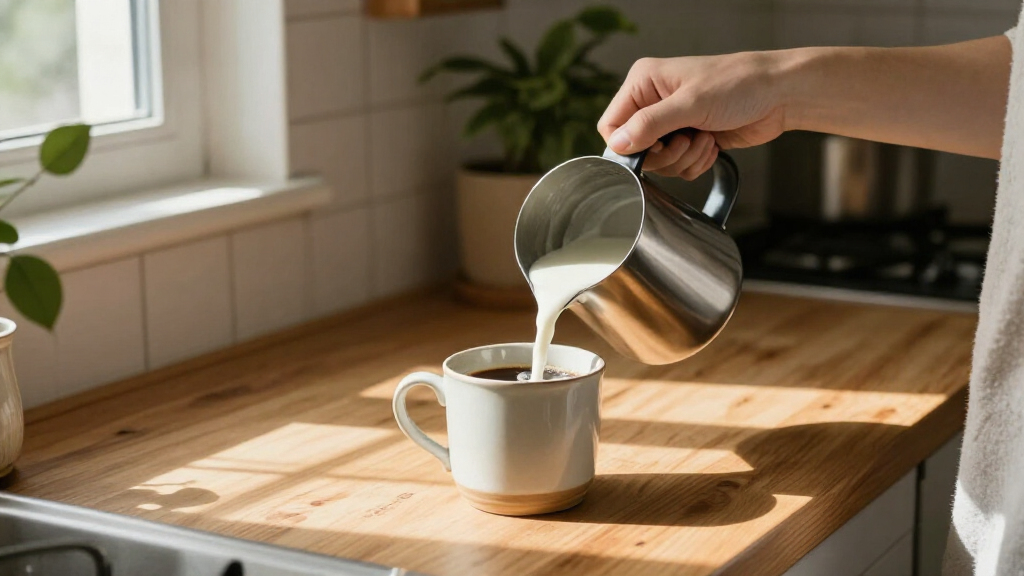
Switch off and unplug a handheld frother before lifting it from the milk. Tap the cup or jug gently on the counter if large bubbles remain, then swirl the milk to combine the foam and liquid. Pour slowly into your prepared drink. For a countertop frother, remove the jug by its handle and pour with care.
Tip:Pour soon after frothing because foam can settle as it stands. Use a spoon to hold back some foam if you want to pour the liquid milk first.
Check: Your drink has the amount of foam you wanted, and the milk stayed inside the cup during pouring.
Step 7: Clean and dry the frother
Unplug the appliance and let heated parts cool. Wash the removable whisk or jug according to the manual. Wipe a handheld motor housing with a damp cloth and keep it out of water. For a countertop model, clean the inside of the jug without wetting the electrical base or connector. Dry all parts before storing them.
Tip:Milk residue can become difficult to remove if it dries. Rinse the jug or whisk soon after use, and avoid abrasive pads that could damage a nonstick coating.
Check: No milk residue remains on the whisk or in the jug, and all parts are dry before storage.
Common Mistakes to Avoid
- Filling the vessel to the brim. — Use the device’s maximum fill line and leave room for the milk to expand as it foams.
- Switching on a handheld frother before the whisk is submerged. — Lower the whisk into the milk first, then turn it on; switch it off before lifting it out.
- Holding a handheld whisk at the surface for too long. — Begin just below the surface, then lower and move the whisk through the milk to blend the foam.
- Submerging the motor or electrical base while cleaning. — Wash only the parts marked as washable and wipe electrical components with a damp cloth.
Troubleshooting
Problem: The milk produces little or no foam.
Solution: Check that the whisk is attached and turning, and that the milk is within the frother’s fill and temperature limits. Try a different milk product or brand; some alternatives foam less reliably.
Problem: The milk splashes out of the cup.
Solution: Use a taller vessel with more empty space. For a handheld model, start with the whisk submerged and keep the motor upright while frothing.
Problem: The foam has large bubbles or feels dry.
Solution: Move a handheld whisk slightly deeper and use gentle motions to blend the bubbles. Stop earlier next time, or swirl the milk before pouring.
Problem: Milk residue sticks to the jug or whisk.
Solution: Unplug the unit, let hot parts cool, and rinse them soon after use. Soak washable parts in warm soapy water if the manual allows, then clean with a soft sponge.
What Success Looks Like
The milk is foamy at the thickness you wanted, pours into the drink without overflowing, and the frother is switched off and cleaned according to its manual. The finished drink should have a visible, reasonably even foam layer; handheld frothers and different milk products can produce different textures.
Next Steps
Rinse milk-contact parts after each use and dry them before storage. Follow the manual for periodic care, such as descaling a model that heats milk. If you use the frother often, note which milk and setting give you the texture you prefer, then adjust the amount or frothing time gradually.
Frequently Asked Questions
Can I use an electric frother with cold milk?
Yes, if your model supports cold frothing. Handheld frothers commonly froth cold milk but do not heat it. Check the manual before selecting a cold setting or using milk straight from the refrigerator.
Can I froth plant-based milk?
Usually, but results vary by product. Try a barista-style version and follow the same fill and temperature limits. If it produces little foam, test another brand or formulation.
How long should I froth milk?
Stop when the milk reaches the texture and volume you want. Handheld models need monitoring, while countertop models may stop at the end of a programmed cycle. A fixed time can give different results with different amounts and types of milk.
Can I put the frother in the dishwasher?
Only if the manual says the specific removable part is dishwasher-safe. Never put a motor housing or electrical base in a dishwasher or under running water.