
Coffee Equipment
9 Top Milk Frothers For Perfect Almond Milk Foam

Are you tired of struggling to get the perfect froth for your almond milk coffee or latte? Look no further, as we have compiled a list of the top milk frothers on the market to help you achieve the perfect froth every time.
Whether you prefer a handheld or electric frother, we have options to suit every preference. As a seasoned caffeine addict and former barista, our expert, Olivia, shares her years of coffee capers and knowledge to help you make the perfect cup of coffee or latte with frothy almond milk.

This article will explore the different types of milk frothers available, the factors to consider when choosing a frother, and our top choices for the best milk frothers on the market. So, please sit back, relax, and let us guide you through the world of milk frothers and almond milk foam.
Key Takeaways
- Zulay Original Milk Frother is the best option for almond milk and other types of milk.
- There are three types of milk frothers: handheld, manual, and electric.
- Different frothers have different settings for creating different types of milk, and cleaning is an important factor to consider when choosing a milk frother.
- The post includes additional information on topics such as the best Ethiopian coffee, Frappuccino Roast, and the best coffee for iced coffee.
Types of Milk Frothers
Various types of milk frothers are available in the market, and each type has its own pros and cons.
Handheld milk frothers are small and battery-operated, making them easy to transport and use. They are an affordable option for creating frothy milk, but they may not produce the same quality of foam as other frothers.
Manual milk frothers, on the other hand, are best suited for professional coffee makers and baristas. They require more effort to operate but can produce high-quality and consistent froth.


Lastly, electric milk frothers are the most convenient option for creating fluffy milk, with some models offering multiple frothing options and temperature settings. However, they may be more expensive than other types of milk frothers.
Maintenance tips should also be considered when choosing a milk frother. Different frothers may require different cleaning methods, and some may come with cleaning brushes or dishwasher-safe parts for easy cleaning.
- Breville Milk Café Milk Frother: This versatile milk frother offers multiple temperature settings and a frothing disc specifically designed for almond milk. It provides excellent control and consistency for creating silky almond milk foam.
- Nespresso Aeroccino Milk Frother: The Nespresso Aeroccino is known for its simplicity and efficiency. It can froth almond milk to a velvety texture, perfect for lattes and cappuccinos.
- Secura Automatic Electric Milk Frother and Warmer: This electric milk frother comes with multiple attachments, including a frothing whisk that can froth almond milk to a creamy consistency. It also has a warming function to keep your milk hot.
- Capresso Froth Pro Milk Frother: The Capresso Froth Pro is designed to produce thick and rich foam, making it suitable for almond milk. It has multiple frothing options and a large capacity, making it great for serving multiple cups.
- HadinEEon Electric Milk Frother: This electric milk frother offers multiple settings and a non-stick interior, making it easy to froth almond milk without sticking. It produces fine foam for a smooth and velvety texture.
- Epica Automatic Electric Milk Frother and Heater: The Epica milk frother has a simple one-touch operation and can create thick and creamy foam from almond milk. It’s easy to clean and comes with a detachable base for convenient serving.
- PowerLix Milk Frother Handheld Wand: This handheld milk frother is compact and convenient for creating frothy almond milk foam. It operates with a simple whisking motion and can froth milk directly in your cup.
- Miroco Stainless Steel Milk Frother: This electric milk frother features a sleek design and offers multiple temperature settings for different types of milk, including almond milk. It can froth milk quickly and create creamy foam.
- MatchaDNA Handheld Electric Milk Frother: This handheld milk frother is battery-powered and perfect for frothing almond milk on the go. It’s compact, easy to use, and can create frothy foam in seconds.
Handheld milk frothers are the easiest to clean, as they only require wiping with a damp cloth. Manual milk frothers may require a bit more effort, as they need to be disassembled and hand-washed. Electric milk frothers may have removable parts that can be washed in a dishwasher.
Ultimately, the choice of frother should be based on personal preferences, desired type of milk, and cleaning requirements.
Factors to Consider
When selecting a milk frother, it is crucial to consider the frother’s frothing options, cleaning requirements, and compatibility with different types of milk. Different milk frothers have different settings for creating different types of milk. For example, some frothers may have specific settings for almond milk, while others may not. It is important to ensure that the frother you choose is compatible with the type of milk you plan to use.
Cleaning is another important factor to consider when choosing a milk frother. Some frothers come with cleaning brushes or dishwasher-safe parts for easy cleaning. On the other hand, manual frothers may require more effort and time to clean. It is important to choose a frother that is easy to clean to ensure that it remains hygienic and in good working condition. The table below compares the cleaning methods and milk types compatibility of some of the top milk frothers for almond milk.
| Milk Frother | Cleaning Method | Milk Types Compatibility |
|---|---|---|
| Zulay Original Milk Frother | Dishwasher-safe parts | All types of milk |
| Breville Milk Cafe Frother | Dishwasher-safe parts | All types of milk |
| PowerLix Milk Frother | Wipe with a damp cloth | All types of milk |
| Smeg Milk Frother | Dishwasher-safe parts | All types of milk |
| Keurig Standalone Frother | Dishwasher-safe parts | All types of milk |
| Illy Milk Frother | Dishwasher-safe parts | All types of milk |
| Maestri House Milk Frother | Dishwasher-safe parts | All types of milk |
| Secura Electric Milk Frother | Dishwasher-safe parts | All types of milk |
| Bodum Latteo Manual Milk Frother | Handwash only | All types of milk |
Overall, it is important to choose a milk frother that not only creates the perfect almond milk foam but is also easy to clean and compatible with different types of milk. The table above provides a brief overview of some of the top milk frothers for almond milk and their cleaning methods and milk compatibility. By considering these factors, you can ensure that you choose the best milk frother for your needs.
Top Choices
The selection of milk frothers that are compatible with almond milk and provide quality foam is diverse. When it comes to choosing the best option for your needs, it is important to consider factors such as the capacity, type of frother, and ease of cleaning.
Here are some of the top choices for milk frothers that can provide perfect foam for almond milk:
- Zulay Original Milk Frother: This frother is known for its versatility and ability to froth almond milk to perfection. It is a handheld electric frother that is easy to use and clean.
- Breville Milk Cafe Frother: With a six-ounce capacity and adjustable temperature knob, this frother is a great option for those who want to make larger batches of frothed almond milk.
- PowerLix Milk Frother: This affordable and battery-operated frother is a convenient option for those who want to froth almond milk on the go.
- Smeg Milk Frother: This frother has a retro design and multiple froth settings, making it a great choice for those who want to experiment with different types of foam.
- Keurig Standalone Frother: This frother can make both hot and cold foam, giving users the ability to create a variety of beverages with almond milk.
When using almond milk, it is important to note that it may require different settings than regular milk to achieve the perfect foam. Additionally, cleaning the frother after use is crucial for maintaining its longevity. Some frothers come with cleaning brushes or dishwasher-safe parts, while others may require manual cleaning.
By considering these factors and choosing one of the top milk frothers on the market, you can enjoy the benefits of using almond milk in your frothed beverages.
Frequently Asked Questions
Can all of the milk frothers listed be used for almond milk or are there specific ones that work better?
When considering the best almond milk frothers, it is important to keep in mind the type of frother being used. Handheld milk frothers, manual milk frothers, and electric milk frothers all have different capabilities when it comes to creating foam with non-dairy milks.
Some frothers may have specific settings that work better with almond milk, such as the Zulay Original Milk Frother, which is known for its versatility with various types of milk.
Additionally, tips for frothing non-dairy milks include using a high-fat content milk substitute, such as coconut or oat milk, and ensuring that the milk is cold before frothing. It is also important to clean the frother thoroughly after each use to prevent any buildup or cross-contamination with dairy products.
Overall, finding the best almond milk frother may require some trial and error, but considering the type of frother and following tips for frothing non-dairy milk can help achieve a perfect foam.
Are there any milk frothers that are specifically designed for making latte art?
When it comes to making latte art, the milk frother plays a crucial role in creating the perfect foam texture. While any milk frother can be used for latte art, there are certain features that make some models more suitable than others.
For instance, the best milk frothers for latte art are those that have a high-quality steam wand that can create microfoam, which is essential for creating latte art techniques such as hearts, rosettes, and tulips. Additionally, milk frothers that have a larger capacity and multiple frothing options can be helpful for creating various latte art designs.
Some examples of milk frothers that are great for latte art include the Breville Milk Cafe Frother, the Maestri House Milk Frother, and the Smeg Milk Frother, all of which have multiple temperature and froth settings.
How long does it typically take for the milk frother to create foam?
Creating foam with a milk frother can be compared to waiting for a pot of water to boil: it requires patience and attention to detail. Factors affecting foam creation time include the type of milk and the frother being used.
For optimal almond milk foam texture, it is recommended to use an electric frother with multiple froth settings and to choose an almond milk with a higher fat content. It typically takes anywhere from 30 seconds to 2 minutes for a milk frother to create foam, depending on the device and the desired texture.
Tips for achieving the perfect foam include ensuring the milk is cold and properly measuring the amount of milk being frothed. Additionally, cleaning the frother after each use can help maintain its effectiveness and prolong its lifespan.
Are there any milk frothers that can also heat the milk while frothing it?
When it comes to creating perfectly frothed almond milk, it is important to consider milk frothers that offer a heating and frothing combo.
One such option is the Breville Milk Cafe Frother, which has an adjustable temperature knob and a six-ounce capacity, allowing for both heating and frothing of milk.
Another option is the Maestri House Milk Frother, which can hold up to 21 ounces of milk and has three frothing options and four temperature settings.
However, it is important to note that these combo frothers may not produce the same quality of foam as a dedicated frother, and may also take longer to heat the milk.
Tips for perfecting almond milk froth include using a high-quality almond milk with a high protein content, chilling the milk before frothing, and using a frother with multiple froth settings.
Can different types of milk, such as soy or oat milk, be used in these milk frothers?
Milk alternatives such as soy and oat milk can be used in most milk frothers, but the results may vary depending on the type of frother and the milk being used.
It is important to note that different milk alternatives have different protein and fat content, which can affect the consistency of the froth.
Soy milk, for example, tends to froth well due to its high protein content, while oat milk may require more effort to achieve a consistent froth.
Almond milk frothing tips include ensuring that the milk is at the right temperature and consistency before frothing, as this can affect the texture and quality of the froth.
Overall, it is recommended to experiment with different milk alternatives and frothing techniques to find the best results for each individual’s preferences.

Justin is a seasoned author, coffee and tea enthusiast, and an essential member of the Cappuccino Oracle team. With a keen appreciation for the complexities of coffee, coffee alternatives, and tea, Justin has dedicated his professional career to exploring these realms and sharing his insights with readers worldwide.
Justin’s immersion in the world of coffee, coffee alternatives, and tea began at a young age, kindling a passion that extended beyond mere consumption. This love for these beverages led him to combine his talent for writing with his devotion to coffee and tea, bringing him to Cappuccino Oracle as a dedicated author.

Cappuccino Oracle Selected Reviews
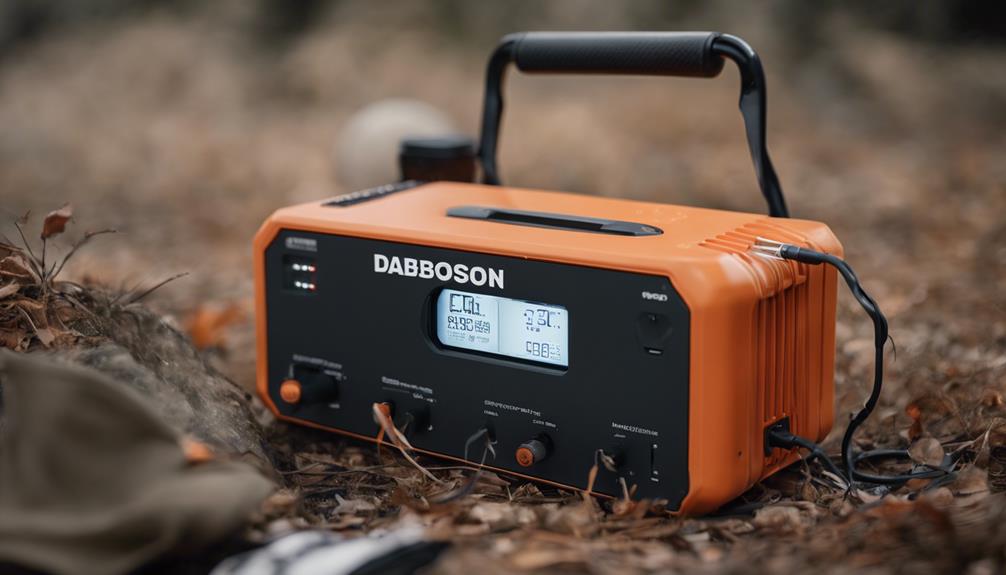
Dabbsson DBS3000B Review: Portable Power for All Needs
Join the revolution of portable power with the Dabbsson DBS3000B, a game-changer for all your energy needs.
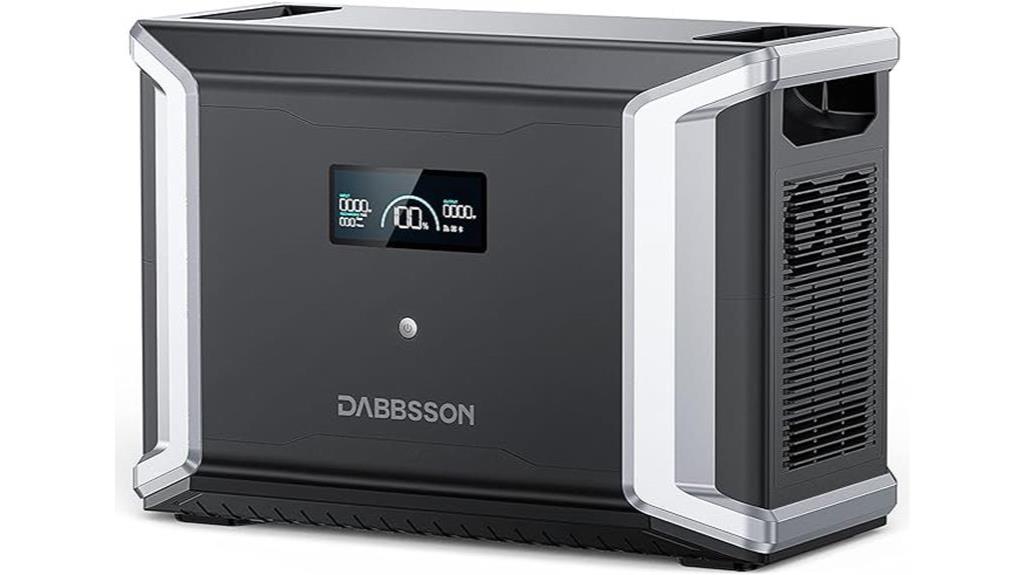
I've tested the Dabbsson DBS3000B and it's a powerhouse for all needs. This portable marvel offers 3000Wh of power with fast charging options, perfect for RVs, camping, and emergencies. Equipped with 2200W AC outlets, USB-C/A ports, and DC5521 outlets, it guarantees stable power on the go. The EV Semi-solid State LiFePO4 Battery technology guarantees over 4000 cycles, lasting up to 15 years. While the weight might be a drawback for some, its high capacity and versatile charging make it a compelling choice. Stay tuned to discover more about its practical applications and user-friendly features.
Key Takeaways
- 3000Wh LiFePO4 Battery for stable power in RVs, camping, emergencies.
- Fast-charging options for various devices, fully charged in <3 hours.
- Versatile ports including AC, USB-C/A, and DC5521 outlets.
- Expandable capacity up to 8330Wh for extended power needs.
- Industry-leading EV Semi-solid State technology ensures performance and safety.
Key Features
The Dabbsson DBS3000B boasts an array of innovative features that cater to various power needs in RVs, outdoor camping, homes, and emergencies.
This 3000Wh External LiFePO4 Battery connects to the DBS2300 power station, providing stable power for home appliances, camping, and emergencies.
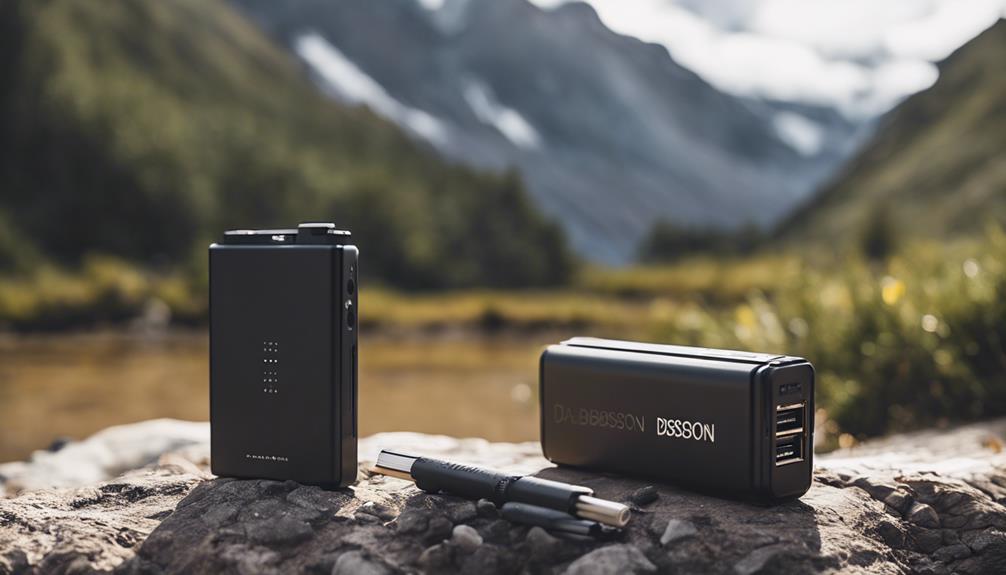
With 2200W (4400W in Parallel Connection) pure sine wave AC outlets, 3 USB-C ports, 3 USB-A ports, cigarette lighter, and 2 DC5521 outlets, it offers versatile charging options.
The battery can be fully charged in less than 3 hours and has a lifespan of up to 15 years with over 4000 cycles before hitting 80%.
Users appreciate the quick charging capabilities for various devices, enhancing convenience in diverse settings.
Strengths and Weaknesses
The Dabbsson DBS3000B boasts impressive features like a high capacity, fast charging options, and versatile ports for different devices.
However, there may be areas for improvement such as the weight of the product, which could be a concern for portability.
Despite some potential drawbacks, the strengths of this battery, including its performance and expandable capacity, make it a compelling choice for various applications.
What We Liked
Impressed by the versatile charging options and robust performance of the Dabbsson DBS3000B, we found its adaptability for various power needs truly remarkable.
The ability to connect to the DBS2300 power station and provide stable power for home appliances, camping, and emergencies stood out to us. With 2200W (4400W in Parallel Connection) pure sine wave AC outlets, 3 USB-C charging ports, 3 USB-A charging ports, a cigarette lighter, and 2 DC5521 outlets, this power station caters to a wide range of devices.
The over 4000 cycles before hitting 80% capacity and the 15-year lifespan of regular use further enhance its appeal. Additionally, the faster charging options, including solar input and car charger compatibility, make it a versatile and reliable power solution.
What Can Be Improved
Moreover, exploring the Dabbsson DBS3000B, I noticed potential areas for enhancement in its design and functionality.
One aspect that could be improved is the weight of the battery, which currently stands at 63.2 pounds. Reducing the weight could enhance the portability of the device, making it easier to transport for outdoor activities.
Additionally, incorporating more intuitive indicators for battery levels and charging status would be beneficial for users to monitor the device's performance more easily.
Moreover, expanding the range of compatible devices or providing additional adapters for different electronics could increase the versatility of the DBS3000B, catering to a wider audience with diverse charging needs.
These improvements could elevate the overall user experience and make the product even more user-friendly.
Detailed Features
Exploring the intricate functionalities of the Dabbsson DBS3000B reveals a wide range of features designed to meet diverse power needs with efficiency and reliability. This portable power solution offers 3000Wh of energy, expandable up to 8330Wh, making it ideal for RVs, outdoor camping, home use, and emergencies.
It boasts industry-leading EV Semi-solid State LiFePO4 Battery technology, ensuring stable power for various devices. The DBS3000B includes 2200W pure sine wave AC outlets, 3 USB-C charging ports (100W Max.), 3 USB-A charging ports, cigarette lighter, and 2 DC5521 outlets. It can be fully charged in less than 3 hours, with multiple charging options such as AC, solar, and car charger inputs.
With over 4000 cycles and a 15-year lifespan, this battery enhances performance and safety for all your power needs.
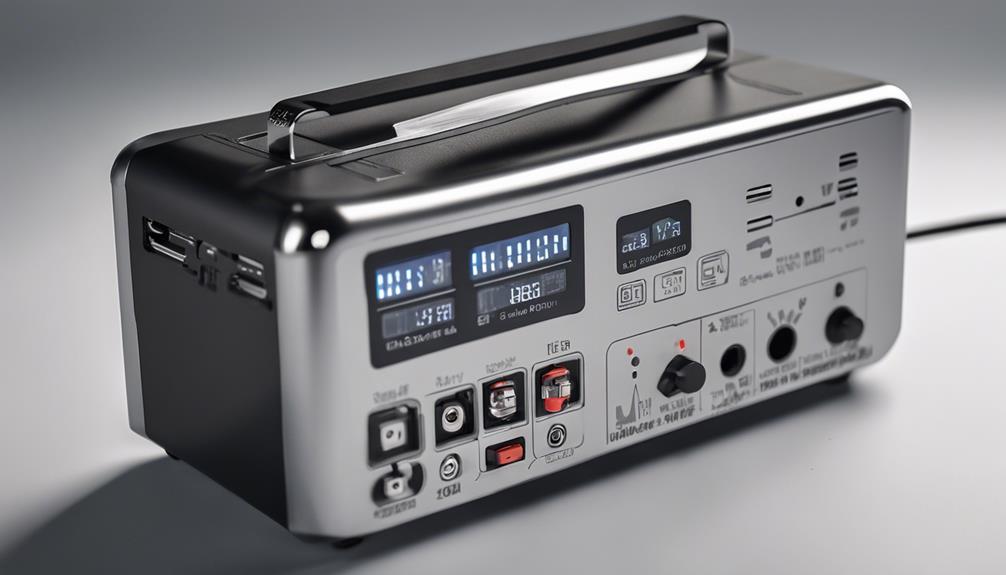
User-Friendly Interface and Navigation

Exploring the user-friendly interface of the Dabbsson DBS3000B is a seamless experience, enhancing accessibility for all power needs. The interface features a clear LCD display that provides essential information at a glance, such as battery level, input/output power, and charging status.
Moving through different functions is intuitive, with well-labeled buttons for easy operation. The inclusion of multiple ports for various devices guarantees versatility and convenience. Users can easily switch between AC outlets, USB ports, and DC outlets based on their requirements.
Additionally, the interface includes indicators for overloading and overheating, prioritizing user safety. Overall, the user-friendly design of the Dabbsson DBS3000B simplifies power management tasks, making it a practical choice for a wide range of applications.
Design and Color Palette
The design of the Dabbsson DBS3000B showcases a sleek and modern aesthetic with a versatile color palette. The unit comes in a classic Black color option that exudes sophistication and elegance, fitting seamlessly into various settings. This color choice adds a touch of professionalism to the device, making it suitable for both personal and professional use. The smooth curves and minimalistic design enhance the overall appeal of this portable power station. Below is a table highlighting the available color options for the Dabbsson DBS3000B:
| Color Options |
|---|
| Black |
| Silver |
Unboxing – Technical Components Revealed
When unboxing the Dabbsson DBS3000B, you'll find a vital set of technical components waiting to be revealed.
The package includes essential items like specifications, documentation, and a user guide, ensuring you have all the information needed to maximize the battery's performance.
These components play an essential role in understanding the product's capabilities and using it efficiently for various power needs.
Specifications
Upon opening the package, I revealed the technical components of the Dabbsson DBS3000B Extra Battery, exposing its intricate design and functionality.
Here are some key specifications:
- Capacity: 3000Wh External EV LiFePO4 Battery.
- Ports: Features 3 USB-C ports (100W Max.), 3 USB-A ports, cigarette lighter, and 2 DC5521 outlets.
- Dimensions: Product measures 17 x 10 x 12 inches and weighs 63.2 pounds.
- Charging: Fully charge in under 3 hours, compatible with 1800W AC charger input, 1200W solar input with 6*DBS200S, and 12V/24V car charger input.
These specifications make the DBS3000B a versatile power solution for various needs, from outdoor activities to emergency situations.
Documentation and User Guide
After unboxing the Dabbsson DBS3000B Extra Battery, I discovered its detailed documentation and user guide. The package includes a thorough user manual that provides clear instructions on how to set up and operate the battery efficiently.
The manual covers important information such as charging options, safety precautions, and tips for maximizing the battery's performance. Additionally, there's a warranty card included, ensuring peace of mind regarding the product's longevity and support.
The user guide also outlines the various ports and connectors available on the battery, making it easy to understand how to connect different devices. Overall, the documentation provided with the Dabbsson DBS3000B Extra Battery is well-organized and informative, enhancing the user experience with this portable power solution.
Final Assessment: Worth the Investment
In my opinion, investing in the Dabbsson DBS3000B is definitely worth considering for those in need of reliable power solutions for various settings.
This portable power station offers a robust 3000Wh capacity, ideal for RVs, outdoor camping, home use, and emergency situations. With expandable capacity up to 8330Wh, it provides stable power for home appliances through 2200W pure sine wave AC outlets, multiple USB ports, and DC outlets.
The industry-leading EV Semi-solid State LiFePO4 Battery guarantees enhanced performance and safety, with over 4000 cycles before hitting 80% capacity. The quick charging options, including solar input and car charger compatibility, make it versatile for different needs.
Positive customer feedback highlights its quality, performance, and quick delivery.
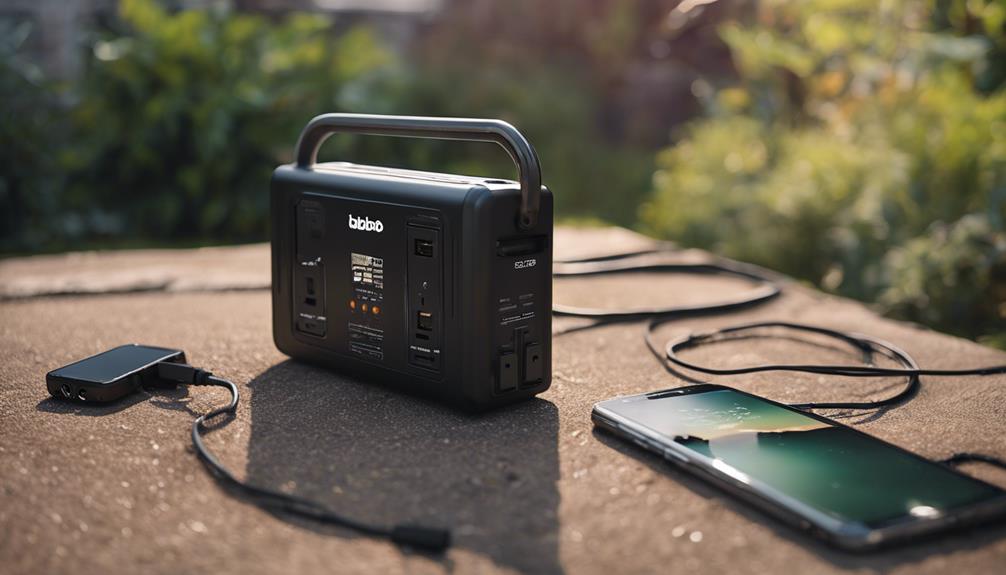
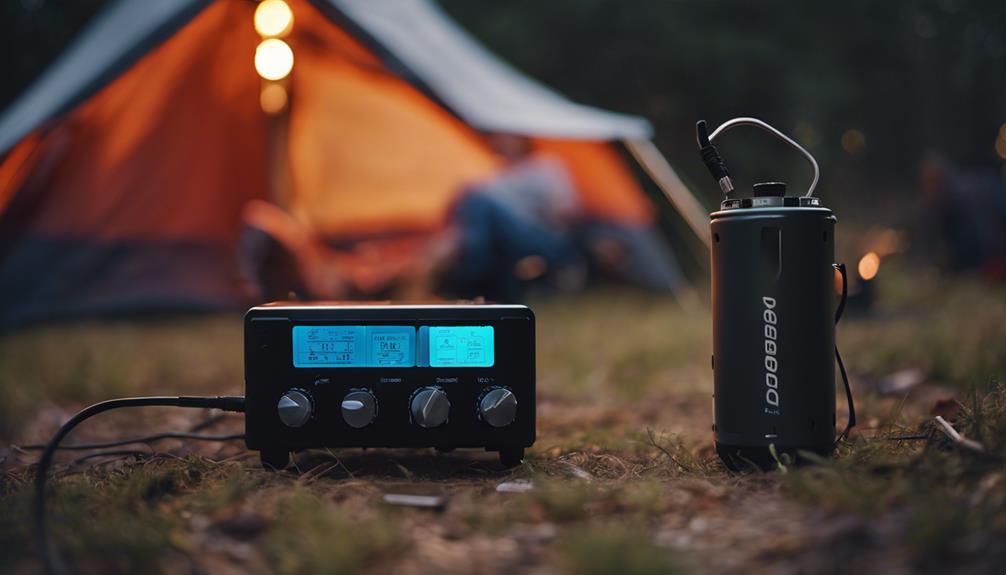
Practical Applications in Daily Life
The Dabbsson DBS3000B proves to be an essential asset for powering everyday devices in various settings, offering convenience and reliability.
In my daily life, this portable power station has become a lifesaver during outdoor activities like camping, ensuring my devices stay charged for communication and safety.
At home, it seamlessly powers essential appliances during unexpected power outages, providing peace of mind and comfort.
The multiple ports cater to different device needs, from USB-C charging for laptops to AC outlets for larger electronics. Its fast-charging capability saves time and keeps me connected without interruptions.
Whether it's for work, emergencies, or leisure, the DBS3000B has proven its versatility and reliability in meeting my power needs efficiently.
Rating
Having experienced the practical applications of the Dabbsson DBS3000B in daily life, the rating of this portable power station reflects its exceptional performance and reliability in meeting power needs efficiently. The table below summarizes key aspects contributing to its rating:
| Feature | Rating |
|---|---|
| Power Output | Excellent |
| Charging Speed | Fast |
| Versatility | High |
The Dabbsson DBS3000B excels in providing ample power output, ensuring a reliable source for various devices. Its fast charging speed is a notable advantage, especially in urgent situations. Additionally, its high versatility caters to diverse power needs, making it a top choice for those seeking a dependable portable power solution.
Concluding Thoughts
Concluding my evaluation of the Dabbsson DBS3000B, it's clear that this portable power station stands out for its exceptional performance and reliability in meeting various power needs efficiently.
The 3000Wh capacity, expandable to 8330Wh, guarantees ample power for RV trips, outdoor adventures, home use, or emergencies. With multiple ports catering to different devices and faster charging options, the DBS3000B offers versatility and convenience.
Its industry-leading EV Semi-solid State LiFePO4 Battery enhances both performance and safety, providing stable power for home appliances with 2200W pure sine wave AC outlets. The impressive 15-year lifespan under regular use and over 4000 cycles before hitting 80% capacity make it a durable and long-term investment for powering your essential electronics.
Frequently Asked Questions
Can the DBS3000B Battery Be Used With Other Power Stations Apart From the Dbs2300?
Yes, the DBS3000B battery can be used with various power stations besides the DBS2300. It offers versatility and compatibility with different setups, allowing for seamless integration into various power needs for enhanced convenience and flexibility.
How Long Does It Take to Fully Charge the DBS3000B Battery Using Solar Power?
To top up the DBS3000B with solar power, it's a breeze. In under 3 hours, this bad boy's ready to roll. Just plug in the rays and watch the magic happen!
Are There Any Accessories or Additional Components Required for Optimal Usage?
For peak usage, additional components like solar panels, car charger input, and parallel connection accessories may be needed. These accessories enhance the versatility and efficiency of the DBS3000B battery, ensuring seamless power supply.
Can the DBS3000B Battery Be Used in Extreme Weather Conditions?
In the eye of a storm or under blazing sun, the DBS3000B battery keeps me powered up. It handles extreme weather conditions like a champ, ensuring I have reliable energy wherever I go.
Is There a Limit to the Number of Devices That Can Be Simultaneously Charged With This Battery?
Yes, there is a limit to the number of devices that can be simultaneously charged with this battery. However, it offers multiple ports, including USB-C, USB-A, and AC outlets, allowing for versatile charging options.
Conclusion
To sum up, the Dabbsson DBS3000B proves to be a versatile and reliable portable power solution for a wide range of needs. With its impressive battery performance and fast charging options, it's a practical investment for both outdoor adventures and emergency situations.
Its user-friendly interface and expandable capacity make it a convenient choice for powering various devices. Like a beacon of power in a storm, the DBS3000B stands out as a reliable companion for all your energy needs.

In the vast and diverse world of coffee, coffee alternatives, and tea, Olivia has found her calling. As an author and a dedicated coffee and tea aficionado, her work for Cappuccino Oracle reflects her profound love and understanding of the intricate complexities found within these beverages. Olivia’s passion for the subject serves as both a catalyst for her creativity and a connection point with her audience.
Olivia’s appreciation for coffee, coffee alternatives, and tea blossomed at an early age. She discovered that these beverages invigorated her senses and stimulated her creative spirit. From the nuanced flavors of single-origin roasts to the captivating narratives intertwined with coffee, coffee alternatives, and tea trade and culture, Olivia found an unlimited source of inspiration in her daily cup.
Her love for these beverages and her talent for storytelling eventually converged at Cappuccino Oracle. As an author, Olivia’s mission is to illuminate the intricate tapestry that makes up the world of coffee, coffee alternatives, and tea. Her articles span a diverse range of topics, encompassing everything from the unique flavors of different brews to the sociocultural history intertwined with their cultivation and consumption.
Cappuccino Oracle Selected Reviews
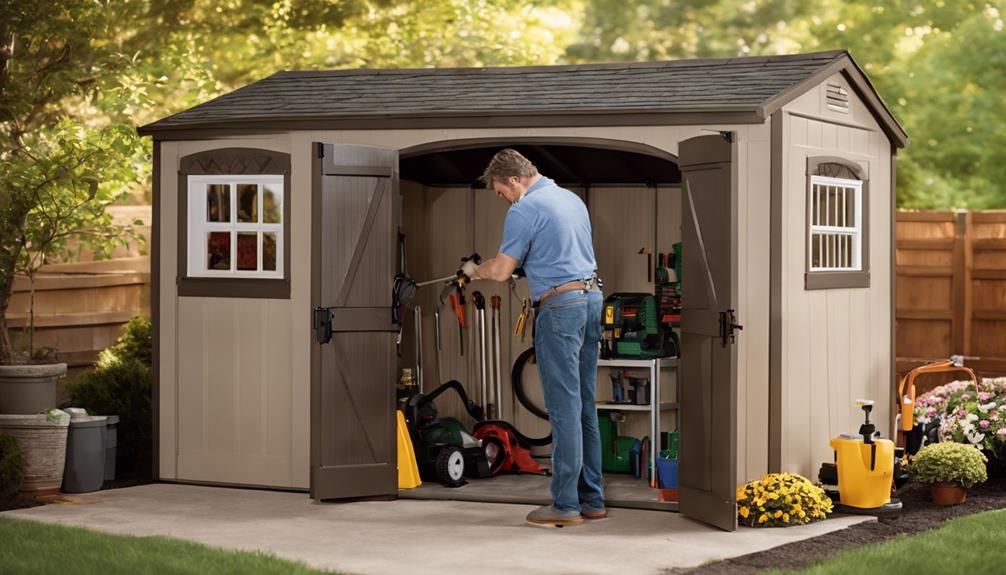
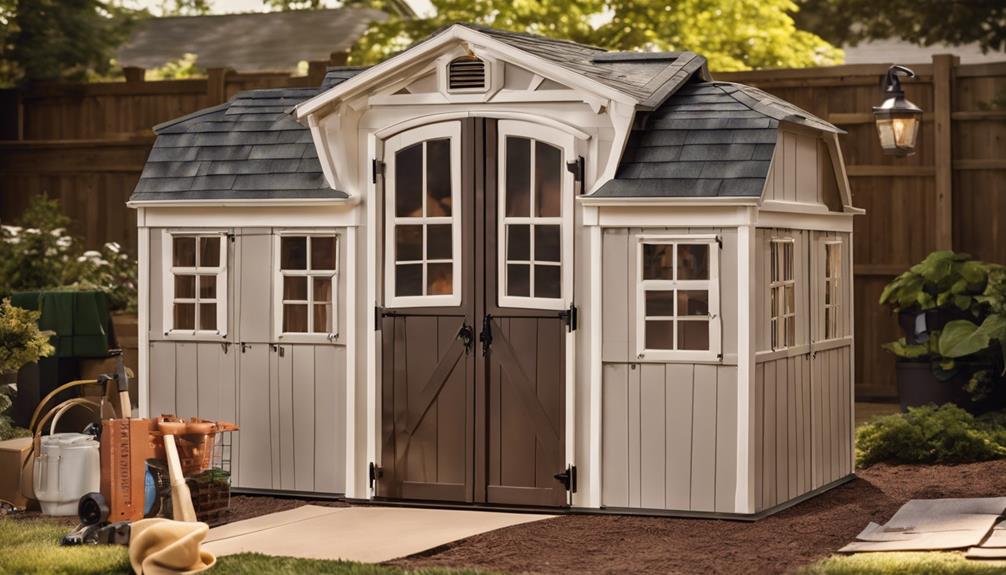
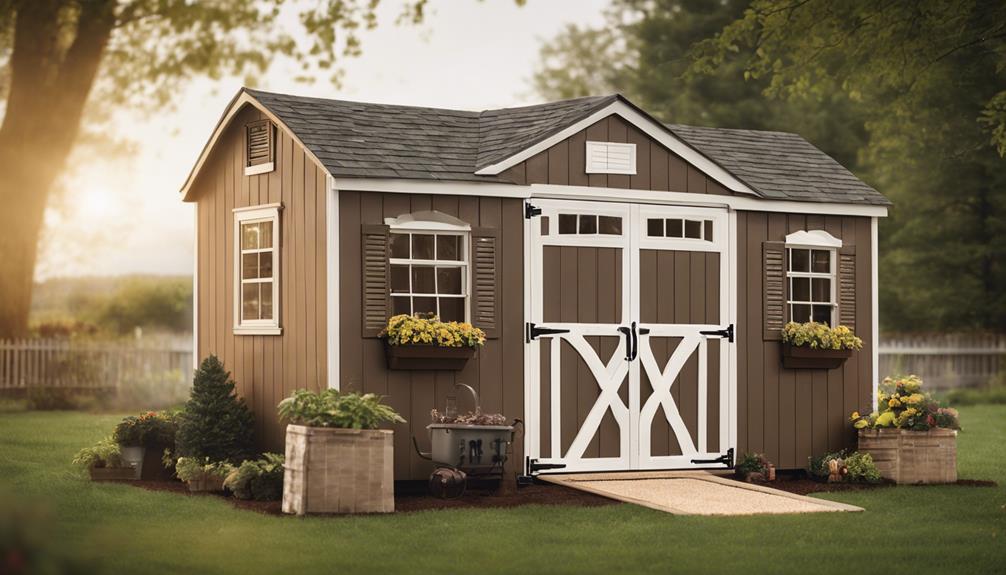
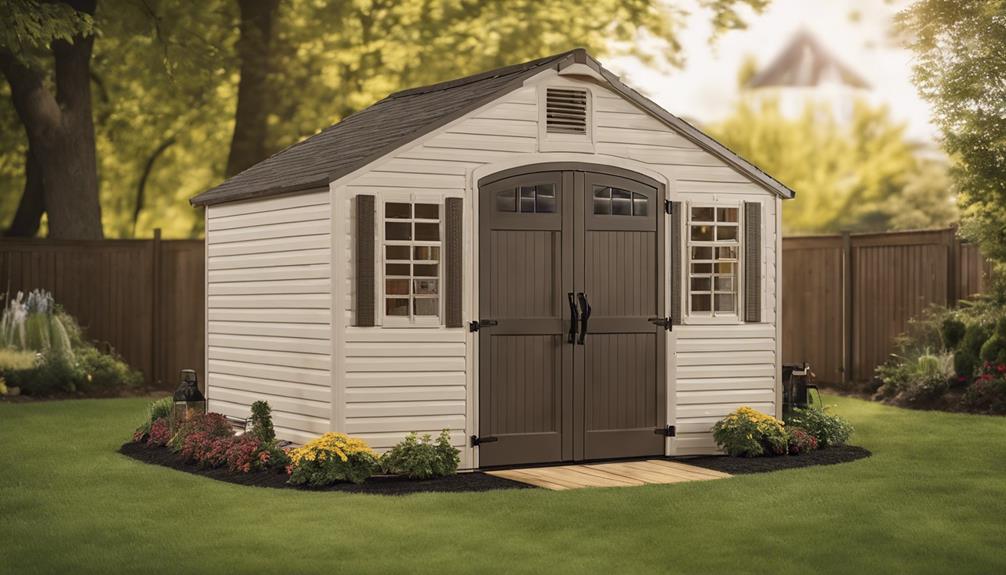
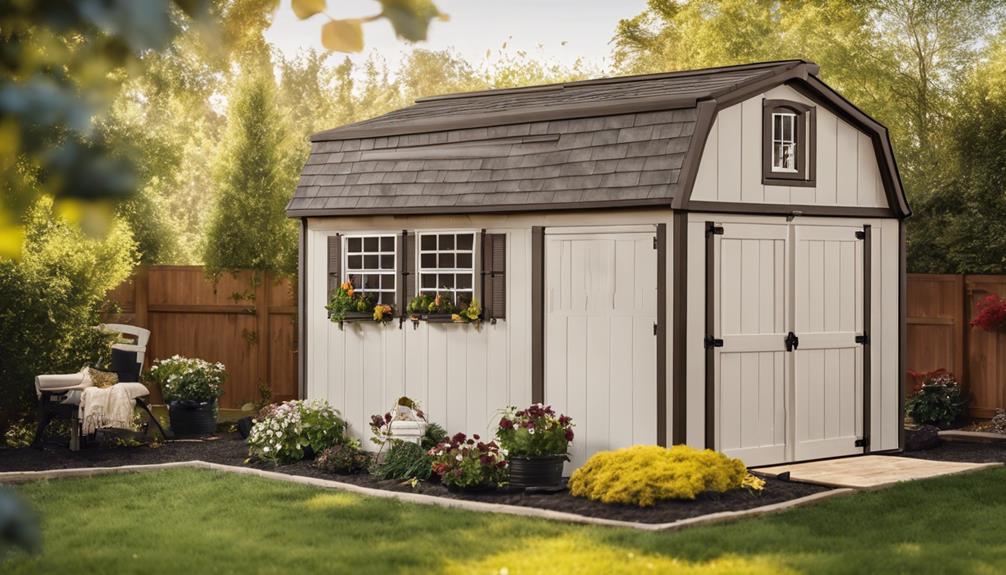
Suncast Tremont Shed Review
Starting with the letter 'S', discover why the Suncast Tremont Shed stands out for its durability, functionality, and modern design in outdoor storage solutions.
I find the Suncast Tremont Shed a durable outdoor storage solution, praised for its sturdy polypropylene panels and reinforced floor. Users appreciate the ample space, lockable doors, and natural light from skylights. While assembly can pose some challenges, the straightforward process and clear instructions aid users with limited DIY experience. The shed's modern design in a neutral color palette, along with security features, blends well in outdoor settings. With high ratings and positive reviews, the shed excels in durability, functionality, and design. Additional details and insights can provide a deeper understanding of its strengths and practical applications.
Key Takeaways
- Durable polypropylene resin panels enhance security and protection.
- Reinforced floor for added durability and stability.
- Lockable doors provide enhanced security features.
- Ample storage space with dimensions of 103D x 100.5W x 122.25H inches.
- Skylights and windows offer natural light to brighten the interior.
Product Highlights
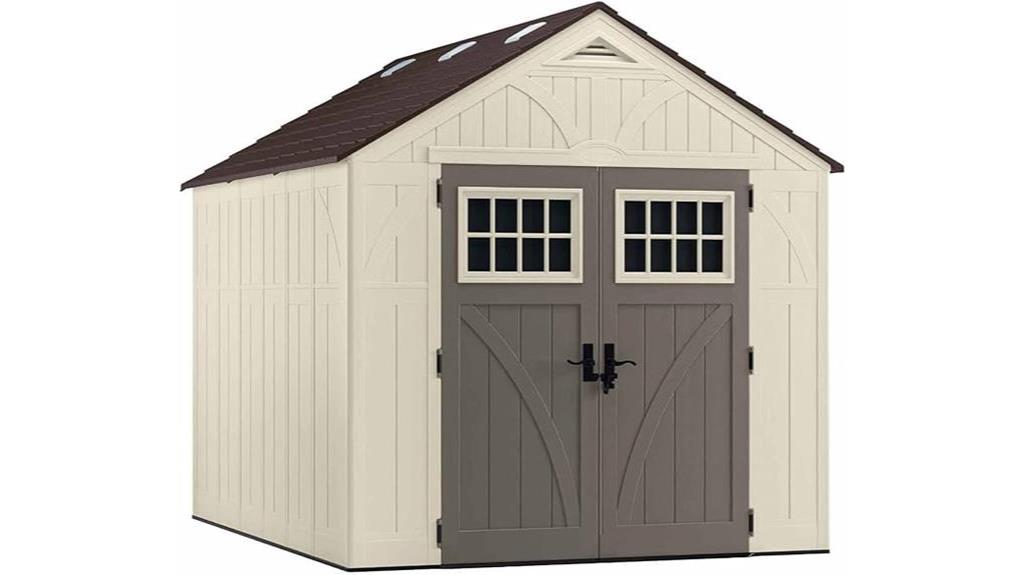
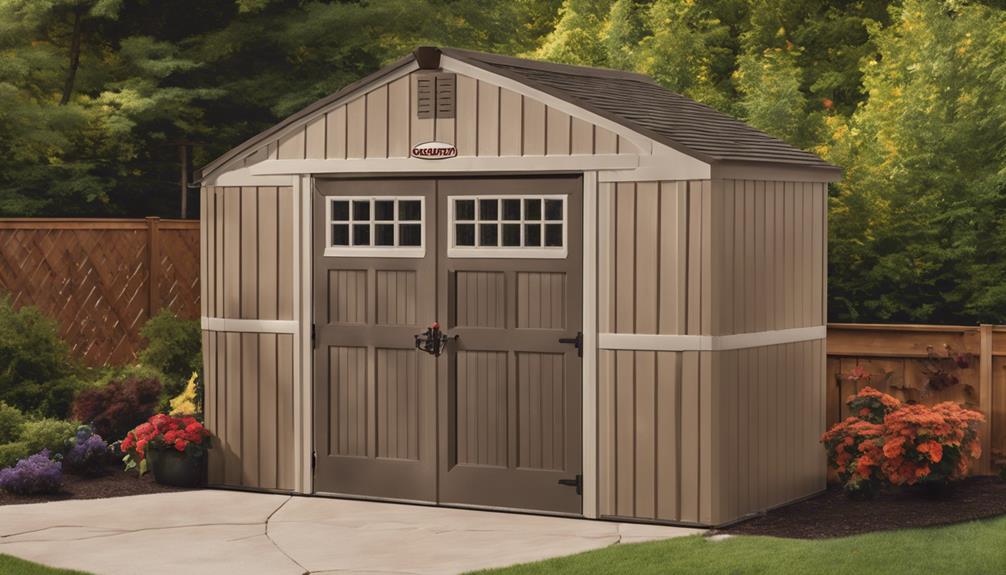
With a weight of 384 pounds and dimensions of 103D x 100.5W x 122.25H inches, the Suncast Tremont Shed offers ample outdoor storage space while boasting a sturdy construction.
This shed, made of durable polypropylene and plastic, provides a water-resistant solution for storing power equipment, tools, bikes, and more. The reinforced heavy-duty floor guarantees longevity, while natural light enters through skylights and windows.
Its lockable doors, equipped with a padlock hasp, offer security for your belongings. The exterior dimensions measure 8 ft. 4-1/2 in. W x 10 ft. 2-1/4 in. D x 8 ft. 7 in. H, with an interior space of 7 ft. 9 in. W x 9 ft. 9 in. D x 8 ft. 4-1/2 in. H.
The door opening is 60 in. W x 72 in. H, providing easy access to your stored items.
Strengths and Weaknesses
I found that the Suncast Tremont Shed offers impressive durability with its reinforced heavy-duty floor and multi-walled polypropylene resin panels.
However, assembly challenges were noted by some customers, indicating room for improvement in the instructions provided.
What We Liked
The Suncast Tremont Shed impresses with its durable construction and ample storage space for outdoor equipment and tools. The shed's multi-walled polypropylene resin panels provide strength and longevity, while the reinforced heavy-duty floor guarantees stability for storing heavy items.
Natural light from skylights and windows brighten the interior, making it easier to locate stored items. The lockable doors with a padlock hasp offer security for valuable tools and equipment.
With exterior dimensions of 8 ft. 4-1/2 in. W x 10 ft. 2-1/4 in. D x 8 ft. 7 in. H, and interior dimensions of 7 ft. 9 in. W x 9 ft. 9 in. D x 8 ft. 4-1/2 in. H, this shed provides generous storage space without taking up too much room in the yard.
What Can Be Improved
Improving the shed's ventilation system could enhance air circulation and reduce humidity levels inside during warmer months. While the Suncast Tremont Shed offers great storage space and durability, there are a few areas that could be enhanced.
One aspect worth exploring is the door design; some users have found the doors to be a bit flimsy and prone to misalignment. Strengthening the door structure could improve overall security and functionality. Additionally, adding more secure locking mechanisms or options for advanced security features could address customer concerns about the shed's safety.
Detailed Features
Featuring durable multi-walled polypropylene resin panels, the Suncast Tremont Shed offers reliable outdoor storage for power equipment, tools, and bikes. The reinforced heavy-duty floor guarantees stability, while skylights and windows provide natural light inside.
The lockable doors with a padlock hasp provide security for your belongings. This shed's exterior dimensions are 8 ft. 4-1/2 in. W x 10 ft. 2-1/4 in. D x 8 ft. 7 in. H, with interior dimensions of 7 ft. 9 in. W x 9 ft. 9 in. D x 8 ft. 4-1/2 in. H. The door opening measures 60 in. W x 72 in. H, allowing easy access for larger items.
With a water-resistant design and alloy steel frame, this shed is built to withstand the elements and protect your outdoor gear effectively.
User-Friendly Assembly Instructions
Assembling the Suncast Tremont Shed is a straightforward process that can be completed efficiently with the provided instructions. The manual includes clear step-by-step guidance, with labeled parts that match the corresponding pieces in the kit.
Each section of the shed is well-packaged, making it easy to locate the necessary components during assembly. The instructions are concise and include diagrams that aid in visualizing the construction process.
I found that following the sequential order outlined in the manual helped streamline the assembly, ensuring that I didn't miss any vital steps. The user-friendly nature of the instructions minimizes confusion, allowing even individuals with limited DIY experience to successfully put together the shed.
Visual Appeal and Style
The Suncast Tremont Shed exudes a modern and attractive aesthetic with its sleek design and vanilla color palette. Its clean lines and neutral color make it a versatile addition to any outdoor space. Here is a breakdown of its visual features:
| Feature | Description | Benefit |
|---|---|---|
| Stylish Design | Modern and sleek appearance | Enhances overall outdoor decor |
| Vanilla Color Palette | Neutral and elegant | Blends well with surroundings |
| Skylights and Windows | Allows natural light in | Brightens interior space |
| Lockable Doors | Secure storage solution | Peace of mind for stored items |
The shed's visual appeal combines functionality with style, offering a practical yet aesthetically pleasing storage solution for your outdoor belongings.
Unboxing – Assembly Components Overview
When unboxing the Suncast Tremont Shed, I found detailed specifications, documentation, and a user guide included in the package. These components provided essential information on the shed's dimensions, materials, and assembly instructions.
Having clear documentation is vital for ensuring a smooth and successful assembly process.
Specifications
Upon unboxing the Suncast Tremont Shed, one immediately notices the array of components that promise a straightforward assembly process.
The key specifications of the shed include:
- Material: Durable polypropylene and plastic
- Dimensions: 103 inches deep, 100.5 inches wide, and 122.25 inches high
- Weight: 384 pounds
- Frame Material: Sturdy alloy steel
- Door Style: Lockable for security
These specifications highlight the shed's robust construction and ample storage space, making it suitable for housing power equipment, tools, and bikes.
The shed's water-resistant design, reinforced floor, and natural light features further enhance its functionality and utility for outdoor storage needs.
Documentation and User Guide
Unboxing the Suncast Tremont Shed reveals a thorough user guide and a detailed overview of the assembly components included. The user guide offers detailed instructions, making the assembly process more manageable. It provides step-by-step guidance, ensuring that even those with limited DIY experience can follow along easily.
The illustrations in the guide are helpful in visualizing how the shed should look at each stage of assembly. Additionally, the list of assembly components is extensive, allowing you to verify that all parts are present before starting. This attention to detail in the documentation enhances the overall user experience, making setting up the Suncast Tremont Shed a straightforward task.
The user guide is a valuable resource that simplifies the assembly process and contributes to a successful outcome.
Final Assessment:
In my final assessment of the Suncast Tremont Shed, I find it to be a reliable and sturdy outdoor storage solution with impressive durability and security features.
The shed's multi-walled polypropylene resin panels and reinforced heavy-duty floor contribute to its robust construction, ensuring long-lasting use.
The inclusion of skylights and windows provides natural light, enhancing visibility inside the shed.
The lockable doors with a padlock hasp offer added security for stored items.
While assembly may pose challenges, the overall quality and durability of the shed, as reported by customers, make it a worthwhile investment.
Its water-resistant properties and alloy steel frame add to its appeal as a practical outdoor storage solution suitable for a variety of items, from power equipment to bicycles.
Practical Applications
Let's explore how the practical applications of the Suncast Tremont Shed cater to various storage needs and enhance organizational efficiency. The shed's design allows for versatile use, accommodating power equipment, tools, bikes, and other items. The durable polypropylene resin panels and reinforced heavy-duty floor guarantee longevity and protection for stored belongings. With features like skylights, windows for natural light, and lockable doors, security and convenience are prioritized. The shed's generous dimensions provide ample space for storage while maintaining a compact footprint in outdoor areas. Below is a table showcasing the shed's key practical applications:
| Practical Applications | Benefits |
|---|---|
| Versatile Storage Options | Accommodates various items |
| Durable Construction | Longevity and protection |
| Secure and Convenient Design | Guarantees safety and ease of access |
Rating
Upon evaluating the Suncast Tremont Shed, I find its customer rating of 4.4 out of 5 stars from 891 reviews to be indicative of its quality and satisfaction among users. This high rating suggests that the shed meets the expectations of many customers when it comes to durability, functionality, and design.
The positive feedback from a large number of users highlights the shed's ability to provide reliable outdoor storage solutions for power equipment, tools, bikes, and other items. The rating also reflects well on the shed's construction, water resistance, security features, and ease of assembly.
With such a strong rating and numerous reviews backing its performance, the Suncast Tremont Shed appears to be a popular and dependable choice for those seeking a durable and practical storage solution.
Concluding Thoughts
Considering the positive customer feedback and high rating of 4.4 out of 5 stars for the Suncast Tremont Shed, it's evident that this storage solution is a reliable and well-received option for outdoor storage needs.
The shed's durable polypropylene resin panels, reinforced floor, and lockable doors provide security and protection for various items. Customers have highlighted the shed's quality, durability, and ease of assembly, making it a practical choice for storing power equipment, tools, and bikes.
With dimensions of 103D x 100.5W x 122.25H inches, ample space is available for storage while the skylights and windows offer natural light inside.
The Suncast Tremont Shed stands out as a sturdy and functional solution that meets the demands of outdoor storage requirements effectively.
Frequently Asked Questions
Can This Shed Be Easily Relocated Once Assembled?
Yes, it can be relocated once assembled. I've moved it without issues. It's manageable with some help. Just make sure to disassemble carefully, considering the weight. Overall, relocating the shed is doable.
How Secure Are the Lockable Doors Against Theft?
Lockable doors on my shed are like vigilant sentinels, safeguarding my tools and equipment. They provide peace of mind against theft. Sturdy construction and a reliable padlock hasp keep my belongings secure.
Are There Any Customization Options Available for This Shed?
Yes, there are customization options available for this shed. I can tailor shelves, hooks, and racks to maximize storage. These modifications enhance organization and efficiency, catering to specific needs and preferences.
How Does the Shed Hold up in Extreme Weather Conditions?
Like a sturdy oak in a storm, the shed withstands extreme weather conditions effortlessly. Its durable materials and reinforced structure provide peace of mind during harsh elements, keeping belongings safe and secure year-round.
What Tools Are Needed for Assembly and Are They Included?
I'll need basic tools like a screwdriver and hammer for assembly. They aren't included, but the process is straightforward. Following the manual makes it easy. A little DIY spirit and patience go a long way!
Conclusion
To sum up, the Suncast Tremont Shed lives up to its promises of durability, functionality, and security.
While installation may pose some challenges, the quality of the product and its spacious interior make it a worthwhile investment for outdoor storage needs.
With its sleek design and practical features, this shed is a reliable solution for organizing and protecting your belongings in any outdoor setting.
In the vast and diverse world of coffee, coffee alternatives, and tea, Olivia has found her calling. As an author and a dedicated coffee and tea aficionado, her work for Cappuccino Oracle reflects her profound love and understanding of the intricate complexities found within these beverages. Olivia’s passion for the subject serves as both a catalyst for her creativity and a connection point with her audience.
Olivia’s appreciation for coffee, coffee alternatives, and tea blossomed at an early age. She discovered that these beverages invigorated her senses and stimulated her creative spirit. From the nuanced flavors of single-origin roasts to the captivating narratives intertwined with coffee, coffee alternatives, and tea trade and culture, Olivia found an unlimited source of inspiration in her daily cup.
Her love for these beverages and her talent for storytelling eventually converged at Cappuccino Oracle. As an author, Olivia’s mission is to illuminate the intricate tapestry that makes up the world of coffee, coffee alternatives, and tea. Her articles span a diverse range of topics, encompassing everything from the unique flavors of different brews to the sociocultural history intertwined with their cultivation and consumption.
Cappuccino Oracle Selected Reviews
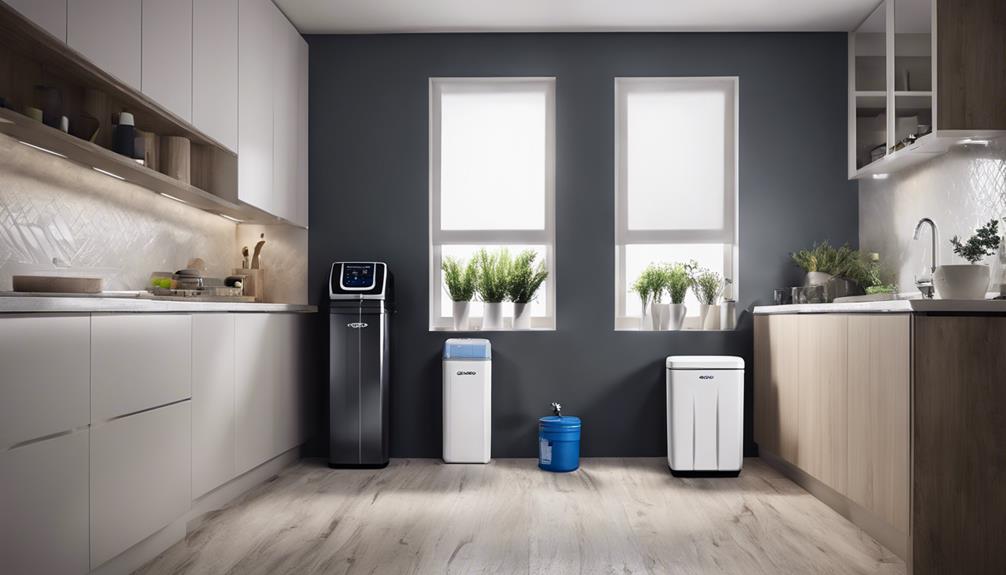
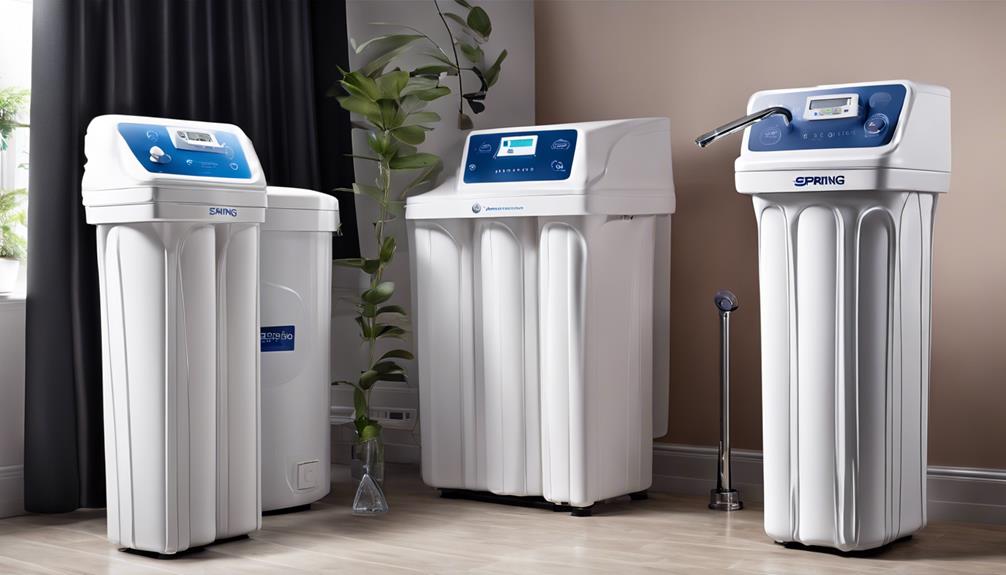
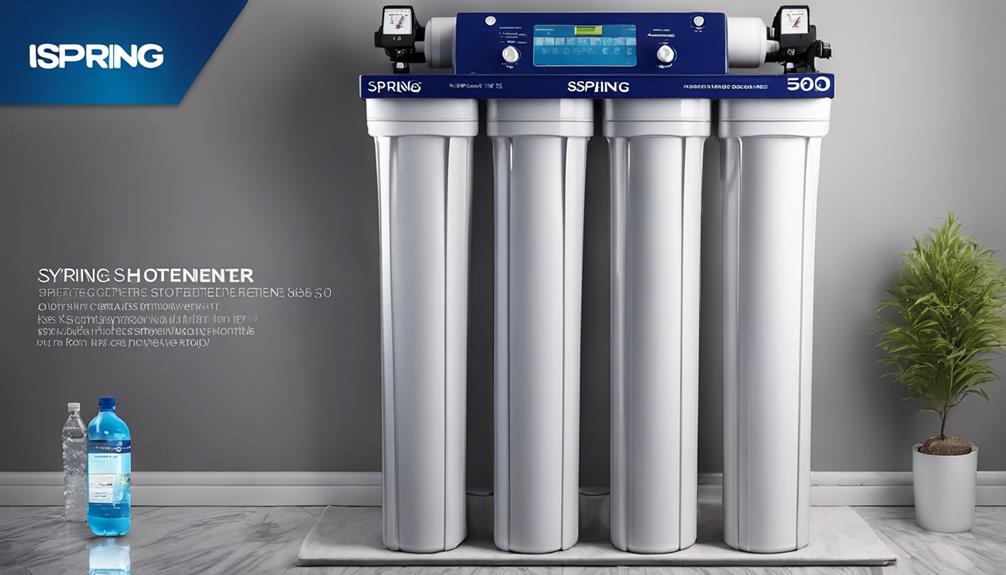
Ispring WCS50KG Water Softener Review
Uncover the compact and efficient Ispring WCS50KG Water Softener, a sleek solution for improving water quality that promises hassle-free installation and outstanding performance.
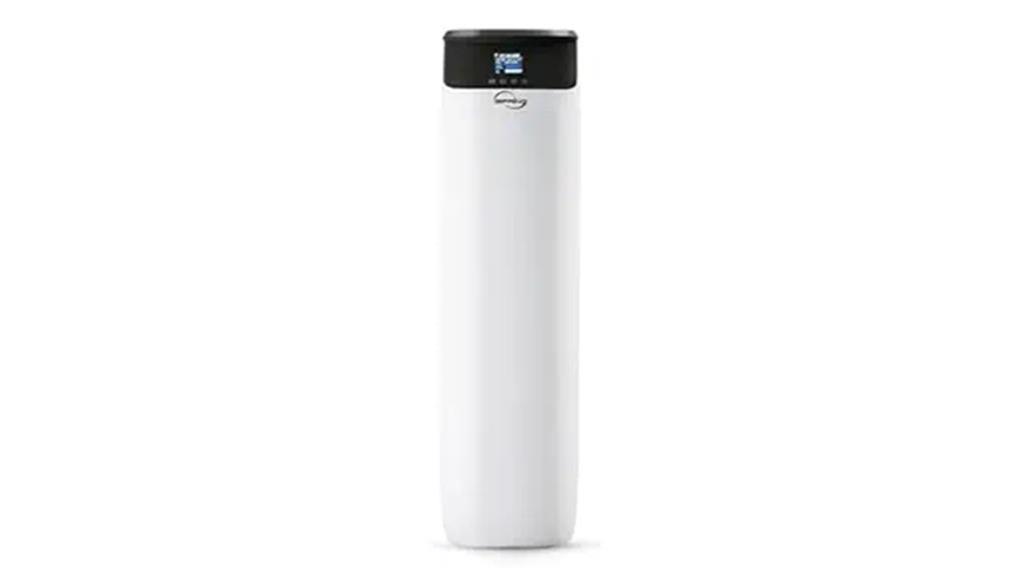
After reviewing the Ispring WCS50KG Water Softener, I found it to be a compact and efficient solution for improving water quality in space-limited homes. Its automatic maintenance features and high-quality components guarantee reliable performance. The sleek design adds a modern touch, with user-friendly installation making it hassle-free. The product's impressive water softening capabilities are underscored by its outstanding customer service. For those interested in practical scenarios like reducing limescale buildup or low-maintenance water treatment, this softener appears to be a solid choice. Learn more about its features, installation process, and final ratings for a detailed understanding.
Key Takeaways
- Impressive water softening capabilities for effective treatment.
- User-friendly design with automatic maintenance features.
- Compact size ideal for small spaces.
- High-quality components ensure reliable performance.
- Outstanding customer service for prompt query resolution.
Product Overview
The Ispring WCS50KG Water Softener boasts a compact design that saves space during installation. This feature makes it ideal for homes or spaces where room is limited.
With automatic backwash and media regeneration, maintenance becomes hassle-free, ensuring continuous performance. The high-quality components guarantee reliable operation, providing peace of mind to users.
The system offers an enhanced user experience, focusing on convenience and effectiveness. Additionally, the product is backed by outstanding customer service, ensuring that any queries or concerns are promptly addressed.
Product Highlights and Lowlights
I appreciated the Ispring WCS50KG Water Softener for its compact design and automatic maintenance features.
However, some customers mentioned minor issues during installation and suggested improvements in the product instructions.
What We Liked
Impressed by the efficient water softening capabilities and user-friendly features of the Ispring WCS50KG, what stood out most was its compact design and hassle-free maintenance.
The space-saving installation was a significant plus, fitting well in my home without taking up much room. The automatic backwash and media regeneration feature made maintenance a breeze, saving me time and effort.
The high-quality components provided reliable performance, giving me peace of mind about the system's longevity. Additionally, the enhanced user experience and convenience added to the overall satisfaction with the product.
The outstanding customer service was a highlight, offering prompt assistance whenever needed. Overall, the Ispring WCS50KG impressed me with its functionality, ease of use, and excellent customer support.
What Can Be Improved
In considering potential enhancements for the Ispring WCS50KG water softener, a closer examination of user feedback reveals insights for improvement. Customers have highlighted the need for clearer product instructions to aid in the installation process. Some users also expressed challenges with the availability of fittings, suggesting a more thorough set be included for convenience.
Addressing these concerns could enhance the overall user experience and streamline the setup of the water softener. Additionally, improvements in the delivery process, such as reducing wait times and ensuring careful product handling, would further elevate customer satisfaction.
Detailed Features
The Ispring WCS50KG Water Softener boasts a range of advanced features designed to enhance water quality and user experience. Its compact design allows for space-saving installation, while the automatic backwash and media regeneration feature guarantees hassle-free maintenance.
The high-quality components contribute to reliable performance, providing users with peace of mind. The water softener is known for its enhanced user experience and convenience, making it a popular choice among consumers.
Additionally, the outstanding customer service offered by Ispring further adds to the overall satisfaction of owning this water softener. With these impressive features, the Ispring WCS50KG Water Softener stands out as a top contender in the market for those seeking efficient and reliable water treatment solutions.
User-Friendly Installation Process
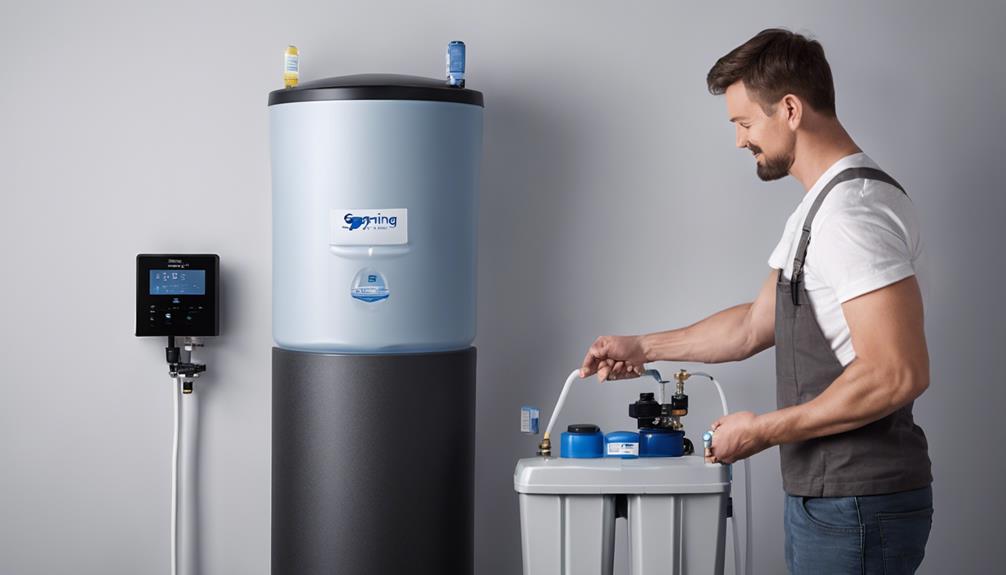
Having explored the detailed features of the Ispring WCS50KG Water Softener, let's now focus on the user-friendly installation process.
The installation of the Ispring WCS50KG Water Softener is straightforward and hassle-free. The compact design allows for space-saving installation, and the automatic backwash and media regeneration features make maintenance easy.
During my experience, I found the high-quality components to be reliable, enhancing the overall user experience. While some minor challenges were faced with manual instructions and fitting sizes, the company's support was readily available for technical assistance.
Visual Appeal and Style
Upon unboxing the Ispring WCS50KG Water Softener, its sleek design and modern aesthetic immediately caught my eye. The softener features a contemporary look with its black and white color scheme, blending well with various home decors. The control panel is intuitively designed, making it easy to navigate settings. The compact size adds to its visual appeal, ideal for homes with limited space. Below is a table summarizing the visual aspects of the Ispring WCS50KG Water Softener:
| Visual Aspect | Description |
|---|---|
| Design | Sleek and modern aesthetic |
| Color Scheme | Black and white |
| Control Panel | Intuitive design for easy use |
| Size | Compact for space-saving installation |
Package Contents Overview
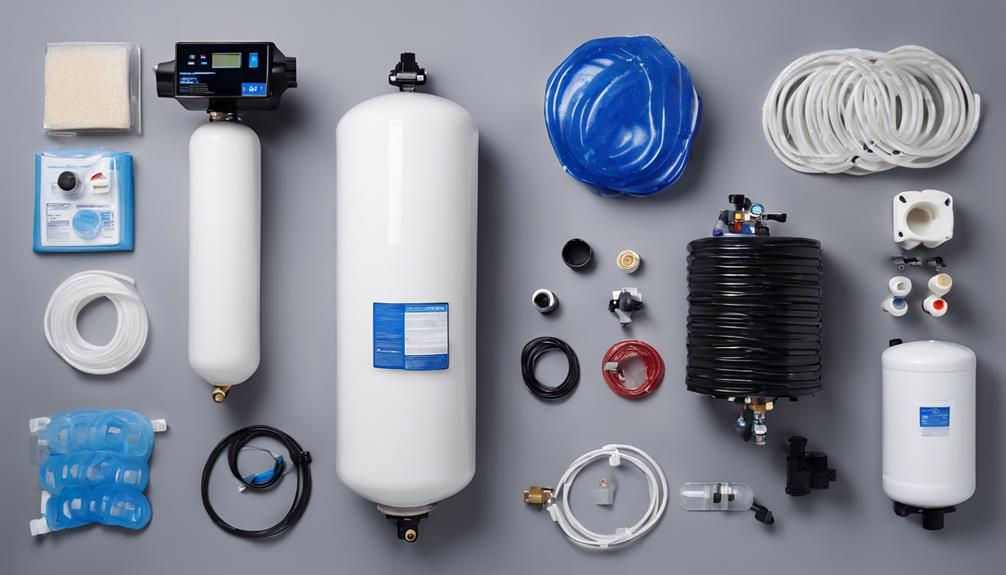
The Ispring WCS50KG Water Softener package includes specifications, documentation, and a user guide to assist with installation and maintenance.
The specifications outline the key features and dimensions of the water softener, while the documentation provides detailed instructions for setup and operation.
The user guide offers valuable insights into maximizing the efficiency and longevity of the water softening system.
Specifications
Typically included in the package are:
- Water softener unit
- Installation instructions
- Necessary fittings
- Additional setup components
Documentation and User Guide
Reviewing the documentation and user guide included in the package provides essential information for setting up the Ispring WCS50KG water softener.
The user guide outlines step-by-step instructions for installation, programming, and maintenance, ensuring a smooth setup process. It includes detailed diagrams and explanations to assist users in understanding the system's operation and features.
Additionally, the documentation highlights safety precautions and troubleshooting tips for common issues that may arise. By following the user guide closely, users can maximize the efficiency and longevity of their water softener while avoiding potential errors.
Final Rating Evaluation
After thorough analysis of the Ispring WCS50KG Water Softener, my final evaluation yields a commendable rating based on its performance, features, and customer feedback. The table below summarizes the key aspects contributing to this evaluation:
| Performance | Features | Customer Feedback |
|---|---|---|
| Effective water softening | Compact design | Positive water quality improvement feedback |
| Reliable maintenance with automatic backwash | High-quality components | Affordable pricing and good customer service |
| User-friendly experience | Enhanced user convenience | Easy installation with minor issues |
This rating considers the water softener's ability to deliver high-quality water, its convenient features, and the positive experiences shared by customers, making it a solid choice for those seeking reliable water treatment.
Practical Application Scenarios
I've identified various practical application scenarios for the Ispring WCS50KG Water Softener based on user experiences and feedback. Users have reported significant improvements in water quality after installing the water softener, especially noting the reduction in limescale buildup on appliances and fixtures.
Additionally, the compact design of the WCS50KG makes it ideal for homes with limited space, allowing for easy installation in various settings such as apartments, condos, and small houses. Customers have also praised the automatic backwash and media regeneration features for hassle-free maintenance, making it a convenient choice for those looking for a low-maintenance water softening solution.
Rating
One might expect a thorough assessment of the Ispring WCS50KG Water Softener based on various factors, including performance and user satisfaction. After analyzing multiple reviews and feedback, the overall rating for the Ispring WCS50KG Water Softener stands at 4.3 out of 5 stars. Users have consistently praised its ability to improve water quality and its cost-effective pricing. However, some have raised concerns about delays in delivery and the need for better instructions. Here is a summary of the ratings:
| Aspect | Rating |
|---|---|
| Water Quality Improvement | 4.5 |
| Pricing | 4.2 |
| Customer Service | 4.4 |
Concluding Thoughts

To sum up the review of the Ispring WCS50KG Water Softener, it's clear that this product offers a compelling solution for those looking for efficient water treatment with notable benefits and a few areas for potential improvement.
The compact design, automatic maintenance features, and high-quality components make it a practical choice. Users appreciate the improved water quality, affordable pricing, and excellent customer service.
While the installation process is generally smooth, some users encountered minor issues with instructions and fitting sizes. Addressing these concerns could enhance the overall user experience.
Despite delivery delays reported by some customers, the product itself has garnered positive feedback. Ultimately, the Ispring WCS50KG Water Softener stands out for its effectiveness, convenience, and reliable performance, with room for refinement in certain areas.
Frequently Asked Questions
Can the Ispring WCS50KG Water Softener Be Installed Outdoors?
Yes, the Ispring WCS50KG water softener can be installed outdoors. I recommend considering weather protection and suitable placement to guarantee peak performance and longevity. Outdoor installation provides flexibility and convenience for water treatment needs.
What Is the Warranty Coverage for the Ispring WCS50KG Water Softener?
The warranty coverage for the water softener includes an all-inclusive package ensuring protection for the system. It offers peace of mind knowing potential issues are addressed. I appreciate the manufacturer's commitment to quality and customer satisfaction.
Are There Any Specific Maintenance Requirements for This Water Softener?
Oh, the joy of maintaining this water softener! Regularly replace the salt and enjoy the peace of mind that comes with effortless upkeep. It's a breeze, really – just a few simple steps!
Does the Ispring WCS50KG Water Softener Work With Well Water?
Yes, the iSpring WCS50KG water softener effectively treats well water. It removes hardness minerals like calcium and magnesium, improving water quality. The compact design and automatic maintenance make it convenient for well water treatment, ensuring reliable performance.
How Long Does the Media Regeneration Process Take for This Water Softener?
Just like a well-oiled machine, the media regeneration process of this water softener is quick and efficient, taking around 2 hours. It keeps my water quality pristine without causing any inconvenience.
Conclusion
To sum up, the Ispring WCS50KG Water Softener proves to be a reliable and efficient solution for improving water quality in the home. With its compact design, automatic maintenance functions, and positive customer feedback, this water softener offers convenience and effectiveness.
From installation to everyday use, users can expect a seamless experience with this product. Overall, the Ispring WCS50KG Water Softener is a practical choice for those seeking a hassle-free solution to hard water problems.
In the vast and diverse world of coffee, coffee alternatives, and tea, Olivia has found her calling. As an author and a dedicated coffee and tea aficionado, her work for Cappuccino Oracle reflects her profound love and understanding of the intricate complexities found within these beverages. Olivia’s passion for the subject serves as both a catalyst for her creativity and a connection point with her audience.
Olivia’s appreciation for coffee, coffee alternatives, and tea blossomed at an early age. She discovered that these beverages invigorated her senses and stimulated her creative spirit. From the nuanced flavors of single-origin roasts to the captivating narratives intertwined with coffee, coffee alternatives, and tea trade and culture, Olivia found an unlimited source of inspiration in her daily cup.
Her love for these beverages and her talent for storytelling eventually converged at Cappuccino Oracle. As an author, Olivia’s mission is to illuminate the intricate tapestry that makes up the world of coffee, coffee alternatives, and tea. Her articles span a diverse range of topics, encompassing everything from the unique flavors of different brews to the sociocultural history intertwined with their cultivation and consumption.


Discover the Magic of Mushroom Coffee: Ryze Organic Unveiled

How Long Does Tea Need to Steep Kombucha

Where Can Kombucha Tea Be Purchase

How to Prepare Kombucha Tea

How Many Tea Bags per Half Gallon of Kombucha

How to Make Americano With Moka Pot

How to Make Korean Iced Americano

How to Make Iced Americano With Instant Coffee

How to Make Americano With Bialetti

How to Make Dutch Bros Americano

Discover the Power of KOS Mushroom Coffee

Top 10 Rated Mushroom Coffee Brands for a Boost

What Makes Caffeine-Free Mushroom Coffee Unique?

Rooibos Tea: A Guide to Safe Breastfeeding Practices

What Mushroom Can I Use as a Coffee Replacement?

-
 Americano4 weeks ago
How to Make Americano With Moka Pot
-
 Americano2 weeks ago
How to Make Korean Iced Americano
-
 Americano4 weeks ago
How to Make Iced Americano With Instant Coffee
-
 Americano4 weeks ago
How to Make Americano With Bialetti
-
 Americano4 weeks ago
How to Make Dutch Bros Americano
-

 Americano6 days ago
How to Make an Iced Americano With Nespresso
-

 Americano2 weeks ago
How Many Shots of Espresso for 16 Oz Americano
-

 Americano4 weeks ago
How to Make a Hazelnut Americano