
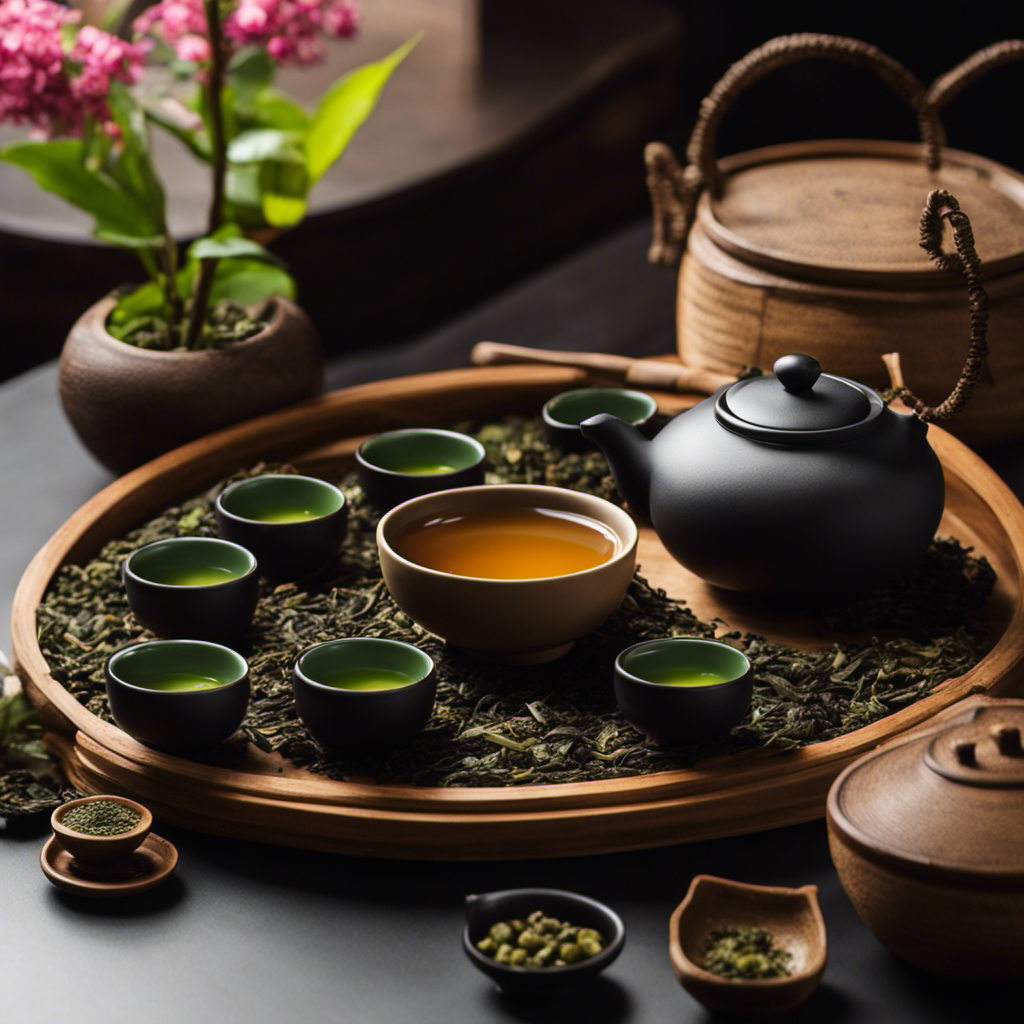
Oolong Tea
Why Do My Joints Canoe

Have you ever felt as though your joints have decided to embark on a new adventure in canoeing? If so, you’re in good company. This vexing and sometimes agonizing condition is something numerous people endure. But what’s the cause of it? In this article, we’re going to explore the realm of joint instability thoroughly to discover what drives this baffling occurrence.
We’ll explore common conditions that are associated with joint instability, such as arthritis and ligamentous laxity.
We’ll also discuss the role that muscle weakness and imbalance play in destabilizing our joints.
Additionally, we’ll examine how postural alignment affects joint stability and delve into injury prevention strategies.
If you’re tired of your joints going off on their own canoeing adventures, it’s time to take action.

We’ll provide tips on seeking professional help, making lifestyle modifications, and utilizing assistive devices and joint support products.
Finally, we’ll highlight the importance of long-term joint care and maintenance.
So, grab your paddle and let’s navigate the turbulent waters of joint instability together!
Key Takeaways
- Joint instability can be caused by factors such as previous injuries, medical conditions like arthritis, and muscle weakness or imbalance.
- Strengthening exercises, physical therapy, and maintaining a healthy weight can help improve joint stability and reduce stress on joints.
- Stretching exercises and proper postural alignment are important for maintaining joint health and reducing the risk of injury.
- Joint supplements, such as glucosamine and chondroitin, may support joint health and reduce inflammation.
Understanding Joint Instability
Feeling like your joints are constantly on a wild ride? It’s time to understand why they’re going canoe!
Joint instability occurs when the ligaments and muscles surrounding a joint are unable to provide adequate support, resulting in excessive movement and a sensation of joint ‘giving way.’
Common causes of joint instability include previous injuries, such as sprains or dislocations, as well as certain medical conditions like Ehlers-Danlos syndrome or rheumatoid arthritis.
Treatment options for joint instability vary depending on the severity and underlying cause. Physical therapy is often recommended to strengthen the muscles around the joint and improve stability.
In more severe cases, surgical interventions, such as ligament reconstruction, may be necessary. Understanding the common conditions associated with joint instability will help shed light on the underlying reasons for your joints going canoe.
Common Conditions Associated with Joint Instability
When it comes to joint instability, there are several common conditions that can contribute to the problem.
Ligament tears and sprains are one of the main culprits, as they can lead to joint laxity and instability.
Arthritis and joint degeneration are also key factors, as they can cause joint damage and weaken the surrounding structures.
Understanding and addressing these conditions is crucial in managing joint instability and improving overall joint health.
Ligament Tears and Sprains
One common cause of joint instability is a ligament tear, which can result in excruciating pain and limited mobility. Ligaments are tough bands of tissue that connect bones and help stabilize joints. When a ligament is torn, it can no longer provide the necessary support, leading to joint instability.
Ligament tears commonly occur due to sudden trauma or repetitive overuse. Treatment for ligament tears involves a combination of rest, physical therapy, and sometimes surgery. Ligament rehabilitation programs aim to strengthen and stabilize the affected joint through targeted exercises and stretches.
Additionally, prevention strategies such as proper warm-up, using protective gear, and maintaining a healthy weight can help reduce the risk of ligament tears. Understanding the causes, symptoms, and treatment options for ligament tears is crucial in managing joint instability.
Moving on to arthritis and joint degeneration, these conditions further contribute to joint instability and require a different approach for management.
Arthritis and Joint Degeneration
To better understand the effects of arthritis and joint degeneration on your overall joint stability, it’s important to recognize the impact these conditions can have on your daily activities and mobility.
Arthritis, a common condition characterized by joint inflammation, can lead to joint degeneration over time. This degeneration occurs when the cartilage that cushions the joints wears down, resulting in bone-on-bone contact and increased friction. This can cause pain, stiffness, and reduced range of motion.
To manage arthritis and prevent further joint degeneration, there are several strategies you can consider. First, maintaining a healthy weight can help reduce stress on your joints. Regular exercise, including low-impact activities such as swimming or cycling, can also help strengthen the muscles around your joints and improve joint stability.
Additionally, certain joint supplements, such as glucosamine and chondroitin, may provide some relief by supporting joint health and reducing inflammation.
Understanding the role of muscle weakness and imbalance in joint stability is crucial in managing arthritis and preventing further joint deterioration.
The Role of Muscle Weakness and Imbalance
Muscle weakness and imbalance can significantly impact joint stability, leading to an increased risk of injury. In fact, studies show that approximately 30% of adults over the age of 60 experience muscle weakness, which can contribute to joint problems.
When certain muscles surrounding a joint are weak or imbalanced, they are unable to provide adequate support and stability. This puts additional stress on the joint, making it more susceptible to injury and degeneration. For example, if the muscles on one side of the knee are weaker than the other, it can lead to an uneven distribution of forces, causing the joint to become unstable.
Moreover, muscle imbalances can alter the alignment of the joint, further compromising its stability. Therefore, addressing muscle weakness and imbalances is crucial in maintaining optimal joint health and reducing the risk of joint problems.
Transitioning into the subsequent section about postural alignment and joint stability, it is important to understand how proper alignment plays a vital role in maintaining joint health.
Postural Alignment and Joint Stability
Maintaining proper alignment of your body is essential for keeping your joints stable and healthy. When your joints are misaligned, it can lead to increased stress and strain on the surrounding muscles and ligaments, making them more prone to injury.
To ensure optimal joint alignment and stability, here are four techniques that can be helpful:
-
Strengthening exercises: Strengthening the muscles around your joints, such as the core muscles, can help support proper alignment and stability.
-
Stretching and flexibility exercises: Regular stretching can improve joint mobility and reduce the risk of imbalances that can affect alignment.
-
Postural awareness: Paying attention to your posture throughout the day can help maintain proper joint alignment and prevent excessive stress on the joints.
-
Ergonomic modifications: Making adjustments to your work or living environment, such as using an ergonomic chair or keyboard, can promote better joint alignment.
By incorporating these joint stability techniques into your daily routine, you can minimize the risk of joint misalignment and injury.
Moving forward, let’s explore some injury prevention strategies that can further support joint health.
Injury Prevention Strategies
When it comes to injury prevention, two key strategies that I always emphasize are warm-up and stretching exercises, as well as proper body mechanics.
Warm-up exercises help to increase blood flow, raise body temperature, and prepare the muscles and joints for physical activity.
Stretching exercises help to improve flexibility and range of motion, reducing the risk of muscle strains and joint injuries.
Additionally, practicing proper body mechanics, such as maintaining good posture and using correct lifting techniques, can help to prevent overuse injuries and protect the joints from unnecessary stress.
Warm-up and Stretching Exercises
Stretching before physical activity is like waking up your body and gently stretching out all the knots and kinks, preparing it for movement. It is an essential part of any warm-up routine and can help prevent injuries by increasing flexibility and range of motion. There are various stretching techniques that can be incorporated into your warm-up routine, such as static stretching, dynamic stretching, and proprioceptive neuromuscular facilitation (PNF) stretching. Static stretching involves holding a stretch for a certain amount of time, while dynamic stretching involves moving through a range of motion. PNF stretching combines static stretching with muscle contraction and relaxation to improve flexibility. By incorporating these stretching techniques into your warm-up routine, you can help loosen up your joints and muscles, reducing the risk of injury. Proper body mechanics are also important in preventing joint injuries, and I will discuss this further in the next section.
Proper Body Mechanics
Using proper body mechanics is crucial for preventing painful injuries and optimizing your physical performance. When it comes to joint stability, understanding and implementing correct body mechanics is essential.
By maintaining proper alignment and posture during movements, you can reduce stress on your joints, enhancing their stability and minimizing the risk of injury. This involves keeping your core engaged, distributing weight evenly, and utilizing the appropriate muscle groups for each activity.
Additionally, practicing proper body mechanics can help improve your overall body awareness and coordination, allowing for smoother and more efficient movements. By incorporating these techniques into your daily activities and exercise routines, you can reduce strain on your joints and promote joint health.
Transitioning into pain management techniques, it’s important to explore strategies that can further alleviate discomfort without causing further harm to your joints.
Pain Management Techniques
To ease your joint pain, try incorporating some gentle movements that dance through the pain, like a graceful river flowing effortlessly. These pain management techniques can provide relief and improve your quality of life.
Here are three effective strategies to consider:
-
Pain medication: Over-the-counter nonsteroidal anti-inflammatory drugs (NSAIDs) like ibuprofen can help reduce inflammation and alleviate joint pain. However, it’s important to consult with a healthcare professional before starting any medication regimen.
-
Alternative therapies: Explore complementary approaches such as acupuncture, massage therapy, or yoga. These practices can help reduce pain, improve flexibility, and promote overall well-being.
-
Heat and cold therapy: Applying heat or cold to your joints can provide temporary pain relief. Hot packs or warm baths can help relax muscles and increase blood flow, while cold packs or ice packs can numb the area and reduce swelling.
By incorporating these techniques into your routine, you can effectively manage joint pain and enhance your daily activities. However, if your pain persists or worsens, it’s crucial to seek professional help for a comprehensive evaluation and appropriate treatment.
Seeking Professional Help
When it comes to seeking professional help for joint pain management, consulting with a Physical Therapist is a crucial step. They have the expertise to assess your condition, create a customized treatment plan, and guide you through various exercises and techniques to improve joint function and reduce pain.
Additionally, exploring surgical options may be recommended in severe cases where conservative treatments have failed, and the joint damage is significant. A skilled surgeon can evaluate your situation and discuss the potential benefits and risks of surgical intervention, helping you make an informed decision for long-term joint health.
Consulting with a Physical Therapist
Consulting with a physical therapist can provide valuable insights on why your joints feel like a canoe. A consultation with a physical therapist offers numerous benefits, such as a comprehensive evaluation of your joint issues, including an assessment of your joint mobility, strength, and overall function.
This assessment can help identify any underlying causes of the canoe-like sensation in your joints. Additionally, a physical therapist can provide personalized treatment options tailored to your specific needs. This may include therapeutic exercises to improve joint stability and range of motion, as well as manual therapy techniques to reduce pain and inflammation.
They can also offer guidance on lifestyle modifications and ergonomic adjustments to minimize joint stress. Consulting with a physical therapist is an essential step towards finding relief from joint discomfort and improving your overall joint health. By exploring surgical options, we can further delve into potential solutions for long-term joint improvement.
Exploring Surgical Options
If you’re ready to take the plunge, surgical options can be like a compass guiding you towards a smoother journey in improving your joint health. While non-invasive treatments and physical therapy should always be considered first, there are times when surgical alternatives become necessary.
These options can range from arthroscopy, where a thin tube is inserted to repair or remove damaged tissue, to joint replacement surgery, which involves replacing the entire joint with artificial components. Each surgical option carries its own risks and benefits, and consulting with a qualified orthopedic surgeon is crucial to determine the best course of action.
It’s important to remember that surgery should be a last resort, and lifestyle modifications for joint health, such as maintaining a healthy weight and engaging in regular exercise, should always be incorporated into your treatment plan to optimize long-term outcomes.
Lifestyle Modifications for Joint Health
Making certain lifestyle modifications can be beneficial for improving the health of your joints. Here are three key ways to support joint health:
-
Incorporate joint supplements: Certain supplements, such as glucosamine and chondroitin, have shown promise in promoting joint health and reducing joint pain. These supplements can help support the cartilage in your joints and reduce inflammation.
-
Follow targeted exercise routines: Engaging in regular exercise can help strengthen the muscles around your joints, providing them with better support. Low-impact exercises like swimming or cycling can be particularly beneficial for joint health. Additionally, exercises that focus on flexibility and range of motion can help improve joint function.
-
Maintain a healthy weight: Excess weight puts added stress on your joints, increasing the risk of joint pain and damage. By maintaining a healthy weight, you can reduce the strain on your joints and improve their overall health.
By implementing these lifestyle modifications, you can take proactive steps towards improving your joint health.
In the next section, we’ll explore the role of assistive devices and joint support products in managing joint health.
Assistive Devices and Joint Support Products
When it comes to joint support, there are various assistive devices and products available.
Braces and splints are commonly used to provide stability and reduce pain in joints.
Orthotic inserts can help correct foot alignment and provide support, while shoe modifications such as lifts or wedges can also help improve joint function.
These assistive devices and products can be valuable tools in managing joint health and improving overall mobility.
Braces and Splints
Wearing braces or splints can provide much-needed support and relief for your aching joints. These joint stability techniques are designed to help reduce pain, improve joint function, and prevent further damage. Braces and splints work by providing external support to the affected joint, helping to stabilize it and reduce the stress placed on the surrounding structures. They can be particularly effective for individuals with conditions such as arthritis, ligament injuries, or joint instability.
Incorporating braces and splints into your daily routine can make a significant difference in managing joint pain and improving overall joint function. They can be worn during activities that put stress on the joints, such as walking, running, or playing sports. Additionally, they can also be worn during periods of rest to provide continuous support and alleviate discomfort.
Transitioning into the next section about orthotic inserts and shoe modifications, it is important to explore other options that can further enhance joint support and stability.
Orthotic Inserts and Shoe Modifications
Orthotic inserts and shoe modifications are essential for enhancing joint support and stability, providing a solid foundation for improved mobility and reduced pain. When it comes to orthotic options, there are a variety of inserts available to address specific joint issues. These inserts can be customized to fit your unique foot shape and correct any imbalances or misalignments that may be contributing to joint problems.
Additionally, shoe selection plays a crucial role in joint health. It’s important to choose shoes that provide adequate cushioning, arch support, and stability. Look for shoes with a wide toe box to allow for proper toe alignment and avoid excessive pressure on the joints.
Taking these factors into consideration can greatly improve joint function and alleviate discomfort.
Moving forward, it’s important to discuss long-term joint care and maintenance to ensure continued joint health and well-being.
Long-Term Joint Care and Maintenance
Regular check-ups and monitoring are essential for maintaining long-term joint health. By regularly visiting a healthcare professional, we can assess the condition of our joints and identify any potential issues early on.
Additionally, implementing healthy habits such as maintaining a balanced diet, engaging in regular exercise, and avoiding excessive strain on our joints can greatly contribute to their overall well-being.
Regular Check-ups and Monitoring
To properly monitor and maintain the health of your joints, it is important to schedule regular check-ups with your healthcare provider. These check-ups allow your healthcare provider to assess the condition of your joints and identify any potential issues before they become more serious. During these appointments, your provider may perform a physical examination, order imaging tests such as X-rays or MRIs, and ask you about any symptoms or changes you may have noticed. Regular check-ups also provide an opportunity for you to discuss any concerns or questions you may have about your joint health. By staying proactive and attending these appointments, you can ensure that your joints are being properly monitored and any necessary interventions can be implemented in a timely manner. This sets the foundation for implementing healthy habits for joint health, which we will explore in the next section.
Implementing Healthy Habits for Joint Health
Take control of your joint health by adopting healthy habits that will keep you active and pain-free. One crucial aspect of maintaining joint health is nutrition. Consuming a balanced diet rich in nutrients like omega-3 fatty acids, vitamin D, and antioxidants can help reduce inflammation and promote joint health.
Incorporate foods such as fatty fish, leafy greens, nuts, and berries into your diet to support your joints.
Additionally, regular exercise is essential for joint flexibility and strength. Low-impact exercises like swimming, cycling, and yoga can help improve joint mobility without putting excessive stress on them. Strength training exercises, focusing on the muscles surrounding the joints, can also provide stability and support.
Remember to consult with a healthcare professional before starting any new exercise routine to ensure it’s suitable for your specific joint health needs.
Frequently Asked Questions
Can joint instability be reversed with exercise and physical therapy?
Yes, joint instability can be reversed with exercise and physical therapy. Regular physical therapy helps strengthen the muscles surrounding the joints, improving stability and reducing the risk of further injury. It’s like giving your joints a superhero cape!
Are there any natural remedies or supplements that can help improve joint stability?
Yes, there are natural remedies and supplements that can help improve joint stability. Some examples include glucosamine, chondroitin, omega-3 fatty acids, turmeric, and ginger. These substances have anti-inflammatory properties and can promote joint health.
Is joint instability more common in certain age groups or populations?
Joint instability is more common in certain age groups and populations. Athletes, especially those with joint hypermobility, are at a higher risk. This can impact their performance and increase the likelihood of joint injuries.
Can joint instability affect multiple joints in the body?
Yes, joint instability can affect multiple joints in the body. It is caused by ligament or muscle weakness, which can lead to pain, swelling, and a feeling of the joint giving way. Strengthening exercises and maintaining a healthy weight can help prevent joint instability.
Are there any non-surgical treatments available for severe joint instability?
There are non-invasive options, such as regenerative medicine, available for severe joint instability. These treatments promote healing and repair of damaged tissues, reducing the need for surgery.
Conclusion
In conclusion, understanding joint instability is crucial for managing and preventing joint issues. Common conditions associated with joint instability include dislocations, subluxations, and ligament sprains. Muscle weakness and imbalance play a significant role in joint instability, highlighting the importance of strengthening exercises.
Maintaining proper postural alignment is also essential for joint stability. While lifestyle modifications and assistive devices can provide temporary relief, seeking professional help is recommended for a comprehensive treatment plan.
Lastly, investigating the theory that genetics may contribute to joint instability could provide a deeper understanding of this complex issue.

Noah, the Editor-in-Chief at Cappuccino Oracle, plays a pivotal role in shaping the voice and vision of our renowned platform. With an unwavering passion for coffee, coffee alternatives, and tea, Noah leads Cappuccino Oracle towards new horizons in the realm of coffee journalism.
Beyond his professional responsibilities, Noah serves as a mentor and guiding force for his team. His dedication to journalistic excellence and genuine love for coffee, coffee alternatives, and tea continue to inspire and motivate the Cappuccino Oracle family. In the ever-evolving world of these beverages, Noah’s leadership ensures that our platform remains at the forefront, delivering enlightening and enjoyable content to our readers worldwide.

Have you ever pondered over the number of times ginseng oolong tea can be steeped?
Prepare to be amazed as we dive into the fascinating world of tea brewing. As an avid tea enthusiast, I have spent countless hours experimenting with different brewing methods and techniques to unlock the full potential of this exquisite beverage.
In this article, we will explore the art and science behind brewing ginseng oolong tea, from understanding the brewing process to discovering the flavor profiles of each brew. We will also delve into the factors that affect the quality of tea leaves and how to enhance the taste with additions and pairings.
Whether you’re a novice or a seasoned tea connoisseur, join me on this journey as we uncover the secrets of brewing ginseng oolong tea and embrace the ritual of tea brewing with mindfulness and enjoyment.
Key Takeaways
- Ginseng oolong tea can be brewed multiple times, offering a unique flavor profile with each infusion.
- The first infusion is light and floral with subtle ginseng hints, while subsequent infusions become more robust and complex.
- The final infusion of ginseng oolong tea is rich and full-bodied.
- The quality of tea leaves greatly impacts the flavor and health benefits of ginseng oolong tea.
Understanding the Brewing Process of Ginseng Oolong Tea
You can brew ginseng oolong tea multiple times, allowing you to fully enjoy its rich flavor and health benefits. This tea is known for its unique combination of ginseng and oolong leaves, creating a harmonious blend that’s both refreshing and invigorating.
When experimenting with brewing techniques, it’s important to consider the water temperature and steeping time. Generally, it’s recommended to use water around 180°F and steep the tea for about 3-5 minutes. However, feel free to adjust these parameters according to your personal taste preferences.
Ginseng oolong tea offers numerous health benefits, including boosting the immune system, aiding digestion, and promoting mental alertness. The quality of tea leaves can greatly impact the brewing process, so it’s essential to choose high-quality leaves for the best flavor.
Moving on to the subsequent section about the impact of tea leaves on brewing…
The Quality of Tea Leaves and Its Impact on Brewing
If the tea leaves are of high quality, then the brewing process will result in a rich and flavorful cup that leaves a lasting impression. Understanding tea grading and its influence on flavor is essential when brewing ginseng oolong tea. Premium tea leaves are carefully selected and processed, ensuring a superior taste experience.
These top-grade leaves release a distinct aroma and offer a complex taste profile with each sip. Not only does the quality of the tea leaves impact the flavor, but it also affects the health benefits of ginseng oolong tea. High-quality leaves retain more of the natural compounds and antioxidants, enhancing the tea’s potential health benefits.
Transitioning into the next section about experimenting with steeping times and water temperature, it is important to explore how these variables can further enhance the brewing process.
Experimenting with Steeping Times and Water Temperature
Discovering the perfect combination of steeping time and water temperature can unlock a world of flavors in your cup of ginseng oolong tea. When it comes to brewing this delicate tea, experimenting with brewing time and exploring different water temperatures can make a significant difference in the taste and aroma of your brew.
To help you understand the impact of these variables, let’s take a look at the table below:
| Steeping Time (minutes) | Water Temperature (°C) |
|---|---|
| 1 | 85 |
| 2 | 80 |
| 3 | 75 |
| 4 | 70 |
| 5 | 65 |
By adjusting the steeping time and water temperature, you can find the perfect balance that suits your taste preferences. It’s a fun and exciting process that allows you to explore the nuances of ginseng oolong tea.
In the subsequent section about the art of multiple infusions: how to re-steep your tea leaves, we will delve into the techniques of maximizing the flavor potential of your tea leaves without wasting a single brew.
The Art of Multiple Infusions: How to Re-Steep Your Tea Leaves
Re-steeping your tea leaves is an art that allows you to extract maximum flavor from a single batch – but how can you ensure each infusion is as delicious as the first? Here are some tips to help you make the most out of re-steeping your tea leaves:
-
Use shorter steeping times: As the leaves’ve already been infused once, they require less time to release their flavors. Start with a shorter steeping time and gradually increase it for subsequent infusions.
-
Adjust water temperature: Experiment with different water temperatures to find the sweet spot for your tea. Some teas may taste better with slightly cooler water, while others may require hotter water for a fuller flavor.
-
Increase steeping time gradually: With each subsequent infusion, increase the steeping time slightly to continue extracting flavors from the leaves.
-
Store the leaves properly: To maintain the quality of your tea leaves, store them in an airtight container away from moisture, light, and strong odors.
Re-steeping your tea leaves not only allows you to enjoy multiple cups of tea, but it also has benefits such as maximizing flavor extraction and reducing waste. By mastering the art of re-steeping, you can discover the unique flavor profiles of each brew and truly appreciate the complexity of your ginseng oolong tea.
Discovering the Flavor Profiles of Each Brew
Unveiling the intricate layers of taste in every infusion is a journey that will captivate your taste buds and leave you craving for more. Each brew of ginseng oolong tea offers a unique flavor profile, allowing you to discover a range of tastes and aromas. The first infusion is often light and floral, with subtle hints of ginseng. As you continue to brew, the flavors become more robust and complex, with a balance of earthiness from the oolong tea and the invigorating sweetness of ginseng. The final infusion is rich and full-bodied, showcasing the full spectrum of flavors. To help you appreciate the variety of tastes, here is a table outlining the tasting notes and aroma profiles of each brew:
| Infusion | Tasting Notes | Aroma Profile |
|---|---|---|
| First | Light, floral | Refreshing |
| Second | Robust, complex | Aromatic |
| Final | Rich, full-bodied | Invigorating |
Discovering these unique flavors is a delightful experience that will enhance your tea brewing journey. Now, let’s dive into some tips for storing and preserving your tea leaves.
Tips for Storing and Preserving Your Tea Leaves
When it comes to preserving the freshness and flavor of your tea leaves, how can you ensure they stay in optimum condition for longer periods of time? Here are three tips for storing and preserving your tea leaves:
-
Keep them in an airtight container: Storing your tea leaves in an airtight container will help prevent exposure to air, moisture, and other odors that can deteriorate their quality.
-
Store in a cool, dark place: Heat and light can accelerate the oxidation process and degrade the flavor of your tea leaves. It’s best to store them in a cool, dark place, such as a pantry or cupboard.
-
Avoid strong odors: Tea leaves are highly absorbent, so it’s essential to keep them away from strong-smelling items like spices or cleaning products. Otherwise, they may absorb these odors and affect the taste of your brew.
By following these tips for storing tea leaves and preserving tea freshness, you can ensure that your ginseng oolong tea stays flavorful and aromatic.
Now, let’s explore different brewing methods for this delightful tea.
Exploring Different Brewing Methods for Ginseng Oolong Tea
For a delightful and aromatic experience, let’s discover the various ways you can brew your ginseng oolong tea. When it comes to brewing ginseng oolong tea, there are several different techniques you can try to achieve the perfect cup. Each method brings out unique flavors and characteristics of the tea.
To help you choose the right brewing technique, here is a table that outlines four common methods and their optimal steeping times:
| Brewing Technique | Optimal Steeping Time |
|---|---|
| Traditional Method | 3-4 minutes |
| Gongfu Method | 30 seconds – 1 minute |
| Cold Brew Method | 4-6 hours |
| Western Method | 2-3 minutes |
By experimenting with these different brewing techniques, you can find the one that suits your taste preferences the best. Now, let’s move on to the next section where we will explore how to enhance the taste of your tea with additions and pairings.
Enhancing the Taste of Your Tea with Additions and Pairings
To enhance the taste of your tea, you can try adding a splash of honey or a squeeze of lemon for a refreshing twist. These additions can complement the natural flavors of ginseng oolong tea and create a more vibrant and enjoyable drinking experience.
Additionally, you can experiment with other ingredients such as mint leaves, ginger slices, or even a sprinkle of cinnamon to add depth and complexity to your brew.
Pairing ginseng oolong tea with food can also enhance the overall taste. The floral and earthy notes of this tea make it a great companion for light and delicate dishes like steamed fish or sushi. For a more substantial pairing, try it with roasted chicken or grilled vegetables to bring out the tea’s richness. You can also enjoy ginseng oolong tea with sweet treats like fruit tarts or dark chocolate for a delightful contrast of flavors.
Now, let’s move on to the common mistakes to avoid when brewing ginseng oolong tea.
Common Mistakes to Avoid When Brewing Ginseng Oolong Tea
When it comes to brewing ginseng oolong tea, there are a few common mistakes that people often make. It’s important to avoid these errors in order to fully enjoy the rich flavors and benefits of this tea. One common mistake is using water that is too hot, which can result in a bitter taste. Another mistake is steeping the tea for too long, which can make it overly strong and astringent. Proper brewing techniques for ginseng oolong tea include using water that is around 180°F and steeping the tea for about 3-4 minutes. This will allow the flavors to fully develop without becoming overpowering. By following these guidelines, you can ensure a delicious and satisfying cup of ginseng oolong tea that showcases its unique flavors and aromas. Now, let’s delve into the next section and explore the mindfulness and enjoyment that comes with the ritual of tea brewing.
Embracing the Ritual of Tea Brewing: Mindfulness and Enjoyment
Immerse yourself in the ritual of brewing tea, embracing the mindfulness and enjoyment that comes with it. Mindful tea rituals have been practiced for centuries, offering a peaceful and calming experience. The benefits of tea meditation are numerous.
Taking the time to brew a cup of ginseng oolong tea can help to reduce stress, enhance focus, and promote relaxation. The process of preparing the tea involves focused attention and intention, allowing you to be fully present in the moment. As you carefully measure the tea leaves, pour hot water over them, and steep them to perfection, you can cultivate a sense of mindfulness and tranquility.
The act of savoring each sip, paying attention to the aroma, taste, and texture, can create a deep sense of enjoyment and gratitude. So, brew yourself a cup of ginseng oolong tea and savor the experience of tea meditation.
Frequently Asked Questions
Can I use ginseng oolong tea bags instead of loose tea leaves?
Yes, you can use ginseng oolong tea bags instead of loose tea leaves. Ginseng oolong tea bags offer the same benefits as loose tea leaves, including improved mental focus, increased energy, and enhanced immune system function.
What is the ideal water temperature for brewing ginseng oolong tea?
The ideal water temperature for brewing ginseng oolong tea is 185°F (85°C). Steep it for 2-3 minutes to achieve a well-balanced flavor. Remember, the water temperature plays a crucial role in extracting the tea’s flavors and aromas.
How long should I steep ginseng oolong tea for the first infusion?
For the first infusion of ginseng oolong tea, steep it for about 2-3 minutes. Adjust the steeping time based on your preference to enhance the flavor. Experiment with shorter or longer steeping times to find your perfect brew.
Can I reuse the tea leaves for multiple infusions?
Yes, you can reuse the tea leaves for multiple infusions. Reusing the leaves allows you to extract different flavors and benefits. Each infusion can offer a unique taste profile and varying levels of antioxidants, making multiple infusions a great way to enjoy ginseng oolong tea.
What are some common mistakes to avoid when brewing ginseng oolong tea?
When brewing ginseng oolong tea, it’s important to avoid common mistakes to achieve the best flavor. Some key brewing techniques include using the right temperature, steeping for the proper duration, and not overloading the tea leaves.
Conclusion
In conclusion, brewing ginseng oolong tea can be a delightful and rewarding experience. By understanding the brewing process and experimenting with steeping times and water temperature, you can unlock the full flavor potential of this tea.
The art of multiple infusions allows you to savor different flavor profiles with each brew. Don’t be afraid to explore different brewing methods and enhance the taste with additions and pairings. Just remember to avoid common mistakes and embrace the ritual of tea brewing with mindfulness and enjoyment.
So, steep, sip, and savor the sensational taste of ginseng oolong tea!
Noah, the Editor-in-Chief at Cappuccino Oracle, plays a pivotal role in shaping the voice and vision of our renowned platform. With an unwavering passion for coffee, coffee alternatives, and tea, Noah leads Cappuccino Oracle towards new horizons in the realm of coffee journalism.
Beyond his professional responsibilities, Noah serves as a mentor and guiding force for his team. His dedication to journalistic excellence and genuine love for coffee, coffee alternatives, and tea continue to inspire and motivate the Cappuccino Oracle family. In the ever-evolving world of these beverages, Noah’s leadership ensures that our platform remains at the forefront, delivering enlightening and enjoyable content to our readers worldwide.

Crafting a cream infused with oolong tea in your own kitchen is akin to engaging in an enchanting blend of tastes and consistencies. It creates a harmonious melody that marries the luxurious thickness of heavy cream with the delicate complexities of oolong tea.
As a tea lover and enthusiast, I have discovered the secret to creating this heavenly concoction, and I am excited to share it with you.
In this article, I will guide you through the precise steps and measurements needed to achieve the perfect oolong tea cream. From gathering your ingredients and brewing a strong pot of oolong tea to infusing the cream with its distinct flavor, I will provide detailed instructions to ensure the best results.
But it doesn’t stop there. I will also delve into the fascinating world of oolong tea, exploring its origins, flavors, and brewing techniques. You will gain a deeper understanding of this exquisite tea and how it enhances the cream.
So, join me on this tea-filled adventure as we create a luscious oolong tea cream that will tantalize your taste buds and leave you craving more. Get ready to indulge in a truly decadent treat that will elevate your tea experience to new heights.
Key Takeaways
- Strain oolong tea cream using a sieve or cheesecloth for a smooth consistency.
- Repurpose oolong tea leaves by infusing them into creams, custards, or savory dishes, or using them in baked goods.
- Sweeten the oolong tea cream with honey, agave syrup, or maple syrup, adjusting the amount to taste.
- Chill the oolong tea cream in the refrigerator for at least 2 hours before serving, and garnish with cinnamon or cocoa powder.
Gather Your Ingredients and Equipment
Now it’s time to gather all the ingredients and equipment you’ll need to make the perfect oolong tea cream at home!
To infuse other desserts with the unique flavor of oolong tea, you’ll need high-quality oolong tea leaves, heavy cream, sugar, and a vanilla bean. You’ll also need a saucepan, a fine-mesh strainer, a mixing bowl, and a whisk to create the cream.
When it comes to alternative cream options, you can use coconut cream or almond milk for a dairy-free version. As a tea sommelier, I recommend using precise measurements and techniques for the best results. A knowledgeable and informative approach is essential in understanding the origins, flavors, and brewing techniques associated with oolong tea.
The next step is to brew a strong pot of oolong tea to infuse into the cream and enhance its flavor.
Brew a Strong Pot of Oolong Tea
When brewing a strong pot of oolong tea for your oolong tea cream, it’s important to choose the right oolong tea leaves. Look for leaves that are tightly rolled and have a rich, complex flavor profile.
Next, brew the tea to your desired strength by using precise measurements. For the best results, steep the leaves at a specific temperature for a certain amount of time, ensuring that you extract the full flavor and aroma of the oolong tea.
The process of brewing the tea should be a sensory experience, with the aroma of the tea leaves and the anticipation of the rich, flavorful cup of oolong tea cream that awaits.
Choose the Right Oolong Tea Leaves
To create a truly divine oolong tea cream, it’s crucial to select the perfect oolong tea leaves that will infuse their enchanting flavors into every spoonful. Here are three key factors to consider when choosing the right tea leaves:
-
Steeping Techniques and Flavor Profiles: Different oolong teas require specific steeping techniques to bring out their unique flavors. Some teas may have floral notes, while others have fruity or nutty undertones. Understanding the flavor profiles will help you select the tea leaves that best complement the cream.
-
Health Benefits and Brewing at Different Temperatures: Oolong tea is known for its numerous health benefits, such as boosting metabolism and promoting digestion. Brewing oolong tea at different temperatures can enhance or mellow its flavors and bring out specific health properties.
-
The History and Cultural Significance: Exploring the origins and cultural significance of oolong tea can deepen your understanding and appreciation for this beverage. Oolong tea has a rich history in Chinese and Taiwanese cultures, and learning about its traditions can add a layer of enjoyment to the tea-making process.
Now that you’ve selected the perfect oolong tea leaves, let’s move on to brewing the tea to your desired strength.
Brew the Tea to Your Desired Strength
Achieving the perfect strength of your brewed oolong tea is as simple as adjusting the steeping time and experimenting with different water temperatures. To brew a flavorful and aromatic oolong tea, start by heating water to 180°F (82°C) for a lighter brew or 200°F (93°C) for a stronger flavor.
Next, add 1 tablespoon of oolong tea leaves per 8 ounces of water into a teapot or infuser. Allow the leaves to steep for 3-5 minutes for a mild brew or 5-7 minutes for a bolder taste. Remember, the longer the steeping time, the stronger the flavor.
Once the desired strength is achieved, strain the tea and let it cool before proceeding to the next step of making the oolong tea cream.
This brewing technique ensures that the tea’s unique flavors and health benefits are fully extracted.
Strain the Tea and Let It Cool
First, strain the tea leaves from the pot and allow the warm, fragrant liquid to cool down to a tranquil lake on a moonlit night. To infuse the cream with other tea flavors, consider adding a touch of jasmine or a hint of bergamot. These complementary flavors will enhance the delicate oolong tea notes in the cream. For an added twist, experiment with adding spices like cinnamon or cardamom to create a unique and aromatic blend.
The precise measurements for infusing the cream will depend on personal preference, but a general guideline would be to add 1 teaspoon of tea leaves or spices per 8 ounces of cream.
Once the tea has cooled to room temperature, it’s ready to be incorporated into the whipped cream.
Now, let’s move on to the next step of whipping the heavy cream to soft peaks.
Whip Heavy Cream to Soft Peaks
After straining the oolong tea and allowing it to cool, it’s time to move on to the next step: whipping the heavy cream to soft peaks. This is a crucial step in creating the perfect oolong tea cream.
Start by pouring the heavy cream into a chilled bowl. Using an electric mixer on medium speed, beat the cream until it starts to thicken slightly. Gradually increase the speed to high and continue beating until soft peaks begin to form. Be careful not to overbeat, as this can result in a grainy texture.
Now, here’s where the creativity comes in. You can infuse other flavors into the whipped cream to enhance its taste. For example, you can add a touch of vanilla extract for a subtle sweetness or a sprinkle of cinnamon for a warm and comforting flavor. The possibilities are endless!
Additionally, whipped cream isn’t just for topping desserts; it can also be used as a delightful addition to your morning coffee or hot chocolate.
As we move forward, let’s explore how to infuse the cream with the wonderful flavor of oolong tea.
Infuse the Cream with Oolong Tea Flavor
To infuse the cream with oolong tea flavor, start by steeping the tea leaves in warm cream. Heat the cream to a precise temperature of 180°F (82°C) and add the oolong tea leaves. Let the leaves steep for exactly 5 minutes to extract their delicate flavors.
Once steeped, strain the cream to remove the tea leaves, ensuring a smooth and creamy texture for the final product. The resulting oolong tea-infused cream will have a tantalizing aroma, a rich golden hue, and a subtle yet complex flavor profile that complements a variety of desserts and beverages.
Steep the Tea Leaves in Warm Cream
Once the tea leaves have been steeped in warm cream, you’ll be greeted with a rich, fragrant infusion that will transport you to a serene tea garden. To infuse the cream with the delicate flavors of oolong tea, it’s important to follow precise instructions to achieve the best results. A tea sommelier would recommend using a temperature of 185°F (85°C) and steeping the tea leaves in warm cream for exactly 10 minutes. This allows the cream to absorb the distinct floral and nutty notes of the oolong tea, creating a harmonious blend of flavors. The following table showcases different ways to use oolong tea cream in desserts, from adding it to cakes and pastries to creating a luxurious oolong tea ice cream. With the tea leaves fully steeped, it’s time to strain the cream to remove any remaining tea leaves and prepare it for the next step in the process.
Strain the Cream to Remove Tea Leaves
Before moving on to the next step, it’s crucial to strain the warm cream to ensure a smooth and refined texture, free from any lingering tea leaves. To strain the cream, you can use a fine-mesh sieve or a cheesecloth. Gently pour the cream through the sieve or wrap it tightly in the cheesecloth and squeeze out the liquid. This will effectively remove any remaining tea leaves and ensure a velvety consistency.
Now that you’ve successfully strained the cream, you may be wondering about alternative straining methods. While a fine-mesh sieve or cheesecloth is the most common technique, some people prefer using a coffee filter or a tea infuser. Experiment with different methods to find the one that works best for you.
Don’t let the strained tea leaves go to waste! You can repurpose them in other recipes. Consider adding them to baked goods, like cookies or cakes, for a subtle oolong tea flavor. You can also use them to infuse flavor into creams, custards, or even savory dishes like rice or soup.
As we move on to the next section about sweetening the cream to taste, keep in mind the versatility of the strained tea leaves and the exciting possibilities they offer for culinary exploration.
Sweeten the Cream to Taste
Indulge your taste buds by adding just the right amount of sweetness to the cream, transforming it into a velvety delight that’ll make your heart sing.
To sweeten the oolong tea cream, start by stirring in a tablespoon of honey. This natural sweetener complements the delicate flavors of the oolong tea, giving the cream a subtle, floral sweetness. If you prefer a different sweetener, feel free to experiment with alternatives like agave syrup or maple syrup. Adjust the amount to taste, keeping in mind that oolong tea has a nuanced flavor profile that can easily be overwhelmed by excessive sweetness.
Once the cream is sweetened to perfection, it’s time to chill it in the refrigerator. This’ll help the flavors meld together and create a luscious, creamy texture.
Chill the Oolong Tea Cream in the Refrigerator
After sweetening the cream to taste, it’s essential to let it chill in the refrigerator. This allows the flavors to meld together and creates a rich, velvety texture. To achieve the perfect chilled oolong tea cream, follow these expert techniques.
Once sweetened, transfer the cream into a container and place it in the refrigerator. For optimal results, set the temperature to approximately 4°C (40°F) and let the cream chill for at least two hours. This cooling process enhances the cream’s consistency and intensifies the flavors.
Alternatively, you can use an ice bath to speed up the chilling process. Fill a larger bowl with ice and place the cream container inside, ensuring the ice surrounds it. Give it a gentle stir occasionally to evenly distribute the cold temperature.
Now that the oolong tea cream has been expertly chilled, it’s time to serve and enjoy its delightful flavors and smoothness.
Serve and Enjoy
To truly savor the delightful flavors and velvety smoothness of this chilled concoction, now it’s time to serve and relish every spoonful. Here are four serving suggestions to enhance your enjoyment:
-
Presentation: Pour the oolong tea cream into elegant tea cups or small bowls. Garnish with a sprinkle of cinnamon or a dusting of cocoa powder for an added touch of sophistication.
-
Pairing: Serve the oolong tea cream with buttery shortbread cookies or delicate tea biscuits. The creamy, slightly floral notes of the oolong tea will complement the sweetness of the treats.
-
Alternative Tea Options: For those seeking variety, consider experimenting with different tea bases. Matcha or jasmine green tea can be used instead of oolong, offering a unique twist to the creamy delight.
-
Chilled Refreshment: Enjoy the oolong tea cream as a refreshing dessert during warm summer days. Its cool, creamy texture and delicate flavor make it a perfect treat to beat the heat.
Now that you’ve experienced the pleasure of serving and indulging in this exquisite oolong tea cream, let’s move on to the next step – storing any leftover cream for future use.
Store Any Leftover Cream for Future Use
If you want to keep enjoying this delectable treat, be sure to store any leftover cream properly for future use. Storing the oolong tea cream correctly will ensure its freshness and flavor. Here are some tips on how to store the cream:
| Storage Method | Temperature | Shelf Life |
|---|---|---|
| Refrigerator | 2-4°C | 3-5 days |
| Freezer | -18°C | 1-2 months |
| Airtight Jar | Room Temp | 1-2 weeks |
To store the cream in the refrigerator, transfer it into an airtight container and place it in the coldest part of your fridge. If you prefer to freeze the cream, pour it into ice cube trays or freezer-safe containers. When ready to use, thaw in the refrigerator overnight. Remember to label the containers with the date to keep track of its shelf life.
By properly storing the leftover cream, you can enjoy its creamy and rich flavor in various recipes. Now, let’s move on to the next section and explore different variations and flavors to experiment with.
Experiment with Different Variations and Flavors
Get ready to indulge your taste buds with a tantalizing array of unique flavors and exciting variations! As a tea sommelier, I’m thrilled to share with you the endless possibilities of oolong tea cream.
To ensure the best results, it’s important to follow precise instructions and measurements. Start by steeping 1 tablespoon of oolong tea leaves in 1 cup of hot water at a temperature of 180°F for 3 minutes. Once steeped, strain the tea leaves and let the infused liquid cool.
In a separate bowl, whisk together 1 cup of heavy cream, 2 tablespoons of powdered sugar, and 1 teaspoon of vanilla extract until soft peaks form. Gently fold in the cooled oolong tea infusion, being careful not to overmix. The result is a creamy concoction with a delicate oolong flavor.
For added excitement, try experimenting with flavor combinations such as jasmine-infused oolong or matcha-infused oolong. Serve the oolong tea cream as a topping for desserts, pancakes, or even as a dip for fruits.
Get creative and enjoy the delightful journey of exploring different variations and flavors!
Frequently Asked Questions
Can I use a different type of tea instead of oolong tea?
Yes, you can use a different type of tea instead of oolong tea. However, it’s important to note that oolong tea offers unique benefits, such as its rich flavor and potential health benefits.
How long should I let the tea cool before adding it to the cream?
To ensure the best results, let the brewed oolong tea cool completely before adding it to the cream. The shelf life of oolong tea cream is typically around 5-7 days. A hand whisk is recommended for whipping the cream, as it creates the desired texture and consistency.
Can I use a hand whisk instead of an electric mixer to whip the heavy cream?
Using a hand whisk to whip heavy cream instead of an electric mixer may affect the texture and consistency of the oolong tea cream. It is recommended to use an electric mixer for best results.
How long can I store the leftover cream in the refrigerator?
The leftover cream can be stored in the refrigerator for up to 3 days. To extend its shelf life, make sure to keep it in an airtight container and use it within this time frame.
What are some popular variations or flavors that I can try with the oolong tea cream?
Popular variations of oolong tea cream include jasmine-infused, matcha-infused, and lavender-infused. Unique flavors to try are bergamot, coconut, and ginger. These variations add depth and complexity to the cream, enhancing its aroma, taste, and overall experience.
Conclusion
As a tea sommelier, I hope you’ve enjoyed learning how to make your own oolong tea cream at home. By following the precise instructions and measurements provided, you can create a luxurious and flavorful cream that perfectly complements your favorite oolong tea.
For example, imagine steeping a rich and floral Tie Guan Yin oolong tea and infusing the cream with its delicate notes of orchid and honey. The end result would be a creamy concoction that elevates your tea-drinking experience to new heights.
So go ahead, indulge in the artistry of making oolong tea cream and savor every sip.
Noah, the Editor-in-Chief at Cappuccino Oracle, plays a pivotal role in shaping the voice and vision of our renowned platform. With an unwavering passion for coffee, coffee alternatives, and tea, Noah leads Cappuccino Oracle towards new horizons in the realm of coffee journalism.
Beyond his professional responsibilities, Noah serves as a mentor and guiding force for his team. His dedication to journalistic excellence and genuine love for coffee, coffee alternatives, and tea continue to inspire and motivate the Cappuccino Oracle family. In the ever-evolving world of these beverages, Noah’s leadership ensures that our platform remains at the forefront, delivering enlightening and enjoyable content to our readers worldwide.
Were you aware that oolong tea, once brewed, can remain fresh for a longer period than one might anticipate? As someone passionate about tea, I have frequently pondered the longevity of this delightful drink. Interestingly, there are several elements that can influence how long it stays fresh.
In this article, we’ll explore how long brewed oolong tea can last and provide some tips on extending its shelf life.
But first, let’s start with an interesting statistic: on average, brewed oolong tea can stay fresh for up to 24 hours when stored properly. Now, you might be wondering what exactly constitutes proper storage. Well, factors such as temperature, air exposure, and contaminants can all impact the longevity of your brewed tea. So, it’s important to know how to tell if your oolong tea has gone bad and how to keep it fresh for as long as possible.
So, if you’re curious about the shelf life of brewed oolong tea and want to ensure that your cuppa stays flavorful, keep reading. We’ve got all the information you need to enjoy your tea to the fullest.
Key Takeaways
- Brewed oolong tea can stay fresh for up to 24 hours when stored properly.
- The shelf life of brewed oolong tea is typically around 1 to 2 days when stored in the refrigerator.
- Factors like temperature, air exposure, and contaminants can affect the freshness of brewed oolong tea.
- Choosing the right brewing methods, such as using the appropriate water temperature and steeping duration, can preserve the freshness of oolong tea.
The Shelf Life of Brewed Oolong Tea
Brewed oolong tea won’t last for ages, but it’ll still be good for a decent amount of time. The shelf life of brewed oolong tea is typically around 1 to 2 days when stored in the refrigerator.
However, the freshness factors play a significant role in determining how long the tea remains enjoyable. The quality of the tea leaves used, the brewing method, and the water temperature all contribute to the overall freshness of the brewed oolong tea. To maximize the shelf life, it’s essential to use high-quality tea leaves, brew the tea properly, and store it in airtight containers.
Additionally, factors like exposure to air, sunlight, and temperature fluctuations can affect the freshness of the brewed tea. Transitioning into the subsequent section about factors that affect the freshness of brewed oolong tea, it’s crucial to consider these elements to fully enjoy the flavor and aroma.
Factors that Affect the Freshness of Brewed Oolong Tea
When it comes to the freshness of brewed oolong tea, there are three key factors to consider.
Firstly, the time since brewing plays a major role in maintaining the tea’s freshness. The longer it sits, the more the flavor and aroma diminish.
Secondly, storage conditions are crucial in preserving the freshness. Properly sealed containers, away from heat and moisture, help maintain the tea’s quality.
Lastly, the quality of the tea leaves themselves greatly impacts the freshness. Higher quality leaves tend to retain their freshness and flavor for longer periods of time compared to lower quality leaves.
Time Since Brewing
Since brewing oolong tea, the flavors have been intensifying with each passing moment. As time goes on, the taste profile of the tea evolves, becoming more robust and complex. However, it’s important to note that the freshness of brewed oolong tea will gradually deteriorate over time.
To maintain its quality, there are some tips for storing oolong tea that can help prolong its lifespan. Storing brewed oolong tea in an airtight container and keeping it in a cool, dark place will minimize exposure to air, light, and moisture, which can all contribute to flavor degradation.
Additionally, choosing the right brewing methods for oolong tea, such as using water at the appropriate temperature and steeping for the recommended duration, can help preserve its freshness.
As we move into the next section on storage conditions, it’s crucial to understand how these factors can further impact the longevity of brewed oolong tea.
Storage Conditions
To maximize the lifespan of oolong tea, it’s crucial to carefully consider the conditions in which it’s stored. The best temperature for storing brewed oolong tea is between 40°F and 60°F (4°C and 15°C). It’s important to keep the tea away from heat sources and direct sunlight, as they can degrade the flavor and aroma.
The best container for storing brewed oolong tea is an airtight, opaque container, such as a glass jar or tin. This will prevent moisture, air, and light from reaching the tea, ensuring its freshness for a longer period of time. Additionally, avoid storing oolong tea near strong-smelling items, as the tea can absorb odors.
By following these guidelines, you can maintain the quality of the tea leaves and enjoy a delightful cup of oolong tea every time.
Quality of the Tea Leaves
If you want to experience the true essence of a fine cup of oolong, pay close attention to the quality of the tea leaves you choose. The quality of the tea leaves is crucial in determining the flavor, aroma, and overall experience of your oolong tea.
Tea leaf grading plays a significant role in identifying the quality of oolong tea. Higher grades of oolong tea, such as those labeled as ‘first flush’ or ‘single estate,’ are typically more flavorful and aromatic compared to lower grades. Additionally, different oolong tea flavors can be attributed to the specific processing methods used, such as oxidation level and roasting. Understanding these factors can help you select the perfect oolong tea that suits your taste preferences.
Now, let’s delve into the next section to explore the question of how long brewed oolong tea can last without compromising its quality.
How Long Can Brewed Oolong Tea Last?
Wondering how long your brewed oolong tea can last? The shelf life of brewed oolong tea depends on various factors, including the storage methods employed. Here are three key points to consider:
-
Proper storage: To maximize the shelf life of brewed oolong tea, it’s crucial to store it in an airtight container in the refrigerator. This’ll help maintain its flavor and prevent the growth of bacteria.
-
Time frame: On average, brewed oolong tea can last for up to 3-4 days when stored correctly. However, it’s essential to note that the taste and quality may gradually decline over time.
-
Sensory evaluation: To determine if your brewed oolong tea has gone bad, rely on your senses. Look for any changes in color, odor, or taste. If you notice any off-putting signs, it’s best to discard the tea.
Now, let’s explore how to tell if brewed oolong tea has gone bad without compromising your taste buds.
How to Tell If Brewed Oolong Tea Has Gone Bad
When determining if brewed oolong tea has gone bad, there are a few key points to consider. First, I always perform a smell test to detect any off or unpleasant odors.
Next, I conduct a taste test to check for any sour or bitter flavors that may indicate spoilage.
Lastly, I visually inspect the tea for any changes in color, cloudiness, or presence of mold or floating particles.
By following these steps, I can easily determine if my brewed oolong tea has gone bad.
Smell Test
To determine the freshness of your brewed oolong tea, give it a quick sniff and see if its aroma entices your senses. The smell of oolong tea should be pleasant and inviting, with hints of floral, fruity, or nutty notes. If the aroma is stale, musty, or overly grassy, it may indicate that the tea has gone bad.
When conducting the smell test, consider your taste preferences and brewing techniques. Oolong teas can vary in their flavor profiles, ranging from light and delicate to rich and robust. Take note of any off-putting or unusual smells that deviate from your usual brewing experience.
In summary, the smell test is an important first step in determining the freshness of your brewed oolong tea. Pay attention to the aroma and compare it to your taste preferences and brewing techniques.
Next, let’s move on to the taste test to further evaluate the quality of your tea.
Taste Test
Let’s jump right into the taste test and discover the delightful flavors that await us in a cup of freshly steeped oolong tea.
When it comes to oolong tea, taste preferences can vary widely. Some people prefer a more floral and fruity taste, while others enjoy a more earthy and roasted flavor profile. The taste of oolong tea can also be influenced by different brewing techniques. The water temperature, steeping time, and amount of tea leaves used can all affect the final taste. It’s important to find the brewing method that suits your taste buds the best.
Personally, I prefer a slightly longer steeping time and a lower water temperature to bring out the tea’s natural sweetness.
Now, let’s move on to the next section and take a closer look at the visual inspection of our brewed oolong tea.
Visual Inspection
The color of the steeped oolong tea is a rich amber, hinting at the complex flavors that await. It’s important to visually inspect brewed oolong tea to determine its freshness and quality.
When examining the tea, pay attention to any changes in color or clarity. Freshly brewed oolong tea should have a clear and vibrant appearance. If the tea appears cloudy or has a dull color, it may indicate that it’s been stored improperly or for an extended period of time. The storage conditions and time since brewing can greatly affect the shelf life of oolong tea.
To extend the freshness of brewed oolong tea, it’s recommended to store it in an airtight container in a cool, dark place. This will help preserve its flavor and prevent it from becoming stale.
Moving on to tips for extending the shelf life of brewed oolong tea…
Tips for Extending the Shelf Life of Brewed Oolong Tea
One interesting statistic is that brewed oolong tea can last up to 24 hours if stored properly.
To extend the freshness and preserve the flavor of brewed oolong tea, there are a few tips you can follow. Firstly, it’s important to store the tea in an airtight container to prevent exposure to air, which can cause oxidation and degrade the flavor.
Secondly, keeping the tea away from direct sunlight and heat sources will help maintain its freshness. Additionally, refrigerating the brewed oolong tea can further extend its shelf life, as the cold temperature slows down the oxidation process.
Lastly, avoiding any contact with moisture is crucial, as it can lead to mold growth.
By following these tips, you can savor the flavor of your brewed oolong tea for longer.
Now, let’s explore creative ways to use leftover brewed oolong tea.
Creative Ways to Use Leftover Brewed Oolong Tea
When it comes to finding creative ways to use leftover brewed oolong tea, there are a few options that always come to mind. One of my personal favorites is making iced oolong tea, which is incredibly refreshing on a hot summer day.
Another great option is using the tea as a base for delicious oolong tea smoothies, adding a unique flavor to your favorite fruit combinations.
Lastly, you can experiment with using brewed oolong tea as a marinade for meats and vegetables, infusing them with a subtle tea flavor that’s both aromatic and flavorful.
Iced Oolong Tea
Enjoy the refreshing taste of iced oolong tea, a perfect way to beat the summer heat and indulge in a flavorful beverage. Here are some iced oolong recipes and benefits of drinking this delightful tea:
-
Iced Oolong Lemonade: A tangy twist on traditional iced tea, combining the citrusy goodness of lemons with the smoothness of oolong.
-
Minty Oolong Refresher: A cooling blend of fresh mint leaves and oolong tea, perfect for a hot day.
-
Peach Oolong Iced Tea: The natural sweetness of peaches complements the earthy flavors of oolong, creating a delightful summer drink.
-
Tropical Oolong Punch: A tropical paradise in a glass, blending oolong tea with pineapple and mango for a refreshing and exotic taste.
-
Raspberry Oolong Cooler: A fruity and refreshing beverage, combining the tartness of raspberries with the floral notes of oolong.
These iced oolong tea recipes not only provide a delicious way to quench your thirst but also offer numerous health benefits. Now, let’s explore the world of oolong tea smoothies.
Oolong Tea Smoothies
Indulge in the velvety goodness of oolong tea smoothies, a symphony of flavors that dance on your taste buds like a tropical breeze caressing your palate. Oolong tea smoothies not only satisfy your cravings for a refreshing drink but also offer numerous health benefits.
Oolong tea is known for its high antioxidant content, which helps boost your immune system and protects against chronic diseases. Brewing the tea to perfection is key to extracting its full potential. Steep the leaves in water that’s around 190-200°F for 3-5 minutes, allowing the rich flavors to develop. Once brewed, let it cool before incorporating it into your favorite smoothie recipe.
The smooth and floral notes of oolong tea complement fruits like mango, pineapple, and peach, creating a delightful fusion of tastes. Transitioning into the next section, oolong tea marinades, brings a new dimension to exploring the versatility of this remarkable tea.
Oolong Tea Marinades
In my previous section, I discussed the delightful idea of using oolong tea to create refreshing smoothies. Now, let’s explore another exciting way to incorporate oolong tea into our culinary adventures: oolong tea marinades. By infusing the savory flavors of oolong tea into marinades, we can impart a unique twist to our favorite dishes. Not only does this technique add depth and complexity to the flavors, but it also offers several health benefits. Oolong tea is rich in antioxidants, which can help boost our immune system and promote overall well-being. Additionally, the polyphenols present in oolong tea possess anti-inflammatory properties that can aid digestion and support heart health. With these advantages in mind, using oolong tea in marinades is a fantastic way to elevate our cooking and enjoy a nutritious meal. Now, let’s delve into frequently asked questions about brewed oolong tea.
Frequently Asked Questions about Brewed Oolong Tea
Can I reheat brewed Oolong tea?
Yes, you can definitely reheat brewed Oolong tea. However, it’s important to note that reheating the tea may alter its taste and aroma slightly. To reheat, simply transfer the tea to a teapot or heatproof container and gently warm it up on the stove or microwave until it reaches your desired temperature.
Can I mix different brewed Oolong teas?
Absolutely! Mixing different brewed Oolong teas can be a fun and creative way to explore new flavors and create your own unique blend. You can experiment by combining teas with different levels of oxidation or from different regions to create a personalized taste profile.
Can I use brewed Oolong tea in cooking?
Definitely! Brewed Oolong tea can add a delicious and subtle flavor to various dishes. You can use it as a marinade for meats, incorporate it into sauces or dressings, or even use it as a base for a refreshing tea-infused dessert. The possibilities are endless when it comes to cooking with brewed Oolong tea.
Can I Reheat Brewed Oolong Tea?
Reheating brewed oolong tea may alter its flavor profile and diminish some of its aromatic qualities. When you reheat oolong tea, the delicate compounds that contribute to its unique taste and aroma can be compromised. Additionally, reheating can cause the tea to become oversteeped, resulting in a bitter or astringent flavor. It’s best to drink oolong tea freshly brewed to fully enjoy its health benefits, such as boosting metabolism and promoting heart health.
If you find yourself with leftover brewed oolong tea, it’s recommended to store it in the refrigerator and consume it within 24 hours for the best taste.
Now, let’s move on to the next question: can I mix different brewed oolong teas?
Can I Mix Different Brewed Oolong Teas?
Blending different varieties of oolong teas can create a rich and nuanced flavor profile, as the unique characteristics of each tea interact and complement one another. When mixing flavors, it’s important to consider the brewing techniques used for each tea to ensure a harmonious blend.
Different brewing times and water temperatures can affect the taste and aroma of the tea, so experimenting with different combinations can lead to delightful results. For example, pairing a floral and delicate oolong with a robust and earthy one can create a balanced and complex cup of tea. Additionally, adjusting the ratio of each tea can further enhance the overall flavor.
By exploring the possibilities of mixing brewed oolong teas, you can discover new and exciting taste experiences.
Moving on to the next topic, let’s explore how brewed oolong tea can be used in cooking.
Can I Use Brewed Oolong Tea in Cooking?
Unlock the incredible potential of brewed oolong tea by infusing your culinary creations with its captivating essence, allowing its delicate flavors to dance and tantalize your taste buds. Cooking with oolong tea opens up a world of possibilities, as its unique aroma and taste can elevate both sweet and savory dishes.
From oolong tea-infused desserts like cakes, cookies, and ice creams to savory dishes like oolong tea-marinated meats and stir-fries, the possibilities are endless. Oolong tea can also be used as a flavorful liquid in sauces and dressings, adding depth and complexity to your dishes.
Explore the internet for oolong tea recipes, and you’ll be amazed at the culinary wonders you can create. As we delve into the health benefits of oolong tea, you’ll discover how this versatile brew can nourish your body and delight your senses.
The Health Benefits of Oolong Tea
Oolong tea offers a wide range of health benefits, making it a delightful and nutritious beverage. Here are three key reasons why incorporating oolong tea into your daily routine can be beneficial for your health:
-
Boosts metabolism: Oolong tea contains polyphenols that can help increase metabolism and promote weight loss. It activates enzymes that enhance fat oxidation and improves overall fat-burning abilities.
-
Enhances brain function: The caffeine and L-theanine in oolong tea work synergistically to improve cognitive function. This combination increases alertness and focus while promoting a sense of calm and relaxation.
-
Supports heart health: Regular consumption of oolong tea has been associated with a reduced risk of heart disease. It helps lower blood pressure and cholesterol levels, promoting a healthy cardiovascular system.
Moving on to the next section about popular varieties of oolong tea, each variety offers unique flavors and aromas that cater to diverse preferences.
Popular Varieties of Oolong Tea
Explore the world of oolong tea by trying out different varieties, each offering distinct flavors and aromas that’ll captivate your taste buds and transport you to different regions of Asia.
Did you know that the most popular variety, Tie Guan Yin, accounts for over 50% of all oolong tea consumed worldwide? This exquisite tea, also known as Iron Goddess of Mercy, is grown in the Fujian province of China. It’s characterized by its floral fragrance and sweet, lingering aftertaste.
Another well-loved variety is Da Hong Pao, a dark oolong tea with a rich, roasted flavor that’s often compared to the taste of ripe fruit.
To fully experience the complexity of these popular varieties, it’s important to use the proper brewing techniques. This includes using water that’s just below boiling and steeping the leaves for the recommended time.
As we conclude our exploration of oolong tea, let’s reflect on the wide array of flavors and aromas that this beloved beverage has to offer.
Conclusion and Final Thoughts
Now that we’ve explored the popular varieties of Oolong tea, let’s move on to the conclusion and final thoughts. As an avid tea drinker, I find Oolong tea to be a versatile and enjoyable beverage. Its unique flavor profiles and health benefits make it a popular choice among tea enthusiasts.
But what about the brewed tea itself? How long can it last? Well, the shelf life of brewed Oolong tea is generally around 2-3 days if stored properly in the refrigerator. However, if you’re looking for creative uses for leftover brewed Oolong tea, there are several options to consider. You can use it as a base for smoothies, incorporate it into baking recipes, make delicious iced tea, or even use it as a marinade for meats. The possibilities are endless.
So, don’t let any brewed Oolong tea go to waste and explore these creative uses while enjoying its numerous health benefits.
- Aromatic and soothing
- Versatile in recipes
- Enhances overall well-being
- Brings a sense of tranquility
Frequently Asked Questions
Can brewed oolong tea be stored in the refrigerator?
Yes, brewed oolong tea can be stored in the refrigerator to extend its shelf life. Storing it properly in an airtight container helps maintain its flavor and freshness for up to 3-5 days.
Is it safe to drink brewed oolong tea that has been left out overnight?
It is not safe to drink brewed oolong tea that has been left out overnight. To ensure safety, store brewed tea in a sealed container in the refrigerator or freeze it for later use.
Can brewed oolong tea be reheated?
Yes, brewed oolong tea can be reheated. Reheating helps to retain the health benefits of drinking oolong tea, such as improved digestion and mental alertness. However, avoid reheating it too many times to maintain its optimal flavor.
How long does brewed oolong tea stay fresh when stored in a sealed container?
Brewed oolong tea stays fresh for up to 2 days when stored in a sealed container. To properly store it, ensure the container is airtight and keep it refrigerated. Avoid exposure to light, heat, and strong odors.
Can brewed oolong tea be frozen for later use?
Yes, brewed oolong tea can be frozen for later use, preserving its flavor and freshness. For example, I once froze a batch of brewed oolong tea and it stayed delicious for up to three months.
Conclusion
In conclusion, brewed oolong tea can last for up to 24 hours if stored properly. However, its freshness and flavor will gradually decline over time. To ensure the longest shelf life, it’s important to store brewed oolong tea in an airtight container in the refrigerator.
Remember the old adage, "Waste not, want not." By taking proper care of your brewed oolong tea, you can enjoy its health benefits and delicious taste for as long as possible. So, savor every sip and make the most of this delightful beverage.
Noah, the Editor-in-Chief at Cappuccino Oracle, plays a pivotal role in shaping the voice and vision of our renowned platform. With an unwavering passion for coffee, coffee alternatives, and tea, Noah leads Cappuccino Oracle towards new horizons in the realm of coffee journalism.
Beyond his professional responsibilities, Noah serves as a mentor and guiding force for his team. His dedication to journalistic excellence and genuine love for coffee, coffee alternatives, and tea continue to inspire and motivate the Cappuccino Oracle family. In the ever-evolving world of these beverages, Noah’s leadership ensures that our platform remains at the forefront, delivering enlightening and enjoyable content to our readers worldwide.


Discover the Magic of Mushroom Coffee: Ryze Organic Unveiled
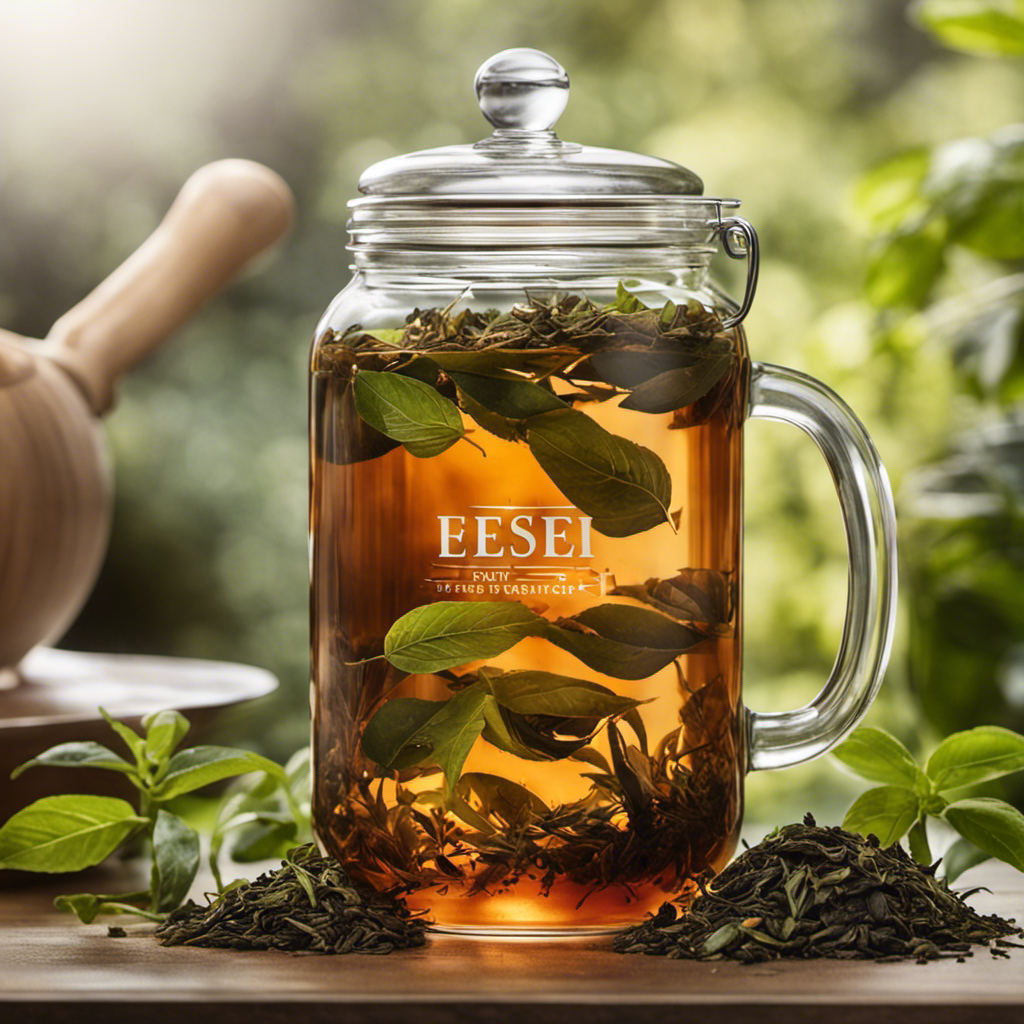
How Long Does Tea Need to Steep Kombucha

Where Can Kombucha Tea Be Purchase
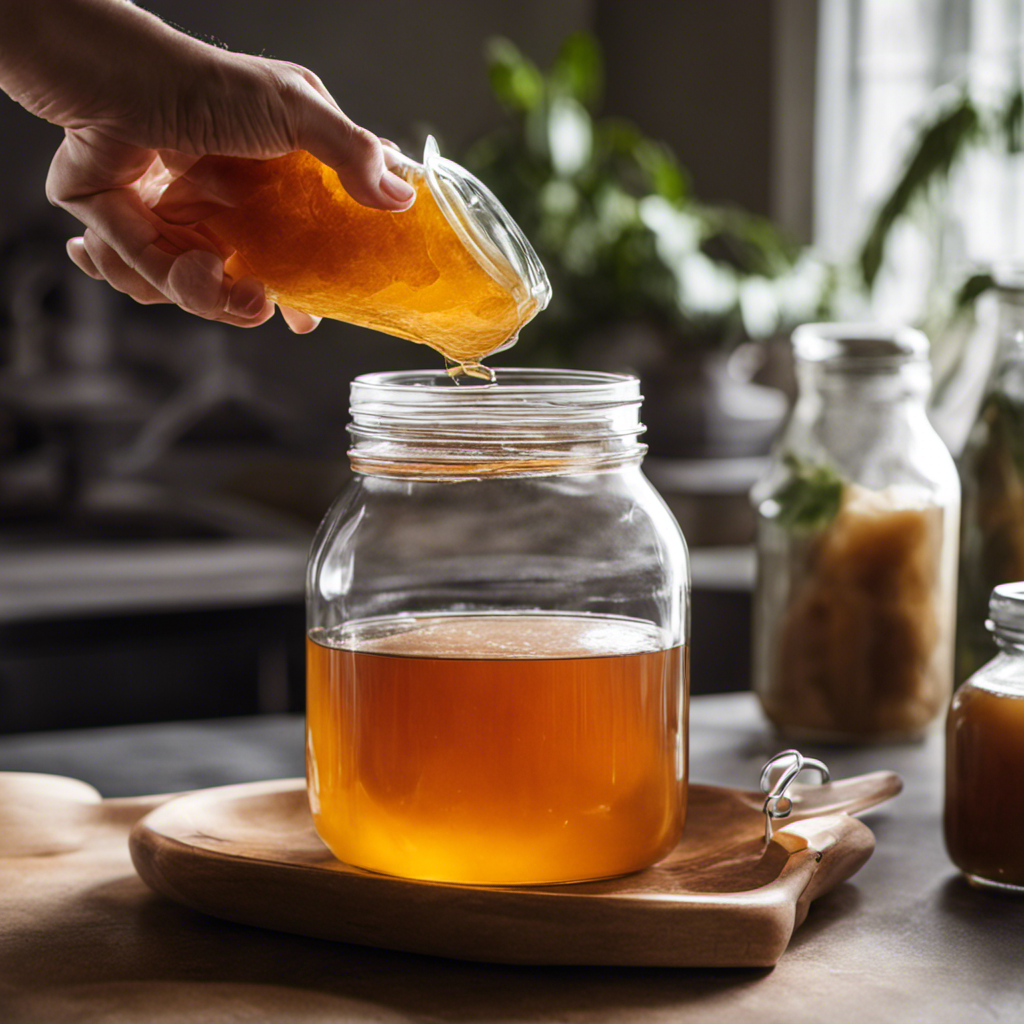
How to Prepare Kombucha Tea
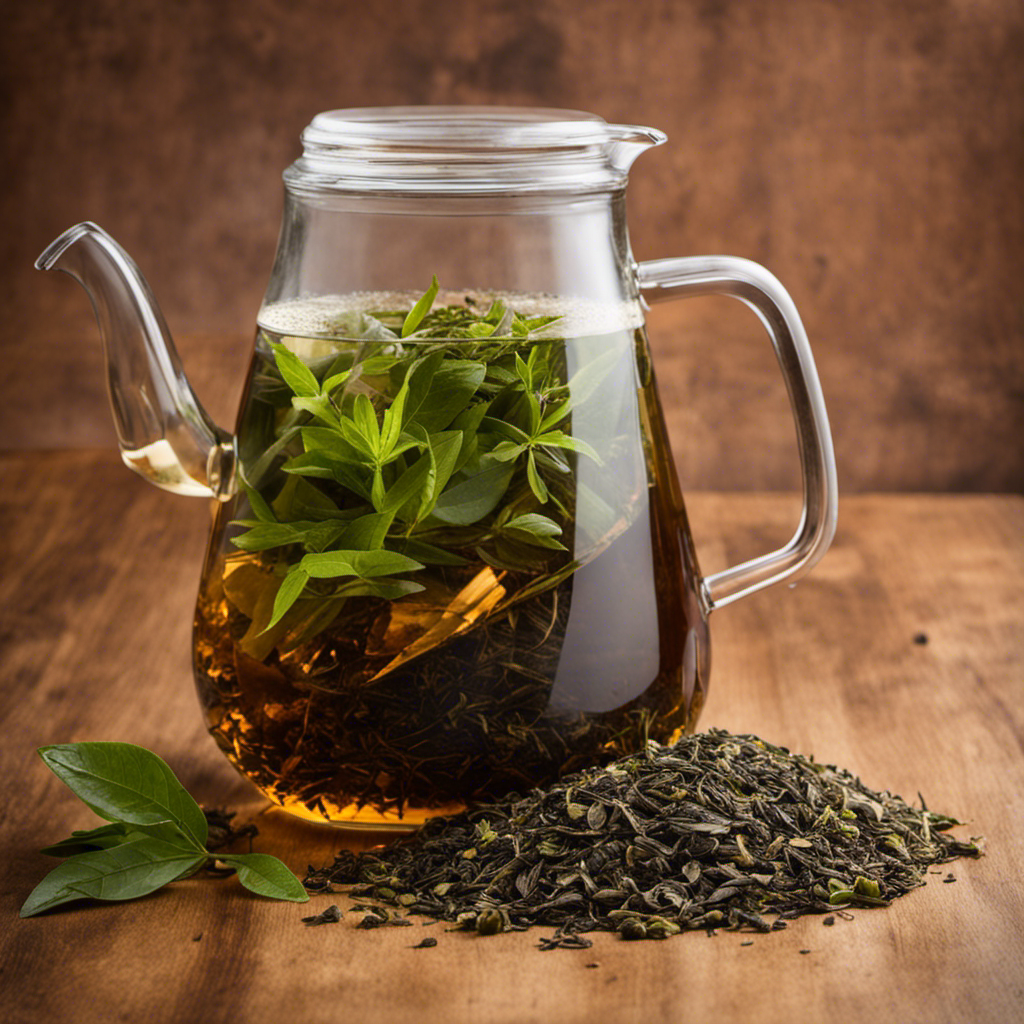
How Many Tea Bags per Half Gallon of Kombucha

How to Make Americano With Moka Pot

How to Make Korean Iced Americano

How to Make Iced Americano With Instant Coffee

How to Make Americano With Bialetti

How to Make Dutch Bros Americano

Discover the Power of KOS Mushroom Coffee

Top 10 Rated Mushroom Coffee Brands for a Boost

What Makes Caffeine-Free Mushroom Coffee Unique?

Rooibos Tea: A Guide to Safe Breastfeeding Practices

What Mushroom Can I Use as a Coffee Replacement?

-
 Americano4 weeks ago
How to Make Americano With Moka Pot
-
 Americano2 weeks ago
How to Make Korean Iced Americano
-
 Americano4 weeks ago
How to Make Iced Americano With Instant Coffee
-
 Americano4 weeks ago
How to Make Americano With Bialetti
-
 Americano4 weeks ago
How to Make Dutch Bros Americano
-

 Americano6 days ago
How to Make an Iced Americano With Nespresso
-

 Americano2 weeks ago
How Many Shots of Espresso for 16 Oz Americano
-

 Americano4 weeks ago
How to Make a Hazelnut Americano