
Turmeric Tea
What Happens If You Drink Alcohol Before Colonoscopy

I had been looking forward to my colonoscopy for weeks. Okay, maybe not the actual procedure, but the peace of mind that comes from knowing your colon is healthy. However, as the day approached, I got a little nervous about the preparation.
I had heard that alcohol was not allowed before a colonoscopy, but I didn’t think it was a big deal. I mean, how could a little drink hurt?
As it turns out, drinking alcohol before a colonoscopy can have serious consequences. Not only can it affect the accuracy of the procedure, but it can also increase the risk of complications.
In this article, we will explore why alcohol is not allowed before a colonoscopy, the risks and complications associated with drinking, and what to do if you accidentally imbibe.
So, grab a glass of water and let’s dive in.

Key Takeaways
- Drinking alcohol before a colonoscopy is not allowed as it can interfere with the accuracy and effectiveness of the procedure.
- Alcohol can cause dehydration, inflammation in the colon, and make the colon more fragile and prone to tearing during the procedure.
- Moderate to heavy alcohol consumption can significantly reduce the effectiveness of the colonoscopy and increase the risks of complications.
- Patients should disclose any alcohol consumption to their healthcare provider before the procedure and follow the guidelines provided for successful colonoscopy preparation.
What is a Colonoscopy and Why is Preparation Important
You’ve probably heard about colonoscopies and how important it is to prepare properly, but do you know why?
The benefits of a colonoscopy are numerous, including the detection and removal of precancerous polyps, the diagnosis of inflammatory bowel disease, and the identification of other abnormalities in the colon.
However, in order to obtain accurate results, it’s necessary to follow pre-procedure instructions carefully.
One of the most important parts of these instructions is bowel preparation. This involves a day or two of a clear liquid diet, laxatives, and sometimes enemas to empty the colon completely.
The purpose of this preparation is to ensure that the colon is completely clean, so that the doctor can see any abnormalities without obstruction.
Failure to follow these instructions can result in an incomplete examination, which may require a repeat procedure.
Now, you may wonder why alcohol is not allowed before a colonoscopy.
Why Alcohol is Not Allowed Before a Colonoscopy
Oh, so you thought you could have a little pre-colonoscopy party with a few drinks? Think again, my friend. Alcohol is a big no-no before the procedure.
It’s important to avoid alcohol consumption before a colonoscopy as it can interfere with the colonoscopy preparation process. Alcohol can cause dehydration, which isn’t ideal when one needs to drink a lot of fluids to clean out the colon. Additionally, alcohol can irritate the lining of the stomach and intestines, making them more sensitive to the laxative used during the preparation process.
Furthermore, drinking alcohol can affect the accuracy of the colonoscopy results. Alcohol can cause the colon to become inflamed, making it difficult for the doctor to see any abnormalities or polyps that may be present. This can lead to missed diagnoses and further complications down the line.
Therefore, it’s crucial to follow the recommended colonoscopy preparation protocol and avoid alcohol consumption before the procedure. In the next section, we’ll discuss the risks and complications that can arise from drinking alcohol before a colonoscopy.
Risks and Complications of Drinking Alcohol Before a Colonoscopy
I want to discuss the risks and complications associated with drinking alcohol before a colonoscopy.
Firstly, drinking alcohol can reduce the effectiveness of the procedure by affecting the accuracy of the results.
Secondly, alcohol consumption increases the risk of perforation during the colonoscopy, which can lead to serious complications.
Finally, drinking alcohol before a colonoscopy can also delay the diagnosis of potential health issues.
It’s important to follow the doctor’s instructions and avoid alcohol before a colonoscopy to ensure a successful and safe procedure.
Reduced Effectiveness of the Procedure
Drinking alcohol before a colonoscopy can lead to reduced effectiveness of the procedure. This is because alcohol can have a sedative effect on the body, which can impact the effectiveness of the sedation used during the colonoscopy. Sedation is used to help patients relax and feel comfortable during the procedure, which is crucial for a successful colonoscopy. However, if alcohol is consumed beforehand, it can interfere with the sedative’s effectiveness, making it less effective and potentially causing discomfort during the procedure.
To better understand the potential impact of alcohol consumption before a colonoscopy, consider the following table:
| Alcohol Consumption | Sedation Impact | Colonoscopy Effectiveness |
|---|---|---|
| None | Optimal | High |
| Moderate | Reduced | Moderate |
| Heavy | Minimal | Low |
As the table shows, consuming alcohol before a colonoscopy can significantly reduce the effectiveness of the procedure, making it more challenging to detect any potential health issues. Therefore, it is essential to avoid alcohol consumption before a colonoscopy to ensure the best possible results. Next, let’s discuss the increased risk of perforation associated with drinking alcohol before a colonoscopy.
Increased Risk of Perforation
Just like a weakened spot in a tire, consuming alcohol before the procedure can lead to a higher risk of colonoscopy perforation. This is because alcohol consumption can cause dehydration, which can make the colon more fragile and prone to tearing.
Additionally, alcohol can affect the patient’s ability to follow instructions and cooperate during the procedure, making it more difficult for the doctor to navigate the colonoscope safely.
To avoid this risk, it’s crucial to follow the pre-colonoscopy instructions provided by the healthcare provider. This includes avoiding alcohol for at least 24 hours before the procedure. It’s also important to disclose any alcohol consumption to the healthcare provider, as this can affect the timing and safety of the procedure.
By following these guidelines, patients can reduce their risk of colonoscopy perforation and ensure a successful procedure leading to an accurate diagnosis.
Moving forward, delaying colonoscopy can lead to delayed diagnosis and prolonged treatment.
Delayed Diagnosis
Delaying colonoscopy can lead to a delayed diagnosis, which can result in missed opportunities for early intervention and treatment. If alcohol’s consumed before the procedure, it can interfere with the accuracy of the results.
The presence of alcohol in the system can cause the colon to become more relaxed, which can lead to missed abnormalities and a less thorough examination. This can result in a delayed diagnosis and a potentially more extensive and difficult treatment.
It’s important to follow the instructions provided by your healthcare provider to ensure the best possible outcome for your colonoscopy. There are alternatives to alcohol that can be used during the preparation process, such as clear liquids. These alternatives provide the necessary hydration without interfering with the accuracy of the results.
By following the recommended guidelines, you can help ensure that your colonoscopy is successful and that any potential issues are identified and addressed in a timely manner.
Alternatives to Alcohol During Colonoscopy Preparation
During my colonoscopy preparation, I found out that clear liquids were allowed to be consumed. This was a relief since it meant I could stay hydrated while undergoing the procedure.
I also discovered that there were other beverages I could consider during the prep, which made the process more manageable.
Clear Liquids Allowed During Prep
Sip on refreshing popsicles and jello as they help you fulfill the requirements of clear liquids allowed during prep for your colonoscopy. These options not only keep you hydrated, which is essential during the preparation process, but they also provide a tasty distraction from the unpleasantness of the prep.
Here are four items to consider when choosing clear liquids:
- Choose a variety of flavors to keep things interesting.
- Freeze your popsicles for a different texture.
- Consider sugar-free options to avoid any unwanted spikes in blood sugar.
- Be sure to follow your doctor’s instructions regarding when to stop consuming clear liquids before the procedure.
As you prepare for your colonoscopy, staying hydrated and comfortable is essential. Sipping on popsicles and jello can provide a much-needed break from the monotony of clear liquids and keep you on track for a successful procedure. However, there are other beverages to consider in addition to these options.
Other Beverages to Consider
To expand your options for clear liquid beverages during colonoscopy preparation, consider incorporating broth, tea, and sports drinks into your routine. These hydration options can provide some variety to your prep process while still adhering to the necessary clear liquid restrictions.
Broth, in particular, can be a great alternative to sweetened drinks, offering a savory option that can help curb hunger while also providing necessary hydration.
If you’re looking for caffeine alternatives, tea can be a great option. While coffee and other caffeinated beverages aren’t allowed during colonoscopy prep, tea can still provide a small amount of caffeine to help ease any potential withdrawal symptoms. Just be sure to stick to herbal or decaffeinated tea options to ensure that you’re still adhering to the clear liquid restrictions.
Ultimately, finding the right clear liquid beverages for your colonoscopy prep process can help make the experience more manageable and less stressful.
Moving on to how to prepare for a colonoscopy, it’s important to follow the instructions provided by your healthcare provider to ensure that the procedure goes smoothly.
How to Prepare for a Colonoscopy
Preparing for a colonoscopy can be uncomfortable, but it’s important to follow the instructions given by your doctor for a successful procedure. One of the most important aspects of preparation is the colonoscopy diet. Your doctor will likely provide you with detailed instructions on what to eat and what to avoid in the days leading up to your procedure. This diet typically involves eating low-fiber foods and avoiding certain fruits, vegetables, and grains that can be difficult to digest.
Another key aspect of preparation is bowel preparation tips. This typically involves taking a laxative to help clear out your colon prior to the procedure. Your doctor may also recommend fasting for a certain amount of time before the procedure to ensure that your colon is completely empty. It’s important to follow these instructions closely to ensure a successful and accurate colonoscopy. In addition to a colonoscopy diet and bowel preparation tips, there are also certain foods and drinks to avoid before colonoscopy. These include anything that is difficult to digest or that can cause bloating or gas, such as beans, broccoli, and carbonated beverages. By following these guidelines, you can help ensure a successful colonoscopy prep and procedure.
Tips for a Successful Colonoscopy Prep
Now that we’ve covered how to prepare for a colonoscopy, let’s dive into some tips for a successful colonoscopy prep. It’s important to follow your doctor’s instructions closely to ensure a clear colon for the procedure. Here are some tips I’ve found helpful:
-
Stay hydrated: Drinking plenty of clear fluids such as water, broth, and clear juices will help flush out your system and prevent dehydration.
-
Stick to the dietary restrictions: Avoid solid foods and stick to a clear liquid diet. This includes avoiding red or purple liquids, as well as alcohol.
-
Set a schedule: Follow the timing instructions for taking your prep solution and when to stop eating and drinking. Setting reminders and alarms can help keep you on track.
-
Make it more tolerable: Many colonoscopy prep solutions can be unpleasant to drink, but there are ways to make it more tolerable. Drink through a straw, use a chaser, or chill the solution to make it easier to swallow.
-
Be prepared for side effects: It’s common to experience cramping, bloating, and diarrhea during the prep process. Have plenty of toilet paper, wipes, and a comfortable place to rest nearby.
When it comes to dietary restrictions and hydration tips, following your doctor’s instructions is key. However, if you accidentally drink alcohol before your colonoscopy, there are steps you can take to ensure the procedure can still be performed effectively.
What to Do If You Accidentally Drink Alcohol Before a Colonoscopy
Oops! Did I accidentally indulge in a drink before my upcoming colonoscopy? Don’t panic, there are steps I can take to ensure that the procedure is still effective. First, it’s important to understand why alcohol consumption can interfere with a colonoscopy. Alcohol can cause dehydration and irritate the lining of the digestive tract, making it difficult for the doctor to get a clear view of the colon.
To mitigate the effects of alcohol, I can drink plenty of water to rehydrate my body and soothe any irritation in my digestive tract. Additionally, I can follow the tips for a successful colonoscopy prep, such as sticking to a clear liquid diet and avoiding solid foods. If I experience nausea from the alcohol or the prep solution, I can speak with my doctor about medication options to alleviate the symptoms. In some cases, it may be necessary to reschedule the procedure to ensure the best possible results.
Drinking alcohol before a colonoscopy can disrupt the procedure, but there are steps I can take to mitigate the effects. By staying hydrated, following the prep instructions, and communicating with my doctor about any discomfort or symptoms, I can still have a successful colonoscopy. For additional resources and support for colonoscopy preparation, there are many online communities and healthcare professionals available to provide guidance and assistance.
Additional Resources and Support for Colonoscopy Preparation
You don’t have to go through your colonoscopy preparation alone. There are many helpful resources and supportive healthcare professionals available to guide and assist you. Here are some additional resources and support to help you prepare for your colonoscopy:
-
Support groups: Joining a support group can be helpful for individuals who are going through the same experience. Support groups offer a safe space for individuals to share their experiences, ask questions, and receive emotional support from others who understand.
-
Online resources: The internet is a great source of information, and there are many online resources available that can help you prepare for your colonoscopy. These resources can include informational websites, videos, and blogs that provide tips and advice on how to prepare for your procedure.
-
Mental health resources: Preparing for a colonoscopy can be stressful, and it’s important to take care of your mental health during this time. There are mental health resources available that can help you cope with the stress and anxiety that may arise during this process.
-
Coping strategies: There are many coping strategies that can help you manage the stress and anxiety that comes with colonoscopy preparation. These strategies can include relaxation techniques, mindfulness practices, and exercise. It’s important to find the coping strategies that work best for you and to incorporate them into your daily routine.
Frequently Asked Questions
Can I drink other types of alcohol before a colonoscopy, such as wine or beer?
I wouldn’t recommend drinking any type of alcohol before a colonoscopy. Both wine and liquor can have negative effects on bowel prep, potentially leading to inaccurate results. It’s best to stick to water and follow your doctor’s instructions closely.
How long before a colonoscopy should I stop drinking alcohol?
I understand the appeal of alcohol before a colonoscopy, but it’s best to avoid it during colonoscopy preparation. Alcohol consumption can interfere with the effectiveness of the procedure. It’s recommended to stop drinking alcohol at least 24 hours before.
What are the effects of alcohol on the colonoscopy procedure itself?
Alcohol can affect the colonoscopy procedure by causing sedation to be less effective and increasing the risk of complications. It’s important to follow the doctor’s instructions and avoid alcohol before the procedure.
What if I have a history of alcohol addiction or abuse?
As someone with a history of alcohol addiction, I know the importance of following pre-colonoscopy instructions. Recovery support and communication with your healthcare provider can help prevent any complications or setbacks.
Can I take medication to help with alcohol cravings during the colonoscopy preparation period?
During the colonoscopy preparation period, medication options for managing alcohol cravings are available. These can be discussed with a healthcare provider. It is important to follow preparation instructions carefully to ensure an accurate colonoscopy.
Conclusion
Well, there you have it. Drinking alcohol before a colonoscopy is a big no-no. Not only can it interfere with the effectiveness of the procedure, but it can also increase the risk of complications.
It’s important to follow the instructions provided by your healthcare provider to ensure a successful and safe colonoscopy. But don’t worry, there are plenty of alternatives to alcohol during the preparation process.
And with proper preparation and a positive attitude, you can have a successful colonoscopy experience. Remember to stay hydrated, follow the dietary restrictions, and communicate any concerns with your healthcare provider. Your health is worth the effort.

Noah, the Editor-in-Chief at Cappuccino Oracle, plays a pivotal role in shaping the voice and vision of our renowned platform. With an unwavering passion for coffee, coffee alternatives, and tea, Noah leads Cappuccino Oracle towards new horizons in the realm of coffee journalism.
Beyond his professional responsibilities, Noah serves as a mentor and guiding force for his team. His dedication to journalistic excellence and genuine love for coffee, coffee alternatives, and tea continue to inspire and motivate the Cappuccino Oracle family. In the ever-evolving world of these beverages, Noah’s leadership ensures that our platform remains at the forefront, delivering enlightening and enjoyable content to our readers worldwide.

I’ve always been a fan of kombucha, but sourcing a starter tea can prove difficult. Therefore, I embarked on a mission to craft my own batch without depending on an existing culture.
In this article, I’ll share the step-by-step process of making kombucha from scratch, without the need for any starter tea. With precise instructions and troubleshooting tips, you’ll be able to brew your own delicious and refreshing kombucha in no time.
Get ready to embark on a journey of homemade kombucha creation like never before!
Key Takeaways
- Making kombucha without starter tea is possible by using store-bought kombucha as a substitute.
- Alternative cultures like commercial SCOBY, bottled kombucha, or vinegar mother can be used as a starter.
- The brewing vessel and equipment should be clean and properly sanitized.
- Flavoring options include adding fruits, herbs, and spices to infuse different flavors into the kombucha.
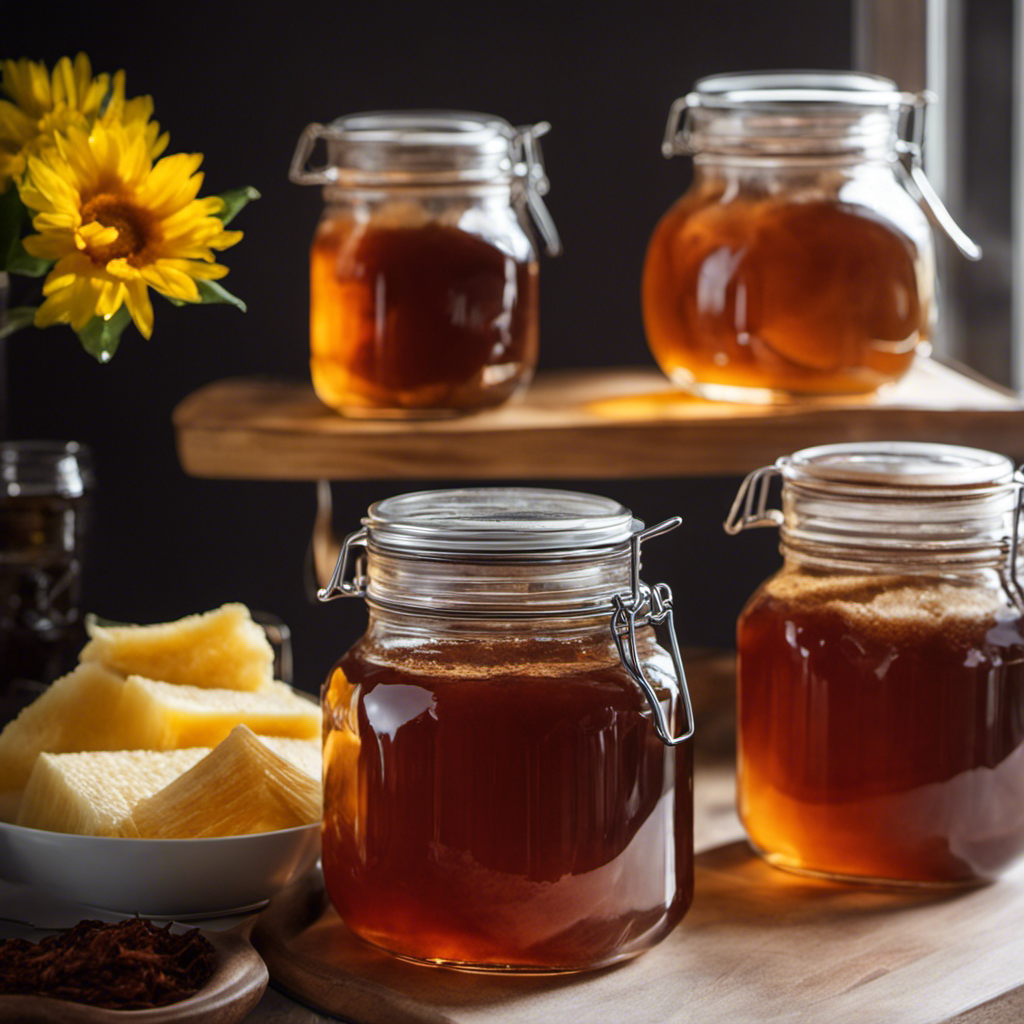
The Basics of Making Kombucha Without Starter Tea
If you don’t have any starter tea, you can still make kombucha by using store-bought kombucha as a substitute. While starter tea is traditionally used to kickstart the fermentation process, there are alternative methods that can achieve the same result.
One such method is using store-bought kombucha as a starter. Make sure to choose an unflavored and unpasteurized variety to ensure the presence of beneficial bacteria and yeast.
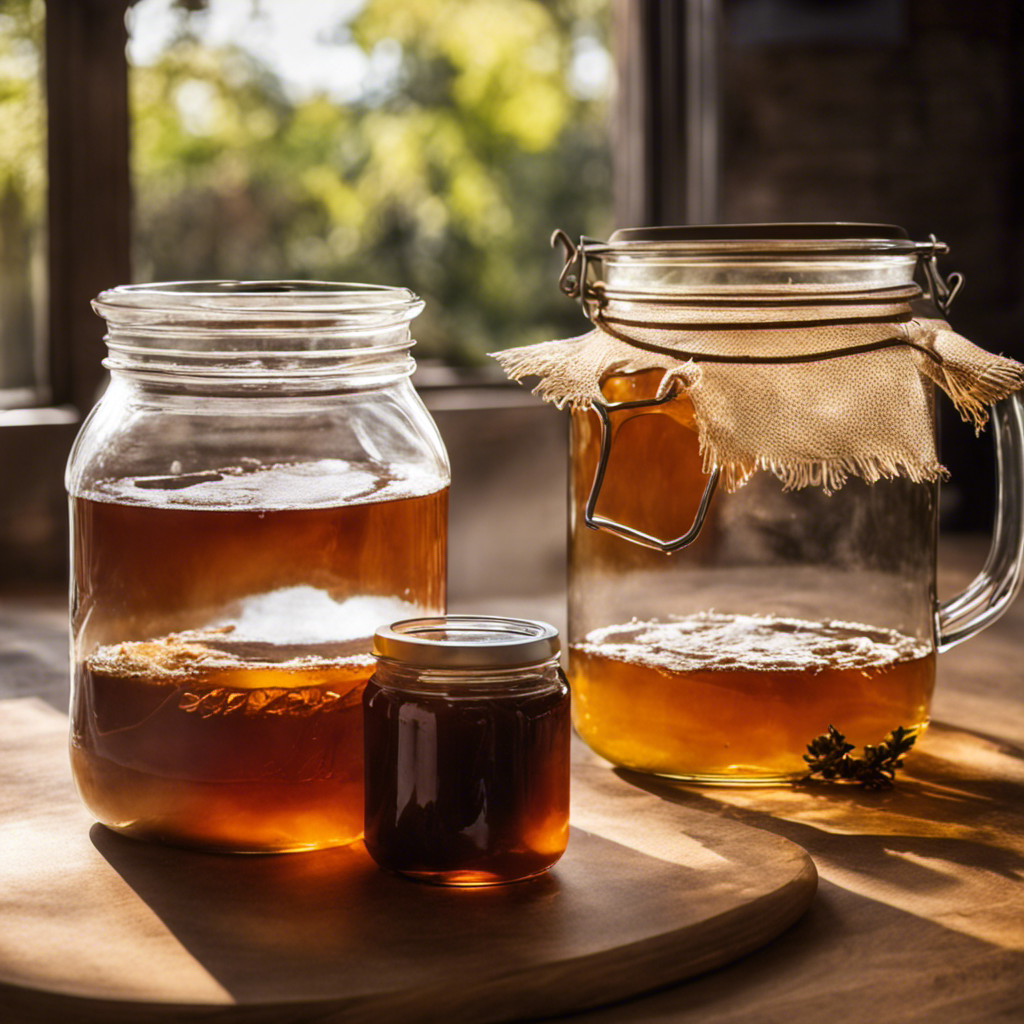
Start by brewing a strong batch of sweetened tea, preferably black or green tea. Let it cool to room temperature and then add the store-bought kombucha. Cover the mixture with a breathable cloth and let it ferment for about a week.
This method may require a little more time and patience, but the end result will still offer the same health benefits that kombucha is known for.
Choosing the Right Ingredients for Starter-less Kombucha
When making kombucha without starter tea, you’ll want to ensure you choose the right ingredients. The key is to find alternative cultures that will ferment the sweet tea and create the beneficial probiotics and acids that make kombucha so healthful. Here are some options for choosing alternative cultures:
| Alternative Cultures | Benefits |
|---|---|
| Commercial SCOBY | Convenient, reliable results |
| Bottled Kombucha | Contains live cultures for fermentation |
| Vinegar Mother | Creates a tangy, vinegar-like kombucha |
Each of these cultures can be used to start the fermentation process and produce a delicious batch of kombucha. It’s important to note that using alternative cultures may result in slightly different flavors and fermentation times compared to traditional starter tea. With the right ingredients, you can successfully brew kombucha without starter tea and enjoy a homemade, probiotic-rich beverage.
Now that we’ve discussed the importance of choosing the right ingredients, let’s move on to the step-by-step guide for brewing kombucha without starter tea.
Step-by-Step Guide to Brewing Kombucha Without Starter Tea
Now that we’ve covered the importance of selecting the right ingredients, let’s dive into the step-by-step process for brewing kombucha without using a starter tea.
-
Prepare the sweet tea: Boil water and dissolve sugar. Add tea bags and steep until cool.
-
Introduce the culture: Once the sweet tea has cooled, pour it into a sterilized glass vessel. Gently add the SCOBY, making sure it is fully submerged.
-
Fermentation: Cover the vessel with a breathable cloth and secure it with a rubber band. Place it in a warm, dark area for 7-10 days. Monitor the fermentation process by observing the formation of a new SCOBY and the change in taste.
Troubleshooting Issues:
- If mold appears, discard the entire batch and start over.
- For a more acidic flavor, extend the fermentation time.
- If the kombucha tastes too sweet, allow it to ferment for a few more days.
Benefits of Starter Tea:
- Provides a balanced pH for healthy fermentation.
- Enhances flavor development and kick-starts the fermentation process.
- Helps prevent contamination by creating a favorable environment for beneficial bacteria and yeast.
Troubleshooting Common Issues in Starter-less Kombucha Making
To troubleshoot common issues in your kombucha making process, remember to discard the entire batch if mold appears and extend the fermentation time for a more acidic flavor.
When troubleshooting problems in starter-less kombucha making, it is important to first ensure that your brewing vessel and equipment are clean and properly sanitized. Any residual bacteria or contaminants can negatively affect the fermentation process.
If your kombucha is not fermenting properly, it may be due to insufficient temperature or lack of oxygen. Make sure to maintain a temperature range of 70-85°F and provide enough airflow during fermentation.
Additionally, if your kombucha tastes too sweet or lacks carbonation, you can try adding more sugar or allowing it to ferment for a longer period.
Remember, troubleshooting is an essential part of the alternative brewing methods, so don’t be afraid to experiment and adjust your process accordingly.
In the next section, we will discuss flavoring and bottling your starter tea-free kombucha.
Flavoring and Bottling Your Starter Tea-Free Kombucha
Flavor your kombucha by adding fruits, herbs, or spices for a unique and customized taste. There are several flavoring techniques you can use to enhance your kombucha experience.
-
Fruits: Adding fresh or frozen fruits to your kombucha can infuse it with delicious flavors. Some popular options include strawberries, blueberries, and mangoes. Simply chop the fruits into small pieces and add them to your bottles before sealing them for the second fermentation process.
-
Herbs: Experiment with different herbs like mint, basil, or lavender to create a refreshing and aromatic kombucha. You can either add the herbs directly to the bottles or make a herbal infusion to mix with your kombucha.
-
Spices: Adding spices like cinnamon, ginger, or cardamom can give your kombucha a warm and comforting flavor. You can either add whole spices to the bottles or make a spice infusion to mix with your kombucha.
Conclusion
In conclusion, making kombucha without starter tea is a rewarding and accessible process. By carefully selecting the right ingredients and following a step-by-step guide, anyone can brew their own starter-less kombucha. Troubleshooting common issues along the way ensures a successful fermentation.
Finally, flavoring and bottling the kombucha adds the perfect finishing touch. As the tangy and effervescent beverage flows into your glass, you can’t help but be captivated by the vibrant colors and intoxicating aromas. Making kombucha without starter tea is a true art form that allows you to create a unique and delicious drink that will leave you craving more.
Noah, the Editor-in-Chief at Cappuccino Oracle, plays a pivotal role in shaping the voice and vision of our renowned platform. With an unwavering passion for coffee, coffee alternatives, and tea, Noah leads Cappuccino Oracle towards new horizons in the realm of coffee journalism.
Beyond his professional responsibilities, Noah serves as a mentor and guiding force for his team. His dedication to journalistic excellence and genuine love for coffee, coffee alternatives, and tea continue to inspire and motivate the Cappuccino Oracle family. In the ever-evolving world of these beverages, Noah’s leadership ensures that our platform remains at the forefront, delivering enlightening and enjoyable content to our readers worldwide.

I have long held the belief that a great cup of tea can rejuvenate both the body and the soul. That’s why I am thrilled to share my personal recipe for Revive Kombucha Campfire Tea with you.
This delightful beverage not only offers a host of health benefits, but it also provides a refreshing and invigorating taste. In this article, I’ll guide you through the steps to make this tea, explain the ingredients involved, and even share some tips to enhance its flavor.
Get ready to experience the revitalizing goodness of Revive Kombucha Camprife Tea!
Key Takeaways
- Revive Kombucha Camprife Tea offers several benefits including thirst-quenching, improved digestion, boosted immune system, and increased energy levels.
- The tea is made from a combination of ingredients such as kombucha, organic herbs and spices (ginger and turmeric), black tea, sugar, and SCOBY.
- The brewing process involves boiling water, steeping black tea, adding sugar, cooling the sweetened tea, transferring it to a glass jar with SCOBY, and fermenting for 7-10 days.
- To enhance the flavor of the tea, one can add fresh fruit slices, use the cold brew method, experiment with different flavor combinations, avoid additional sweeteners by using naturally sweet fruits, and try different brewing techniques.
The Benefits of Revive Kombucha Camprife Tea
You’ll love the benefits of Revive Kombucha Camprife tea! This delicious beverage not only quenches your thirst, but also provides numerous health benefits.
The brewing process of Revive Kombucha Camprife tea involves fermenting a blend of black tea, water, sugar, and a SCOBY (symbiotic culture of bacteria and yeast). This fermentation process creates a fizzy, probiotic-rich drink that is packed with nutrients.
The health benefits of this tea include improved digestion, boosted immune system, increased energy levels, and detoxification. Additionally, the fermentation process produces organic acids, vitamins, and enzymes that promote overall well-being.
With its unique flavor profile and numerous health benefits, Revive Kombucha Camprife tea is the perfect choice for those looking to incorporate a healthy and refreshing beverage into their daily routine.
Now that you understand the health benefits and brewing process of Revive Kombucha Camprife tea, let’s delve into understanding the ingredients that make this tea so unique.
Understanding the Ingredients for Revive Kombucha Camprife Tea
To understand the ingredients for this delicious tea, you’ll need to familiarize yourself with the different components used in the recipe.
Revive Kombucha Camprife Tea is made with a unique blend of ingredients that not only create a delightful flavor but also offer numerous health benefits.
The main ingredient is kombucha, a fermented tea that is known for its probiotic properties and gut-healing abilities. It is rich in antioxidants and can boost immunity.
Other components include a blend of organic herbs and spices, such as ginger and turmeric, which add a hint of warmth and depth to the tea.
Understanding the brewing process and the health benefits of kombucha will help you appreciate the importance of each ingredient in creating this revitalizing tea.
Now, let’s dive into the step-by-step guide to brewing Revive Kombucha Camprife Tea.
Step-by-Step Guide to Brewing Revive Kombucha Camprife Tea
Now, let’s start by carefully following the step-by-step guide for brewing this revitalizing beverage.
The brewing process of Revive Kombucha Camprife Tea is both simple and rewarding.
Firstly, gather the necessary ingredients: black tea, sugar, a SCOBY (Symbiotic Culture of Bacteria and Yeast), and water.
Boil the water and steep the black tea for about 5 minutes. Remove the tea bags and stir in the sugar until it dissolves. Allow the sweetened tea to cool to room temperature.
Next, transfer the tea to a glass jar and add the SCOBY. Cover the jar with a breathable cloth and secure it with a rubber band. Let it ferment for 7-10 days, away from direct sunlight.
Finally, strain the tea, bottle it, and refrigerate.
The health benefits of this fermented tea include improved digestion, immune system support, and detoxification.
Tips and Tricks for Enhancing the Flavor of Revive Kombucha Camprife Tea
For an extra burst of flavor, try adding slices of fresh fruit such as lemon or strawberries to your brewed Revive Kombucha Camprife Tea. The combination of the tangy citrus from the lemon and the sweet juiciness of strawberries will elevate the taste of your tea to new heights.
Not only will it add a refreshing twist, but it will also provide natural sweetness without the need for additional sweeteners. To achieve the best flavor, I recommend brewing the tea using the cold brew method. This technique allows the flavors to meld together slowly, resulting in a smoother and more well-rounded taste.
Experiment with different flavor combinations and brewing techniques to discover your perfect cup of Revive Kombucha Camprife Tea. Cheers to delicious and refreshing tea!
Exploring Creative Ways to Enjoy Revive Kombucha Camprife Tea
One creative way to enjoy Revive Kombucha Camprife Tea is by experimenting with different flavor combinations and brewing techniques. This unique tea offers a refreshing and tangy taste that can be enhanced by adding various ingredients.
For a tropical twist, try serving it over ice with a slice of fresh pineapple and a sprig of mint. The sweet and tart flavors of the tea pair perfectly with the juicy pineapple, and the mint adds a refreshing touch.
Another great combination is to pair the Camprife Tea with spicy foods like Thai curry or Mexican salsa. The tea’s natural effervescence helps to cleanse the palate and balance out the heat of the spices.
Conclusion
Well, there you have it folks! You now possess the knowledge to create your very own Revive Kombucha Camprife Tea.
With its numerous benefits and delicious flavor, this tea is bound to become your new favorite beverage.
So go ahead, brew yourself a cup and let the rejuvenating combination of ingredients work its magic.
And remember, don’t be afraid to get creative with how you enjoy it – whether it’s sipping it by the campfire or lounging on the couch, Revive Kombucha Camprife Tea is here to bring you joy and relaxation.
Cheers to a refreshing and revitalizing tea experience!

Arf, an author and an innovative enthusiast of coffee, coffee alternatives, and tea, plays a crucial role as a contributor to the esteemed Cappuccino Oracle platform. Renowned for his curiosity and passion for these captivating beverages, Arf has carved out a unique space for himself in the world of exploration and writing. He realized that coffee, coffee alternatives, and tea are not mere drinks to keep one awake, but universes of flavors and stories waiting to be explored.
Arf’s articles for Cappuccino Oracle blend meticulous research with personal experiences, providing readers with an in-depth understanding of various types of coffee, coffee alternatives, and tea, along with their unique characteristics, cultures, and histories. His honest reviews and engaging narratives guide readers on their own journeys, helping them discover their preferences and find their perfect brew.
I have a secret to tell you – creating homemade kombucha tea is simpler than you might imagine!
In this article, I’ll guide you through the step-by-step process of brewing your own delicious and healthful kombucha tea right in the comfort of your own kitchen.
From selecting the perfect ingredients to mastering the fermentation and flavoring techniques, you’ll soon be sipping on your very own homemade kombucha tea that will rival even the best store-bought brands.
Let’s get started!
Key Takeaways
- Homemade kombucha tea supports gut health and promotes a balanced gut microbiome.
- Choosing the right ingredients, such as organic tea leaves and unrefined sugar, is important for making homemade kombucha tea.
- The step-by-step brewing process involves boiling water, steeping tea bags, adding sugar, cooling the tea, and transferring it to a glass jar with a SCOBY.
- Fermentation and flavoring techniques allow for experimentation with different flavor combinations and the addition of fruits, herbs, and spices.
Benefits of Homemade Kombucha Tea
If you’re looking to improve your gut health, homemade kombucha tea can provide you with a range of benefits. Kombucha is a fermented beverage made from tea, sugar, and a symbiotic culture of bacteria and yeast (SCOBY). This tangy and fizzy drink is known for its probiotic properties, which can help support a healthy digestive system. Regular consumption of kombucha may also contribute to improved immune function and increased energy levels.
One of the main health benefits of homemade kombucha tea is its ability to support gut health. The fermentation process produces beneficial bacteria and organic acids that promote a balanced gut microbiome. This can lead to improved digestion, reduced inflammation, and enhanced nutrient absorption.
To make homemade kombucha, you’ll need a few basic brewing equipment. These include a glass jar, a breathable cover (such as a cloth or coffee filter), a rubber band to secure the cover, and a brewing vessel. It’s important to use clean, sterilized equipment to prevent the growth of harmful bacteria and ensure a successful fermentation process.
Choosing the Right Ingredients for Homemade Kombucha Tea
When choosing the right ingredients for your homemade kombucha, remember to use organic tea leaves and unrefined sugar.
Organic tea leaves are important because they are grown without the use of synthetic pesticides or fertilizers, ensuring a cleaner and healthier brew. Sourcing quality tea is also crucial for a successful kombucha fermentation process.
Look for teas that are specifically labeled for kombucha brewing, as they have been tested and proven to work well. These teas are usually made from Camellia sinensis, the plant species used to produce black, green, and white teas.
Additionally, unrefined sugar is preferred over refined sugar because it contains more natural minerals and nutrients that provide essential food for the SCOBY (symbiotic culture of bacteria and yeast) during fermentation.
Step-by-Step Brewing Process for Homemade Kombucha Tea
To start the brewing process for homemade kombucha, first gather all the necessary ingredients and equipment. Here’s a step-by-step guide to making your own kombucha tea:
- Gather the following ingredients and equipment:
- Organic black or green tea bags
- Granulated sugar
- Filtered water
- SCOBY (Symbiotic Culture of Bacteria and Yeast)
- Glass jar or container with a breathable cover
- Boil water and steep the tea bags for 10-15 minutes.
- Add sugar to the hot tea and stir until dissolved.
- Let the tea cool to room temperature.
- Transfer the tea to the glass jar and add the SCOBY.
- Cover the jar with a breathable cover and let it ferment for 7-10 days.
During the fermentation process, you may encounter some common issues like mold or a vinegary taste. To troubleshoot these problems, maintain proper hygiene, ensure the right temperature and pH levels, and monitor the fermentation time.
Experiment with different kombucha tea recipes to find your preferred flavors and enjoy the numerous health benefits of this probiotic-rich beverage.
Fermentation and Flavoring Techniques for Homemade Kombucha Tea
Experiment with different flavor combinations and fruit additions to enhance the taste of your homemade kombucha. Not only does this add variety to your brew, but it also provides additional health benefits. By infusing different fruits, herbs, and spices during the fermentation process, you can create a unique and delicious beverage. Here are some flavor combinations to get you started:
| Flavor Combination | Fruit Additions |
|---|---|
| Strawberry Basil | Strawberries, Basil |
| Ginger Lemon | Ginger, Lemon |
| Blueberry Mint | Blueberries, Mint |
These flavor combinations not only add a burst of flavor, but they also offer various health benefits. Strawberries are rich in antioxidants, basil has anti-inflammatory properties, ginger aids digestion, lemon boosts immunity, blueberries are packed with vitamins, and mint can soothe the stomach. So go ahead, get creative with your kombucha flavor experimentation and enjoy the added health benefits.
Storing and Enjoying Homemade Kombucha Tea
Store your homemade kombucha in the refrigerator to keep it chilled and ready to enjoy whenever you want. Storing kombucha properly is essential to maintain its flavor and quality.
Here are some helpful tips for storing and enjoying your homemade kombucha:
-
Keep it refrigerated: Cold temperatures slow down the fermentation process and help preserve the flavors of your kombucha.
-
Use airtight containers: Transfer your kombucha into glass bottles with airtight lids to prevent carbonation loss and maintain freshness.
-
Label and date your bottles: This will help you keep track of the brewing and storing dates, ensuring you consume your kombucha while it’s still at its best.
-
Experiment with flavor combinations: You can enhance the taste of your kombucha by adding fruits, herbs, or spices during the second fermentation process. Some popular flavor combinations include strawberry-basil, ginger-lemon, and blueberry-mint.
-
Enjoy within a reasonable time: Homemade kombucha is best consumed within a few weeks to enjoy its optimal taste and carbonation levels.
Conclusion
In conclusion, making homemade kombucha tea is a truly enlightening experience.
Not only does it give you the opportunity to embrace your inner scientist, but it also allows you to pretend you’re some sort of mystical potion master.
With the right ingredients and brewing process, you can create a concoction that is not only delicious but also potentially beneficial for your gut health.
So go forth, my fellow kombucha enthusiasts, and embark on this wonderful journey of brewing your own magical elixir.
Cheers!
Arf, an author and an innovative enthusiast of coffee, coffee alternatives, and tea, plays a crucial role as a contributor to the esteemed Cappuccino Oracle platform. Renowned for his curiosity and passion for these captivating beverages, Arf has carved out a unique space for himself in the world of exploration and writing. He realized that coffee, coffee alternatives, and tea are not mere drinks to keep one awake, but universes of flavors and stories waiting to be explored.
Arf’s articles for Cappuccino Oracle blend meticulous research with personal experiences, providing readers with an in-depth understanding of various types of coffee, coffee alternatives, and tea, along with their unique characteristics, cultures, and histories. His honest reviews and engaging narratives guide readers on their own journeys, helping them discover their preferences and find their perfect brew.

How to Make Kombucha Without Starter Tea
How Make Revive Kombucha Camprife Tea

Why Do Americanos Taste so Bad

What Is a Hot Americano Starbucks
How to Make Homemade Kombucha Tea

How Many Calories Are in a Americano

How to Make Americano With Moka Pot

How to Make Iced Americano With Instant Coffee

How to Make an Americano in a French Press

What to Add to an Americano at Starbucks

Discover the Power of KOS Mushroom Coffee

Top 10 Rated Mushroom Coffee Brands for a Boost

What Makes Caffeine-Free Mushroom Coffee Unique?

Rooibos Tea: A Guide to Safe Breastfeeding Practices

What Mushroom Can I Use as a Coffee Replacement?

-
 Americano4 weeks ago
How Many Calories Are in a Americano
-
 Americano1 week ago
How to Make Americano With Moka Pot
-
 Americano1 week ago
How to Make Iced Americano With Instant Coffee
-
 Americano2 weeks ago
How to Make an Americano in a French Press
-
 Americano2 weeks ago
What to Add to an Americano at Starbucks
-
 Americano2 weeks ago
How to Make Americano With a Nespresso Machine
-

 Americano7 days ago
How to Make Americano With Bialetti
-

 Americano1 week ago
How to Make Dutch Bros Americano