
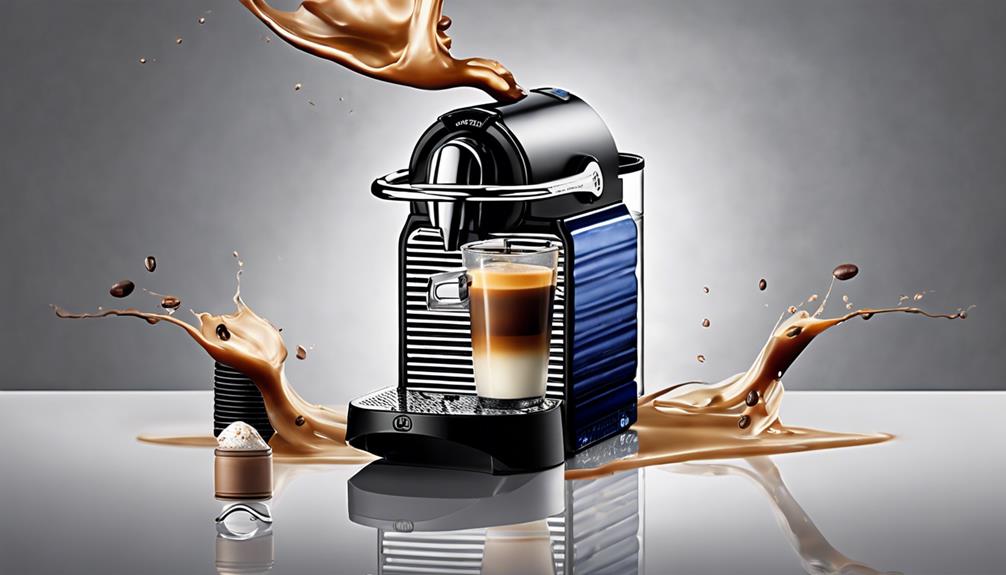
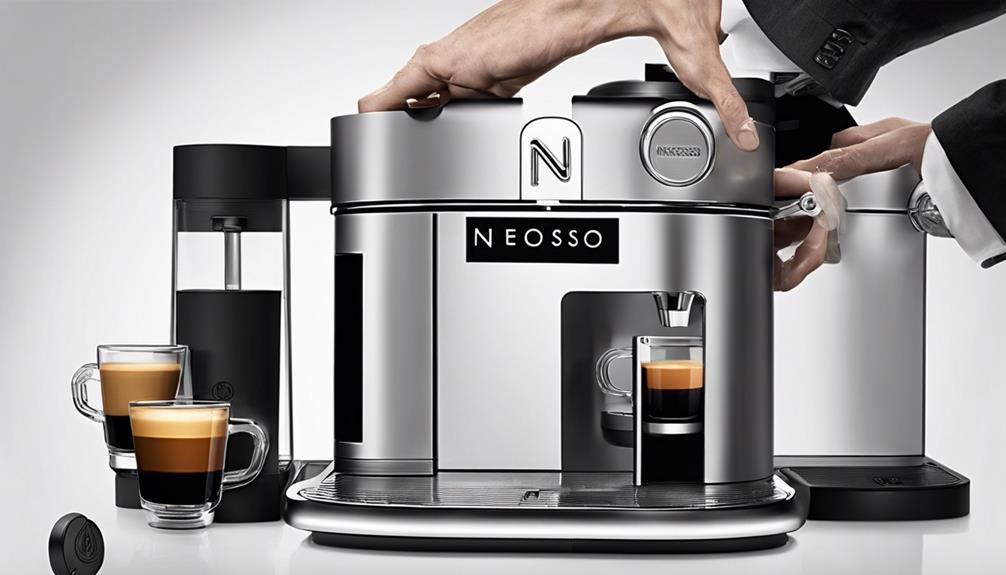
Nespresso
How To Turn On Nespresso Vertuo Next
Hey there, coffee lovers! Today, I want to share with you how to turn on your Nespresso Vertuo Next. This sleek machine is packed with features that make it easy to enjoy your favorite coffee drinks at home, but getting started can be a bit daunting. That’s why I’m here to walk you through the process step-by-step.
First things first, let’s unpack your Nespresso Vertuo Next and make sure you have everything you need. You should have the machine itself, a water tank, and a cup holder. Once you’ve confirmed that everything is here, it’s time to get started!
Key Takeaways
- Plug in and check power compatibility before turning on the Nespresso Vertuo Next.
- Wait for preheating before inserting a capsule to ensure optimal brewing parameters are achieved.
- Select the desired coffee size using either the ‘Espresso’ or ‘Coffee’ button.
- Troubleshoot capsule ejection with the ejection lever if needed.
Unpack Your Nespresso Vertuo Next
Let’s start by unboxing your new Nespresso Vertuo Next and getting it ready to brew your favorite coffee in no time! The first step is to carefully unpack your machine, taking care not to damage any of the components.
Once you’ve removed all the pieces from the box, take a moment to familiarize yourself with each part. As you unpack your machine, pay close attention to the water tank. It’s important to set this up correctly to ensure that your machine functions properly.
Start by removing the water tank from the packaging and giving it a good rinse with warm water. Then, fill the tank with fresh, cold water up to the maximum fill line. Make sure the tank is securely in place on the back of the machine before moving on to the next step.
Now that your machine is unboxed and the water tank is set up correctly, it’s time to move on to the next step: plugging your machine in. Simply find a suitable spot for your machine, make sure it’s close to a power outlet, and plug it in.

Once your machine is plugged in, you’re one step closer to enjoying your first cup of coffee from your new Nespresso Vertuo Next!
Plug Your Machine In
Once you’ve located a nearby outlet, simply plug in your new coffee maker. Before doing so, it’s important to ensure that the power cord and outlet are compatible. Checking the power cord and outlet compatibility can help troubleshoot any power issues that may arise.
To check the compatibility of the power cord and outlet, refer to the table below:
| Power Cord | Outlet | Compatibility |
|---|---|---|
| 2-prong polarized | 2-prong polarized | Compatible |
| 2-prong polarized | 3-prong grounded | Not compatible |
| 3-prong grounded | 2-prong polarized | Not compatible |
| 3-prong grounded | 3-prong grounded | Compatible |
If your power cord and outlet are not compatible, it’s important to purchase the appropriate adapter or have an electrician install the correct outlet. Once you’ve confirmed compatibility, plug in your Nespresso Vertuo Next and turn it on.
After plugging in your machine, the next step is to fill the water tank. By properly filling the water tank, you’ll ensure that your Nespresso Vertuo Next is ready to make your favorite coffee drinks.
Fill the Water Tank
Okay, now that my Nespresso Vertuo Next’s plugged in, it’s time to fill the water tank.
First, I need to locate the water tank on the back of the machine. Once I find it, I can easily remove the lid and fill it with fresh water.
It’s important to use fresh water every time to ensure the best quality coffee.
Locate the Water Tank
To find the water tank, you’ll spot a clear container that resembles a pitcher and sits at the back of the Nespresso Vertuo Next machine, like a beacon in the night. This is where you’ll need to pour the water for your coffee.
Before filling up the tank, it’s important to note that the water tank capacity is up to 1.7 liters, and you’ll need to refill it depending on your usage frequency. Common issues with the water tank may include leaks or difficulty in attaching the tank to the machine. In such cases, troubleshooting tips include checking if the tank is firmly attached and if there are any visible cracks or damages.
Once you’ve located the water tank, the next step is to remove the lid. This will allow you to fill up the tank with fresh water.
Remove the Lid
Now that you’ve found the water tank, simply remove the lid to fill it up with fresh water. To remove the Nespresso Vertuo Next lid, press the button located at the top of the lid and lift it upwards. Be sure to handle the lid with care to prevent any damage.
Proper lid maintenance is crucial to avoid any leaks or spills. Once you’ve removed the lid, you can fill the water tank with fresh water. It’s important to use cold water to prevent any damage to the machine and ensure the best quality coffee.
After filling the tank, securely place the lid back onto the machine and press down until you hear a click. Now you’re ready to make your first cup of coffee with your Nespresso Vertuo Next.
Fill with Fresh Water
Once you’ve removed the lid, you’ll be able to fill the water tank with fresh, cold water – like filling up a glass with ice water on a hot summer day. It’s highly recommended to use filtered water for the best results. This not only ensures that your coffee tastes great but also helps to prolong the life of your machine.
If you don’t have access to filtered water, you can use tap water, but make sure it’s fresh and cold. It’s recommended to change the water in the tank every day if you use your Nespresso Vertuo Next frequently. If your machine isn’t used as often, you can change the water every two to three days. This helps to maintain the freshness of the water and ultimately, the quality of your coffee.
Now that your water tank is filled with fresh water, it’s time to turn your Nespresso Vertuo Next on and start brewing your favorite coffee.
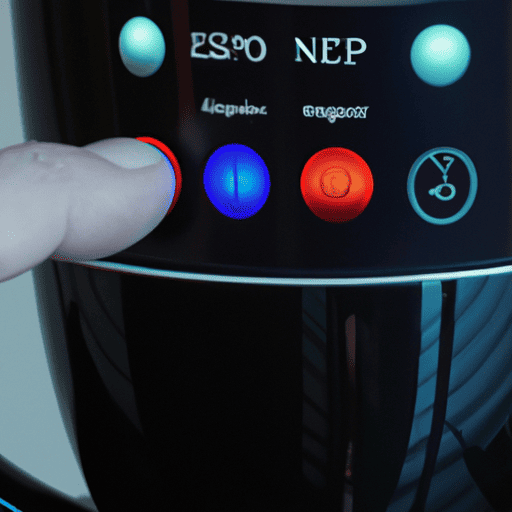
Turn Your Nespresso Vertuo Next On
First, you’ll need to locate the power button on your Nespresso Vertuo Next. It’s located on the top of the machine, towards the back. Once you’ve found it, press the button to turn the machine on. The button will light up, indicating that the machine is ready to use.
To ensure that your Nespresso Vertuo Next stays in good working order, it’s important to follow some troubleshooting tips and maintenance recommendations. These include descaling the machine regularly, cleaning the drip tray and capsule container, and using only Nespresso-branded capsules.
Additionally, if you encounter any issues with your machine, such as a flashing power button or a malfunctioning brew cycle, refer to the user manual or contact Nespresso customer service for assistance.
Now that your Nespresso Vertuo Next is on and ready to go, it’s time to select your coffee size. This can be done by pressing one of the two buttons on the front of the machine, labeled ‘Espresso’ and ‘Coffee’. Simply choose the size that corresponds to your desired drink and the machine will begin brewing.
Select Your Coffee Size
To choose the size of your coffee, simply press either the ‘Espresso’ or ‘Coffee’ button located on the front of the Nespresso Vertuo Next machine. The ‘Espresso’ button produces a 1.35 oz shot of coffee, while the ‘Coffee’ button produces a 7.77 oz cup of coffee.
Understanding coffee strength is crucial in selecting the appropriate size. If you prefer a stronger taste, choose the Espresso button. On the other hand, if you prefer a milder taste, choose the Coffee button.
Choosing the perfect brew time is also an essential factor in getting the ideal cup of coffee. The Vertuo Next machine automatically reads the barcode on each coffee capsule and determines the optimal brewing parameters. This ensures that each cup of coffee is brewed to perfection, no matter the size.
For best results, it’s recommended to wait for the machine to preheat and then select the desired size of coffee before inserting the capsule.
Once you’ve finished enjoying your cup of coffee, it’s time to eject your used capsule. To do this, simply lift the top lever and the capsule will automatically drop into the container.
This feature is not only convenient but also environmentally friendly, as it allows you to dispose of the used capsule without creating unnecessary waste.
With these simple steps, you can enjoy a perfect cup of coffee with ease and convenience.
Eject Your Used Capsule
Now, let’s move on to ejecting the used capsule. First, locate the capsule ejection lever on your Nespresso Vertuo Next machine. It’s usually located on the top of the machine, near the capsule compartment.
Next, lift the lever to release the used capsule from the machine.
Finally, dispose of the used capsule and you’re ready to brew your next cup of coffee.
Locate the Capsule Ejection Lever
Once you’ve positioned your Nespresso Vertuo Next, take a look at the front of the machine and find the capsule ejection lever. This lever is an essential component of the brewing process, as it allows you to eject the used capsule from the machine and prepare it for a new one. Additionally, the capsule ejection lever can be used to troubleshoot any issues related to capsule ejection, such as if the capsule gets stuck in the machine or if the machine doesn’t recognize the capsule.
To make the most of the capsule ejection lever, it’s essential to understand how it works. The following table provides an overview of the different uses of the capsule ejection lever and how to troubleshoot common issues related to capsule ejection:
| Function | How to Use | Troubleshooting |
|---|---|---|
| Eject used capsule | Lift the lever and remove the used capsule. | If the capsule gets stuck, gently wiggle the lever back and forth to release it. |
| Troubleshoot capsule ejection issues | Push the lever down and then lift it back up to reset the machine. | If the machine still doesn’t recognize the capsule, make sure it’s the correct size and properly inserted. |
Now that you know how to locate and use the capsule ejection lever, the next step is to lift the lever and prepare the machine for a new capsule.
Lift the Lever
After locating the capsule ejection lever, lifting it is the next step in preparing the machine for a new capsule. Proper lever usage is crucial to avoid any issues when ejecting the used capsule and inserting a new one.
To lift the lever, simply place your hand on the lever and lift it upwards until you hear a click. This will open the machine’s head and allow you to insert a new capsule.
If you encounter any issues while lifting the lever, troubleshooting lever issues is necessary. Check if there’s any blockage or if the capsule is not properly placed in the machine. Make sure to use the lever gently to avoid any damage to the machine.
Once you’ve successfully lifted the lever, you’re ready to move on to the next step: disposing of the used capsule.
Dispose of the Used Capsule
To dispose of the used capsule, you’ll need to carefully remove it from the machine and place it in a designated container or bin. It’s important to properly dispose of the used capsule to avoid any mess or damage to the environment.
The Nespresso Vertuo Next has a unique capsule system that separates the coffee grounds from the aluminum capsule for easy disposal. You can choose to recycle the aluminum capsule or dispose of it in the trash. When it comes to proper disposal, there are also environmentally friendly options available.
Nespresso offers a recycling program where you can return your used capsules to any Nespresso boutique or partner location. The company uses the recycled aluminum to create new products, reducing their environmental impact. With these options, you can enjoy your coffee while also doing your part to protect the environment.
To adjust your cup holder, simply lift the lever and adjust the height to fit your cup.
Adjust Your Cup Holder
Okay, now let’s talk about adjusting your cup holder.
First, locate the cup holder on your Nespresso Vertuo Next machine.
Next, adjust the height of the cup holder to fit your preferred cup size by sliding it up or down.
Finally, place your cup under the dispenser and make sure it’s centered before starting the brewing process.
It’s important to get this step right to ensure a perfect cup every time.
Locate the Cup Holder
First, take a moment to familiarize yourself with the machine and find the cup holder – it’s a key component for your coffee experience.
The cup holder is located at the front of the machine, just below the brew head.
Here are some possible discussion ideas about locating the cup holder:
-
Cup holder design: The Nespresso Vertuo Next comes with a removable cup holder that can be adjusted to fit different cup sizes. The design of the cup holder is sleek and modern, which adds to the overall aesthetic of the machine.
-
Alternative cup holder options: If you prefer to use your own cup holder, you can remove the one that comes with the machine and replace it with a different one. There are many options available online, so you can find one that fits your style and needs.
To adjust the height of the cup holder, simply lift it up or push it down to the desired position. This will ensure that your coffee is brewed directly into your cup, giving you the perfect cup every time.
Adjust the Height
Don’t forget to adjust the height of the cup holder for a perfect cup of coffee every time.
The Nespresso Vertuo Next comes with an adjustment mechanism that allows you to raise or lower the cup holder to fit different cup sizes. This is important because if the cup is too far from the dispenser, the coffee may splash out and make a mess, or if it’s too close, it may not fit properly and affect the quality of the brew.
To adjust the height, simply slide the cup holder up or down until it’s at the right level for your cup. If you’re having trouble with the adjustment mechanism, make sure that the machine is turned off and unplugged before attempting to fix it.
If the problem persists, consult the troubleshooting tips in the user manual or contact Nespresso customer service.
After adjusting the height, you’re ready to place your cup under the dispenser and enjoy a delicious cup of coffee.
Place Your Cup Under the Dispenser
Now it’s time to position your cup directly under the dispenser, making sure it’s centered and in the right place to catch the delicious coffee that’s about to flow like water off a duck’s back. Using Nespresso Vertuo Next for different cup sizes is easy and convenient.
Simply adjust the dispenser height for optimal coffee pour. Here are the steps to follow:
- First, remove the drip tray to accommodate taller cups.
- Next, slide the cup support up or down to adjust the dispenser height.
- For smaller cups, slide the cup support down and for larger cups, slide it up.
- Make sure the cup is centered under the dispenser before pressing the button to start the coffee flow.
With the cup in place, you’re ready to experience the perfect cup of coffee. Once you’ve mastered the art of positioning your cup under the dispenser, you can move on to customize your coffee settings for an even more personalized experience.
Customize Your Coffee Settings
To personalize your coffee experience, you can adjust the settings on your Nespresso Vertuo Next. This machine allows you to create custom blends using different coffee pods, so you can explore a variety of flavors and strengths.
To begin, make sure your machine is turned on and your cup is placed under the dispenser. Once you’re ready, press and hold the button on the top of the machine until the light starts flashing. This means you’re now in customization mode.
Next, choose the size and strength of your coffee by pressing the button on the top of the machine. You can choose from five different cup sizes, ranging from espresso to alto, and three different strength levels. The strength levels affect how much coffee is used in the brewing process, so you can adjust it to your preference.
Once you’ve chosen your settings, simply press the button again to save them. Your machine will remember your preferences for next time.
Now that you’ve customized your coffee settings, it’s time to enjoy your delicious cup of coffee! But before you do, make sure to clean your Nespresso Vertuo Next to keep it functioning properly.
Simply remove the capsule and rinse the drip tray and capsule container with warm water. You can also use a damp cloth to wipe down the exterior of the machine. With proper maintenance, your Nespresso Vertuo Next will continue to make delicious coffee for years to come.
Clean Your Nespresso Vertuo Next
When it comes to keeping my Nespresso Vertuo Next machine in top condition, regular cleaning is essential. This includes cleaning the drip tray and capsule container after each use, as well as descaling the machine every few months to remove any built-up mineral deposits.
To ensure optimal performance and longevity, it’s important to follow these cleaning procedures diligently and keep the machine in tip-top shape.
Regular Cleaning Procedures
Maintaining your Nespresso Vertuo Next is a breeze, and you’ll be amazed at how easy it is to keep it in tip-top shape! Regular cleaning procedures are essential to ensure that your machine stays in pristine condition. Here are some best practices to follow:
-
Use a soft, damp cloth to wipe the machine’s exterior and remove any coffee residue or dust.
-
Empty the capsule container and drip tray regularly to prevent any blockages or spills.
-
Use only Nespresso-approved cleaning products when cleaning your Vertuo Next. Avoid using harsh chemicals or abrasive materials that can damage the machine.
-
Clean the milk frother after each use to prevent any milk residue from building up and affecting the taste of your coffee.
Regularly cleaning your Nespresso Vertuo Next is crucial for maintaining its performance and longevity. However, it’s equally important to descale your machine periodically to remove any mineral buildup. In the next section, we’ll discuss the importance of descaling and how to do it effectively.
Descale Your Machine
Keeping your Nespresso machine in top shape requires regular descaling to remove mineral buildup that can affect the taste of your coffee. Descaling is an essential part of maintaining the machine’s functionality and prolonging its lifespan. Failure to descale can lead to clogged pipes and reduced performance, resulting in subpar coffee quality.
To descale your Nespresso Vertuo Next, you will need to use a descaling solution that is safe for your machine. Nespresso offers its own descaling solution that is specifically designed for their machines, but there are other options available as well. It’s important to choose a descaling solution that is safe for your machine to avoid damaging it. Once you have your descaling solution, follow the manufacturer’s instructions on your machine’s manual to properly descale the machine.
Now that you have descaled your machine, it’s time to clean the drip tray and capsule container.
Clean the Drip Tray and Capsule Container
After descaling my Nespresso Vertuo Next machine, I always make sure to clean the drip tray and capsule container. This is an important step to maintain the quality of my coffee and the longevity of my machine.
The drip tray collects any excess coffee or water, preventing it from spilling onto my countertop. Over time, the tray can accumulate buildup and bacteria, affecting the taste and cleanliness of my coffee. Therefore, cleaning the drip tray regularly ensures that my coffee is smooth and free of any unwanted flavors.
Additionally, it’s important to dispose of used capsules properly to prevent any environmental harm. Nespresso has a recycling program where used capsules can be collected and recycled. To participate, simply order a recycling bag from Nespresso and fill it with your used capsules. You can then drop off the bag at a Nespresso boutique or schedule a pickup. By properly disposing of used capsules, we can help reduce waste and protect our environment.
Moving on to troubleshooting common issues, it’s important to address any problems with your machine in a timely manner to prevent further damage.
Troubleshoot Common Issues
If you’re having trouble with your Nespresso Vertuo Next, don’t fret. I’ve encountered a few common issues with my machine and know just how to troubleshoot them.
First, if your machine isn’t turning on, check the power source and make sure it’s properly plugged in.
Second, if coffee isn’t dispensing, check the water tank and ensure it’s filled to the appropriate level.
Lastly, if your machine is making strange noises, it could be due to a blockage in the capsule compartment or a need for descaling.
Machine Not Turning On
Oops! My Nespresso Vertuo Next machine isn’t turning on. Don’t worry, let’s troubleshoot together.
The first thing to check is the power source. Make sure the machine is plugged in and the outlet is working. If the outlet isn’t working, try plugging the machine into a different outlet or using a different power cord.
If none of these solutions work, it may be a problem with the machine itself. In this case, it’s best to contact customer support for further assistance.
If you’ve successfully turned on the machine but are experiencing issues with coffee not dispensing, there are a few things you can try. First, make sure the water tank is properly filled and securely attached to the machine.
Next, check the capsule compartment to ensure there are no obstructions or blockages. If these solutions don’t work, it may be a problem with the machine’s internal mechanisms. Again, contacting customer support is the best course of action in this situation.
Coffee Not Dispensing
Having trouble getting your morning caffeine fix from your Nespresso machine? It’s possible that the coffee is not dispensing properly.
Here are some possible discussion ideas about coffee not dispensing:
- Troubleshooting solutions: check if the capsule is inserted correctly, clean the machine, descale the machine, and check for any blockages in the coffee outlet.
- Common causes: lack of water in the tank, incorrect capsule size, dirty machine, or malfunctioning parts.
- Prevention tips: regularly clean and descale the machine, use the correct size capsule, and avoid using old or expired capsules.
If these solutions do not work, it’s possible that the machine is making strange noises. This could be a sign of a more serious issue that needs to be addressed.
Machine Making Strange Noises
You may notice some unusual sounds coming from your Nespresso machine, which can be a cause for concern. It’s important to troubleshoot these strange noises to prevent any further damage to your machine or potential safety hazards. Here are some steps you can take to address the issue:
| Problem | Possible Causes | Solution |
|---|---|---|
| Grinding noise | Coffee beans stuck in the grinder | Clean the grinder and make sure there are no obstructions |
| Whirring noise | Air bubbles in the water line | Run the machine without a capsule to clear the air bubbles |
| Gurgling noise | Water pump malfunction | Contact Nespresso support for assistance |
If none of these solutions work, it’s best to contact Nespresso support for further assistance. They may be able to diagnose the issue and provide additional troubleshooting steps or arrange for a repair or replacement of the machine if necessary. Don’t hesitate to reach out for help to ensure the longevity and safety of your Nespresso machine.
Remember, strange noises coming from your Nespresso machine can be a sign of a deeper issue. By following these troubleshooting steps and contacting Nespresso support if needed, you can prevent potential damage to your machine and continue to enjoy your favorite coffee beverages.
Frequently Asked Questions
What is the ideal temperature for brewing coffee with the Nespresso Vertuo Next?
To achieve the ideal temperature for brewing coffee with the Nespresso Vertuo Next, it’s recommended to preheat the machine before use.
The ideal brewing temperature for coffee is between 195 and 205 degrees Fahrenheit. This temperature range allows for the best extraction of flavor from the coffee grounds.
The Vertuo Next has a preheating function that ensures the water in the machine is at the optimal temperature before brewing. This helps to ensure that the coffee flavor is rich and balanced.
Once the machine is preheated, the coffee can be brewed at the touch of a button. The Vertuo Next will maintain the ideal temperature throughout the brewing process, resulting in a delicious cup of coffee every time.
Can I use my own coffee grounds with the Nespresso Vertuo Next?
Yes, you can use your own coffee grounds with the Nespresso Vertuo Next. You can simply use the reusable capsule option or purchase refillable capsules that are compatible with the machine. Using other coffee grounds allows for greater flavor options and customization settings. You can choose the roast, blend, and strength of your preferred coffee.
However, it’s important to note that the machine is designed to work best with Nespresso capsules. The machine’s extraction technology is optimized for their specific size and shape. Using other coffee grounds may require some trial and error to find the optimal brewing settings for your desired flavor profile.
Is the Nespresso Vertuo Next compatible with milk frothers?
Are you a fan of foamy and creamy coffee drinks? If so, you may be wondering if the Nespresso Vertuo Next is compatible with milk frothers. The answer is yes, it is! The machine has a built-in milk frother, but you can also use an external frother if you prefer.
Nespresso offers an Aeroccino milk frother that is compatible with the Vertuo Next, or you can choose from a variety of other milk frothing options on the market. Keep in mind that if you do use an external frother, you’ll need to heat the milk separately before frothing it.
Overall, the Vertuo Next is a versatile machine that offers plenty of milk frothing compatibility options for your perfect cup of coffee.
How frequently should I clean my Nespresso Vertuo Next?
Cleaning frequency and maintenance tips are important to keep your Nespresso Vertuo Next in top condition. It’s recommended to clean the machine after every 50 capsules or at least once a month, whichever comes first. To clean the machine, remove the capsule container and drip tray, and wash them with warm water and a mild detergent.
Wipe the exterior of the machine with a damp cloth. Descaling the machine is also important to maintain its performance. The machine will notify you when it’s time to descale, which is recommended every three months. Use the Nespresso descaling kit and follow the instructions carefully.
Regular maintenance will ensure that your Nespresso Vertuo Next continues to deliver quality coffee.
What is the warranty period for the Nespresso Vertuo Next?
As someone who recently purchased a Nespresso Vertuo Next, I was curious about the warranty period for this machine.
After doing some research, I found out that the warranty period for the Nespresso Vertuo Next is one year from the date of purchase.
If any issues arise during this time, you can contact customer service for troubleshooting assistance or to request a repair or replacement.
It’s also important to note that regular maintenance is key to keeping your machine in good working order, so be sure to follow the maintenance tips provided in the user manual.
Overall, I’m happy with my purchase and feel confident in the warranty and customer service options available to me.
Conclusion
In conclusion, turning on your Nespresso Vertuo Next is a simple process that can be accomplished in just a few steps. Once you’ve unpacked your machine, plugged it in, and filled the water tank, you can turn it on and select your desired coffee size.
Additionally, adjusting the cup holder and customizing your coffee settings can help you get the perfect cup of coffee every time. While some may argue that using a Nespresso machine isn’t as authentic or flavorful as traditional methods, the convenience and consistency of the Vertuo Next can’t be denied.
Plus, with the ability to customize your coffee settings and choose from a variety of flavors and blends, you can still enjoy a high-quality cup of coffee that suits your personal taste preferences. Overall, the Nespresso Vertuo Next is a great investment for coffee lovers who value convenience and consistency.
By following these simple steps, you can easily turn on your machine and start enjoying delicious coffee in no time. So why not give it a try and experience the convenience and quality of the Vertuo Next for yourself?

Arf, an author and an innovative enthusiast of coffee, coffee alternatives, and tea, plays a crucial role as a contributor to the esteemed Cappuccino Oracle platform. Renowned for his curiosity and passion for these captivating beverages, Arf has carved out a unique space for himself in the world of exploration and writing. He realized that coffee, coffee alternatives, and tea are not mere drinks to keep one awake, but universes of flavors and stories waiting to be explored.
Arf’s articles for Cappuccino Oracle blend meticulous research with personal experiences, providing readers with an in-depth understanding of various types of coffee, coffee alternatives, and tea, along with their unique characteristics, cultures, and histories. His honest reviews and engaging narratives guide readers on their own journeys, helping them discover their preferences and find their perfect brew.

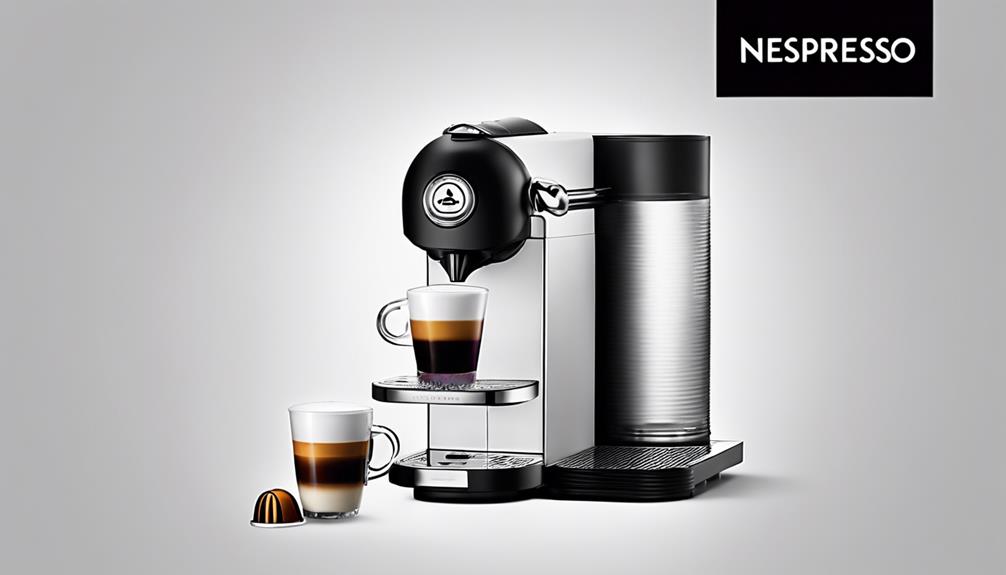
Nespresso
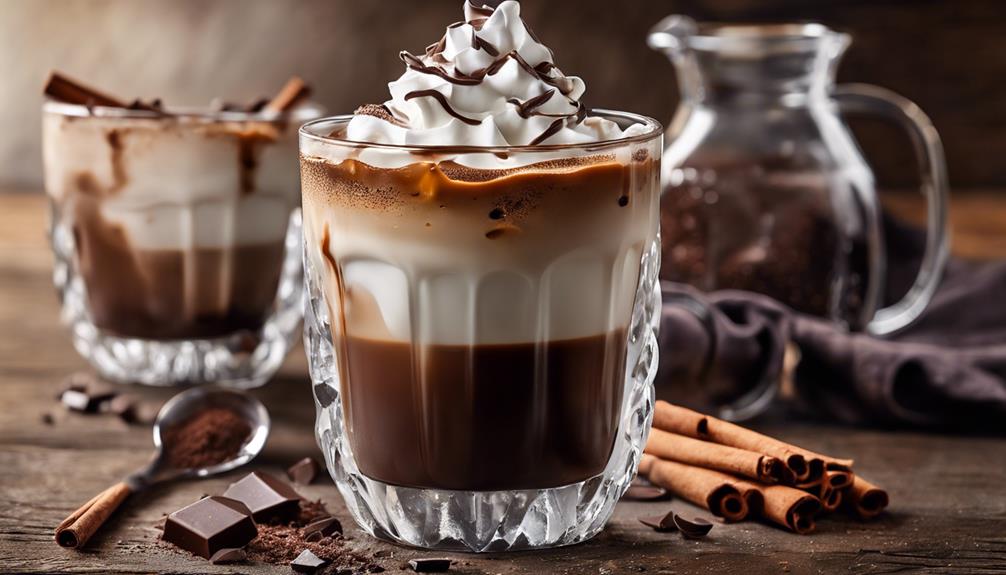
How to Make Iced Coffee at Home With Nespresso
Frothy milk, flavored syrups, and seasonal fruits are just the beginning of creating your perfect homemade iced coffee with Nespresso – keep reading for more tips on elevating your brew!
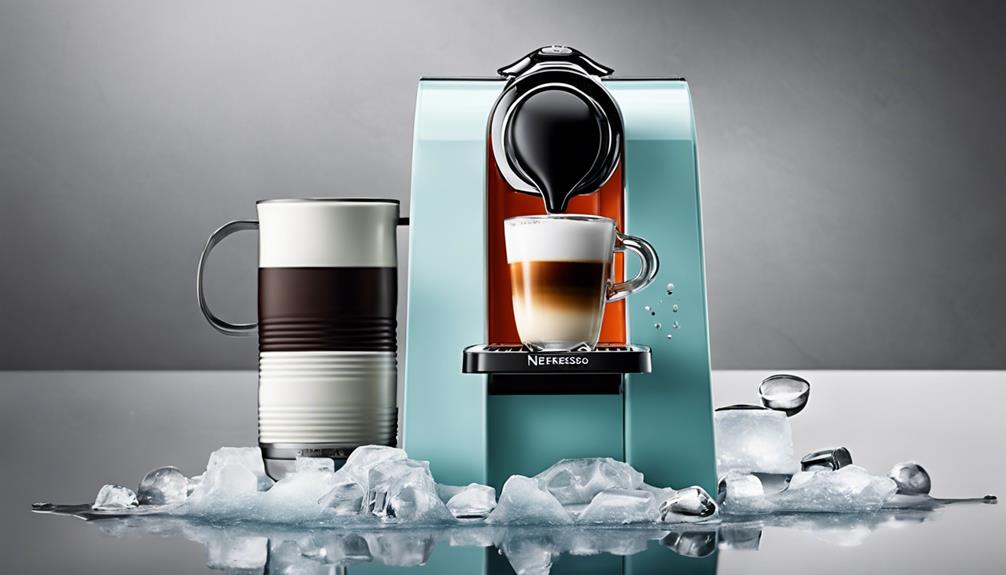
So, you wanna make iced coffee with your Nespresso, huh? Well, grab a tall glass, fill it with ice, and brew a Cold Brew Style Intense capsule. Let that brew cool, then add milk. Fancy frothy milk? Use the Aeroccino. Experiment with different capsules for unique flavors. Try whole milk or go light with almond milk. Sweeten with syrups like vanilla or hazelnut. Top with berries or season fruits. Add a stylish straw for fun. Want more tips? Keep discovering to level up your homemade iced coffee game!
Key Takeaways
- Start with a 500ml glass, 6 ice cubes, and Nespresso Cold Brew Style Intense capsules.
- Chill brewed coffee before adding milk and sweeteners.
- Froth cold milk with Nespresso Aeroccino.
- Experiment with different Nespresso capsules for flavor variations.
- Use whole milk or try plant-based options, like oat or almond milk, for customization.
Nespresso Vertuo Brewing Basics
When brewing with a Nespresso Vertuo machine, ensuring the glass is twice the size of your drink enhances the iced coffee experience. This trick allows enough room for ice cubes and prevents your delicious coffee from overflowing.
For a perfect iced coffee, start with a 500ml glass and add six regular-sized ice cubes before brewing your Nespresso Vertuo coffee. I recommend using Nespresso Vertuo Cold Brew Style Intense capsules like Arpeggio for that extra kick.
Once brewed, let the coffee cool down before adding any milk or sweeteners. This way, you'll enjoy a revitalizing iced coffee that's not diluted by melting ice. The Nespresso Vertuo machine's quantity selector also comes in handy here, ensuring you get the right coffee-to-ice ratio every time.
Experiment with different recipes and milk options to find your favorite combination for a custom iced coffee experience right at home.
Chilling and Frothing Techniques

Cool your brewed coffee in the fridge before adding milk for an invigorating iced coffee experience. When making that perfect iced coffee at home with Nespresso, chilling and frothing techniques play an important role. The Nespresso Aeroccino milk frother is a game-changer, allowing you to froth cold milk to create a creamy topping for your iced coffee. Additionally, using ice cubes in your glass before brewing your coffee helps to chill the drink quickly, preserving its flavors.
Here's a handy table to summarize the chilling and frothing techniques for your Nespresso iced coffee:
| Chilling Techniques | Frothing Techniques |
|---|---|
| Chill brewed coffee in the fridge | Utilize Nespresso Aeroccino for cold milk froth |
| Use ice cubes in the glass before brewing | Experiment with different Nespresso capsules for flavor |
Selecting the Perfect Milk
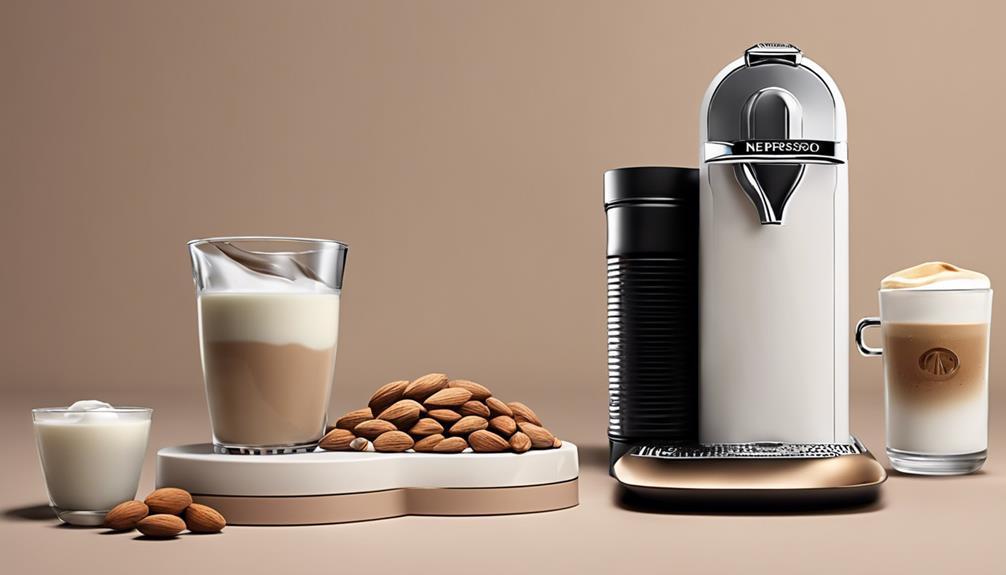
Selecting the perfect milk is crucial for achieving the desired creamy texture and flavor in your homemade iced coffee. For a lusciously creamy iced coffee, opt for whole milk or cream. These choices bring a richness that blends magically with the coffee, creating a decadent treat.
If you lean towards a lighter option, explore low-fat or plant-based milks like almond, oat, or soy milk. These alternatives offer a different take, keeping things fresh and exciting. It's fascinating how the type of milk you choose can influence the flavor profile of your iced coffee. Experimenting with different milks opens up a world of possibilities, letting you tailor your drink precisely to your liking.
To elevate your iced coffee game, froth your milk with a Nespresso Aeroccino for that touch of luxury and velvety foam. And if you're feeling adventurous, try a sweetened condensed milk for a rich and sweet twist that will make your iced coffee truly unforgettable.
Sweeteners and Flavor Enhancements
To enhance the flavor of your homemade iced coffee, consider experimenting with various sweeteners and flavor enhancements. Here are some exciting options to jazz up your Nespresso creation:
- Maple Syrup: Add a touch of natural sweetness with maple syrup, giving your iced coffee a rich and decadent flavor profile.
- Sugar-Free Syrups: For those watching their sugar intake, try sugar-free syrups in flavors like vanilla, caramel, or hazelnut for a guilt-free treat.
- Brown Sugar: Infuse a warm and caramel-like taste by incorporating brown sugar into your iced coffee, creating a cozy and comforting drink.
- Honey or Agave Nectar: Opt for the goodness of honey or agave nectar as healthier alternatives to traditional sugar, bringing a subtle sweetness that complements the coffee's bold flavors perfectly.
Experimenting with these sweeteners and flavor enhancers will elevate your Nespresso iced coffee experience, allowing you to customize your drink to suit your taste preferences.
Creative Nespresso Capsule Combinations
Experimenting with different Nespresso capsule combinations can add a unique and invigorating twist to your homemade iced coffee creations.
I love mixing Nespresso capsules like Odacio and Firenze Arpeggio for a burst of rich flavors in my iced coffee. If you're feeling adventurous, try combining Arpeggio and Livanto for a delightful taste experience that will elevate your morning pick-me-up.
For a tropical vibe, the Nespresso Tropical Coconut capsule is a must-try, while the Ice Forte and Ice Leggero capsules offer revitalizing options for a hot summer day. Don't miss out on the new releases like Watermelon Flavour Over Ice and Cold Brew Style Intense; they bring a whole new level of excitement to your coffee routine.
When choosing capsules, opt for bold and intense flavors like Kazaar, Arpeggio, or Ristretto for a satisfying iced coffee that packs a punch. Get creative and mix things up to discover your perfect iced coffee combination!
Experimenting With Different Milk Types
My go-to choice for a creamy and dairy-free option to enhance the bold flavors of Nespresso coffee is oat milk. When exploring different milk types for your iced coffee, it's like venturing on a flavorful journey where each sip uncovers new possibilities. Here are some reasons why playing with milk types can elevate your iced coffee experience:
- Oat Milk: Creamy and rich, oat milk pairs exquisitely with Nespresso's robust coffee, giving your drink a velvety texture that feels like a cozy hug in a glass.
- Almond Milk: For a lighter touch, almond milk introduces a subtle nuttiness that dances gracefully with the coffee's flavors, offering a delicate twist to your usual iced coffee routine.
- Soy Milk: Versatile and creamy, soy milk is like a blank canvas, ready to absorb the intense notes of Nespresso's coffee blends, creating a harmonious and luscious iced coffee experience.
- Personalized Experience: By customizing your milk choice, you tailor your iced coffee to suit your preferences, ensuring each sip is uniquely yours, adding a touch of creativity to your daily routine.
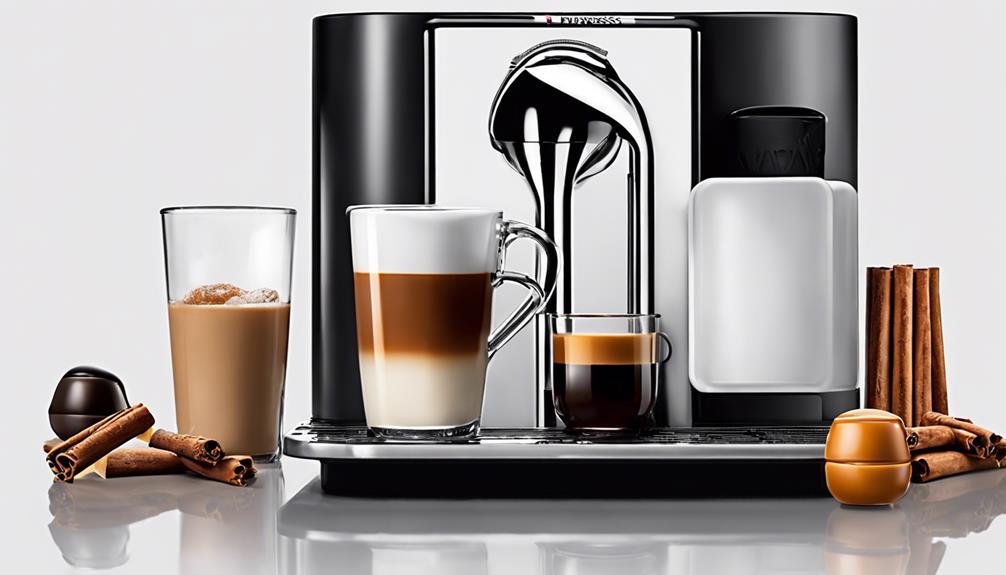
Customizing With Toppings and Garnishes
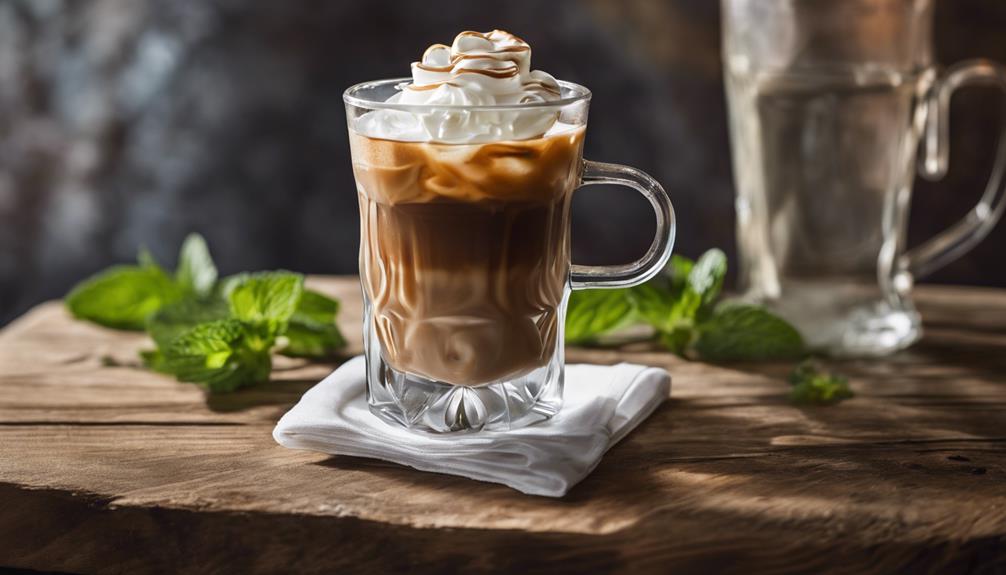
Enhance your iced coffee experience with a variety of toppings and garnishes that add a touch of luxury and creativity to your drink. When it comes to customizing your homemade Nespresso iced coffee, the options are endless! Think beyond the usual whipped cream and chocolate shavings – why not try a drizzle of caramel for that extra indulgence or some fresh mint leaves for a burst of flavor? Garnishes like cinnamon sticks or citrus zest can elevate your drink, making it not only delicious but also visually appealing.
Experimenting with different flavors is key to finding your perfect combination. Sprinkle some cocoa powder, nutmeg, or a pinch of sea salt on top to enhance the taste profile of your iced coffee. By personalizing your drink with unique toppings and garnishes, you can create a signature beverage that truly reflects your style and creativity. So go ahead, get creative, and take your iced coffee to the next level!
Serving Suggestions and Presentation Ideas
When it comes to serving your homemade iced coffee, think about jazzing it up with some fresh fruit garnishes for a pop of color and flavor.
Don't forget to grab some decorative straws to add a fun touch to your presentation.
And if you're feeling fancy, consider drizzling in some flavored syrups for that extra oomph!
Garnish With Fresh Fruit
Incorporating fresh fruit garnishes elevates the visual appeal and taste of your Nespresso iced coffee. Here are some innovative ideas to enhance your iced coffee experience:
- Colorful Citrus Twist: Try garnishing with slices of lime or grapefruit for a tangy kick that complements the rich flavors of your Nespresso creation.
- Berry Burst: Add a burst of sweetness by topping your iced coffee with assorted berries like strawberries, raspberries, or blueberries.
- Seasonal Sensations: Embrace the flavors of the season by using fresh seasonal fruits like peaches in the summer or apples in the fall to create a drink that's both visually appealing and delicious.
- Creative Combos: Mix and match different fruits to create visually stunning presentations that not only look great but also tantalize your taste buds.
Use Decorative Straws
Often overlooked, decorative straws can instantly elevate the presentation of your iced coffee, adding a touch of fun and style to your beverage. When choosing your straws, consider picking vibrant colors, playful patterns, or unique materials to match your personality or the occasion. Striped, polka dot, metallic, or eco-friendly reusable straws are all the rage for serving iced coffee. Opt for sustainable options like bamboo, paper, stainless steel, or glass straws to align with environmentally conscious choices. Using these stylish straws not only enhances the visual appeal of your drink but also makes it Instagram-worthy. Elevate your iced coffee game with these small yet impactful details that are both fun and sustainable.
| Colors | Patterns | Materials |
|---|---|---|
| Vibrant | Striped | Bamboo |
| Playful | Polka dot | Paper |
| Unique | Metallic | Stainless steel |
| Glass | ||
| Reusable eco-friendly |
Add Flavored Syrups
To further enhance the flavor profile and presentation of your iced coffee, consider incorporating flavored syrups for a delightful twist on your beverage. Here are some fun ways to customize your drink:
- Vanilla Dream: Add a splash of vanilla syrup for a classic and sweet flavor.
- Caramel Bliss: Indulge in the rich and buttery notes of caramel syrup swirled into your iced coffee.
- Hazelnut Heaven: Elevate your drink with the nutty and aromatic essence of hazelnut syrup.
- Mocha Magic: Experience the decadence of chocolate and coffee with a drizzle of mocha syrup on top.
Tips for a Refreshing Iced Coffee Experience
For a truly revitalizing iced coffee experience, opt for low-acid, dark roast Nespresso capsules like Kazaar or Arpeggio. These capsules pack a flavorful punch, perfect for creating a robust and satisfying iced coffee. If you're feeling adventurous, try out new releases like Watermelon Flavour Over Ice or Cold Brew Style Intense capsules for a unique twist on your usual iced coffee routine.
To enhance your homemade iced coffee, consider adding syrups, spices, or cold milk to customize it to your taste preferences. The possibilities are endless when it comes to personalizing your invigorating drink. Don't forget to leverage the Nespresso Barista for versatile recipes and easy customization of flavors and ingredients. It's like having your own personal barista at home, ready to help you craft the perfect iced coffee for those hot days when you need a cool pick-me-up.
| Tips for Revitalizing Iced Coffee |
|---|
| Opt for low-acid, dark roast Nespresso capsules like Kazaar or Arpeggio |
| Experiment with new releases like Watermelon Flavour Over Ice or Cold Brew Style Intense capsules |
| Customize your iced coffee with syrups, spices, or cold milk |
Enjoying Your Homemade Iced Coffee
I've found that serving your homemade iced coffee with style can really elevate the whole experience.
Experimenting with different flavors like caramel, vanilla, or even a splash of cinnamon can add a fun twist to your drink.
Serving With Style
Savor the stylish experience of enjoying your homemade iced coffee by serving it in Nespresso Recipe glasses. When it comes to serving your invigorating beverage, presentation is key.
Elevate your homemade iced coffee with Nespresso Espresso Cups & Saucers for a sophisticated touch. Create a visually appealing experience using Nespresso's specially designed VIEW Recipe Glasses.
Choose between a 12 oz. glass or an 8 oz. mug for a satisfying and stylish serving encounter. Enhance the overall enjoyment of your beverage by serving it in a visually appealing manner.
With the right glassware, every sip becomes a moment of indulgence and innovation. It's not just a drink; it's a whole experience!
Experiment With Flavors
Elevate your homemade iced coffee experience by infusing it with a variety of flavors to suit your taste preferences. Get creative with Nespresso capsules like Kazaar, Arpeggio, or Ristretto to craft unique iced coffee creations.
Experiment with syrups, spices, cold milk, or cream to customize your drink just the way you like it. Want to take it up a notch? Add a dollop of whipped cream or a scoop of ice cream for an indulgent twist.
The possibilities are endless when it comes to enhancing the flavors of your homemade iced coffee. So go ahead, mix and match, and find that perfect blend that will have you sipping in style all summer long!
Frequently Asked Questions
Can You Make Iced Coffee With a Nespresso Machine?
Yes, I can make iced coffee with a Nespresso machine. Nespresso offers specific capsules like Kazaar, Arpeggio, and Ristretto for a flavorful iced coffee. Using the Vertuo machine or pouring espresso capsules over ice creates a quick and invigorating cold brew effect.
How Many Nespresso Pods for Iced Coffee?
Finding the perfect balance of Nespresso pods for iced coffee is key. Depending on your preference, I recommend experimenting with 1-2 capsules. The variety of capsules available allows for customizing your iced coffee's strength and flavor.
How Do You Make Coffee With Nespresso Vertuo?
To make coffee with Nespresso Vertuo, use the appropriate capsule and cup size. Start by placing the cup and pressing the brew button. Enjoy freshly brewed coffee in seconds. It's easy, convenient, and delivers a delicious coffee experience every time.
Why Is My Nespresso Making Cold Coffee?
My Nespresso making cold coffee could be due to water temperature settings. Verify adequate water level in the reservoir with cold water. If issue persists, contact Nespresso support for help to troubleshoot and resolve the problem.
Conclusion
Well, there you have it – making iced coffee at home with Nespresso is easier than you think!
Did you know that iced coffee has become increasingly popular, with a 20% increase in consumption over the past decade?
So why not try your hand at crafting your own delicious and revitalizing iced coffee creations?
With these simple steps and tips, you'll be sipping on a homemade iced coffee masterpiece in no time!
Cheers to your barista skills!

In the vast and diverse world of coffee, coffee alternatives, and tea, Olivia has found her calling. As an author and a dedicated coffee and tea aficionado, her work for Cappuccino Oracle reflects her profound love and understanding of the intricate complexities found within these beverages. Olivia’s passion for the subject serves as both a catalyst for her creativity and a connection point with her audience.
Olivia’s appreciation for coffee, coffee alternatives, and tea blossomed at an early age. She discovered that these beverages invigorated her senses and stimulated her creative spirit. From the nuanced flavors of single-origin roasts to the captivating narratives intertwined with coffee, coffee alternatives, and tea trade and culture, Olivia found an unlimited source of inspiration in her daily cup.
Her love for these beverages and her talent for storytelling eventually converged at Cappuccino Oracle. As an author, Olivia’s mission is to illuminate the intricate tapestry that makes up the world of coffee, coffee alternatives, and tea. Her articles span a diverse range of topics, encompassing everything from the unique flavors of different brews to the sociocultural history intertwined with their cultivation and consumption.
Nespresso
How to Remove Nespresso Descaling Mode in 3 Simple Steps
Find out how to effortlessly eliminate Nespresso's descaling mode with just three easy steps and get your machine back to brewing perfection.
Removing Nespresso's descaling mode is a breeze! First, make sure you're all set up with a container in place and the water tank full. Then, activate the descaling mode using the specific button combo for your Nespresso model. Let the magic happen as it cleans out those calcium deposits. After that, give it a final rinse with fresh water to get rid of any leftover solution. Voilà! Your machine is now free from descaling mode and ready to brew. Get those beans ready for a delightful cup of joe!
Key Takeaways
- Perform final rinse with fresh water to eliminate descaling solution remnants.
- Refill water tank and let water run through the machine to ensure cleanliness.
- Automatic exit from descaling mode occurs after final rinse completion.
- Ensure no descaling solution residue remains to maintain optimal coffee flavor.
- Complete proper rinsing to restore machine to regular functionality.
Preparation Steps
I'll get the container ready to catch any water or descaling solution that may come out during the process. It's like preparing for a mini science experiment with our Nespresso machines. Ensuring we've everything in place before diving into the descaling mode is key. Imagine the water tank filled to the brim, ready to battle any limescale buildup. It's like giving our Nespresso buddy a rejuvenating spa day!
Positioning the machine securely on a stable surface is vital. We don't want any unexpected acrobatics during the descaling dance. Safety first, folks! Oh, and don't forget to unplug the power cord. We're going green, not sparking! Let's keep those electrical mishaps at bay.
With our container at the ready, water tank filled, and machine securely positioned, we're all set for the descaling adventure. These preparation steps might seem essential, but they're the foundation for a successful descaling mission. Let's get ready to bid adieu to that pesky limescale!
Descaling Mode Activation

After preparing the necessary materials and ensuring the machine is securely positioned, activating the descaling mode on Nespresso Original Machines involves specific button combinations. To put your Nespresso machine into descaling mode, you'll need to press a sequence of buttons that vary depending on the model. Below is a handy table to guide you through the process:
| Nespresso Model | Descaling Mode Activation |
|---|---|
| Essenza Mini | Press both buttons simultaneously for 3 seconds. |
| Pixie | Hold down Lungo and Espresso buttons for 5 seconds. |
| CitiZ | Simultaneously press both buttons for 3 seconds. |
| Inissia | Press both buttons for 2 seconds. |
These button combinations trigger the descaling mode, allowing your machine to begin the cleaning process and remove any built-up calcium or lime deposits. Remember, following the correct steps is essential for maintaining your Nespresso machine's performance.
Final Rinse and Exit

To complete the descaling process for your Nespresso machine, perform the final rinse with fresh water to make certain all traces of descaling solution are thoroughly removed.
After the final drain, refill the water reservoir with fresh water. Let it flow through the machine to rinse out any lingering descaling solution. This step is vital to guarantee your machine is free from any leftover solution that could impact the taste of your coffee.
Once the final rinse is done, the Nespresso machine will automatically exit the descaling mode, signaling that the process is complete. It's like giving your machine a rejuvenating shower to wash away all the descaling solution remnants.
Proper rinsing ensures peak performance and prepares your Nespresso for regular use. So, let the water work its magic, and soon you'll be ready to brew your favorite cup of coffee without any descaling worries!
Frequently Asked Questions
How Do I Turn off Nespresso Descaling Mode?
To turn off Nespresso descaling mode, I press and hold the lungo button for at least 5 seconds. This action stops the blinking lights and restores normal operation swiftly. It's a simple process that quickly gets my Nespresso machine back to making delicious coffee.
How Do I Reset My Nespresso After Descaling?
After descaling my Nespresso, I confirm the process is complete and rinse with fresh water. To reset, I follow the manufacturer's instructions or press specific buttons for a set duration. Once done, my Nespresso is ready for use.
How Do I Get My Nespresso Vertuo Next Out of Descaling Mode?
To exit descaling mode on my Nespresso Vertuo Next, I press and hold the button for 20-30 seconds. Ensuring the machine is unplugged, I wait for it to respond and exit descaling mode. It's a simple fix for normal operation.
Why Is the Descaling Light Still Flashing After Descaling Nespresso?
The descaling light continues flashing after descaling Nespresso due to inadequate rinsing, leaving residual solution triggering the light. Thoroughly rinse with fresh water to eliminate all traces, ensuring components are dry for use.
Conclusion
So there you have it, removing the descaling mode from your Nespresso machine is as easy as 1, 2, 3! Just follow the simple steps outlined in this guide, and you'll be back to enjoying your favorite coffee in no time.
And if you're worried about messing up, don't sweat it! The visuals provided in the article will guide you every step of the way, making the process a piece of cake.
Happy brewing!
In the vast and diverse world of coffee, coffee alternatives, and tea, Olivia has found her calling. As an author and a dedicated coffee and tea aficionado, her work for Cappuccino Oracle reflects her profound love and understanding of the intricate complexities found within these beverages. Olivia’s passion for the subject serves as both a catalyst for her creativity and a connection point with her audience.
Olivia’s appreciation for coffee, coffee alternatives, and tea blossomed at an early age. She discovered that these beverages invigorated her senses and stimulated her creative spirit. From the nuanced flavors of single-origin roasts to the captivating narratives intertwined with coffee, coffee alternatives, and tea trade and culture, Olivia found an unlimited source of inspiration in her daily cup.
Her love for these beverages and her talent for storytelling eventually converged at Cappuccino Oracle. As an author, Olivia’s mission is to illuminate the intricate tapestry that makes up the world of coffee, coffee alternatives, and tea. Her articles span a diverse range of topics, encompassing everything from the unique flavors of different brews to the sociocultural history intertwined with their cultivation and consumption.
Nespresso
How to Turn Off Nespresso Descaling Mode in 3 Steps
Brew the perfect cup by learning how to exit Nespresso descaling mode in 3 simple steps – your coffee adventure awaits!
Let's get your Nespresso out of descaling mode in 3 simple steps. To begin with, press and hold the brew button for 7 seconds. Keep an eye out for that yellow light to know you're good to go. Next, secure and then release the lid with a satisfying click. It's like giving your Nespresso a secret handshake! Finally, repeat the descaling process until all the water drains out. Your machine will thank you for it! Ready to enjoy that perfect cup of coffee? These steps will have you sorted in no time! Let's get brewing!
Key Takeaways
- Press and hold brew button for 7 seconds.
- Confirm secure lid closure.
- Refill water reservoir.
- Ensure yellow light is on.
- Machine ready for normal operation.
Press and Hold Brew Button
To exit Nespresso descaling mode, simply press and hold the brew button for at least 7 seconds. This action is like hitting the essential button on your Nespresso machine after it's had a little spa treatment.
By holding down the brew button, you're telling your machine, 'Hey, I'm ready to get back to brewing those delicious cups of coffee.' It's the final step in the descaling process, ensuring your Nespresso is free from any limescale buildup that might be slowing down its performance.
Once you press and hold that button, you'll see the yellow light indicating that your machine is ready to exit the descaling mode and get back to business. Remember, this step is vital to maintaining your Nespresso machine's health and longevity, so don't skip it!
After you've held the brew button, your Nespresso will do a little happy dance (okay, not really) to complete the descaling process and be all set for your next coffee brewing adventure. Don't forget to refill the water reservoir before you start brewing again!
Lock and Unlock Lid
Securing and releasing the lid of the Nespresso machine is an important step in moving out of descaling mode. When it's time to secure and confirm the lid, it's like giving your Nespresso machine a little high-five to let it know it's done with descaling mode! This action not only resets the machine's sensors but also signals the completion of the descaling process. Think of it as a secret handshake between you and your Nespresso buddy.
To secure the lid, simply place it back in position and twist it until you hear a satisfying click. This confirms everything is snug and ready to go. When confirming, give it a twist in the opposite direction and lift it gently. It's like saying, 'You did great, now it's time to shine again!' Making sure the lid is securely in place after confirming guarantees your Nespresso machine is set for its next brewing adventure. So, secure, confirm, and get ready to brew your favorite cup of coffee!
Repeat Until Water Drains

After confirming the lid is securely in place, proceed to repeat the descaling process until the water drains completely from the Nespresso machine.
It can be frustrating when your Vertuo Plus seems stuck in descaling mode, but don't worry, we've you protected!
If you find there's still a lot of water left in the machine, it's important to keep going until it's all out.
This step is vital to guarantee your Nespresso machine is properly descaled and ready for your next delicious brew.
Frequently Asked Questions
How Do I Get My Nespresso Out of Descaling Mode?
To exit descaling mode on my Nespresso, I follow the red light indicators and let the process complete naturally. Overheating should be avoided. If issues persist, I contact Nespresso support. A factory reset might not resolve the problem.
How Do I Reset My Nespresso After Descaling?
After descaling my Nespresso, I guarantee completion following the manual. If the machine doesn't exit descaling mode, a quick restart usually does the trick. If issues persist, I contact Nespresso for further assistance.
How Do I Stop My Nespresso Expert From Descaling?
Stopping my Nespresso Expert from descaling is simple. I wait until the descaling process finishes, ensuring the machine exits descaling mode automatically. Following the prompts and lights is key. Interrupting could lead to issues, but Nespresso support can help if problems persist.
Why Is My Nespresso Descaling Light Still on After Descaling?
My Nespresso descaling light persists after descaling due to incomplete cycles or sensor issues. I guarantee proper descaling steps, check for remaining solution triggering the light, and reach out to Nespresso support if needed. Peak machine performance is key.
Conclusion
And that's all there's to it! By following these simple steps, you can easily turn off the descaling mode on your Nespresso machine.
Just press and hold the brew button, secure and release the lid, and repeat until the water drains. It's like a little dance for your coffee maker!
So go ahead, give it a try and get back to enjoying your favorite Nespresso drinks without any interruptions. Cheers to hassle-free brewing!
In the vast and diverse world of coffee, coffee alternatives, and tea, Olivia has found her calling. As an author and a dedicated coffee and tea aficionado, her work for Cappuccino Oracle reflects her profound love and understanding of the intricate complexities found within these beverages. Olivia’s passion for the subject serves as both a catalyst for her creativity and a connection point with her audience.
Olivia’s appreciation for coffee, coffee alternatives, and tea blossomed at an early age. She discovered that these beverages invigorated her senses and stimulated her creative spirit. From the nuanced flavors of single-origin roasts to the captivating narratives intertwined with coffee, coffee alternatives, and tea trade and culture, Olivia found an unlimited source of inspiration in her daily cup.
Her love for these beverages and her talent for storytelling eventually converged at Cappuccino Oracle. As an author, Olivia’s mission is to illuminate the intricate tapestry that makes up the world of coffee, coffee alternatives, and tea. Her articles span a diverse range of topics, encompassing everything from the unique flavors of different brews to the sociocultural history intertwined with their cultivation and consumption.


Why Do Americanos Taste so Bad

What Is a Hot Americano Starbucks

How to Make Homemade Kombucha Tea

What Is the Warmest Tea You Can Pour in Kombucha

What Tea for Kombucha

How Many Calories Are in a Americano

How to Make Americano With Moka Pot

How to Make an Americano in a French Press

How to Make Iced Americano With Instant Coffee

What to Add to an Americano at Starbucks

Discover the Power of KOS Mushroom Coffee

Top 10 Rated Mushroom Coffee Brands for a Boost

What Makes Caffeine-Free Mushroom Coffee Unique?

Rooibos Tea: A Guide to Safe Breastfeeding Practices

What Mushroom Can I Use as a Coffee Replacement?

-
 Americano4 weeks ago
How Many Calories Are in a Americano
-
 Americano1 week ago
How to Make Americano With Moka Pot
-
 Americano2 weeks ago
How to Make an Americano in a French Press
-
 Americano1 week ago
How to Make Iced Americano With Instant Coffee
-
 Americano2 weeks ago
What to Add to an Americano at Starbucks
-

 Americano2 weeks ago
How to Make Americano With a Nespresso Machine
-

 Americano7 days ago
How to Make Americano With Bialetti
-

 Americano1 week ago
How to Make Dutch Bros Americano