
Frequently asked questions about coffee
How To Tackle Latte Spills And Stains On Kitchen Appliances

Ah, the joys of making a latte at home. The aroma of freshly brewed coffee, the warm milk froth, and the satisfying sip of that first delicious sip. But with all good things comes a downside: spills and stains on our beloved kitchen appliances.
As someone who has experienced their fair share of latte-related accidents, I know firsthand how frustrating it can be to deal with those stubborn marks on our kitchen surfaces. But fear not! With a little bit of knowledge and some handy cleaning supplies, we can tackle these stains head-on and keep our appliances looking as good as new.
So let’s dive in and explore some tips and tricks for tackling latte spills and stains on our trusty kitchen appliances.
Key Takeaways
- Regular maintenance and cleaning of kitchen appliances can help prevent stains and bacteria buildup.
- Using spill-proof mugs and measuring spoons can reduce chances of future staining incidents.
- Wiping down appliances after each use and using a vinegar solution for tough stains can keep appliances looking newer for longer.
- Turning off the machine before cleaning ensures safety during the cleaning process.
Identify the Type of Stain
Got a latte spill on your kitchen appliances? Let’s figure out what type of stain you’re dealing with!
Identifying the type of stain is crucial in determining the most effective stain removal techniques. There are two types of stains: water-based and oil-based.
Water-based stains result from spills or drips of liquids such as coffee, tea, milk, or juice. These types of stains are usually easy to remove using soap and water or vinegar solution. However, if the stain has dried up, it may require a bit more effort to get rid of it completely.

Oil-based stains are caused by substances such as butter, cooking oil, or salad dressing. These stains can be stubborn and difficult to remove since they tend to cling onto surfaces. To tackle an oil-based stain effectively, use dishwashing liquid mixed with warm water and gently scrub the affected area with a sponge or cloth until the stain disappears.
Now that you have identified the type of stain on your kitchen appliance caused by that latte spill, it’s time to gather necessary cleaning supplies.
Gather Necessary Cleaning Supplies
You’ll need to gather some cleaning supplies before you can start removing those pesky marks from your beloved morning brew. It’s a common misconception that any old cleaning product will do the trick, but in reality, certain solutions work better on specific surfaces. To make things easier for you, I’ve created a table below which outlines effective cleaning techniques and eco-friendly products for each surface.
| Surface | Effective Cleaning Techniques | Eco-Friendly Products |
|---|---|---|
| Stainless Steel | Use a mixture of water and vinegar or dish soap. Avoid abrasive cleaners as they can cause scratches. | Biokleen All Purpose Cleaner |
| Glass | Use white vinegar or baking soda mixed with water. Avoid using harsh chemicals like ammonia as they can damage the glass over time. | Seventh Generation Glass Cleaner |
| Plastic | Use warm soapy water and a soft cloth to avoid scratching the surface. For tougher stains, mix baking soda with water to create a paste and apply it to the stain for 15 minutes before wiping away. | Method All Purpose Cleaner |
Now that you have your cleaning supplies ready, it’s time to get started! The next step is learning how to clean the coffee maker itself without causing any damage or leaving behind unwanted residue.
Clean the Coffee Maker
First, it’s important to disconnect the coffee maker from any power source before cleaning it. This ensures no electrical accidents happen while you clean your machine.
Regular maintenance of your coffee maker is key in extending its lifespan and efficiency. Descaling the coffee maker is one of the most important aspects of maintenance since it removes mineral deposits that can affect the taste and quality of your brew.
To descale your coffee maker, fill half of the carafe with equal parts water and white vinegar. Pour this mixture into the reservoir and turn on the machine as if you were brewing a pot of coffee. Once the cycle is complete, rinse out the carafe and run another cycle with just plain water to remove any remaining vinegar residue.
After descaling, wipe down all external surfaces with a damp cloth or sponge to remove any stains or spills that may have occurred during use.
Now that your coffee maker is sparkling clean, let’s move onto cleaning our blender.
Without proper maintenance, appliances like these can become breeding grounds for bacteria and mold growth which can cause health risks over time. So be sure to keep them clean regularly!
Clean the Blender
Did you know that neglecting to clean your blender can lead to harmful bacteria buildup? Blender maintenance is essential in ensuring that it performs optimally and lasts longer.
Here are some blender cleaning techniques that I use to keep my appliance in top shape:
-
Disassemble the blender – Start by unplugging the device from the power source, removing the blades and any other detachable parts. This makes it easier to access all the nooks and crannies that require cleaning.
-
Rinse with warm water – Once you’ve disassembled the blender, rinse each part thoroughly under warm running water. Use a soft sponge or brush to scrub off any residue or stains.
-
Clean with soap – After rinsing, apply dish soap onto a sponge or brush and gently scrub every part of the blender until it’s spotless. Be careful not to scratch or damage any delicate parts.
-
Dry and reassemble – Finally, wipe down each part with a dry cloth or towel before reassembling back into place.
Maintaining a clean blender not only ensures optimal performance but also reduces bacterial growth that may cause illness in individuals who consume contaminated food or drinks made from an unclean appliance.
Now that we’ve cleaned our blenders, let’s move on to tackling another kitchen appliance: Cleaning the espresso machine.
Note: The key takeaway here is maintaining cleanliness in all kitchen appliances for better health outcomes for ourselves and those we serve food/drink to!
Clean the Espresso Machine
Cleaning the espresso machine is essential for maintaining its longevity and ensuring a high-quality cup of coffee. I always make sure to clean the portafilter and group head after each use. I use a brush and hot water to remove any leftover coffee grounds or oils.
Additionally, removing milk stains from the steam wand with a damp cloth can prevent buildup. This ensures optimal steam performance for frothing milk.
Cleaning the portafilter and group head
You’ll want to grab a soft cloth and get ready to give your portafilter and group head a good clean. Deep cleaning the portafilter and group head is an essential part of regular maintenance for your espresso machine. Over time, coffee oils can build up in these areas, affecting the taste of your espresso shots.
To properly clean the portafilter and group head, start by removing any remaining coffee grounds. Then, using a soft cloth or brush, scrub the inside of the portafilter and group head with warm water and dish soap. Rinse thoroughly with hot water and dry completely before reassembling.
For a more detailed guide on how to deep clean your portafilter and group head, refer to the following table:
| Step | Instructions |
|---|---|
| 1 | Remove any remaining coffee grounds from the portafilter |
| 2 | Scrub the inside of both the portafilter and group head with warm water and dish soap |
| 3 | Rinse thoroughly with hot water |
| 4 | Dry completely before reassembling |
With your portafilter and group head now sparkling clean, it’s time to move onto removing milk stains from your steam wand.
Removing milk stains from steam wand
Once the milk has been steamed and poured into your cup, it’s common for residue to build up on the steam wand. However, preventing residue buildup is relatively easy with proper steam wand maintenance. After each use, purge any remaining milk from the wand by running a short burst of steam through it. This helps to prevent dried milk from sticking to the surface of the wand.
To remove stubborn milk stains from a steam wand, there are several methods you can try. One effective method is to soak a small towel in hot water and wrap it around the end of the wand while holding down the steam button for about 10 seconds. The heat and moisture should help loosen any dried-on milk residue.
Another option is to use a specialized cleaning solution designed specifically for espresso machines. Once you’ve removed all visible stains, be sure to give your steam wand a thorough wipe-down with a clean cloth before moving on to cleaning your milk frother.
Clean the Milk Frother
To keep your milk frother looking spotless, just give it a quick wipe down with a damp cloth after each use. Proper maintenance and regular cleaning will help prevent any buildup of milk residue that can lead to staining and damage over time. If you notice any stubborn stains on the frother, try using a specialized cleaner designed for milk equipment.
When wiping down the frother, pay special attention to the wand and nozzle as these are the areas where most of the milk residue accumulates. Use a soft cloth or sponge to gently wipe away any visible debris, being careful not to scratch or damage any delicate parts. If you’re short on time, consider investing in a small brush specifically designed for cleaning steam wands.
Taking care of your milk frother is an important aspect of ensuring that your kitchen appliances remain clean and functional over time. In addition to regularly cleaning the unit itself, there are also several preventative measures you can take to avoid spills and stains altogether. For example, always make sure that your cup is positioned directly underneath the nozzle before starting the frothing process.
By following these simple tips and tricks, you can enjoy perfectly frothed milk without worrying about damaging your equipment or creating unnecessary messes in your kitchen.
Preventative Measures
When it comes to keeping my kitchen appliances clean, I’ve learned that taking preventative measures is key. That’s why I always make sure to wipe down my milk frother after each use with a damp cloth or sponge.
This not only helps prevent any spills or stains from setting in, but also keeps the appliance looking like new. Additionally, using non-stick surfaces can be a game changer when it comes to cleaning up messes quickly and easily.
By implementing these simple habits, I’m able to maintain a tidy and functional kitchen without spending too much time on cleanup.
Wiping down appliances after use
After you’ve finished making your latte, don’t forget to grab a damp cloth and wipe down your appliances to prevent any unsightly stains or spills from building up. Regular wiping is essential to keeping your kitchen appliances clean and free of coffee residue.
Not only does it help maintain the appearance of your appliances, but it also prevents the buildup of bacteria that can lead to unpleasant odors. Using eco-friendly wipes is another great way to ensure that you’re not introducing harmful chemicals into your home environment while cleaning.
Opting for wipes made from natural materials like bamboo or cotton can be a more sustainable choice than traditional disposable wipes. Additionally, these types of wipes are often biodegradable and compostable, which means they won’t end up in landfills for years to come. When it comes to tackling latte spills and stains on kitchen appliances, using non-stick surfaces can also be incredibly helpful.
These types of surfaces make it easier to wipe away any coffee residue without leaving behind stubborn stains or marks. By incorporating these techniques into your cleaning routine, you’ll be able to keep your kitchen looking spotless and inviting every day.
Using non-stick surfaces
Well, ain’t it a relief that non-stick surfaces exist to save us from the horror of scrubbing away at coffee remnants on our precious gadgets?
The benefits of using non-stick surfaces in kitchen appliances are endless. Not only do they make cleaning up spills and stains easier, but they also help prevent food from sticking to the surface during cooking. This means less oil or butter is needed, making healthier meals while saving time and effort.
But how do you choose the right non-stick material for your appliances? There are various types available, such as ceramic, silicone, and Teflon coatings. Ceramic is a popular choice for its durability and scratch-resistant properties. Silicone is another great option that can withstand high temperatures without releasing toxic fumes. Teflon coating remains the most common choice due to its affordability and effectiveness in preventing sticking.
With these options in mind, you can now select the best non-stick material for your kitchen appliances and enjoy their benefits hassle-free.
Transitioning into the next section about removing stubborn stains, sometimes even with non-stick surfaces accidents happen. In this case, we need to be equipped with tips and tricks on how to tackle those pesky stains effectively without damaging our beloved gadgets.
Removing Stubborn Stains
When it comes to removing stubborn stains from my kitchen appliances, I’ve found that using baking soda and vinegar can work wonders. Mixing these two ingredients together creates a powerful cleaning solution that can easily lift away stains from surfaces like countertops and stovetops.
Additionally, some specialized cleaning products designed for specific materials like stainless steel or glass can also be incredibly effective in removing tough stains.
Using baking soda and vinegar
For a sophisticated solution to latte spills and stains on your kitchen appliances, try using a mixture of baking soda and vinegar. This powerful combination is not only effective in removing stubborn stains but is also eco-friendly and affordable. Baking soda works as a gentle abrasive that scrubs away the stain while vinegar acts as a natural disinfectant that deodorizes the surface.
To make this cleaning solution, simply mix equal parts of baking soda and white vinegar to form a paste. Apply the paste onto the affected area with a soft cloth or sponge and let it sit for 5-10 minutes. Then, rinse the area with warm water and dry it with a clean cloth. For tougher stains, you can add more baking soda or repeat the process until the stain disappears completely.
| Baking Soda | Vinegar | |
|---|---|---|
| Alternative Uses | Deodorizer | Pickling |
| Health Benefits | Heartburn Relief | Lower Blood Sugar |
| Environmental Impact | Biodegradable | Non-Toxic |
Using this simple solution not only saves you money but also helps reduce your environmental impact by avoiding harsh chemicals found in commercial cleaning products. However, if you prefer specialized cleaning products or have sensitive surfaces that require specific care, read on for tips on how to use them effectively without damaging your appliances.
Using specialized cleaning products
Using specialized cleaning products can be a great way to maintain the cleanliness of your household, and according to a recent survey, over 70% of Americans prefer using them for their specific cleaning needs. However, it’s important to choose the right product that not only effectively cleans but also protects your kitchen appliances from any damage.
One option is eco-friendly cleaning products which are gentle on both your appliances and the environment. These products are made with natural ingredients and free from harsh chemicals that can cause discoloration or corrosion. Another alternative is using multi-purpose cleaners that are specifically designed for kitchen appliances. They come in various forms such as sprays, wipes or gels and contain powerful ingredients that remove even the toughest stains while leaving a protective layer on your appliances.
Additionally, some specialized cleaning products have a pleasant scent which leaves your kitchen smelling fresh and clean after each use. With proper usage of these specialized cleaning products, you can keep your kitchen appliances looking new for longer!
When it comes to maintaining a clean kitchen, it’s not just about tackling latte spills and stains on your appliances; other surfaces such as countertops and floors require attention too. Therefore, let’s move onto the next section where we’ll discuss effective ways to clean other kitchen surfaces without damaging them!
Cleaning Other Kitchen Surfaces
To keep your kitchen looking its best, wipe down other surfaces like countertops and cabinets regularly with a damp cloth. Efficient cleaning is key to maintaining a tidy kitchen, and time-saving techniques can make all the difference.
Here are four tips for tackling your kitchen surfaces:
-
Use vinegar and water: Mix equal parts of white vinegar and water in a spray bottle. Spray the solution onto your countertops or cabinets, let it sit for a few minutes, then wipe it off with a damp cloth.
-
Avoid abrasive cleaners: While it might be tempting to use something tough on stubborn stains, harsh chemicals could damage your surfaces over time. Stick to gentle cleansers that won’t scratch or discolor your counters or cabinets.
-
Don’t forget the corners: Dirt and grime can build up in those hard-to-reach areas, so take extra care when wiping down corners and edges.
-
Keep microfiber cloths handy: These soft, absorbent cloths are perfect for wiping down surfaces without leaving streaks or lint behind.
By following these techniques, you’ll keep your kitchen looking clean and fresh without spending hours scrubbing away at stains. As important as efficient cleaning is maintenance – after all, prevention is better than cure!
Maintenance Tips
Maintaining a spotless kitchen requires consistent effort and attention, but with a bit of elbow grease, your space can shine like a diamond in the rough. When it comes to keeping kitchen appliances free from latte spills and stains, regular maintenance is key. Not only does it prevent future stains from occurring, but it also helps prolong the life of your appliances.
To make sure your appliances stay looking their best, start by wiping them down after each use. Use a damp cloth or sponge to clean off any coffee residue or drips that may have landed on the machine or counter. For more stubborn stains, mix equal parts water and vinegar and apply it directly to the stain before wiping away with a clean cloth.
In addition to daily cleaning, there are some tips you can follow to avoid future stains. Try using a spill-proof mug when making your morning latte. If you’re prone to spills while pouring milk or sugar into your drink, consider using measuring spoons instead of eyeballing it. And finally, always make sure your machine is turned off before attempting to clean it – this will prevent accidental burns and spills. With these maintenance tips in mind, you’ll be able to enjoy delicious lattes without worrying about ruining your appliances!
| Tips for Regular Maintenance | Why It’s Important | Benefits |
|---|---|---|
| Wipe down appliances after each use | Prevents buildup of coffee residue which can lead to staining over time | Appliances look newer for longer |
| Use vinegar solution for stubborn stains | Removes tough stains without damaging surfaces or finishes | Keeps appliances looking their best |
| Use spill-proof mugs & measuring spoons when making lattes | Prevents spills during preparation process | Reduces chances of future staining incidents |
| Always turn off machine before cleaning | Ensures safety during cleaning process | Prevents accidents such as burns and spills |
Overall, keeping your kitchen appliances free from latte spills and stains requires a little bit of effort, but it’s well worth it in the end. By following these tips for regular maintenance and making a few small changes to your routine, you can avoid future stains and keep your appliances looking their best for years to come. Happy sipping!
Frequently Asked Questions
What should I do if the stain has already dried on my kitchen appliance?
If I’ve got a dried stain on my kitchen appliance, there are a few options to consider.
Prevention is key, so in the future, I’ll be sure to address spills and stains immediately to avoid them becoming permanent.
For DIY solutions, I can try using a mixture of baking soda and water or vinegar and water to scrub away the stain. However, if these methods don’t work or if the appliance requires delicate care, it may be best to seek out professional cleaning services.
While this option can be more expensive, it has the benefit of being thorough and safe for the appliance’s material.
Ultimately, weighing the pros and cons of each approach will help determine the best course of action for tackling dried stains on kitchen appliances.
Can I use a regular dish soap to clean my milk frother or do I need a specialized cleaner?
When it comes to cleaning my milk frother, I’ve found that regular dish soap works just fine. However, if you prefer natural cleaning options or want to avoid harsh chemicals, there are plenty of regular soap alternatives available that can do the job just as well.
Some people even use vinegar or baking soda mixed with water as a gentle and effective cleaner for their kitchen appliances. Ultimately, it’s up to personal preference and what works best for you and your appliance.
Just be sure to follow any manufacturer’s instructions for cleaning and maintenance to keep your milk frother in top condition.
Is it safe to use bleach or other harsh chemicals to remove stubborn stains?
When it comes to removing stubborn stains on kitchen appliances, it can be tempting to reach for harsh chemicals like bleach. However, there are safer alternatives that can still effectively clean and disinfect surfaces without the potential health risks associated with bleach.
Some of these alternatives include vinegar, baking soda, hydrogen peroxide, and lemon juice. It’s important to always wear gloves and protective clothing when handling cleaning solutions, especially if they’re acidic or caustic in nature.
Additionally, always read the labels and instructions on any cleaning products before using them to ensure safe and proper usage. By taking these safety precautions and utilizing bleach alternatives, you can effectively remove stubborn stains without compromising your health or the integrity of your appliances.
How often should I clean my coffee maker to prevent buildup of stains and residue?
Honestly, I never really thought about how often I should clean my coffee maker until recently. But after doing some research and experiencing a few too many bitter cups of coffee, I learned that regular cleaning is crucial to prevent buildup of stains and residue.
Depending on how often you use your machine, it’s recommended to clean it at least once a month. However, if you’re an avid coffee drinker like myself, it’s best to clean it every two weeks or so. Maintenance tips include using a mixture of water and vinegar to descale the machine, wiping down all surfaces with a damp cloth after each use, and replacing the water filter regularly.
Trust me, taking care of your coffee maker not only improves the taste of your morning brew but also prolongs the lifespan of your appliance.
Are there any specific cleaning methods for stainless steel appliances to avoid scratching or damaging the surface?
When it comes to cleaning stainless steel appliances, there are a few things to keep in mind to avoid scratching or damaging the surface. Firstly, I always use microfiber cloths as they’re gentle on the stainless steel and won’t leave any streaks.
Secondly, I like to clean with vinegar as it’s great for removing any stubborn stains or marks without leaving any residue behind. However, it’s important to dilute the vinegar with water before using it on your appliances.
Additionally, I make sure to wipe in the direction of the grain of the stainless steel as this’ll help prevent scratching.
By following these tips and tricks, you can keep your stainless steel appliances looking shiny and new for years to come!
Conclusion
In conclusion, dealing with latte spills and stains on kitchen appliances can be a real hassle. However, with the right approach and tools at hand, it’s possible to tackle even the most stubborn of them.
As I’ve learned through my own experience, identifying the type of stain is crucial in determining which cleaning supplies to use. Additionally, taking preventative measures such as wiping down surfaces after each use can help minimize potential damage.
But what about those particularly pesky stains that refuse to budge? Fear not! With a bit of elbow grease and patience, you can remove them too.
And when it comes to maintaining your kitchen appliances in tip-top shape, regular cleaning and upkeep are key. By following these simple steps and implementing some good habits into your routine, you’ll be able to enjoy your lattes without worrying about any mess or damage they may cause.
So go ahead and indulge – your kitchen (and taste buds!) will thank you for it.

Arf, an author and an innovative enthusiast of coffee, coffee alternatives, and tea, plays a crucial role as a contributor to the esteemed Cappuccino Oracle platform. Renowned for his curiosity and passion for these captivating beverages, Arf has carved out a unique space for himself in the world of exploration and writing. He realized that coffee, coffee alternatives, and tea are not mere drinks to keep one awake, but universes of flavors and stories waiting to be explored.
Arf’s articles for Cappuccino Oracle blend meticulous research with personal experiences, providing readers with an in-depth understanding of various types of coffee, coffee alternatives, and tea, along with their unique characteristics, cultures, and histories. His honest reviews and engaging narratives guide readers on their own journeys, helping them discover their preferences and find their perfect brew.

I have always been a coffee lover, but I recently discovered a new favorite way to enjoy my beloved beverage: cold brew coffee.
Not only is it a refreshing and delicious alternative to hot coffee, but it also has numerous health benefits that make it a great choice for anyone looking to improve their diet.
Cold brew coffee is less acidic than regular coffee, which means it’s gentler on the stomach and can reduce acid reflux. It’s also naturally sweeter and has a smoother taste than hot coffee, making it a great option for those who prefer less bitter coffee.
Plus, it has 22.8% more caffeine than regular drip coffee, which can give you a much-needed energy boost without the jitters that come with other caffeinated beverages.
In this article, I’ll share everything you need to know about cold brew coffee, including its benefits, how to make it at home, and why it’s a sustainable and convenient choice for coffee lovers everywhere.
Key Takeaways
- Cold brew coffee has numerous health benefits, such as being less acidic, naturally sweeter, and having more caffeine than regular coffee.
- Consuming caffeine in moderation can lead to various health benefits, including reducing the risk of diseases, improving memory, and aiding in weight loss.
- Making cold brew coffee at home is a simple and enjoyable process, and it can introduce drinkers to new and enticing flavor profiles.
- Cold brew coffee is a great alternative to regular coffee for those looking for a healthier, tastier, and more enjoyable cup of joe.
Benefits of Cold Brew
I love that cold brew coffee has so many benefits. It’s less acidic, naturally sweeter, and has more caffeine than regular coffee. As someone with a sensitive stomach, I appreciate that cold brew is less acidic and easier on my digestive system.
Plus, the natural sweetness of cold brew eliminates the need for added sugar and syrups, making it a healthier option for coffee lovers.
Another benefit of cold brew is its higher caffeine content, which is great for those looking for an extra boost of energy. As a fitness enthusiast, I also appreciate that cold brew is better for exercise due to its lower acidity, making it easier on the stomach before, during, and after a workout.
Drinking cold brew after a workout can also help replenish glycogen levels faster and strengthen muscles, making it a great option for post-workout recovery.
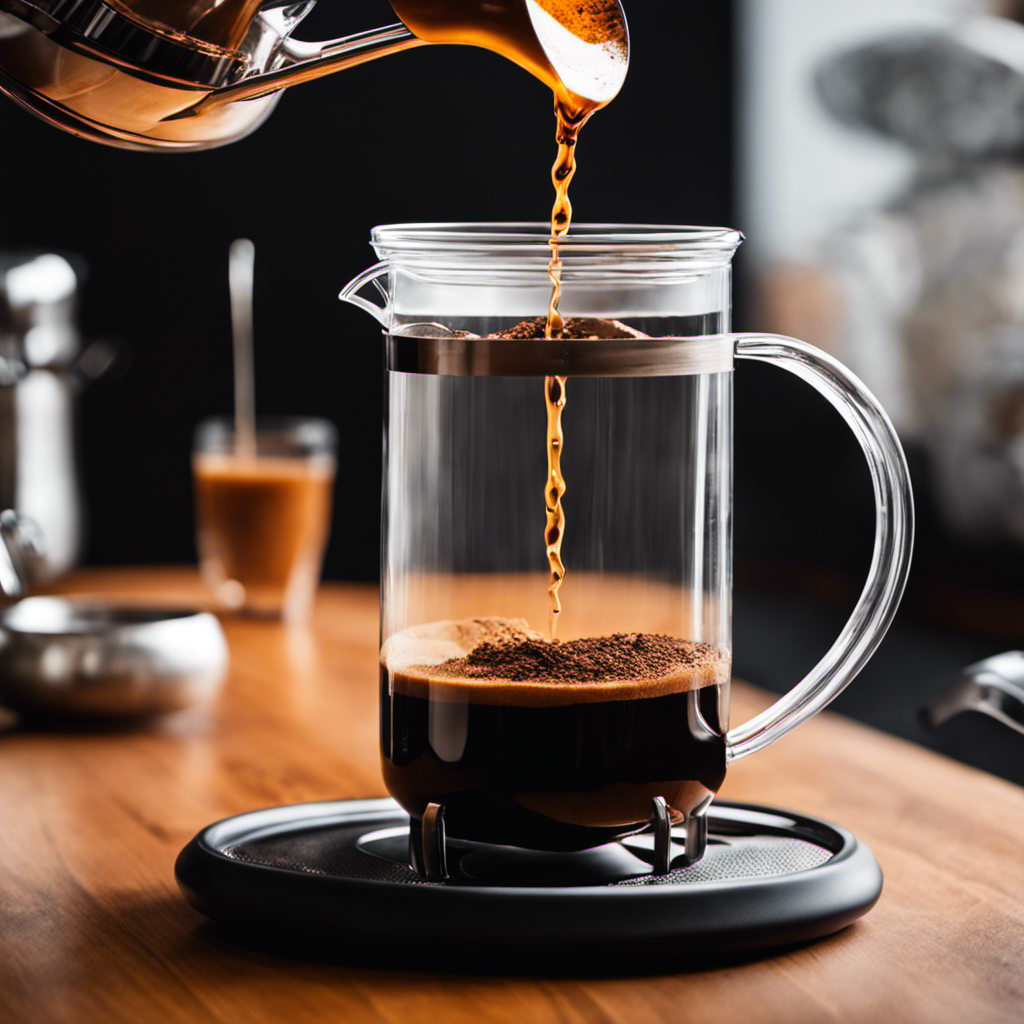
Making Cold Brew
To make this delicious beverage, all you need are coarsely ground coffee beans and room temperature water. Simply combine the two in a large jug and let it steep for 12-24 hours.
Once the steeping process is complete, strain the coffee grounds using a cheesecloth strainer and enjoy your homemade cold brew coffee.
There are plenty of DIY methods for making cold brew, and each one can result in a unique flavor profile. You can experiment with different coffee bean varieties, water-to-coffee ratios, and steeping times to find the perfect combination that suits your taste.
Making cold brew can be a fun and rewarding activity, and the end result is a healthier, sweeter, and stronger coffee that you can enjoy all week long.
Comparison to Regular Coffee
Comparing the caffeine content between cold brew and regular coffee, it’s important to note that cold brew has 22.8% more caffeine than drip coffee. This makes it an ideal choice for those who need an extra boost of energy in the morning or before a workout. While some may argue that espresso is the strongest form of coffee, it’s important to note that cold brew can have a higher caffeine content and a smoother taste than espresso.
To better understand the differences between cold brew and regular coffee, take a look at this table:
| Cold Brew | Drip Coffee | |
|---|---|---|
| Caffeine content | 200mg per 8oz | 163mg per 8oz |
| Acidity | Less acidic, smoother taste | More acidic, bitter taste |
| Preparation | Steeped in cold water for 12-24 hours | Coffee grounds are run through hot water for a few minutes |
| Health benefits | More caffeine for an energy boost | Lower acidity for easier digestion |
In terms of health benefits, cold brew may be the better choice for those with sensitive stomachs or those looking for a healthier option. With its lower acidity and higher caffeine content, cold brew can provide the energy boost without the negative side effects of regular coffee. However, it’s important to note that moderation is key, as consuming too much caffeine can have negative effects on the body. Ultimately, the choice between cold brew and regular coffee comes down to personal preference and individual needs.
Caffeine Content
As a coffee lover, I was surprised to discover the caffeine content difference between my usual cup and cold brew. It was eye-opening and added an extra boost to my morning routine. Compared to drip coffee, cold brew has a whopping 22.8% increase in caffeine content, making it a stronger option for those needing an extra jolt of energy.
It’s also worth noting that cold brew has less caffeine than espresso, so it’s a great middle-ground option for those who find espresso too intense. Not only does the higher caffeine content in cold brew provide an energy boost, but it’s also been shown to increase productivity.
Consuming caffeine in moderation has been linked to improved focus, alertness, and overall cognitive function. So, if you’re looking for a way to kickstart your mornings or stay focused during a long workday, cold brew could be a great option to try.
Health Benefits of Caffeine
I’ve learned that moderate caffeine consumption can have various health benefits, such as reducing the risk of diseases and improving cognitive function. Studies have shown that caffeine can help protect against diseases such as Parkinson’s and Alzheimer’s, which affect the brain’s cognitive function.
Additionally, caffeine has been shown to improve memory and cognitive performance, making it a great supplement for those looking to enhance their mental clarity. Another benefit of moderate caffeine consumption is that it can aid in weight loss. Caffeine has been shown to increase metabolic rate and fat burning, making it a great addition to a healthy diet and exercise routine.
However, it’s important to remember that excessive caffeine consumption can have negative effects on one’s health, so moderation is key. Overall, incorporating moderate amounts of caffeine, such as in a cup of cold brew coffee, can have positive effects on both cognitive function and weight loss.
Collagen Protein Powder
Adding collagen protein powder to my post-workout cold brew creates a creamy and nourishing elixir that helps with muscle recovery and promotes healthy skin. Collagen supplements have been gaining popularity in recent years, and for good reason.
Collagen is a protein that makes up a large part of our skin, bones, and muscles. As we age, our bodies produce less collagen, leading to wrinkles, joint pain, and weaker muscles. By adding collagen protein powder to my cold brew, I’m providing my body with the necessary building blocks to maintain healthy skin and strong muscles.
But the benefits of collagen protein powder go beyond just aesthetics. When consumed after a workout, collagen can help with post-workout recovery by reducing inflammation and promoting muscle growth. It can also aid in joint health, as it is a major component of cartilage.
By incorporating collagen into my cold brew routine, I’m not only enjoying a delicious and healthier cup of coffee but also giving my body the essential nutrients it needs to function at its best.
Convenient and Sustainable
By incorporating collagen protein powder into my post-workout routine, I’m able to conveniently and sustainably provide my body with the essential nutrients it needs for optimal performance and recovery.
Collagen protein powder is a convenient and easy way to supplement my diet with the necessary amino acids that support muscle growth and repair. Not only is collagen protein powder an excellent source of protein, but it’s also easy to mix into my cold brew coffee, making it a convenient and delicious way to refuel after a tough workout.
Using collagen protein powder in my cold brew coffee also helps me reduce waste. By batch brewing a large amount of cold brew at once, I’m able to minimize the amount of packaging and waste that comes with buying individual servings of protein drinks. This not only saves me money in the long run but also helps me feel good about my impact on the environment.
Overall, incorporating collagen protein powder into my cold brew coffee has been a game-changer for my post-workout routine. It provides me with the energy and nutrients I need in a convenient and sustainable way.
Author and Website Information
Moving on from the convenience of cold brew, let me introduce you to the author and website behind this informative text. I developed an obsession with coffee. This fascination led me to write for Cappuccino Oracle, where I explore my love for coffee and help others brew their perfect cup.
Cappuccino Oracle is a participant in the Amazon Services LLC Associates Program, an affiliate advertising program designed to provide a means for sites to earn advertising fees by advertising and linking to Amazon.com. My passion for coffee has driven me to research and discover new brewing techniques and flavor profiles continuously.
Through Cappuccino Oracle, I aim to share my knowledge and expertise with fellow coffee enthusiasts and help them enjoy a healthier, sweeter, and stronger cup of coffee.
| Discussion Ideas | Description |
|---|---|
| The Science of Coffee | Discuss the chemistry behind coffee and how it affects its taste and aroma. |
| Brewing Techniques | Share different brewing techniques and methods to make the perfect cup of coffee. |
| Coffee Bean Varieties | Explore the different types of coffee beans and how they contribute to the flavor and aroma of coffee. |
| Coffee and Health | Discuss the various health benefits and drawbacks of consuming coffee in moderation. |
| Cold Brew vs. Hot Brew | Compare and contrast the differences between cold brew and hot brew coffee, and which one is better for certain occasions or preferences. |
| The History of Coffee | Explore the origins and evolution of coffee, from its discovery in Ethiopia to its global popularity today. |
Frequently Asked Questions
What is the best type of coffee bean to use for cold brew?
What’s the best type of coffee bean to use for cold brew? Well, it all depends on your personal preference.
When it comes to the roasting process, medium to dark roast coffee beans tend to work best for cold brew as they have a bolder flavor profile. Additionally, exploring different flavor notes can lead to a more complex and enjoyable cup of cold brew. Some popular flavor notes include chocolate, nutty, and fruity.
It’s also important to consider the brew time and dilution when choosing coffee beans for cold brew. A longer brew time with coarsely ground coffee beans can result in a stronger and more concentrated cold brew, while a shorter brew time with a finer grind can lead to a lighter and more refreshing cup.
Experimentation is key to achieving the perfect cold brew ratio with different coffee beans.
Can cold brew be made with hot water instead of room temperature water?
I’ve experimented with making cold brew using hot water as an alternative to room temperature water, and I’ve found that it doesn’t produce the same smooth and sweet taste as traditional cold brew.
Cold brew is naturally less acidic and sweeter than regular hot coffee, and using hot water can result in a bitter and unbalanced flavor.
Additionally, one of the main benefits of cold brew is its higher caffeine content, which is achieved through a longer steeping process with room temperature water.
Overall, I would recommend sticking to the traditional method of making cold brew with room temperature water to fully experience its benefits.
How long does cold brew last in the refrigerator?
Storing cold brew in the refrigerator can be a tricky task, but with a little bit of know-how, it’s easy to keep your cold brew fresh for days. To properly store cold brew in the refrigerator, it’s important to transfer it from the brewing container to an airtight container. This will help prevent the coffee from absorbing any odors or flavors from the surrounding foods.
I recommend using a glass jar or bottle with a tight-fitting lid. Cold brew can last up to two weeks in the refrigerator if stored properly. If you’re looking to make cold brew without a coffee maker, there are a few tips to keep in mind.
First, you’ll need to use coarsely-ground coffee to ensure that the coffee doesn’t become too strong. Second, you’ll need to steep the coffee for at least 12 hours to achieve the desired strength and flavor. Lastly, make sure to strain the coffee through a cheesecloth or fine-mesh strainer to remove any sediment or grit.
With these tips in mind, making cold brew at home is easy and rewarding.
Is cold brew more expensive than regular coffee?
When it comes to cost comparison, cold brew coffee may seem more expensive than regular coffee at first glance. However, the economic impact of making cold brew at home can be significant.
While a cup of regular coffee may cost less per serving, cold brew can be made in larger batches and stored in the refrigerator for up to a week, providing a more cost-effective solution in the long run.
Additionally, making cold brew at home can be a fun and rewarding hobby, allowing you to experiment with different coffee beans and flavor profiles while also saving money.
So, while the initial cost of cold brew may be higher, the economic benefits of making it at home make it a worthwhile investment.
Can cold brew be made with decaf coffee beans?
I recently tried making cold brew coffee using decaf alternatives and was pleasantly surprised by the results. Although the caffeine content was significantly lower, the taste comparison was still enjoyable.
The process of making cold brew is the same regardless of whether you use regular or decaf beans, simply steeping them in room temperature water for 12-24 hours.
This alternative is great for those who want to enjoy the taste of cold brew without the caffeine jitters or those who are sensitive to caffeine. So, if you’re looking for a new way to enjoy coffee without the caffeine, give decaf cold brew a try.
Conclusion
Well, folks, it’s been a pleasure introducing you to the wonderful world of cold brew coffee. It’s a healthier, sweeter, and stronger alternative to regular coffee, and it’s incredibly easy to make at home.
Not only does it taste delicious, but it also has numerous health benefits that can help improve your overall well-being. So go ahead, give it a shot.
Your taste buds will thank you, and your body will too. Who knows, maybe cold brew will become your new best friend. As for me, I’ll be enjoying my cold brew with a splash of collagen protein powder, because who doesn’t love a little extra boost of health benefits?
Cheers to your new favorite cup of joe!
Arf, an author and an innovative enthusiast of coffee, coffee alternatives, and tea, plays a crucial role as a contributor to the esteemed Cappuccino Oracle platform. Renowned for his curiosity and passion for these captivating beverages, Arf has carved out a unique space for himself in the world of exploration and writing. He realized that coffee, coffee alternatives, and tea are not mere drinks to keep one awake, but universes of flavors and stories waiting to be explored.
Arf’s articles for Cappuccino Oracle blend meticulous research with personal experiences, providing readers with an in-depth understanding of various types of coffee, coffee alternatives, and tea, along with their unique characteristics, cultures, and histories. His honest reviews and engaging narratives guide readers on their own journeys, helping them discover their preferences and find their perfect brew.
As a coffee lover, I know that the freshness of coffee beans is the key to a perfect cup of Joe. That’s why proper storage is essential. In this article, I’ll share with you 5 tips for mastering coffee bean storage that will help you maintain the freshness of your coffee beans and ensure that every cup you brew is delicious and satisfying.
First, we’ll discuss why proper storage matters. Coffee beans are sensitive to heat, light, and air, which can cause them to lose their flavor and aroma. When coffee beans are exposed to these elements, they can become stale and tasteless.
Proper storage is essential to protect the beans from these harmful factors and maintain their freshness. With these 5 tips for coffee bean storage, you’ll be able to enjoy a consistently great-tasting cup of coffee every time.
Key Takeaways
- Proper storage is crucial for maintaining the freshness of coffee beans and preserving their taste and quality.
- Glass or ceramic storage containers that are tightly sealed and kept in a cool, dry, and dark place are preferred over metal tins to prevent interference with natural oils and flavors.
- The shelf life of coffee beans varies depending on their roast level, with lighter roasts having a shorter shelf life than darker roasts. Pre-roasted beans with a roast date ensure freshness.
- In addition to being a delicious beverage, coffee also provides various health benefits such as reducing the risk of cardiovascular disease and diabetes, aiding in weight loss, and providing antioxidants.
Why Proper Storage Matters
I know that proper storage is crucial for the freshest, best-tasting coffee, and it’s important to understand why.
One of the main reasons is the effects of moisture on coffee. When coffee beans or grounds are exposed to moisture, they can become stale and lose their flavor. This is why it’s important to store coffee in a cool, dry, and dark place away from sunlight. Fridges and freezers are not recommended for storing coffee as they can expose the coffee to moisture and affect its taste and quality.
Another important aspect of proper storage is buying small amounts of coffee. When coffee is exposed to air, it begins to oxidize and lose its freshness and flavor. Therefore, it’s better to buy small amounts of coffee and use it up quickly rather than buying in bulk and storing it for a long time.
Whole bean coffee lasts longer than pre-ground coffee, and ground coffee should be brewed within 15 minutes of grinding to maximize freshness. By following these tips for proper storage, you can ensure that your coffee stays fresh and flavorful for as long as possible.
Best Storage Practices
Glass or ceramic containers are preferable to metal tins when storing coffee beans to maintain their freshness and quality. These materials don’t have any negative effect on the taste and aroma of the coffee. Additionally, they provide a non-reactive environment that prevents any interference with the natural oils and flavors of the beans.
Glass or ceramic containers also help to keep moisture out, which can ruin the beans and lead to mold growth. To further prevent moisture, it’s important to keep the container tightly sealed and in a cool, dry, and dark place away from sunlight.
It’s also recommended to buy and store small amounts of coffee to ensure maximum freshness. This way, you won’t have to worry about the coffee going stale or losing its nutritional value.
By following these simple storage practices, you can enjoy a delicious cup of coffee that tastes just as good as the day it was roasted.
Additional Considerations
Finding the perfect spot to store your coffee beans can be a bit of a puzzle, but like any good mystery, it’s all about uncovering the clues.
In addition to the best storage practices mentioned earlier, there are a few more things to consider when it comes to keeping your coffee fresh and flavorful.
First, it’s important to consider the roasting techniques used for your coffee beans. Lightly roasted beans tend to have a shorter shelf life than darker roasts, so it’s important to use them up quickly.
Additionally, if you’re roasting your own beans at home, it’s important to let them rest for a few days before brewing to allow the gases to escape and the flavors to fully develop. And if you’re buying pre-roasted beans, look for ones with a roast date on the bag to ensure maximum freshness.
Finally, don’t forget about the health benefits of coffee! In addition to its delicious taste, coffee has been shown to have numerous health benefits, including reducing the risk of cardiovascular disease and diabetes, aiding in weight loss, and providing antioxidants.
So, by taking care to properly store your coffee beans, you can not only enjoy a great cup of coffee, but also reap the many health benefits it has to offer.
Frequently Asked Questions
Can coffee be stored in the fridge or freezer to extend its shelf life?
Storing coffee in the fridge or freezer may seem like a good idea to extend its shelf life, but it can actually have a negative impact on the flavor. Both environments expose coffee to moisture, affecting its taste and quality.
It’s better to store coffee in a cool, dry, and dark place away from sunlight, such as a pantry or cupboard. To tell if coffee has gone bad, you can perform a smell or taste test. If it has a sour or rancid smell, or tastes off, it’s time to get rid of it.
Proper storage is crucial for maintaining the freshness and nutritional value of coffee, and buying and storing small amounts can help.
Is it better to buy whole bean or pre-ground coffee for storage purposes?
After investigating the truth of the theory, it’s better to buy whole bean coffee for storage purposes.
This is because whole bean coffee lasts longer than pre-ground coffee. Additionally, grinding methods can affect the freshness of the coffee.
Grinding the coffee just before brewing it can enhance its flavor and aroma. Moreover, the type of coffee bean variety can also impact the shelf life of the coffee.
Arabica beans are higher quality and have a longer shelf life than Robusta beans. Therefore, it’s recommended to buy whole bean Arabica coffee and grind it just before brewing for the freshest and best-tasting coffee.
How long can you store coffee before it starts to lose its freshness?
Proper storage techniques are crucial for maximizing coffee freshness. Whole bean coffee can last up to two weeks if stored in a cool, dry, and dark place away from sunlight. Ground coffee, on the other hand, should be brewed within 15 minutes of grinding to ensure maximum freshness.
Glass or ceramic containers are preferable to metal tins as they do not affect taste. It’s recommended to buy and store small amounts of coffee to maintain freshness and quality. Roasting at home is also an option for maximum freshness but can be impractical.
Ultimately, the main reason to worry about storage is freshness, as proper storage techniques can counteract loss of freshness and nutritional value.
Are there any specific types of containers that are best for storing coffee?
When it comes to storing coffee, the type of container used can make a big difference.
Mason jars are a popular choice, but they may not be the best option. Vacuum sealed bags are a great choice for keeping coffee fresh and preventing exposure to air and moisture.
Opaque containers are also preferred over clear containers, as they prevent sunlight from affecting the coffee’s flavor.
Overall, it’s important to choose a container that is airtight and keeps the coffee in a cool, dry place. As someone who appreciates a good cup of coffee, I know that choosing the right container can make all the difference in the taste and freshness of my daily brew.
Does the type of roast affect how long coffee can be stored?
Roast levels have a significant impact on how long coffee can be stored. The aging process of coffee beans begins as soon as they’re roasted and continues over time.
Lighter roasts tend to have a shorter shelf life as they have a higher acidity level and contain more moisture. Darker roasts, on the other hand, have a longer shelf life as they have a lower acidity level and less moisture content.
However, it’s important to note that regardless of the roast level, coffee beans should be consumed within a few weeks of roasting to ensure the freshest and best-tasting coffee. Proper storage can also help extend the shelf life of coffee beans.
Conclusion
In conclusion, proper coffee bean storage is crucial for maintaining freshness and flavor. The five tips outlined above provide a comprehensive guide to mastering the art of coffee storage. By investing in airtight containers, storing beans away from light and moisture, and monitoring the roast date, coffee lovers can enjoy a consistently satisfying cup of Joe.
Remember, the key to fresher coffee is attention to detail. Don’t overlook the importance of proper storage, and don’t hesitate to experiment with different storage methods to find what works best for you. With these tips in mind, you’ll be well on your way to brewing the perfect cup of coffee every time.
So go forth and enjoy the rich, robust flavors of freshly stored coffee beans!
Arf, an author and an innovative enthusiast of coffee, coffee alternatives, and tea, plays a crucial role as a contributor to the esteemed Cappuccino Oracle platform. Renowned for his curiosity and passion for these captivating beverages, Arf has carved out a unique space for himself in the world of exploration and writing. He realized that coffee, coffee alternatives, and tea are not mere drinks to keep one awake, but universes of flavors and stories waiting to be explored.
Arf’s articles for Cappuccino Oracle blend meticulous research with personal experiences, providing readers with an in-depth understanding of various types of coffee, coffee alternatives, and tea, along with their unique characteristics, cultures, and histories. His honest reviews and engaging narratives guide readers on their own journeys, helping them discover their preferences and find their perfect brew.

As someone who relies on coffee to power through the day, I know the importance of understanding the caffeine content in my cup. Not all coffees are created equal, and the amount of caffeine can vary greatly depending on the type of coffee, brewing method, and serving size.
That’s why I’ve put together the ultimate guide to caffeine content in coffee, to help you find the perfect cup of coffee for your caffeine needs.
In this article, we’ll explore the different types of coffee and how they impact caffeine content, from bold and rich espresso shots to smooth and creamy lattes.
We’ll also dive into the various factors that can affect caffeine levels, including the roast level, brewing time, and water temperature.
And if you’re curious about the benefits of caffeine or just want to learn some fun coffee facts, we’ve got you covered there too.
So let’s get started and explore the world of caffeine content in coffee.
Key Takeaways
- Different types of coffee have varying amounts of caffeine, with drip coffee having the highest amount and specialty coffees having less due to added milk.
- Factors such as serving size, brewing method, water temperature, and roast degree also affect caffeine levels in coffee.
- Cold brew coffee typically has less caffeine than hot brewed coffee, but it could still be stronger due to smaller serving sizes.
- Drinking dark roast coffee regularly may reduce the risk of developing diabetes, according to Harvard researchers, and caffeinated beverages can lead to better brain function and increased exercise.
Types of Coffee
Oh great, just what I needed – more options to choose from when it comes to types of coffee and their varying caffeine levels. As someone who relies on caffeine to start their day, it’s important to know which types of coffee have the most caffeine.
Caffeine sources play a significant role in determining caffeine levels. Robusta coffee beans contain about twice as much caffeine as Arabica beans. This is because Robusta plants are easier to grow and have a higher yield, making them a more affordable option for coffee producers.
Brewing techniques also affect the caffeine content in coffee. Espresso has the most caffeine per ounce because of the way it’s brewed – hot water is forced through finely ground coffee at high pressure, extracting more caffeine. Drip coffee, on the other hand, has a lower caffeine content because the water passes through coarser grounds and is not under pressure. Cold brew coffee has less caffeine than hot brewed coffee because it’s brewed with cold water, which extracts caffeine more slowly. However, people often drink cold brew in smaller amounts, so the caffeine concentration per serving may still be higher.
Knowing the caffeine content of different types of coffee and brewing techniques can help you make a more informed choice when it comes to your daily cup of joe.
Factors Affecting Caffeine Levels
I’ve learned that the amount of caffeine in my coffee can vary greatly depending on factors such as the type of bean, roast level, and brewing method. Brewing methods play a crucial role in determining caffeine content, with espresso having the highest amount of caffeine per ounce. This is because the coffee is extracted under high pressure, resulting in a concentrated shot.
On the other hand, drip coffee has a higher caffeine content per serving due to its larger serving size. Serving sizes also affect caffeine levels, as a larger serving size means more caffeine intake. For example, a 16 oz cold brew can have up to 200 mg of caffeine, which is equivalent to an 8 oz serving of drip coffee.
It’s important to keep these factors in mind when ordering coffee, as the caffeine content can vary greatly even within the same type of coffee. Understanding these factors can help me make better choices when it comes to my caffeine intake.
Benefits and Curiosities
One thing that I find interesting is that drinking dark roast coffee regularly may reduce the risk of developing diabetes, according to Harvard researchers. This is because dark roast coffee contains a higher amount of compounds that protect the cells in our body from damage.
In addition to reducing the risk of diabetes, coffee has other health benefits such as reducing the risk of liver and colorectal cancer, and improving cognitive function.
Fun facts about coffee include that Arabica cherries must be handpicked when ripe, making it a labor-intensive process. This is why Arabica coffee is more expensive than Robusta coffee, which can be harvested mechanically.
Additionally, people in the US prefer drip coffee, while in Europe and other countries, espresso-based drinks are more popular. These differences in coffee culture highlight the diverse ways in which people enjoy their caffeine fix.
Overall, coffee is not just a delicious beverage, but it also has numerous health benefits and cultural significance.
Frequently Asked Questions
Is it possible to completely remove caffeine from coffee?
Completely removing caffeine from coffee is not feasible as it is a natural component of the bean. Decaf coffee goes through a process that removes most of the caffeine but can affect taste and availability.
Can the caffeine content in coffee vary depending on the time of day it is consumed?
The caffeine content in coffee can vary depending on the time of day it is consumed due to the Circadian rhythm impact on our body’s absorption and processing of caffeine. Additionally, brewing method effects can also impact caffeine levels in coffee.
How does the caffeine content in instant coffee compare to other types of coffee?
Wow, instant coffee is like a shot of adrenaline! Compared to brewed coffee, instant coffee has significantly higher caffeine content. The impact of roast on caffeine levels is also important to consider.
Are there any health risks associated with consuming high amounts of caffeine in coffee?
Consuming high amounts of caffeine in coffee can lead to long term effects such as increased heart rate, insomnia, and anxiety. Alternative options include decaf coffee, herbal tea, and reducing caffeine intake gradually.
How does the caffeine content in coffee compare to other popular caffeinated beverages, such as tea or soda?
Comparing coffee to tea and energy drinks, coffee typically has higher caffeine content per serving. A standard cup of coffee has 95-200mg of caffeine, while tea has 20-80mg, and energy drinks have 70-200mg per can.
Arf, an author and an innovative enthusiast of coffee, coffee alternatives, and tea, plays a crucial role as a contributor to the esteemed Cappuccino Oracle platform. Renowned for his curiosity and passion for these captivating beverages, Arf has carved out a unique space for himself in the world of exploration and writing. He realized that coffee, coffee alternatives, and tea are not mere drinks to keep one awake, but universes of flavors and stories waiting to be explored.
Arf’s articles for Cappuccino Oracle blend meticulous research with personal experiences, providing readers with an in-depth understanding of various types of coffee, coffee alternatives, and tea, along with their unique characteristics, cultures, and histories. His honest reviews and engaging narratives guide readers on their own journeys, helping them discover their preferences and find their perfect brew.


Brewing on the Range: How Did Cowboys Make Coffee

Top Best Coffee Recipes for Home Baristas

Discover Origin of Famous Italian Coffee Beans

Decaf Tea With Ginger and Turmeric

Turmeric and Cocoa Powder Ginger Tea
Your Ultimate Guide to Ryze Mushroom Coffee: 9 Things to Know

Unveiling the Puzzle: Top 10 Alternatives to Ryze Mushroom Coffee Revealed

Unveiling the Mysteries of Ryze Mushroom Coffee: Top 10 Questions Answered

9 Essential Steps to Perfect Rooibos Tea: A Brewing Guide

How Do Starbucks’ Seasonal Specialties Appeal to Customers?

Discover the Power of KOS Mushroom Coffee

Top 10 Rated Mushroom Coffee Brands for a Boost

What Makes Caffeine-Free Mushroom Coffee Unique?

Rooibos Tea: A Guide to Safe Breastfeeding Practices

What Mushroom Can I Use as a Coffee Replacement?

-
Mushroom Coffee3 weeks ago
Your Ultimate Guide to Ryze Mushroom Coffee: 9 Things to Know
-
Mushroom Coffee3 weeks ago
Unveiling the Puzzle: Top 10 Alternatives to Ryze Mushroom Coffee Revealed
-
Mushroom Coffee3 weeks ago
Unveiling the Mysteries of Ryze Mushroom Coffee: Top 10 Questions Answered
-
Rooibos3 weeks ago
9 Essential Steps to Perfect Rooibos Tea: A Brewing Guide
-
Coffee Basics4 weeks ago
How Do Starbucks’ Seasonal Specialties Appeal to Customers?
-
 Mushroom Coffee3 weeks ago
3 Best Techniques to Brew Ryze Mushroom Coffee
-
 Turmeric Tea2 weeks ago
Turmeric Ginger, Cinnamon, Lemon, Honey Tea Benefits
-
 Mushroom Coffee3 weeks ago
Is Ryze Mushroom Coffee’s Caffeine Content More like Decaf or Regular Coffee?
