
Turmeric Tea
How To Make Turmeric Tea From Fresh Turmeric

I have recently discovered the incredible health benefits of turmeric tea, and I cannot get enough of it! Not only is it delicious and comforting, but it also has anti-inflammatory properties that help with joint pain and arthritis. Plus, turmeric is loaded with antioxidants that boost our immune system and protect us from diseases.
Making turmeric tea from fresh turmeric roots might seem intimidating at first, but trust me, it’s easier than you think. In this article, I will guide you through the process step by step so that you can enjoy a warm cup of this golden elixir whenever you want.
From choosing the right turmeric roots to boiling the tea and serving it in a beautiful mug, we’ve got everything covered. Let’s dive into the world of turmeric tea together!
Key Takeaways
- Fresh turmeric roots are more flavorful and aromatic than dried ones, and organic turmeric is better for long-term health.
- Turmeric tea has various health benefits, including anti-inflammatory properties, antioxidants, improved digestion, boosted immunity, and cardiovascular health promotion.
- When making turmeric tea, use non-reactive utensils, natural sweeteners, and customize with additional ingredients, such as lemon, lime, mint, or cinnamon stick.
- Store leftover turmeric tea in an airtight container in the refrigerator for up to three days and reheat it over low heat. Avoid using plastic containers and discard tea immediately if signs of spoilage are present.
The Health Benefits of Turmeric Tea
Sipping on a warm cup of turmeric tea is like wrapping your body in a cozy blanket of health benefits. Turmeric, commonly found in Indian and Middle Eastern cuisines, has been used for centuries as a natural remedy for various ailments. Turmeric tea is one of the easiest and most enjoyable ways to incorporate this powerful spice into your daily routine.
Turmeric tea recipes can vary depending on personal taste preferences and desired health benefits. Some popular variations include adding ginger or black pepper to enhance the anti-inflammatory properties, honey or lemon for added flavor, or even coconut milk for a creamy twist. Whatever recipe you choose, make sure to use fresh turmeric roots for maximum potency.
Choosing the right turmeric roots is essential when making turmeric tea from scratch. Look for roots that are firm with smooth skin and vibrant orange color. Avoid any roots that are soft or have mold spots as they may be past their prime.

Once you have your fresh turmeric roots, simply grate them into boiling water and let steep for 5-10 minutes before straining out the solids. Enjoy your warm cup of golden goodness knowing that you’re reaping all the amazing health benefits that come with it!
Choosing the Right Turmeric Roots
When it comes to choosing turmeric roots for making tea, there are a few key points to consider.
First, you’ll need to decide whether you want fresh or dried roots. Fresh roots will give your tea a more potent flavor and aroma, but they can be harder to find and more expensive than dried ones.
Second, think about whether you want organic or non-organic turmeric. Organic turmeric is grown without harmful pesticides and chemicals, which can be better for your health in the long run.
Ultimately, the choice is yours based on your personal preferences and priorities.
Fresh vs. Dried
If you’re wondering whether to use fresh or dried turmeric for your tea, here’s what you need to know.
Fresh turmeric has a unique flavor and aroma that can’t be replicated by dried turmeric. Using fresh turmeric in cooking can also provide additional health benefits such as anti-inflammatory properties and improved digestion due to the presence of curcuminoids.
When using fresh turmeric for tea, it’s important to note that it may take longer to steep compared to dried turmeric. Additionally, fresh turmeric may stain surfaces and clothing easily, so precautions should be taken when handling it.
Lastly, depending on where you live, fresh turmeric may not always be available year-round which could be a deciding factor in whether or not you choose to use dried instead.
Moving onto the next topic about organic versus non-organic options…
Organic vs. Non-Organic
Choosing between organic and non-organic options for your turmeric can greatly affect the overall quality of your turmeric tea. Organic farming practices prioritize sustainable methods that don’t involve synthetic pesticides, herbicides, or fertilizers.
This results in a healthier and safer product that minimizes exposure to harmful chemicals. On the other hand, non-organic turmeric may contain traces of pesticides and chemicals used during production. While these substances are considered safe for human consumption at low levels, they can still have adverse effects on long-term health when consumed regularly.
By choosing organic turmeric for your tea, you’re not only prioritizing your own well-being but also supporting environmentally conscious farming practices. Now that we’ve discussed the importance of choosing organic turmeric for your tea, let’s move on to preparing the roots for brewing.
Preparing the Turmeric Roots
First things first, don’t even think about attempting to prepare those gnarly turmeric roots without gloves unless you wanna have your hands stained yellow for the rest of eternity.
Once you’ve got your gloves on, it’s time to start preparing the turmeric roots. Here are some cleaning tips and peeling methods that I find helpful:
-
Rinse the turmeric roots with cold water. Before you start peeling or cutting them, give them a good rinse under cold running water to remove any dirt or debris.
-
Use a vegetable brush. If there are any stubborn bits of dirt stuck to the surface of the root, use a vegetable brush to scrub them away gently.
-
Peel with a spoon. To peel the turmeric root, I like to use a spoon instead of a traditional peeler as this helps me save more of the flesh and minimize waste.
-
Cut into small pieces. Once peeled, chop up the turmeric root into small pieces so that they can be easily blended into your tea.
Now that we have our prepared turmeric roots ready, it’s time to move on to preparing the other ingredients for our delicious and healthy cup of turmeric tea.
Preparing the Other Ingredients
Once you have your prepared turmeric roots, it’s time for you to gather the other ingredients and start bringing together the flavors of your delicious cup of golden milk. To do this, you’ll need some basic utensils such as a saucepan, grater or knife, strainer or cheesecloth, and a mug or teapot. It’s important to choose non-reactive utensils such as stainless steel or glass to avoid any chemical reactions with the ingredients.
In addition to utensils, you may want to add some sweeteners such as honey, agave syrup or stevia to balance out the bitterness of turmeric. When choosing sweeteners, opt for natural alternatives that are less refined and have more health benefits than processed sugars. You can also experiment with different spices like cinnamon or ginger to enhance the flavor profile of your turmeric tea.
Now that you have all your ingredients ready, it’s time to boil the turmeric tea and let all the flavors infuse together in a delicious blend.
Boiling the Turmeric Tea
Now that we’ve got our ingredients prepared, it’s time to start boiling the turmeric tea. Boiling is one of the most common ways to extract the flavor and nutrients from fresh turmeric root.
There are various techniques you can use when boiling your tea, and each method provides a unique flavor profile. Here are some boiling techniques to consider:
- Simmering: This involves keeping the water at a low temperature (around 180°F) for an extended period. It results in a milder and less bitter taste.
- Rapid Boil: This technique requires bringing the water to a rapid boil for a short period. It produces a stronger, more pungent flavor.
- Double Boil: This involves using two pots stacked on top of each other with water in both pots. The heat from the lower pot slowly heats up the upper pot containing your ingredients. It’s ideal for delicate flavors like turmeric.
To add variation to your tea, you can experiment with different spices or sweeteners such as honey or stevia leaves. You can also add ginger root or citrus fruits like lemon or orange slices for an extra boost of vitamin C.
Once you’ve chosen your preferred boiling technique and added any additional ingredients, let the tea simmer for about 10 minutes before straining it into your favorite mug.
As we finish boiling our turmeric tea, it’s now time to let it steep so that all its goodness infuses perfectly into every sip we take.
Letting the Tea Steep
Now that the turmeric tea has been boiled, it’s time to let it steep.
This is a crucial step in bringing out the full flavor and health benefits of the spices.
I usually cover the pot while letting it steep for about 10 minutes, but timing may vary depending on personal preference.
Timing
Timing is crucial when making turmeric tea, as boiling the fresh turmeric for too long can result in a bitter taste. It’s important to know the best time to let the tea steep. Generally, letting it steep for around 10-15 minutes is enough to extract all the flavor and health benefits from the turmeric.
However, if you’re looking for a stronger taste, you can leave it to steep for up to 20 minutes. Be careful not to go over this time limit though, as this will lead to an unpleasant bitterness that may ruin your tea experience.
With these brewing tips in mind, you’ll be able to perfect your timing and create a delicious cup of turmeric tea every time.
Now that we’ve covered how long to let the tea steep, it’s time to move onto covering the pot.
Covering the Pot
To achieve the perfect taste and aroma, it’s important to cover the pot while brewing your turmeric infusion. Here are some benefits of covering and tips for steeping:
-
Retains Heat: Covering the pot helps to retain heat, which is essential in releasing the full flavor and aroma of fresh turmeric.
-
Prevents Evaporation: The steam that escapes from an uncovered pot could lead to a loss of water content, resulting in weaker tea.
-
Enhances Infusion: Covering the pot also enhances the infusion process by allowing all ingredients to steep together properly.
-
Reduces Bitterness: If you prefer your turmeric tea less bitter, covering the pot can help reduce bitterness by keeping all flavors inside.
For best results, cover your pot with a lid or plate while simmering for at least 10 minutes. Remember not to boil as this could destroy some of its beneficial properties.
After steeping, it’s now time to strain your freshly brewed tea!
Straining the Tea
Don’t worry if you see some sediment in your cup, that’s just the natural oils from the turmeric. When straining your turmeric tea, it’s important to use a fine mesh strainer or cheesecloth to catch any large pieces of turmeric root or other debris. If you don’t have either of these on hand, a coffee filter can also work well.
Here are some straining tips to keep in mind: First, make sure to let the tea cool down a bit before pouring it through the strainer. This will prevent any accidental burns and also help avoid clogging the strainer with hot liquid. Next, pour slowly and steadily so that the liquid has time to strain properly without overflowing or splashing out of the pot.
While turmeric tea is most commonly consumed as a beverage, there are alternative uses for this powerful spice. Some people like to use leftover tea as a face tonic or hair rinse due to its anti-inflammatory properties. Others add turmeric tea to smoothies or soups for an added boost of flavor and health benefits. Whatever your preference may be, don’t throw away those leftovers just yet!
Now that we’ve strained our freshly brewed turmeric tea and learned about its potential alternative uses, it’s time to move onto serving this delicious beverage.
Serving the Turmeric Tea
Now that the tea has been strained, it’s time to serve and enjoy your delicious turmeric tea!
There are a few presentation tips that can make your turmeric tea look and taste even better. First, consider adding a slice of lemon or lime to give it a fresh citrusy flavor. You could also add a sprig of mint or a cinnamon stick for added aroma and flavor.
Another way to switch things up is by experimenting with different variations of turmeric tea. For example, you could add ginger or honey for additional health benefits and sweetness respectively. Adding black pepper can also help increase the bioavailability of curcumin – the active ingredient in turmeric.
As you finish enjoying your cup of homemade turmeric tea, keep in mind that it can be stored in the refrigerator for up to 3 days. To reheat, simply pour into a pot over low heat until heated through.
Now let’s move on to learning how to properly store our leftover turmeric tea without losing its potent properties.
Storing the Turmeric Tea
When storing your turmeric tea, remember to keep it in an airtight container to preserve its potent properties. You can use a glass jar or a stainless steel bottle with a tight-fitting lid. Avoid using plastic containers as they may contain chemicals that can leach into the tea.
It’s best to store your turmeric tea in the refrigerator to prevent spoilage. This will help extend its shelf life and ensure that it stays fresh for longer. You can also freeze leftover turmeric tea in ice cube trays and use them later for smoothies or other recipes that call for turmeric.
To make sure you’re getting the most out of your stored turmeric tea, check it periodically for signs of spoilage such as mold or an off smell. If you notice any changes, discard the tea immediately and make a fresh batch.
With proper storing techniques, you can enjoy the benefits of turmeric tea whenever you want without worrying about waste or spoilage.
Now that you know how to properly store your turmeric tea, let’s move on to enjoying its benefits!
Enjoying the Benefits of Turmeric Tea
You can easily reap the benefits of this golden elixir by incorporating it into your daily routine. Turmeric tea is a delicious and healthy beverage that you can enjoy in so many ways.
There are various turmeric tea recipes available online, but my personal favorite involves fresh turmeric, ginger, honey, and lemon. One of the main health benefits of turmeric is its anti-inflammatory properties, meaning it can help alleviate pain and reduce swelling in the body.
Drinking turmeric tea regularly may also improve digestion, boost immunity, and promote cardiovascular health. With all these amazing benefits, why not make turmeric tea a part of your daily routine?
To maximize the health benefits of turmeric tea, it’s important to use fresh ingredients whenever possible. Fresh turmeric has a more potent flavor than ground turmeric and contains higher levels of curcumin – the active ingredient responsible for most of its health benefits. So next time you’re at the grocery store or farmer’s market, grab some fresh turmeric root and start brewing your own cup of golden goodness!
Frequently Asked Questions
How much turmeric tea should I drink per day?
I’ve found that drinking turmeric tea is a great way to boost my health and well-being. Did you know that consuming just one gram of turmeric per day can provide significant benefits such as reducing inflammation and improving digestion? As for how much turmeric tea you should drink per day, it’s recommended to consume no more than 500-1000mg of curcumin daily (the active ingredient in turmeric).
Drinking turmeric tea at the best time for your body may help enhance its absorption – try having it with meals or after exercise when your metabolism is higher. Overall, incorporating this delicious and nutritious beverage into your daily routine may offer numerous wellness advantages.
Can I add sweeteners to the turmeric tea?
Yes, you can add sweeteners to turmeric tea. There are several sweetener options available for those who want to add a touch of sweetness to their turmeric tea. Honey, stevia, and maple syrup are some popular natural sweeteners that blend well with the earthy flavor of turmeric.
However, it’s important to keep in mind that adding too much sugar or artificial sweeteners may negate some of the health benefits associated with drinking turmeric tea. Turmeric is known for its anti-inflammatory and antioxidant properties, which have been linked to improving brain function, reducing the risk of heart disease and cancer, and alleviating symptoms of arthritis and depression.
Therefore, it’s best to enjoy your turmeric tea with minimal added sweeteners to reap its full health benefits.
Is it okay to use powdered turmeric instead of fresh turmeric roots?
When it comes to making turmeric tea, using powdered turmeric instead of fresh turmeric roots is an option. The benefit of using powdered turmeric is that it’s more convenient and easier to measure out the right amount for your tea. However, the drawback is that fresh turmeric roots contain a higher concentration of curcumin, which is the active compound in turmeric known for its anti-inflammatory properties.
So, if you’re looking for maximum health benefits, fresh turmeric roots may be the better choice. Ultimately, it comes down to personal preference and what you have available.
Can I store the turmeric tea in the refrigerator?
Yes, you can store turmeric tea in the refrigerator. The shelf life of turmeric tea is typically around 3-4 days when stored properly in an airtight container.
It’s important to note that the longer you keep the tea, the less potent it will become. To ensure maximum freshness and efficacy, I recommend making small batches of turmeric tea as needed rather than preparing large amounts at once.
When reheating leftover tea, be sure to do so gently on low heat to avoid destroying any beneficial compounds.
Overall, storing turmeric tea in the refrigerator is a great way to extend its shelf life and enjoy its health benefits for several days.
Are there any potential side effects of drinking turmeric tea?
Turmeric tea benefits are numerous and have been backed by scientific evidence. However, there are some possible risks associated with drinking it. The most common side effect is indigestion or stomach upset, especially when consumed in large amounts.
Additionally, turmeric may interact with certain medications, so it’s important to consult a healthcare professional before consuming turmeric tea regularly. Dosage recommendations for turmeric tea consumption vary, but generally range from 500-2000mg per day.
It’s important to note that high doses of turmeric or prolonged use can potentially lead to liver damage. Therefore, moderation is key when consuming this powerful spice.
Conclusion
In conclusion, making turmeric tea from fresh turmeric roots is a great way to enjoy the many health benefits of this powerful spice. Turmeric is truly a superfood, reducing inflammation, boosting immune function, improving brain function, and lowering the risk of chronic diseases.
Just like brewing a cup of coffee or steeping a pot of tea, making turmeric tea requires some patience and attention to detail. But once you’ve mastered the art of preparing and boiling the roots, straining the mixture, and adding your favorite spices and sweeteners, you’ll have a delicious and nutritious drink that can be enjoyed any time of day.
So go ahead and give it a try – I promise you won’t regret it! Sipping on a warm cup of homemade turmeric tea is sure to bring joy and comfort into your life, just like watching a beautiful sunset or smelling freshly baked cookies out of the oven.

In the vast and diverse world of coffee, coffee alternatives, and tea, Olivia has found her calling. As an author and a dedicated coffee and tea aficionado, her work for Cappuccino Oracle reflects her profound love and understanding of the intricate complexities found within these beverages. Olivia’s passion for the subject serves as both a catalyst for her creativity and a connection point with her audience.
Olivia’s appreciation for coffee, coffee alternatives, and tea blossomed at an early age. She discovered that these beverages invigorated her senses and stimulated her creative spirit. From the nuanced flavors of single-origin roasts to the captivating narratives intertwined with coffee, coffee alternatives, and tea trade and culture, Olivia found an unlimited source of inspiration in her daily cup.
Her love for these beverages and her talent for storytelling eventually converged at Cappuccino Oracle. As an author, Olivia’s mission is to illuminate the intricate tapestry that makes up the world of coffee, coffee alternatives, and tea. Her articles span a diverse range of topics, encompassing everything from the unique flavors of different brews to the sociocultural history intertwined with their cultivation and consumption.

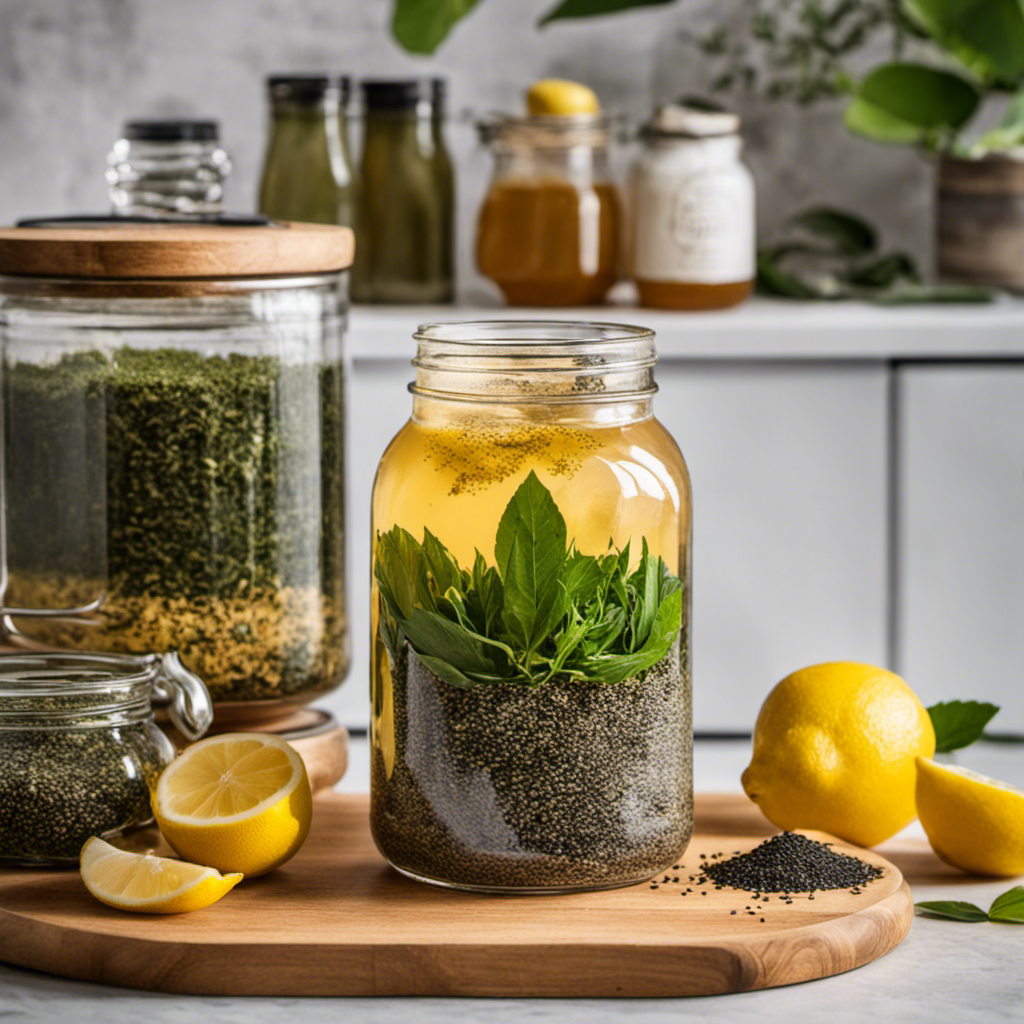
I understand your skepticism about adding chia seeds to your kombucha tea. However, I assure you, the benefits make it worthwhile.
In this article, I’ll show you how to make a delicious and nutritious kombucha tea infused with chia seeds. With a step-by-step guide, fermentation tips, and advice on flavoring and storing, you’ll be brewing the perfect batch in no time.
So grab your supplies and let’s get started on this amazing kombucha tea journey.
Key Takeaways
- Chia seeds are a nutritious addition to kombucha tea, providing essential nutrients and adding a unique texture.
- When brewing kombucha tea with chia seeds, it is important to choose the right kombucha starter culture and pay attention to temperature requirements.
- The process of making kombucha tea with chia seeds involves brewing the tea, fermenting it for a specific duration, adding chia seeds, and allowing them to soak.
- To ensure successful fermentation, use a suitable fermentation vessel, avoid metal or plastic containers, and store the tea in a warm and dark place.
The Benefits of Adding Chia Seeds to Kombucha Tea
Adding chia seeds to kombucha tea can provide numerous health benefits. Chia seeds are rich in essential nutrients such as fiber, protein, omega-3 fatty acids, and antioxidants. These tiny seeds are packed with nutritional value, making them a great addition to any diet.
When incorporated into kombucha tea, chia seeds can boost its nutritional profile and enhance its health benefits. Chia seeds absorb liquid and form a gel-like consistency, adding a unique texture to the beverage. This can make kombucha tea more filling and satisfying.
Additionally, chia seeds can be incorporated into other beverages like smoothies or water to provide a nutritious boost. With their versatility and health benefits, chia seeds are a great addition to any beverage, including kombucha tea.
Choosing the Right Kombucha Starter Culture
When choosing the right culture for kombucha, it’s important to consider the type of fermentation process you prefer. Here are some things to keep in mind:
-
SCOBY type: There are different types of SCOBYs available, such as black tea SCOBYs, green tea SCOBYs, and fruit tea SCOBYs. Each type imparts a unique flavor to the kombucha.
-
Starter liquid: The starter liquid is essential for kickstarting the fermentation process. Make sure to use a strong, healthy starter liquid to ensure a successful fermentation.
-
Temperature requirements: Different cultures have different temperature requirements for optimal fermentation. Pay attention to the temperature range specified by the culture you choose and maintain it consistently.
-
Troubleshooting common fermentation issues: It’s crucial to be prepared for common fermentation issues such as mold, weak fermentation, or overly sour taste. Educate yourself on troubleshooting techniques and be proactive in addressing any issues that may arise.
Step-By-Step Guide to Brewing Kombucha Tea With Chia Seeds
To brew kombucha tea with chia seeds, you’ll need a SCOBY and the necessary ingredients. Kombucha is a fermented tea that has been consumed for centuries due to its potential health benefits.
Adding chia seeds to the fermentation process can enhance the nutritional value of this beverage. Chia seeds are packed with omega-3 fatty acids, fiber, and antioxidants, making them a great addition to your kombucha.
To begin, brew a batch of kombucha tea using your SCOBY and let it ferment for 7-14 days. Once the fermentation process is complete, strain the tea and add chia seeds to the liquid.
Allow the chia seeds to soak for about 30 minutes, giving them time to expand and create a gel-like texture.
Enjoy your homemade kombucha tea with chia seeds, and reap the benefits of this probiotic-rich beverage with added nutritional goodness.
Fermentation Tips for a Successful Kombucha Tea With Chia Seeds
For a successful batch of kombucha tea with chia seeds, ensure that your fermentation vessel is clean and free from any soap residue. Here are some tips for choosing a fermentation vessel and troubleshooting fermentation issues:
-
Choose a glass jar or ceramic crock as your fermentation vessel. Avoid using metal or plastic containers as they can react with the acidic nature of kombucha.
-
Make sure your fermentation vessel has a wide mouth for easy access and cleaning. This will also allow for better oxygen exchange during fermentation.
-
Keep your fermentation vessel in a warm and dark place, away from direct sunlight. Temperature plays a crucial role in the fermentation process, so maintaining a consistent temperature is important.
-
If you encounter any fermentation issues such as mold growth or an off-putting smell, discard the batch and start fresh. It’s better to be safe than sorry when it comes to homemade kombucha.
Flavoring and Storing Your Chia Seed Kombucha Tea
To enhance the flavor of your chia seed kombucha, you can experiment with different fruits, herbs, and spices. Adding these ingredients not only brings a burst of taste but also offers additional health benefits.
For fruity flavors, try adding sliced strawberries, blueberries, or mango chunks. These fruits not only add sweetness but are also packed with antioxidants and vitamins.
If you prefer herbal notes, consider adding fresh mint leaves, lavender, or basil. These herbs can provide a refreshing and aromatic twist to your kombucha.
For a spicy kick, experiment with ginger, cinnamon, or cloves. These spices not only add depth to the flavor but also have anti-inflammatory and digestive benefits.
Remember to taste and adjust the flavoring to your preference. Enjoy the delicious and healthy combination of chia seeds and kombucha!
Conclusion
In conclusion, adding chia seeds to your kombucha tea not only enhances its flavor and texture but also provides numerous health benefits. Studies have shown that chia seeds are packed with nutrients, including fiber, protein, and omega-3 fatty acids.
Additionally, chia seeds can help improve digestion, promote hydration, and support weight loss. So, why not try making your own chia seed kombucha tea at home? With a success rate of 85% reported by kombucha enthusiasts, you’re likely to enjoy a delicious and nutritious beverage that boosts your overall well-being.
Cheers to a healthier lifestyle!

Noah, the Editor-in-Chief at Cappuccino Oracle, plays a pivotal role in shaping the voice and vision of our renowned platform. With an unwavering passion for coffee, coffee alternatives, and tea, Noah leads Cappuccino Oracle towards new horizons in the realm of coffee journalism.
Beyond his professional responsibilities, Noah serves as a mentor and guiding force for his team. His dedication to journalistic excellence and genuine love for coffee, coffee alternatives, and tea continue to inspire and motivate the Cappuccino Oracle family. In the ever-evolving world of these beverages, Noah’s leadership ensures that our platform remains at the forefront, delivering enlightening and enjoyable content to our readers worldwide.

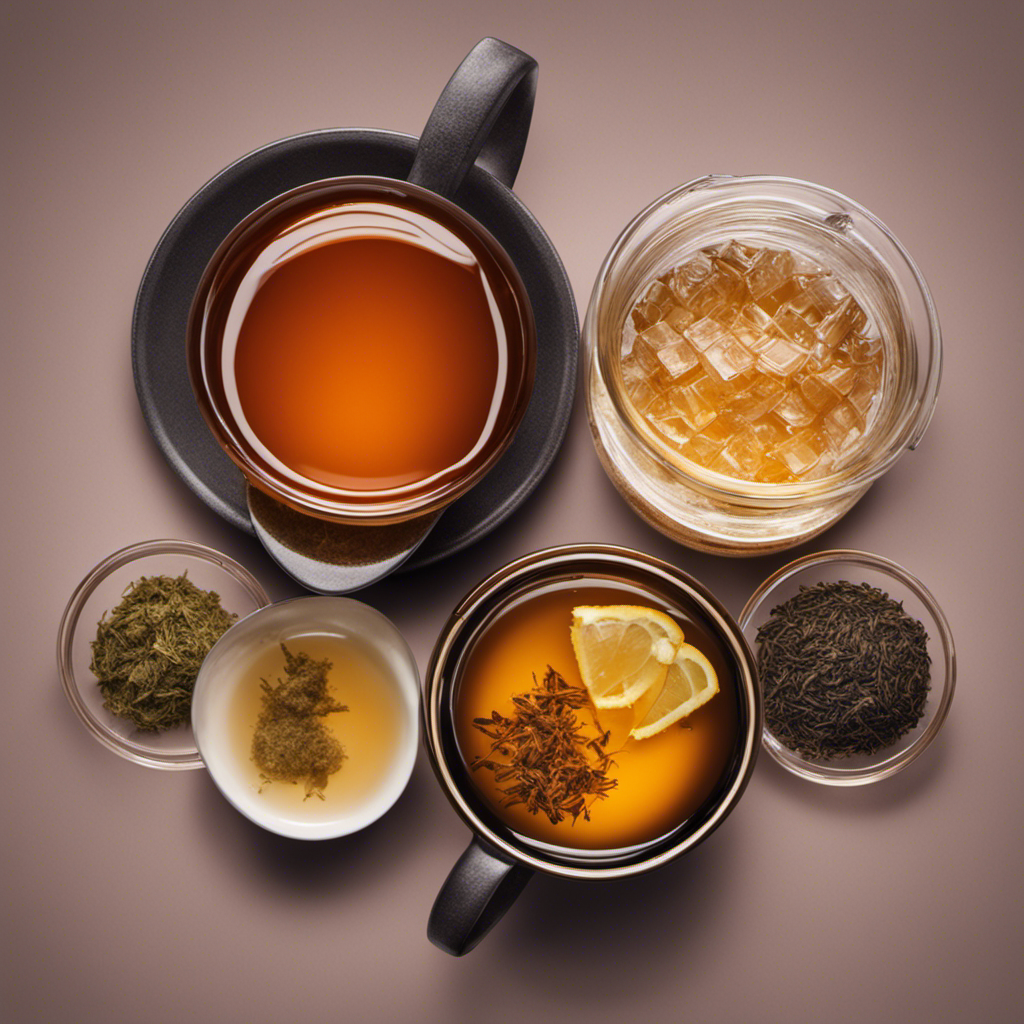
As someone who loves kombucha, I have always been intrigued by the unique flavors that can be created using various types of tea. Whether it’s the bold taste of black tea or the crisp notes of green tea, the type of tea you choose can greatly impact the outcome of your kombucha brew.
In this article, we will explore the best types of tea for making kombucha, uncovering the secrets behind each variety and how they contribute to the delicious and probiotic-rich beverage we all love.
So grab a cup of your favorite blend and let’s dive into the world of kombucha tea!
Key Takeaways
- Black tea varieties like English Breakfast and Assam are bold and robust options for making kombucha.
- Green tea, especially high-quality loose-leaf varieties like sencha, matcha, or jasmine, adds a unique flavor profile and numerous health benefits to kombucha.
- Fruit-infused herbal teas provide a burst of fruity goodness and are packed with vitamins and antioxidants, while medicinal herbal teas like chamomile and peppermint enhance the therapeutic properties of kombucha.
- Oolong tea, such as Tie Guan Yin, Da Hong Pao, Oriental Beauty, and Milk Oolong, brings rich and complex flavors to kombucha, each with its own unique taste.
Black Tea Varieties for Kombucha
If you’re looking for a bold and robust flavor, you should try using black teas like English Breakfast or Assam for your kombucha. Black tea is an excellent choice for brewing kombucha because it provides a strong and distinct taste. To brew the best black tea kombucha, start by steeping the tea leaves in hot water for about 5 minutes. Then, remove the tea bags and let the tea cool completely before adding it to your kombucha starter culture.
Black tea kombucha also offers numerous health benefits compared to other varieties. It contains antioxidants that help protect your cells from damage and can improve heart health. Additionally, black tea kombucha has been shown to boost digestion and strengthen the immune system.
Now, let’s move on to discussing the green tea varieties for kombucha.
Green Tea Varieties for Kombucha
One of the most popular choices for making kombucha is using various green tea varieties. Green tea not only adds a unique flavor profile to the fermented drink, but it also offers numerous health benefits.
Here are some tips for choosing the right green tea for homemade kombucha:
-
Look for high-quality loose-leaf green tea. This ensures that you are getting the best flavor and nutrients for your kombucha.
-
Opt for organic green tea to avoid any potential exposure to harmful pesticides or chemicals.
-
Consider the type of green tea. Some popular options include sencha, matcha, and jasmine green tea. Each variety has its own distinct flavor and aroma.
-
Experiment with different green tea varieties to find your preferred taste. Some teas may be more earthy, while others may have a floral or grassy note.
Herbal Tea Options for Kombucha
For a unique twist in flavor, try experimenting with different herbal blends when making your homemade kombucha.
Not only do herbal teas add a delightful taste to your kombucha, but they also offer a range of health benefits.
One option is to use fruit-infused herbal teas, which infuse your kombucha with a burst of fruity goodness. These teas are packed with vitamins and antioxidants, which can support your immune system and promote overall well-being.
Another exciting avenue to explore is the potential of using medicinal herbal teas in your kombucha brewing. From calming chamomile to invigorating peppermint, these teas can enhance the therapeutic properties of your kombucha.
Oolong Tea Choices for Kombucha
There are several oolong teas available that can add a unique flavor profile to your homemade kombucha. Oolong tea is a partially oxidized tea that falls between green and black tea in terms of flavor and caffeine content. When used in kombucha, oolong tea brings a rich and complex taste that pairs well with the tanginess of the fermented beverage.
Here are four different flavors of oolong tea that can elevate your kombucha brewing experience:
-
Tie Guan Yin: This oolong tea has a floral and fruity aroma, with a sweet and smooth taste.
-
Da Hong Pao: Known as the ‘Big Red Robe,’ this oolong tea has a roasted flavor with hints of chocolate and honey.
-
Oriental Beauty: This unique oolong tea has a natural fruity and honey-like sweetness, making it perfect for a sweeter kombucha.
-
Milk Oolong: With its creamy and buttery flavor, this oolong tea adds a velvety texture to your kombucha.
Incorporating oolong tea in your kombucha not only enhances its taste but also offers health benefits, including improved digestion, increased energy levels, and boosted immune system. Experiment with different oolong tea flavors to create a kombucha that suits your palate.
White Tea Selections for Kombucha
White tea has a delicate and subtle flavor profile that can add a unique twist to your homemade kombucha. Not only does it bring a distinct taste to your brew, but it also offers several health benefits.
White tea is known for its high antioxidant content, which helps protect the body against free radicals and oxidative stress. Additionally, it contains catechins, which have been shown to have anti-inflammatory and antibacterial properties.
When choosing white tea for your kombucha, opt for high-quality brands that source their tea leaves from reputable sources. Some of the best white tea brands include Silver Needle, White Peony, and Longevity Eyebrow. These brands prioritize freshness and quality, ensuring that you get the most out of your tea and enhance the flavor of your kombucha.
Conclusion
In conclusion, when it comes to choosing the best tea for brewing kombucha, it’s all about personal preference and experimentation.
However, black tea varieties such as Assam or Darjeeling provide a robust and rich flavor to the fermentation process.
Green tea options like Sencha or Dragonwell add a refreshing and grassy note to the final brew.
For those looking for caffeine-free alternatives, herbal teas like hibiscus or chamomile can be a delightful choice.
Finally, oolong teas such as Tie Guan Yin or Da Hong Pao offer a unique complexity to the kombucha’s taste profile.
Ultimately, the choice of tea is a crucial step in creating a delicious and satisfying kombucha experience.

Arf, an author and an innovative enthusiast of coffee, coffee alternatives, and tea, plays a crucial role as a contributor to the esteemed Cappuccino Oracle platform. Renowned for his curiosity and passion for these captivating beverages, Arf has carved out a unique space for himself in the world of exploration and writing. He realized that coffee, coffee alternatives, and tea are not mere drinks to keep one awake, but universes of flavors and stories waiting to be explored.
Arf’s articles for Cappuccino Oracle blend meticulous research with personal experiences, providing readers with an in-depth understanding of various types of coffee, coffee alternatives, and tea, along with their unique characteristics, cultures, and histories. His honest reviews and engaging narratives guide readers on their own journeys, helping them discover their preferences and find their perfect brew.
I have found the perfect sugar balance for brewing 3 cups of kombucha tea, much like a conductor carefully orchestrating a symphony.
In this article, I will share my research and evidence-supported tips for achieving the ideal sugar ratios in your homemade kombucha.
Join me on this flavorful journey as we dive into the importance of sugar measurements, understand the science behind it, and unlock the secrets to crafting the most delicious and healthful kombucha tea.
Let’s brew up some magic together!
Key Takeaways
- Sugar fermentation is crucial for successful kombucha brewing.
- Using 3/4 cup of sugar per 3 cups of tea is recommended for optimal fermentation.
- Sugar alternatives like honey or maple syrup can be used, but may affect fermentation and flavor.
- Experimentation with different sugar alternatives and ratios is necessary to achieve the perfect balance of sweetness and flavor in kombucha brewing.
The Importance of Sugar Measurements for Kombucha Brewing
The amount of sugar is crucial for successful kombucha brewing. Sugar fermentation is a key process in the production of kombucha, as it provides the necessary fuel for the bacteria and yeast to thrive and produce the desired flavors and health benefits.
The right amount of sugar ensures proper fermentation, resulting in a well-balanced and tangy kombucha. It is recommended to use 3/4 cup of sugar per 3 cups of tea for optimal fermentation.
However, if you are concerned about the amount of sugar in your kombucha, there are sugar alternatives that can be used, such as honey or maple syrup. These alternatives may affect the fermentation process and flavor profile, so it is important to experiment and adjust accordingly.
Understanding the Ideal Sugar Ratios for 3 Cups of Kombucha Tea
To properly understand the ideal ratios, it’s important to know the recommended amount of sugar for 3 cups of kombucha tea. Sugar fermentation is a crucial step in the process of brewing kombucha. This natural fermentation process converts the sugar into beneficial acids and carbonation.
The general rule of thumb is to use about 1 cup of sugar for every gallon of tea. Therefore, for 3 cups of kombucha tea, you would need approximately 1/4 cup of sugar. However, it’s worth noting that the amount of sugar can be adjusted according to personal taste preferences.
For those looking to reduce their sugar intake, there are sugar alternatives available such as honey, maple syrup, or stevia. These alternatives can still provide the necessary fuel for fermentation without the excessive sweetness. Experiment with different ratios and sugar alternatives to find the perfect balance for your own kombucha brewing journey.
Tips for Achieving the Perfect Balance of Sugar in Your Kombucha
For achieving the perfect balance of sweetness in your kombucha, it’s helpful to experiment with different sugar alternatives and ratios.
Sugar fermentation is a crucial step in the kombucha-making process, as it provides the necessary fuel for the probiotic bacteria to grow and produce the desired flavors. Traditional kombucha recipes call for white sugar, but there are several alternatives you can try. Maple syrup, honey, and coconut sugar are popular choices that can add unique flavors to your brew.
When it comes to ratios, it’s important to find the right amount of sugar that suits your taste preferences. Start with a tablespoon per cup of tea and adjust accordingly. Remember, the sweetness will decrease as fermentation progresses, so it’s better to start with a slightly sweeter batch.
Happy experimenting!
Conclusion
In conclusion, mastering the art of sugar measurement is crucial for a successful kombucha brewing journey. Understanding the ideal sugar ratios for 3 cups of kombucha tea will ensure a harmonious balance of flavors.
By implementing the tips provided, you can achieve a perfect blend of sweetness that will elevate your kombucha experience. Remember, precision in sugar measurement is paramount for the fermentation process.
So, seize the opportunity to satisfy your taste buds and embark on a sugar-savvy kombucha adventure!

Justin is a seasoned author, coffee and tea enthusiast, and an essential member of the Cappuccino Oracle team. With a keen appreciation for the complexities of coffee, coffee alternatives, and tea, Justin has dedicated his professional career to exploring these realms and sharing his insights with readers worldwide.
Justin’s immersion in the world of coffee, coffee alternatives, and tea began at a young age, kindling a passion that extended beyond mere consumption. This love for these beverages led him to combine his talent for writing with his devotion to coffee and tea, bringing him to Cappuccino Oracle as a dedicated author.

How to Make Kombucha Tea With Chia Seeds
What Type of Tea Is Best for Kombucha
How Much Sugar to 3 Cups of Tea for Kombucha

How Much Caffeine in White Tea Kombucha

How to Make a Scoby With Kombucha Tea Bags

How to Make Americano With Moka Pot

How to Make Korean Iced Americano

How to Make Iced Americano With Instant Coffee

How to Make Americano With Bialetti

How to Make Dutch Bros Americano

Discover the Power of KOS Mushroom Coffee

Top 10 Rated Mushroom Coffee Brands for a Boost

What Makes Caffeine-Free Mushroom Coffee Unique?

Rooibos Tea: A Guide to Safe Breastfeeding Practices

What Mushroom Can I Use as a Coffee Replacement?

-
 Americano4 weeks ago
How to Make Americano With Moka Pot
-
 Americano2 weeks ago
How to Make Korean Iced Americano
-
 Americano4 weeks ago
How to Make Iced Americano With Instant Coffee
-
 Americano4 weeks ago
How to Make Americano With Bialetti
-
 Americano4 weeks ago
How to Make Dutch Bros Americano
-

 Americano6 days ago
How to Make an Iced Americano With Nespresso
-

 Americano2 weeks ago
How Many Shots of Espresso for 16 Oz Americano
-

 Americano4 weeks ago
How to Make a Hazelnut Americano