
Raw Cacao
How To Make Raw Chocolate With Cacao Nibs
Are you searching for a healthier way to satisfy your chocolate cravings? Your search is over because I am about to share a secret recipe that will transform the way you enjoy chocolate. Get ready to discover the joys of creating your very own raw chocolate using cacao nibs. That’s right – raw chocolate that is not only tasty, but also loaded with beneficial nutrients. Say goodbye to store-bought bars filled with harmful additives and preservatives and welcome the skill of crafting your own indulgent delight.
In this article, I will guide you through the step-by-step process of making raw chocolate with cacao nibs. We’ll start by gathering the essential ingredients and move on to roasting and grinding the cacao nibs to achieve that rich, velvety texture. Then, we’ll melt the cacao butter and mix in the perfect amount of sweetener to strike the right balance. If you’re feeling adventurous, we’ll even explore optional add-ins to customize your chocolate creation.
So, get ready to impress yourself and your loved ones with homemade raw chocolate that will leave you craving for more.
Key Takeaways
- Molding techniques: Pour mixture into desired molds, use clean and dry molds, tap molds to remove air bubbles.
- Cooling and setting time: Let it set in the refrigerator for at least two hours, cooling and setting time varies depending on recipe and temperature, rushing the cooling process may result in undesirable texture, patience is crucial for achieving desired texture.
- Alternative ingredients: Get creative with alternative ingredients, alternative sweeteners infuse distinct flavors, sea salt enhances richness, almond extract adds nutty flavor.
- Serving and decorating: Serve homemade raw chocolate in small molds or trays, add sea salt or crushed nuts for texture and flavor, pair raw chocolate with fresh raspberries or sea salt, decorate chocolate with edible flowers, crushed nuts, edible glitter, shredded coconut, or dried fruit.
Gather Your Ingredients
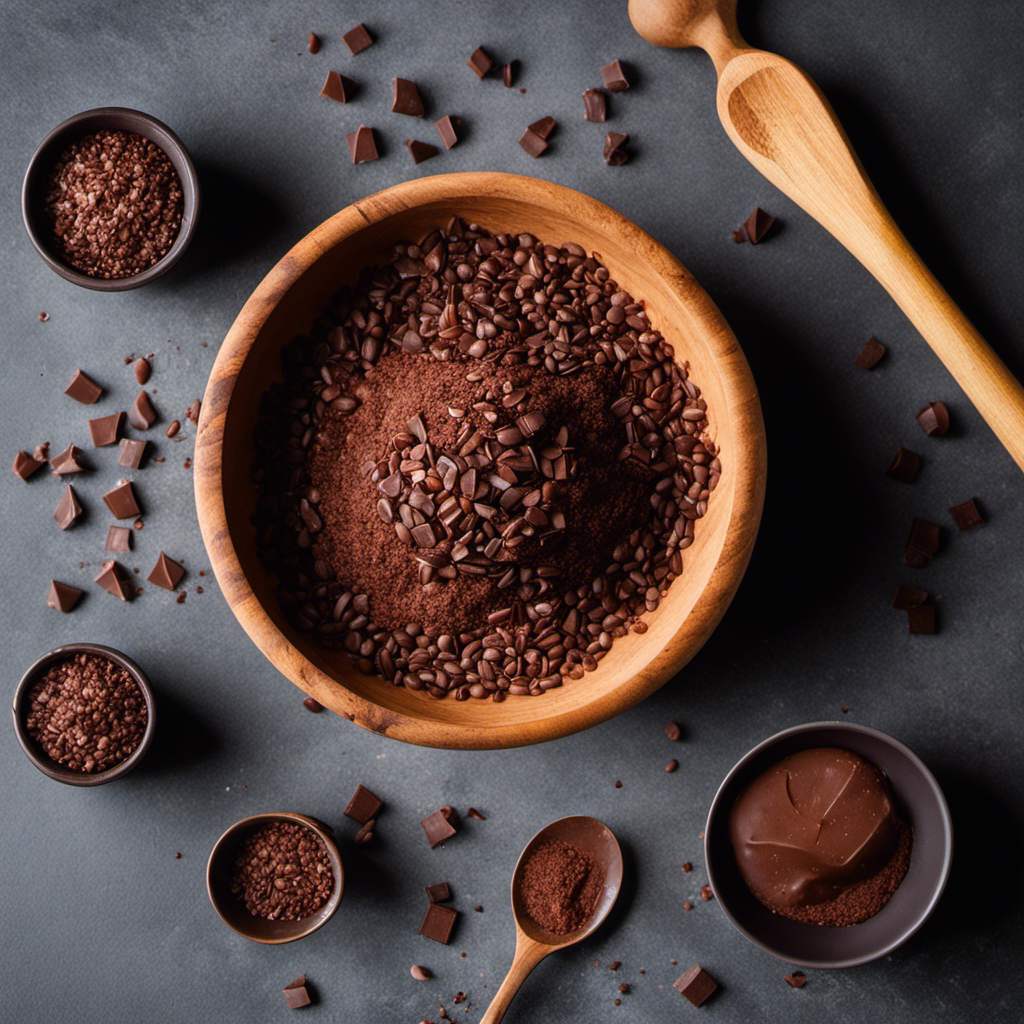
Now that you’ve got your cacao nibs ready, it’s time to gather the rest of your ingredients and get ready to make some delicious raw chocolate!

To ensure the best flavor and texture, it is important to choose high-quality ingredients. Start by selecting the type of sweetener you prefer for your chocolate. Options include natural sweeteners like maple syrup, honey, or coconut sugar, or you can use a sugar substitute like stevia or erythritol. The choice of sweetener will depend on your personal taste and dietary preferences.
Additionally, consider experimenting with different roasting techniques for the cacao nibs before grinding them. Some popular methods include light roasting for a milder flavor or dark roasting for a more intense, robust taste.
With your ingredients gathered, it’s time to move on to the next step and roast and grind the cacao nibs to perfection.
Roast and Grind the Cacao Nibs
In this section, I will discuss the roasting and grinding processes involved in making raw chocolate with cacao nibs.
The roasting process is crucial as it helps to develop the flavors and aroma of the cacao nibs. It involves heating the nibs at a specific temperature for a certain amount of time, which enhances their natural characteristics.
Once the nibs are roasted, they need to be ground into a fine powder. This grinding process is essential to break down the nibs into smaller particles, allowing the cocoa butter to be released and creating a smooth texture in the final chocolate product.
Roasting process
First, you’ll want to pop those delicious cacao nibs in the oven and let them roast to perfection. Roasting techniques play a crucial role in developing the rich flavors of raw chocolate.
The time and temperature you choose will greatly influence the end result. For a more delicate flavor, roast the nibs at a lower temperature, around 250°F (120°C), for about 10-15 minutes. If you prefer a bolder, more intense flavor, opt for a higher temperature, around 300°F (150°C), for 15-20 minutes.
Experimenting with different roasting times and temperatures can yield exciting flavor variations in your final product.
Once the nibs are roasted to your desired level, we can move on to the grinding process, where we’ll transform them into a smooth, silky chocolate paste.
Grinding process
Once the roasted nibs have undergone the grinding process, their transformation into a smooth and silky chocolate paste is nothing short of magical. Grinding techniques play a crucial role in achieving the desired texture and consistency of the chocolate.
The most common method is to use a high-speed blender or a food processor. This involves adding the roasted nibs to the machine and pulsing them until they break down into a fine powder.
Another alternative grinding method is to use a stone grinder, which slowly grinds the nibs to create a smoother and creamier texture. Regardless of the method used, the goal is to grind the nibs until they reach a liquid-like consistency, resembling melted chocolate.
This brings us to the next step: melting the cacao butter to incorporate into the chocolate paste.
Melt the Cacao Butter
To make raw chocolate with cacao nibs, it’s important to understand the role of cacao butter and the melting process.
Cacao butter is the fat extracted from cacao beans. It’s a crucial ingredient in chocolate making because of its smooth texture and its ability to solidify at room temperature.
The melting process involves gently heating the cacao butter until it reaches its melting point, usually around 90°F. This ensures that it’s in a liquid state and ready for further use in chocolate making.
Importance of cacao butter
One crucial ingredient you don’t want to overlook in your homemade raw chocolate is the rich and creamy cacao butter. It is not just a flavor enhancer but also offers several benefits for your skin. Here are five ways cacao butter can be beneficial for your skincare routine:
-
Hydration: Cacao butter is a natural moisturizer that deeply hydrates your skin, leaving it soft and supple.
-
Anti-aging: It contains antioxidants that help combat free radicals and reduce the signs of aging, such as fine lines and wrinkles.
-
Healing properties: Cacao butter has healing properties that can soothe and repair damaged skin, including scars and stretch marks.
-
Sun protection: It has a natural SPF, providing some protection against harmful UV rays.
-
Hair care: Cacao butter can be used to nourish and condition your hair, making it shiny and lustrous.
In addition to skincare, cacao butter can be incorporated into various recipes to add a rich and velvety texture. Now that you understand the importance of cacao butter, let’s move on to the melting process.
Melting process
After understanding the importance of cacao butter in making raw chocolate, let’s move on to the next step: the melting process. This is a crucial step as it determines the final texture and consistency of your chocolate. To melt the cacao butter and turn it into liquid form, I recommend using a double boiler. This method ensures gentle and even heat distribution, preventing the cacao butter from burning or becoming grainy. Simply place a heat-resistant bowl on top of a pot of simmering water, making sure the bottom of the bowl doesn’t touch the water. Add the cacao butter and stir occasionally until fully melted. Once the cacao butter is melted, it’s time to incorporate alternative sweeteners into the mixture. This step will add the perfect amount of sweetness to your homemade raw chocolate.
Mix in the Sweetener
Now that you’re ready to sweeten your raw chocolate, it’s time to mix in your preferred sweetener and enhance the rich flavors of the cacao nibs. This will create a delectable treat that satisfies your sweet tooth.
When choosing a sweetener, you have a variety of options to explore. Popular choices include raw honey, maple syrup, coconut sugar, or agave nectar. Consider your desired sweetness level and taste preferences when selecting your sweetener.
Start by adding a small amount of sweetener and gradually increase until you reach your desired taste. Remember, you can always add more sweetener, but it’s difficult to remove sweetness once it’s added.
Once you’ve mixed in your sweetener, you can move on to the next section about adding in your optional add-ins, such as nuts, dried fruits, or vanilla extract.
Add in Your Optional Add-Ins
Enhance the already delightful flavors of your sweetened raw chocolate by adding in a variety of optional add-ins. Here are some discussion ideas to inspire your creativity:
-
Flavor combinations: Experiment with different combinations of add-ins to create unique flavor profiles. Try mixing in almonds and dried cherries for a classic chocolate cherry flavor, or add shredded coconut and macadamia nuts for a tropical twist.
-
Health benefits of cacao nibs: Cacao nibs not only add a rich, chocolatey taste to your raw chocolate, but they also offer numerous health benefits. They are packed with antioxidants, fiber, and minerals such as magnesium and iron. Additionally, cacao nibs can boost your mood and improve cognitive function.
Now that you have added your optional add-ins, it’s time to pour the mixture into molds and let it set.
Pour the Mixture into Molds
First, pour the mixture into your desired molds, allowing it to take shape and solidify into delectable treats.
When it comes to molding techniques, there are a few options to consider. Silicone molds are a popular choice due to their flexibility and easy release. You can also use ice cube trays or even a baking dish lined with parchment paper.
Whatever you choose, make sure it’s clean and dry before pouring in the mixture. If you want to get creative, try adding in some alternative ingredients like chopped nuts, dried fruits, or even a sprinkle of sea salt for that perfect balance of flavors.
Once the molds are filled, gently tap them on the counter to remove any air bubbles.
Now, let it set in the refrigerator for at least two hours before moving on to the next step of letting it set completely.
Let it Set
After pouring the mixture into the molds, it’s crucial to let it set properly. The cooling and setting time will vary depending on the recipe and the temperature of the environment.
It’s important to exercise patience during this step as rushing the process can result in a chocolate that isn’t properly set and may not have the desired texture.
Cooling and setting time
Once the mixture is smooth and well combined, it’s time to let it cool and set, allowing the flavors to develop and intensify.
The cooling process is crucial as it helps the raw chocolate reach its desired consistency. There are various cooling techniques you can use to expedite this process, such as placing the mixture in the refrigerator or freezer. Another option is to pour the mixture into silicone molds and let it cool at room temperature.
While the chocolate cools, the alternative sweeteners, like maple syrup or honey, will infuse their distinct flavors, enhancing the overall taste.
It’s important to exercise patience during this stage, as rushing the cooling and setting time may result in a texture that is too soft or brittle. So, take your time and allow the chocolate to cool and set properly before moving on to the next section, where we will discuss the importance of patience in the final steps of making raw chocolate.
Importance of patience
While waiting for the mixture to cool and set, it’s crucial to exercise patience and allow the flavors to fully develop, resulting in a delectable treat. The importance of patience when making raw chocolate cannot be overstated. Taking your time has numerous benefits and directly affects the final result.
Patience plays a vital role in achieving the desired texture of the chocolate. Rushing the process can negatively impact the taste, as the flavors need time to meld and harmonize.
Patience also fosters mindfulness in chocolate making, allowing you to fully engage with the process and appreciate each step. The connection between patience and the overall enjoyment of the process is evident, as taking the time to savor each moment enhances the experience.
Furthermore, patience is crucial in developing unique flavor profiles and allows for creativity in customizing recipes. The impact of patience extends beyond the process itself, as it contributes to the overall satisfaction of making homemade raw chocolate.
So, with patience, enjoy your homemade raw chocolate!
Enjoy Your Homemade Raw Chocolate!
When it comes to serving your homemade raw chocolate, there are a few suggestions to keep in mind.
- First, consider using small silicone molds or ice cube trays to create bite-sized pieces for easy portion control.
- Additionally, you can sprinkle some sea salt or crushed nuts on top of the chocolate to add texture and flavor.
As for storage, it’s important to keep your raw chocolate in an airtight container in a cool, dry place to prevent it from melting or becoming too soft.
Enjoy your homemade raw chocolate!
Serving suggestions
To add a delightful twist to your raw chocolate creation, try pairing it with fresh raspberries or a sprinkle of sea salt. These combinations will elevate the flavor profile of your homemade chocolate and add a burst of freshness or a savory touch. Additionally, you can get creative with different types of sweeteners to enhance the sweetness of the chocolate. Maple syrup, honey, or coconut sugar are great options to experiment with. When it comes to decorating the chocolate, let your imagination run wild. You can use edible flowers, crushed nuts, or even edible glitter to make your raw chocolate visually appealing. To give you some inspiration, here’s a table showcasing creative ways to decorate your chocolate:
Decorating Ideas:
- Edible flowers
- Crushed nuts
- Edible glitter
- Shredded coconut
- Dried fruit
Now that you have learned some exciting serving suggestions, let’s move on to storage tips for your delicious raw chocolate creation.
Storage tips
When it comes to serving suggestions, I’ve covered various ideas on how to enjoy your homemade raw chocolate with cacao nibs. Now, let’s talk about storage tips to ensure your chocolate stays fresh and delicious in the long term.
Proper storage is crucial to maintain the quality and taste of your homemade chocolate. Here are the best containers for storing raw chocolate:
- Airtight glass jars: Glass jars with airtight seals are ideal for preserving the freshness of your chocolate.
- Silicone molds: Silicone molds are not only great for making chocolate, but they also serve as excellent storage containers.
- Vacuum-sealed bags: Vacuum-sealed bags help remove excess air, preventing oxidation and maintaining the chocolate’s quality.
- Tin containers: Tin containers are a classic choice for storing chocolate, as they offer protection from light and moisture.
- Dark and cool place: Store your chocolate in a dark and cool place, away from direct sunlight and heat sources.
Now that you know how to store your chocolate properly, let’s move on to the next section about how to experiment and customize your raw chocolate creation.
Experiment and Customize
Experiment and customize your raw chocolate by adding different flavors such as sea salt, almond extract, or dried fruits to create a unique and personalized treat. For example, you can mix in a handful of chopped dried cherries and a pinch of cinnamon to give your raw chocolate a deliciously fruity and spicy twist.
| Flavors | Benefits |
|---|---|
| Sea Salt | Enhances richness |
| Almond Extract | Adds nutty flavor |
| Dried Fruits | Adds natural sweetness |
The experimentation benefits of customizing your raw chocolate are endless. By adding various flavors, you can cater to your taste preferences and create a truly one-of-a-kind treat. Furthermore, customization allows you to adjust the intensity of flavors, ensuring that your raw chocolate is exactly as you desire. Whether you prefer a hint of sea salt or a burst of fruity sweetness, the choice is yours. So go ahead and get creative with your raw chocolate by experimenting with different flavors and personalization options.
Frequently Asked Questions
How long does it take for the mixture to set in the molds?
The setting time for the mixture in the molds varies depending on the ingredients used and the desired texture. However, using alternative sweeteners may extend the setting time slightly due to their different properties.
Can I use a different sweetener instead of the recommended one?
Yes, you can use alternative sweeteners in place of the recommended one. Some options include honey, maple syrup, or coconut sugar. However, it’s important to consider their health benefits and choose one that aligns with your dietary needs.
Are there any specific brands of cacao nibs and cacao butter that you recommend?
I recommend brands like Navitas Organics and Terrasoul for cacao nibs and cacao butter. If you prefer an alternative to the recommended sweetener, you can try using maple syrup or coconut sugar.
Can I add nuts or dried fruits as optional add-ins?
Adding nuts or dried fruits to raw chocolate can enhance the flavor and texture. They serve as delightful add-ins and can be substituted for recommended sweeteners. However, be cautious with the proportions to maintain the desired consistency.
How should I store the homemade raw chocolate to ensure it stays fresh?
To ensure the freshness of homemade raw chocolate, store it in an airtight container in a cool, dry place. This will help extend its shelf life. Avoid exposing it to heat or moisture, as it can cause the chocolate to spoil.
Conclusion
In conclusion, making raw chocolate with cacao nibs is a simple and rewarding process. Here’s how you can do it:
-
Start by carefully roasting and grinding the cacao nibs. This will bring out their rich flavor and aroma.
-
Next, melt the cacao butter in a double boiler or a microwave. This will give your raw chocolate a smooth and creamy texture.
-
Once the cacao butter is melted, add in your preferred sweetener. You can use natural sweeteners like maple syrup, honey, or coconut sugar. Adjust the amount to suit your taste.
-
If you like, you can also add in some optional add-ins to enhance the flavor of your raw chocolate. Some popular choices include vanilla extract, sea salt, nuts, or dried fruits.
-
Stir the mixture well until everything is fully combined and smooth.
-
Pour the mixture into chocolate molds or onto a lined baking sheet.
-
Place the molds or baking sheet in the refrigerator or freezer to allow the raw chocolate to set. This usually takes about 1-2 hours.
-
Once the raw chocolate is set, remove it from the molds or break it into smaller pieces if using a baking sheet.
-
Now, you can indulge in the rich and heavenly flavors of your homemade raw chocolate. Enjoy it as is or use it in your favorite recipes.
So go ahead, unleash your creativity and enjoy the deliciousness of your homemade raw chocolate.

Arf, an author and an innovative enthusiast of coffee, coffee alternatives, and tea, plays a crucial role as a contributor to the esteemed Cappuccino Oracle platform. Renowned for his curiosity and passion for these captivating beverages, Arf has carved out a unique space for himself in the world of exploration and writing. He realized that coffee, coffee alternatives, and tea are not mere drinks to keep one awake, but universes of flavors and stories waiting to be explored.
Arf’s articles for Cappuccino Oracle blend meticulous research with personal experiences, providing readers with an in-depth understanding of various types of coffee, coffee alternatives, and tea, along with their unique characteristics, cultures, and histories. His honest reviews and engaging narratives guide readers on their own journeys, helping them discover their preferences and find their perfect brew.

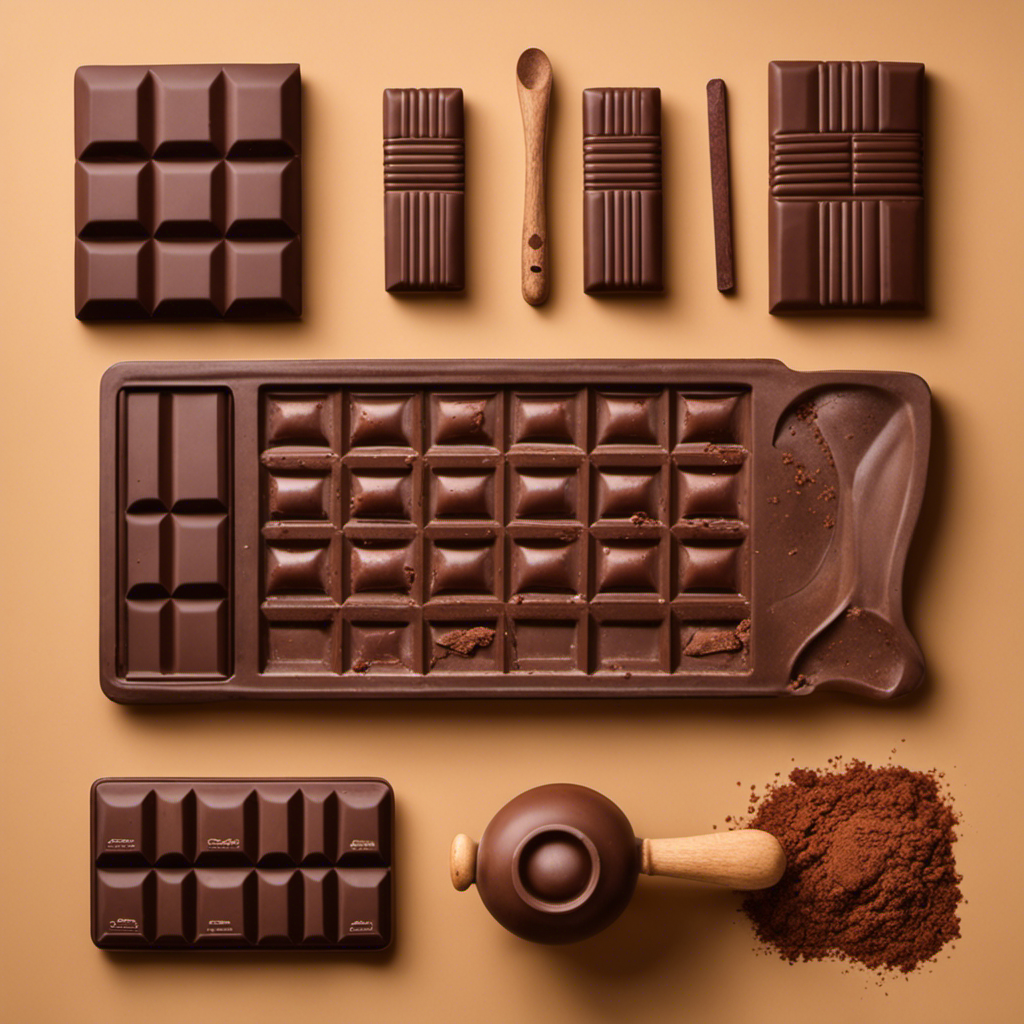
Envision the enticing scent of newly roasted cacao beans permeating your kitchen space, as you delve into the adventure of crafting your very own scrumptious chocolate bars from the beginning. Through this article, I’ll lead you through the detailed procedure of turning unprocessed cacao into luscious chocolate bars that are sure to tantalize your palate.
With a few simple ingredients and some basic techniques, you can unlock the true potential of cacao and experience the joy of crafting your own chocolate creations. From roasting and grinding the cacao beans to melting and tempering the chocolate, I will walk you through each stage, ensuring that you achieve the perfect texture and flavor.
We will also explore the art of adding sweeteners and flavors, as well as experimenting with various toppings and decorations.
So, roll up your sleeves and get ready to indulge in the world of homemade chocolate bars made from raw cacao.
Key Takeaways
- Cacao farming involves cultivating and harvesting cacao trees.
- Different varieties of cacao have unique flavors, such as delicate Criollo, robust Forastero, and balanced Trinitario.
- Sweeteners like honey, maple syrup, and coconut sugar balance the bitterness of raw cacao.
- Additional flavors and add-ins, such as cinnamon, chili powder, mint, sea salt, caramel, orange zest, dark chocolate, crushed nuts, dried fruits, and espresso powder, enhance taste and texture of chocolate bars made from raw cacao.
Introduction to Raw Cacao
Let’s dive into the wonderful world of raw cacao and discover how to transform it into delicious chocolate bars!
Raw cacao is the purest form of chocolate, packed with incredible health benefits. It is rich in antioxidants, minerals like iron and magnesium, and contains mood-enhancing compounds like phenylethylamine.
There are different varieties of raw cacao, each with its unique flavor profile and characteristics. Criollo, known for its delicate flavor and low bitterness, is often considered the finest variety. Forastero, on the other hand, is more robust and widely used in chocolate production. Trinitario, a hybrid of Criollo and Forastero, offers a balance of flavors.
Now that we understand the health benefits and different varieties of raw cacao, let’s move on to gathering the ingredients needed for making our chocolate bars.
Gathering the Ingredients
In gathering the ingredients for making chocolate bars from raw cacao, I’ll need to start with raw cacao beans. These beans are the foundation of the chocolate and provide the rich, deep flavor.
Next, I’ll need to choose a sweetener such as honey or maple syrup to balance out the bitterness of the cacao.
Lastly, I can add additional flavors and add-ins such as vanilla extract, sea salt, or nuts to enhance the taste and texture of the chocolate.
Raw Cacao Beans
To truly experience the magic of creating chocolate bars, imagine holding a handful of raw cacao beans. These little gems are waiting to be transformed into rich, velvety goodness. Raw cacao beans are the foundation of chocolate, and understanding their origins is essential to appreciating the final product.
Cacao farming is a complex process that involves cultivating and harvesting cacao trees, which thrive in tropical climates. These beans have been cherished for centuries not only for their delicious flavor but also for their potential health benefits. Cacao is rich in antioxidants, which can help fight inflammation and improve heart health. It also contains minerals like magnesium, iron, and zinc, which are essential for various bodily functions.
Now that we understand the importance of raw cacao beans, let’s explore the next crucial ingredient: sweeteners.
Sweeteners
Imagine the delight of discovering the perfect sweetener to complement the natural richness of cacao beans and enhance the flavor of your homemade chocolate creations.
When it comes to sweetening raw cacao, there are plenty of natural alternatives that not only add a touch of sweetness but also provide health benefits. One popular option is raw honey, which not only adds a subtle sweetness but also contains antioxidants and enzymes that can boost your immune system.
Another great choice is maple syrup, which adds a rich and complex flavor to your chocolate bars. Not only is it a natural sweetener, but it also contains minerals like manganese and zinc.
And let’s not forget about coconut sugar, a low glycemic sweetener that adds a caramel-like taste.
Incorporating these natural sweeteners into your raw cacao creations will elevate the taste and provide additional health benefits.
Now, let’s explore the world of additional flavors and add-ins to take your chocolate bars to the next level.
Additional Flavors and Add-ins
Adding different flavors and add-ins to your homemade chocolate creations can elevate the taste and provide a unique twist. Incorporating spices like cinnamon or chili powder, according to a study published in the Journal of Food Science, can enhance the flavor and add a hint of warmth to your chocolate.
Different flavor combinations:
- Mint and dark chocolate for a refreshing twist.
- Sea salt and caramel for a sweet and savory combination.
- Orange zest and dark chocolate for a citrusy burst.
Creative mix-ins:
- Crushed nuts like almonds or hazelnuts for added crunch.
- Dried fruits such as cranberries or raisins for a burst of sweetness.
- Espresso powder for a subtle coffee flavor.
By experimenting with these different flavors and mix-ins, you can create your own signature chocolate bars that are sure to impress.
In the next section, we will delve into the process of roasting and grinding the cacao beans, a crucial step in making chocolate from scratch.
Roasting and Grinding the Cacao Beans
Once the cacao beans have been roasted and ground, they transform into a rich and flavorful base for creating chocolate bars. Roasting techniques are crucial in developing the desired flavor profile of the chocolate. Different temperatures and durations can impart distinct characteristics, such as nuttiness or fruity notes. For example, a lower temperature of around 250°F (121°C) for a longer time will result in a deeper, more complex flavor. Grinding methods are equally important in achieving the desired texture and smoothness. Traditional stone mills or modern equipment like conching machines can be used to grind the roasted cacao beans into a fine paste, known as chocolate liquor. This step helps to release the natural fats, or cocoa butter, which contributes to the smoothness and melt-in-your-mouth feel of the final chocolate product. Transitioning into the subsequent section, the next step after roasting and grinding is melting and tempering the chocolate to achieve the perfect consistency.
Melting and Tempering the Chocolate
To achieve the perfect consistency, you’ll need to gently melt and artfully temper the luscious chocolate, transforming it into a silky and velvety delight.
Melting techniques play a crucial role in the chocolate-making process. There are two common methods: direct heat and indirect heat. With direct heat, the chocolate is melted in a double boiler or microwave, ensuring a controlled temperature and preventing scorching. Indirect heat involves melting the chocolate using hot water or a warm environment.
Once the chocolate is melted, the tempering process begins. Tempering is the method of carefully cooling and reheating the chocolate to stabilize its cocoa butter crystals, resulting in a glossy finish and a firm texture. This is achieved by gradually lowering the temperature and then raising it again, following precise timing and stirring techniques.
As we move into the next section about adding sweeteners and flavors, it’s important to maintain the tempered state of the chocolate.
Adding Sweeteners and Flavors
Enhance the lusciousness of your chocolatey creation by infusing it with a tantalizing blend of sweeteners and flavors. Experimenting with different sweeteners allows you to customize the level of sweetness in your chocolate bars. Popular options include cane sugar, maple syrup, honey, and coconut sugar. Each sweetener brings its own unique taste profile to the table, so don’t be afraid to get creative and try out new combinations.
In addition to sweeteners, exploring unique flavor combinations can take your chocolate bars to the next level. Consider adding a pinch of sea salt for a delightful salty-sweet contrast, or try incorporating spices like cinnamon or chili powder for an exciting twist.
To help you in your sweetener and flavor experimentation, here’s a handy table showcasing some popular options:
| Sweeteners | Flavors |
|---|---|
| Cane sugar | Sea salt |
| Maple syrup | Cinnamon |
| Honey | Chili powder |
| Coconut sugar | Vanilla extract |
By adding these sweeteners and flavors, you can create a truly unique and delicious chocolate bar. Now, let’s move on to pouring and setting the chocolate.
Pouring and Setting the Chocolate
Now it’s time to pour your delectable chocolate mixture into molds and let it set into irresistible treats. But before you start pouring, it’s important to master the pouring techniques to achieve the perfect consistency.
First, hold the mold steady and pour the chocolate mixture slowly and steadily. This will ensure that the chocolate fills every nook and cranny of the mold, creating a smooth and even surface.
Second, tap the mold gently on the countertop to remove any air bubbles that may have formed during the pouring process. This will prevent any unsightly holes or gaps in your chocolate bars.
Lastly, let the chocolate set undisturbed for at least 1-2 hours, or until it becomes firm and solid.
Once your chocolate bars have set, you can move on to the exciting step of adding toppings and decorations, which will take your homemade treats to the next level.
Adding Toppings and Decorations
Once your chocolate bars have set, you can take them to the next level by adding a variety of enticing toppings and decorations. Some options include crushed nuts, colorful sprinkles, or a drizzle of caramel sauce. The possibilities for toppings are endless, so feel free to get creative and make your chocolate bars truly unique.
Try adding a sprinkle of sea salt for a savory twist, or dusting them with edible gold dust for a touch of elegance. You can even experiment with different textures by adding crunchy toffee bits or smooth peanut butter swirls.
These toppings not only enhance the visual appeal of your homemade chocolates but also add layers of flavor and texture.
Now, let’s move on to storing and enjoying your homemade chocolate bars.
Storing and Enjoying Your Homemade Chocolate Bars
To fully enjoy your homemade chocolate bars, you’ll want to know the best way to store them and savor their delicious flavors. Proper storage techniques are essential to maintain the quality and freshness of your chocolate bars. Here are some tips to help you store your homemade chocolate bars effectively:
| Storing Technique | Description |
|---|---|
| Refrigeration | Store your chocolate bars in an airtight container in the fridge. |
| Freezing | Wrap your chocolate bars tightly in plastic wrap and freeze them. |
| Room Temperature | Keep your chocolate bars in a cool, dry place away from sunlight. |
Pairing Suggestions:
- Dark chocolate pairs well with red wine or strong coffee.
- Milk chocolate complements fruity desserts or a glass of cold milk.
- White chocolate goes perfectly with a hot cup of tea or a creamy dessert.
In the next section, we will discuss troubleshooting and tips to ensure your chocolate bars turn out perfectly.
Troubleshooting and Tips
If you’re experiencing any issues or need some helpful advice, here’s a tip to enhance your chocolate bar-making experience: Did you know that adding a pinch of salt to your chocolate mixture can enhance the overall flavor and bring out the richness of the cocoa? It may seem counterintuitive, but the salt acts as a flavor enhancer, balancing the sweetness and intensifying the chocolate taste.
Additionally, here are some troubleshooting tips and common mistakes to avoid:
- Avoid overheating the chocolate as it can cause it to seize or become grainy.
- Make sure all your equipment is completely dry before starting the process to prevent any water from causing the chocolate to seize.
- If your chocolate bar doesn’t have a smooth texture, try tempering it by carefully heating and cooling it to create stable cocoa butter crystals.
By following these troubleshooting tips and avoiding common mistakes, you’ll be able to create delicious homemade chocolate bars every time.
Frequently Asked Questions
How do I source high-quality raw cacao beans?
To source high-quality raw cacao beans, I recommend exploring different sourcing options such as reputable online suppliers, specialty grocery stores, or local farmers markets. Look for quality indicators like organic certifications and fair trade labels to ensure the beans are of the highest quality.
Can I use a regular oven instead of a specialized roasting machine to roast the cacao beans?
Yes, a regular oven can be used to roast cacao beans. However, it is important to maintain a consistent temperature and monitor the beans closely. Alternative sweeteners like honey or coconut sugar can be used in chocolate bars.
Is it necessary to temper the chocolate when making chocolate bars from raw cacao?
Tempering is not necessary when making chocolate bars from raw cacao. There are tempering alternatives, such as using cocoa butter or adding lecithin, that achieve similar results. However, not tempering can result in a dull appearance and less stable texture.
Can I use alternative sweeteners like maple syrup or honey instead of sugar?
Using alternative sweeteners like maple syrup or honey in chocolate bars can provide health benefits. They add natural sweetness and unique flavors. However, they may alter the texture and taste of the final product.
How long does it take for the chocolate bars to fully set and harden?
The setting time for chocolate bars to fully harden varies, typically taking 1-2 hours at room temperature. During this time, the chocolate undergoes a fascinating transformation, gradually solidifying into a smooth and irresistibly firm texture.
Conclusion
As I gaze upon the glossy surface of my homemade chocolate bars, I am reminded of the transformation that took place. From the humble raw cacao beans to the velvety chocolate delight, each step in the process symbolized growth and mastery.
The roasting and grinding unleashed the hidden potential within the beans, while the melting and tempering brought forth their true beauty. With sweeteners and flavors, a symphony of tastes emerged.
Pouring and setting, like a skilled artist, I crafted each bar with care. Now, as I savor the fruits of my labor, I am filled with a sense of accomplishment and joy.
Arf, an author and an innovative enthusiast of coffee, coffee alternatives, and tea, plays a crucial role as a contributor to the esteemed Cappuccino Oracle platform. Renowned for his curiosity and passion for these captivating beverages, Arf has carved out a unique space for himself in the world of exploration and writing. He realized that coffee, coffee alternatives, and tea are not mere drinks to keep one awake, but universes of flavors and stories waiting to be explored.
Arf’s articles for Cappuccino Oracle blend meticulous research with personal experiences, providing readers with an in-depth understanding of various types of coffee, coffee alternatives, and tea, along with their unique characteristics, cultures, and histories. His honest reviews and engaging narratives guide readers on their own journeys, helping them discover their preferences and find their perfect brew.
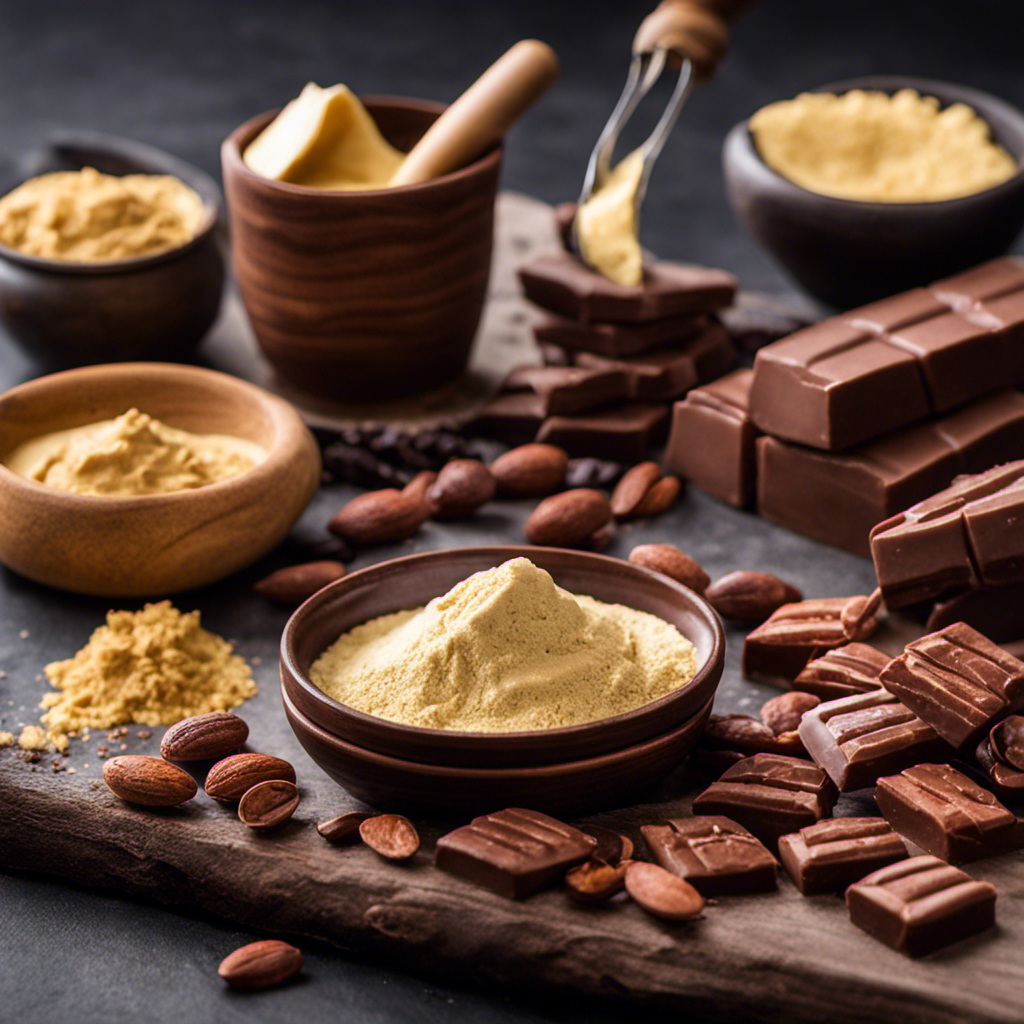
Immersing myself in the realm of gastronomic endeavors, I become mesmerized by the lush and creamy charm of raw cacao butter. This opulent component, distinguished by its profound scent and silky consistency, is the gateway to exploring a universe filled with succulent options.
Allow me to guide you through the process of creating your very own raw cacao butter, step by step, ensuring every detail is accurately described.
With a scientific approach, we will explore the chemical processes involved in making cacao butter, from the role of fats to the art of emulsification and temperature control. As we delve into the technical aspects, we will employ precise measurements, temperatures, and techniques to achieve the desired result.
But this journey is not purely scientific; it is also one of knowledge and information. We will uncover the nutritional content and potential health benefits of raw cacao butter, as well as its versatility in culinary delights.
So, gather your ingredients and equipment, for we are about to embark on a tantalizing adventure into the world of homemade raw cacao butter.
Key Takeaways
- Raw cacao butter is a luxurious ingredient with a rich aroma and smooth texture, suitable for culinary and skincare uses.
- The process of making raw cacao butter involves roasting high-quality cacao beans, grinding them to extract the fats, and separating the nibs from the husks for purity.
- Melting and straining the cacao butter requires controlled temperature for proper tempering and straining for a smoother consistency.
- After melting, the cacao butter can be poured into molds or containers for portioning and should be allowed to solidify in a cool, dry area. Proper storage in an airtight container can extend its shelf life.
Gather the Necessary Ingredients and Equipment
To make raw cacao butter, gather the necessary ingredients and equipment. Start by getting high-quality cacao beans, preferably organic and fair-trade. You can find them at specialty stores or order online. Also, you’ll need a grinder or food processor to crush the beans into a fine powder. Use a double boiler or a heat-resistant bowl over simmering water for melting the ground cacao beans. Have a spatula or whisk for stirring the mixture. For shaping the cacao butter, use different types of chocolate molds in various shapes and sizes. It’s worth mentioning that cacao butter has alternative uses, such as in skincare products or as a moisturizer. Once you have everything, proceed to the next step of roasting and grinding the cacao beans.
Roast and Grind the Cacao Beans
Once you’ve got your hands on those rich cacao beans, it’s time to roll up your sleeves and get ready to roast and grind them into a heavenly concoction.
To bring out the full flavor of the cacao beans, there are various roasting techniques you can employ. You can opt for a low and slow roast, which involves baking the beans at a low temperature for a longer duration, or a high heat roast, which quickly develops a rich aroma.
After roasting, it’s time to grind the beans. There are different grinding methods available, such as using a mortar and pestle or a specialized grinder. The grinding process helps break down the beans into smaller particles, allowing the fats to be extracted more efficiently.
Once the beans are ground to a fine consistency, you can proceed to the next step of separating the cacao nibs from the husks.
Separate the Cacao Nibs from the Husks
To free the precious cacao nibs from their husky confines, it’s time to employ a nifty technique that will have you separating them with ease. First, gather your roasted cacao beans and place them into a clean bowl. Using your hands or a utensil, gently crush the beans, ensuring that the husks begin to separate from the nibs.
Next, transfer the crushed beans into a large sieve or colander and shake it gently. As you do this, the lighter husks will float to the top, while the heavier nibs will remain at the bottom. Carefully remove the husks, preserving the valuable nibs.
By separating the cacao nibs from the husks, you ensure that you have the purest form of cacao for making raw cacao butter. This process also allows you to reap the benefits of using raw cacao butter in skincare.
Now, let’s move on to the next step: melting the cacao nibs.
Melt the Cacao Nibs
Now that you’ve separated the precious cacao nibs from their husks, it’s time to unleash their rich and velvety potential by melting them into a luscious liquid chocolate potion.
To begin, measure out the desired amount of cacao nibs and place them in a heat-safe bowl. Using a double boiler or microwave, gently apply heat to the nibs until they melt completely. It’s crucial to maintain a controlled temperature throughout the melting process to properly temper the cacao butter. The ideal range is between 104-113°F (40-45°C).
Stir the melted cacao butter occasionally to ensure even heating and smooth texture. Once fully melted, remove from heat and allow it to cool slightly before using in recipes. Tempered raw cacao butter adds a glossy finish and enhances the texture of desserts and confections.
Now, let’s move on to the next step and strain the melted cacao for a smoother consistency.
Strain the Melted Cacao
After melting the cacao nibs into a luscious liquid, it’s time to strain the velvety chocolate to achieve a smoother and more refined consistency. To strain the melted cacao, you will need a fine mesh strainer or cheesecloth. Place the strainer or cheesecloth over a bowl or container to catch the strained cacao. Carefully pour the melted cacao into the strainer, allowing the liquid to flow through while capturing any solid particles. Gently press down on the cacao solids to extract as much liquid as possible. This process helps remove any remaining bits of cacao nibs and ensures a silky texture for the final product. Once strained, your raw cacao butter is ready for the next step: pouring the melted cacao into molds or containers. This will create convenient portions for future use in various culinary creations.
Pour the Melted Cacao into Molds or Containers
Once you’ve achieved the desired consistency, it’s time to transfer the smooth, velvety liquid into molds or containers for easy portioning and future culinary adventures. Molding techniques play a crucial role in shaping the cacao butter into desired forms.
Silicone molds are highly recommended as they allow for easy removal and maintain the integrity of the cacao butter. Alternatively, you can use ice cube trays or small glass jars as containers.
Carefully pour the melted cacao butter into the molds or containers, ensuring that they are filled to the desired level. To create uniform shapes, gently tap the molds or containers on a flat surface to release any trapped air bubbles.
Once filled, place the molds or containers in a cool, dry area to allow the cacao butter to solidify. This step ensures that the butter sets properly before moving on to the next stage of the process: allowing the cacao butter to solidify.
Allow the Cacao Butter to Solidify
Let the luscious liquid turn into a solid delight as you allow the cacao butter to firm up. To solidify the cacao butter, follow these precise and detailed steps:
- Place the molds or containers with the melted cacao butter in a cool and dry area.
- Ensure that the temperature is around 55-65°F (13-18°C) to facilitate the solidifying process.
- Avoid placing the cacao butter in the refrigerator, as it can cause rapid solidification and affect the texture.
- Leave the cacao butter undisturbed for approximately 2-3 hours, or until it reaches a solid state.
- During this time, the fats in the cacao butter will undergo crystallization, resulting in a smooth and creamy texture.
Solidifying the cacao butter properly ensures that it maintains its desirable properties. The benefits of using raw cacao butter include its high content of healthy fats and antioxidants, which can contribute to improved heart health and overall well-being.
Once the cacao butter has solidified, it is ready to be stored properly for future use in culinary creations.
Store the Cacao Butter Properly
To properly store your solidified cacao butter, find a cool and dry spot where it can be safely tucked away for future culinary adventures. Proper storage techniques are crucial to extending the shelf life of your homemade raw cacao butter. Keep in mind that cacao butter is sensitive to light, heat, and moisture, so it’s important to protect it from these elements. I recommend using an airtight container made of glass or food-grade plastic to prevent any odors or contaminants from affecting the quality of your cacao butter. Additionally, store it away from any strong-smelling foods to avoid flavor transfer. It’s also a good idea to label the container with the date of preparation to keep track of its freshness. By following these storage guidelines, you can ensure that your homemade raw cacao butter stays fresh, flavorful, and ready to enhance your culinary creations. Now, let’s move on to the next section and learn how to enjoy your homemade raw cacao butter.
Enjoy Your Homemade Raw Cacao Butter
Now that you’ve successfully stored your culinary treasure, it’s time to indulge in the delicious possibilities that await with your homemade raw cacao butter.
To use raw cacao butter in recipes, start by gently melting it over low heat until it becomes a smooth liquid. It’s important to use low temperatures to preserve its delicate flavor and nutritional properties.
Once melted, you can incorporate the cacao butter into a wide range of recipes. It adds a rich and creamy texture to smoothies, desserts, and baked goods.
Additionally, raw cacao butter is known for its health benefits. It is packed with antioxidants, vitamins, and minerals that support cardiovascular health and boost mood. Its natural fats also provide a sustained source of energy.
So go ahead and experiment with this versatile ingredient to create delectable treats that are both delicious and nutritious.
Frequently Asked Questions
How long does it take for the cacao butter to solidify?
The solidification time of cacao butter can vary depending on several factors. To speed up the process, factors such as temperature, fat content, and emulsification techniques can be optimized.
Can I use a regular blender to grind the cacao beans?
Using a regular blender for grinding cacao beans is not recommended as it may not achieve the desired texture. Instead, alternative methods like using a food processor or a specialized grinder are more effective.
How should I store the cacao butter to ensure it stays fresh?
To ensure proper storage and maximize the shelf life of cacao butter, it should be stored in an airtight container in a cool, dark place, away from sunlight and moisture. This will help maintain its freshness and prevent oxidation.
Can I use roasted cacao beans instead of raw cacao beans?
Roasted cacao beans have a distinct flavor profile compared to raw cacao beans. The roasting process enhances the chocolatey taste and aroma, but it also reduces the nutritional content.
What are some common uses for raw cacao butter?
Raw cacao butter has various uses in skincare, as it helps moisturize and nourish the skin. In baking, it adds a rich, chocolatey flavor and enhances the texture of desserts. Its high antioxidant content provides potential health benefits.
Conclusion
In conclusion, making homemade raw cacao butter requires precision and attention to detail. By following the step-by-step instructions, you can successfully create this delicious and nutritious ingredient.
Remember to gather all the necessary ingredients and equipment, roast and grind the cacao beans, separate the nibs from the husks, melt the nibs, strain the melted cacao, and pour it into molds or containers.
Allow the cacao butter to solidify and store it properly. By understanding the scientific processes involved, you can fully appreciate the role of fats, emulsification, and temperature control in creating the perfect cacao butter.
Enjoy the rich and decadent flavors of your homemade creation, knowing that it offers numerous health benefits and endless culinary possibilities. So grab your apron and embark on this delightful journey to make your own raw cacao butter – it’s time to indulge in a little chocolate magic!
Arf, an author and an innovative enthusiast of coffee, coffee alternatives, and tea, plays a crucial role as a contributor to the esteemed Cappuccino Oracle platform. Renowned for his curiosity and passion for these captivating beverages, Arf has carved out a unique space for himself in the world of exploration and writing. He realized that coffee, coffee alternatives, and tea are not mere drinks to keep one awake, but universes of flavors and stories waiting to be explored.
Arf’s articles for Cappuccino Oracle blend meticulous research with personal experiences, providing readers with an in-depth understanding of various types of coffee, coffee alternatives, and tea, along with their unique characteristics, cultures, and histories. His honest reviews and engaging narratives guide readers on their own journeys, helping them discover their preferences and find their perfect brew.
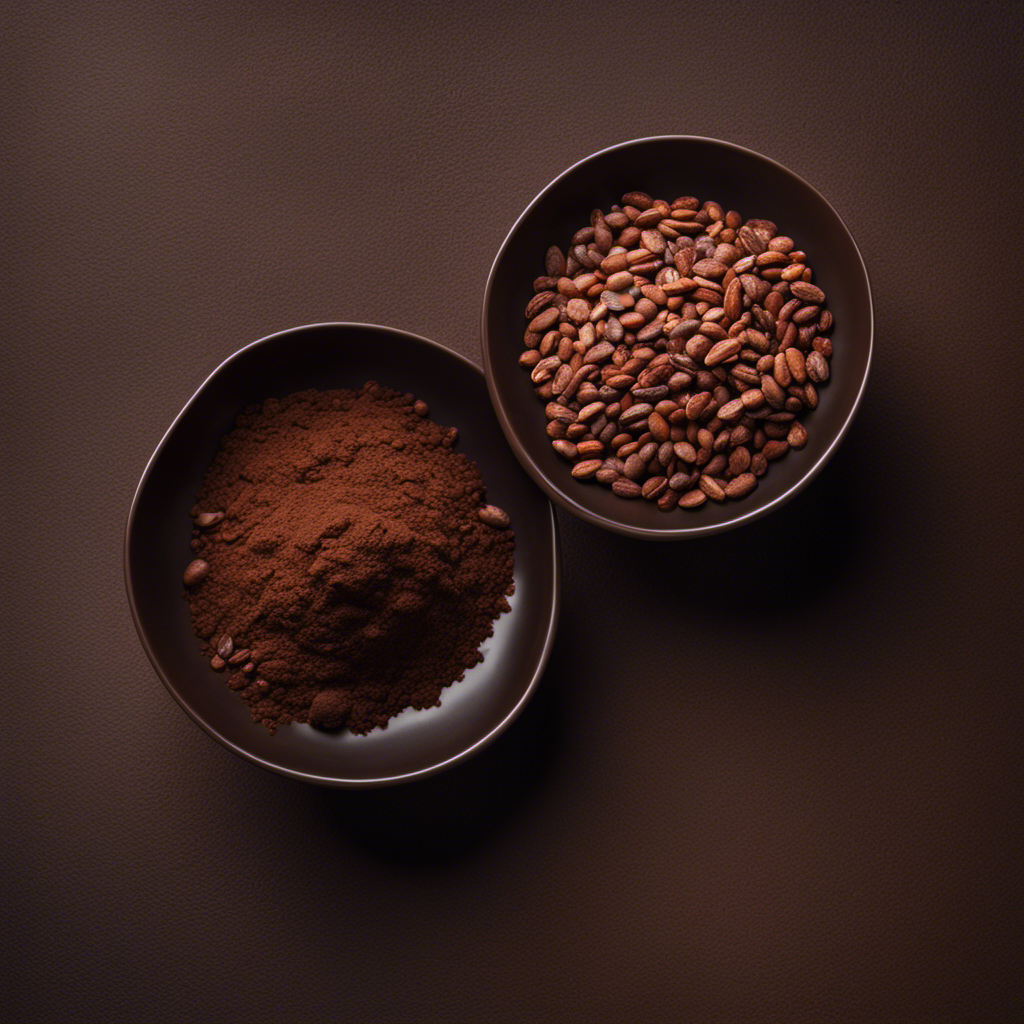
As I explore the realm of cacao and cocoa, I am fascinated by the delicate distinctions that set apart these two components. The inquiry arises: what sets raw, natural cacao apart from cocoa powder?
In this article, I aim to unravel the complexities and shed light on this intriguing topic.
Originating from the cacao tree, these two products undergo different processing methods, resulting in distinct flavor profiles and nutritional content. While cacao retains its raw, unprocessed form, cocoa powder undergoes a more intensive process involving roasting and grinding. Understanding these differences is crucial for culinary enthusiasts and health-conscious individuals alike.
Join me as we explore the origins, processing methods, nutritional content, and culinary uses of cacao and cocoa powder. We will also delve into availability, cost, sustainability, and storage considerations. By the end of this article, you will have a comprehensive understanding of these two ingredients and be equipped to make informed choices in your culinary endeavors.
So, let’s embark on this fascinating journey together.
Key Takeaways
- Raw cacao and cocoa powder are derived from the same source, but they undergo different processing methods.
- Raw cacao is made by cold-pressing unroasted cacao beans, while cocoa powder is produced by roasting the beans at high temperatures.
- Raw cacao retains more nutrients and antioxidants compared to cocoa powder due to minimal processing.
- When choosing between raw cacao and cocoa powder, factors to consider include flavor preferences, nutritional benefits, and support for sustainable and fair trade practices.
The Origins of Cacao and Cocoa
The rich history of cacao and cocoa will transport me to exotic lands and ignite my curiosity about their origins.
Cacao, the raw form of chocolate, comes from the cacao tree, which has been cultivated for thousands of years in Central and South America. The Mayans and Aztecs revered cacao for its cultural significance and used it in religious ceremonies.
Cocoa, on the other hand, is the processed form of cacao. To make cocoa powder, cacao beans are fermented, roasted, and ground into a fine powder. This processing technique removes the natural fats, known as cocoa butter, from the cacao beans. The difference between raw cacao and cocoa powder lies in their processing methods.
Now, let’s explore the various processing methods used to transform cacao into cocoa powder.
Processing Methods
When it comes to processing techniques, you’ll be surprised to discover the unique ways in which cacao and cocoa are transformed into delicious treats. The following list will give you an insight into the intricate process:
-
Fermentation: After the cacao beans are harvested, they undergo a fermentation process. This step is crucial as it develops the flavor profiles and reduces bitterness.
-
Roasting: The fermented beans are then roasted to enhance their aroma and deepen the flavors. Roasting also helps to remove moisture and further develop the chocolatey taste.
-
Grinding and Pressing: The roasted beans are ground into a paste, known as chocolate liquor. This paste is then pressed to separate the cocoa solids from the cocoa butter.
These processing methods not only bring out the distinct flavors but also impact the nutritional properties of cacao and cocoa.
Transitioning into the subsequent section about ‘nutritional content,’ let’s explore how these processing techniques affect the final products.
Nutritional Content
The discussion on the Nutritional Content of raw cacao and cocoa powder explores the health benefits of raw cacao and the nutritional differences between cacao and cocoa powder.
Raw cacao is rich in antioxidants, flavonoids, and minerals, which contribute to its potential health benefits such as improved cardiovascular health and mood enhancement.
On the other hand, cocoa powder is processed at a higher temperature, which reduces its nutritional content but still retains some health benefits.
Health benefits of raw cacao
Indulging in raw cacao can boost your health and give you a delectable treat at the same time. This superfood is packed with health benefits due to its minimal processing methods. Here are some reasons why raw cacao is a great addition to your diet:
-
High in antioxidants: Raw cacao contains a wide range of antioxidants that help fight free radicals and reduce inflammation.
-
Mood enhancer: Raw cacao stimulates the production of endorphins and serotonin, improving mood and promoting feelings of happiness.
-
Cardiovascular support: The flavonoids in raw cacao have been shown to lower blood pressure, improve circulation, and reduce the risk of heart disease.
-
Brain booster: Raw cacao is rich in flavonoids and other compounds that enhance cognitive function and improve memory.
-
Culinary versatility: Raw cacao can be used in various culinary creations, such as smoothies, desserts, and baked goods.
Understanding the health benefits of raw cacao sets the stage for exploring the nutritional differences between cacao and cocoa powder.
Nutritional differences between cacao and cocoa powder
One cannot help but be intrigued by the nutritional disparities found within the realm of cacao and cocoa powder.
When comparing the two, one notable difference is the theobromine content. Cacao powder contains a higher concentration of theobromine, a stimulant that can have positive effects on cardiovascular health, while cocoa powder has a lower theobromine content.
Another difference lies in their antioxidant levels. Cacao powder has a higher antioxidant content, which can help protect the body against oxidative stress and inflammation. Cocoa powder, on the other hand, undergoes processing that may decrease its antioxidant levels.
These disparities in theobromine content and antioxidant levels contribute to the distinct nutritional profiles of cacao and cocoa powder.
Moving on to the subsequent section about ‘flavor profiles’, it’s important to consider how these nutritional differences may impact the taste experience.
Flavor Profiles
When it comes to flavor, cacao powder has a distinct earthy and slightly bitter taste, while cocoa powder offers a smoother and milder flavor. Flavor preferences play a crucial role in determining which powder to use in recipes. Some people enjoy the intense and complex flavor of cacao, while others prefer the more subtle taste of cocoa. Understanding these flavor profiles is essential for recipe substitution, as the two powders have different impacts on the overall taste of a dish. To help you make an informed decision, I have created a table comparing the flavor profiles of cacao and cocoa powder:
| Cacao Powder | Cocoa Powder |
|---|---|
| Earthy | Smooth |
| Slightly Bitter | Milder |
| Intense | Subtle |
| Complex | Delicate |
| Rich | Sweet |
Considering these flavor differences, it is important to choose the right powder based on your desired taste outcome. In the next section, we will explore the culinary uses of cacao and cocoa powder, highlighting their versatility in various dishes.
Culinary Uses
Expand your culinary creativity by exploring the various ways you can incorporate these delectable powders into your dishes.
- For culinary applications:
- Use raw cacao powder as a natural sweetener in smoothies or baked goods. Its intense flavor adds depth to chocolate desserts.
- Cocoa powder is ideal for making hot cocoa, chocolate sauces, or dusting over desserts for a rich, velvety finish.
Recipe ideas:
- Experiment with raw cacao powder in homemade energy bars or truffles for a healthy, indulgent treat.
- Add cocoa powder to chili or mole sauces for a subtle hint of chocolate that enhances savory dishes.
These versatile powders offer a wide range of culinary possibilities, allowing you to elevate the taste and presentation of your creations.
Now, let’s explore their availability and cost.
Availability and Cost
When it comes to the availability of raw cacao and cocoa powder, there are some important factors to consider.
Raw cacao is typically more widely available in health food stores and specialty shops, while cocoa powder can be found in most grocery stores.
As for the price comparison, raw cacao tends to be more expensive than cocoa powder due to its higher quality and processing methods. However, the cost can vary depending on the brand and the specific type of cacao or cocoa powder being purchased.
Availability of raw cacao and cocoa powder
Raw cacao and cocoa powder are both readily available in grocery stores and online.
When it comes to raw cacao, it is sourced from the Theobroma cacao tree, native to Central and South America. This unprocessed form of cacao retains its natural nutrients and antioxidants, making it a popular choice among health-conscious individuals.
On the other hand, cocoa powder is a processed form of cacao that has been roasted and ground into a fine powder. Despite the processing, cocoa powder still contains some health benefits, although it may have a slightly lower antioxidant content compared to raw cacao.
In terms of availability, both raw cacao and cocoa powder can be easily found in various brands and forms, including organic options.
Transitioning into the subsequent section about price comparison, it is important to consider the cost differences between these two products.
Price comparison between the two
In terms of price, there is a notable difference between raw cacao and cocoa powder. Raw cacao tends to be more expensive than cocoa powder due to the differences in their processing methods.
Raw cacao is made by cold-pressing unroasted cacao beans, which helps to retain more of the natural nutrients and antioxidants present in the cacao bean. On the other hand, cocoa powder is made by extracting the fat (cocoa butter) from roasted cacao beans, which results in a more processed product. This processing difference contributes to the higher price of raw cacao.
However, it is important to note that both raw cacao and cocoa powder offer health benefits, such as being rich in antioxidants and potentially improving mood and cognitive function.
Transitioning into the subsequent section about sustainability and fair trade, it is also worth considering the ethical and environmental aspects of cacao production.
Sustainability and Fair Trade
Sustainability and fair trade are essential for the production of both cacao and cocoa powder. Cacao farmers employ techniques to minimize environmental impact and promote biodiversity. This includes using organic farming methods and implementing agroforestry systems to preserve natural habitats.
Fair trade certifications guarantee that farmers receive fair wages and work in safe conditions. By supporting fair trade, consumers contribute to the social and economic development of cacao-producing communities.
Moving on to the next section about storage and shelf life, it is important to consider how sustainability and fair trade practices also influence the packaging and transportation of cacao and cocoa powder. These practices ensure that these products reach consumers while minimizing their environmental footprint.
Storage and Shelf Life
Proper storage of raw cacao and cocoa powder is crucial to maintaining their quality and flavor. Raw cacao should be stored in an airtight container in a cool, dry place away from direct sunlight. Exposure to heat and light can degrade its nutritional value and flavor.
Cocoa powder, on the other hand, has a longer shelf life due to its lower moisture content. However, it should still be stored in a cool, dark place to prevent it from absorbing any odors or moisture.
Proper storage of raw cacao and cocoa powder
To keep raw cacao and cocoa powder fresh and delicious, it’s important to know the proper storage methods. Here are three key factors to consider:
-
Temperature: Store raw cacao and cocoa powder in a cool, dry place, away from direct sunlight. Fluctuations in temperature can cause moisture buildup and spoilage.
-
Airtight Containers: Use airtight containers to maintain flavor and prevent moisture absorption. This protects them from exposure to air, humidity, and odors.
-
Avoid Contamination: Keep raw cacao and cocoa powder away from strong-smelling foods or spices as they can easily absorb odors. Also, use clean utensils when scooping out the desired amount.
By following these proper storage techniques, you can extend the shelf life of both raw cacao and cocoa powder. Now let’s explore the differences in their shelf life.
Shelf life differences between the two
To ensure that your cacao and cocoa stay fresh, let’s now dive into how their shelf life varies. Proper storage methods and preservation techniques are crucial in maintaining the quality of these products. The shelf life of raw cacao is generally longer compared to cocoa powder. This is because raw cacao undergoes minimal processing and retains more natural antioxidants, which act as preservatives. On the other hand, cocoa powder is processed at higher temperatures, which reduces its antioxidant content and shelf life. To illustrate the differences, refer to the table below:
| Raw Cacao | Cocoa Powder | |
|---|---|---|
| Shelf Life | 1-2 years | 1 year |
| Storage | Cool, dry place | Cool, dry place |
Understanding these shelf life differences can help you make informed decisions about the storage and usage of your cacao and cocoa. In the subsequent section, we will discuss our conclusions and provide recommendations for optimal storage practices.
Conclusion and Recommendations
In conclusion, when it comes to choosing between raw cacao and cocoa powder, there are several factors to consider. The difference in flavor and nutritional benefits is significant, making it a decision worth considering for any chocolate lover. Raw cacao tends to be more expensive than cocoa powder due to the additional processing steps involved. However, the sustainability practices associated with raw cacao production can justify the higher cost. Raw cacao is often sourced from sustainable farms that prioritize fair trade and organic practices, ensuring the protection of biodiversity and the well-being of farmers. Additionally, raw cacao retains more of its natural antioxidants, minerals, and flavonoids compared to cocoa powder, making it a healthier choice. Therefore, if you are willing to invest in a higher quality and more sustainable chocolate experience, raw cacao is the way to go.
Frequently Asked Questions
Can raw cacao or cocoa powder be used interchangeably in recipes?
In baking, raw cacao and cocoa powder can generally be used interchangeably. However, there are nutritional differences. Raw cacao is less processed and retains more nutrients, while cocoa powder undergoes more processing and may have added ingredients.
Are there any potential health risks associated with consuming raw cacao or cocoa powder?
There may be potential health risks associated with consuming raw cacao or cocoa powder, but they can also provide potential health benefits due to their nutritional differences.
How does the caffeine content compare between raw cacao and cocoa powder?
Compared to cocoa powder, raw cacao generally contains more caffeine. However, the exact caffeine content can vary depending on the brand and processing methods. Taste preference between the two may differ due to the different levels of bitterness.
Are there any specific recipes or dishes where raw cacao or cocoa powder is recommended over the other?
Specific recipes and recommended uses for raw cacao or cocoa powder include smoothies, desserts, and hot beverages. Raw cacao is ideal for raw desserts, while cocoa powder is commonly used in baking recipes.
What are some common misconceptions or myths about raw cacao and cocoa powder?
Oh, the misconceptions people have about raw cacao and cocoa powder! Some believe that raw cacao is a nutritional powerhouse, while cocoa powder is just a processed, inferior version. But let me enlighten you with the truth.
Conclusion
In conclusion, understanding the difference between raw cacao and cocoa powder is crucial for both culinary and health purposes.
While both are derived from the same source, their processing methods result in distinct nutritional profiles and flavor profiles.
Raw cacao is rich in antioxidants and retains more of its natural nutrients, making it a healthier choice.
On the other hand, cocoa powder is more commonly used in baking and has a milder taste.
For example, in a study comparing the effects of raw cacao and cocoa powder on blood pressure, it was found that raw cacao significantly reduced blood pressure in hypertensive individuals.
Therefore, when choosing between raw cacao and cocoa powder, consider your desired health benefits and culinary preferences.
Arf, an author and an innovative enthusiast of coffee, coffee alternatives, and tea, plays a crucial role as a contributor to the esteemed Cappuccino Oracle platform. Renowned for his curiosity and passion for these captivating beverages, Arf has carved out a unique space for himself in the world of exploration and writing. He realized that coffee, coffee alternatives, and tea are not mere drinks to keep one awake, but universes of flavors and stories waiting to be explored.
Arf’s articles for Cappuccino Oracle blend meticulous research with personal experiences, providing readers with an in-depth understanding of various types of coffee, coffee alternatives, and tea, along with their unique characteristics, cultures, and histories. His honest reviews and engaging narratives guide readers on their own journeys, helping them discover their preferences and find their perfect brew.


Experience the Warmth of Tanpopo Konditorei Café Munich
Autumn hygge coloring book for adults: Experience the warmth and comfort of autumn with relaxing, cozy hygge-inspired designs to color...


Dabbsson DBS3000B Review: Portable Power for All Needs
Join the revolution of portable power with the Dabbsson DBS3000B, a game-changer for all your energy needs.


Suncast Tremont Shed Review
Starting with the letter 'S', discover why the Suncast Tremont Shed stands out for its durability, functionality, and modern design...


Ispring WCS50KG Water Softener Review
Uncover the compact and efficient Ispring WCS50KG Water Softener, a sleek solution for improving water quality that promises hassle-free installation...


RealTruck Roll-N-Lock M-Series Tonneau Cover Review
Yearning for a reliable and stylish tonneau cover?


Sojag Portland Gazebo Review: Outdoor Sun Shelter Insights
Optimize your outdoor space with the sturdy Sojag Portland Gazebo - discover why it's a must-have for sun shelter seekers!


Arrow Carports Galvanized Steel Carport Review
Meticulously designed for durability and ease of assembly, the Arrow Carport offers robust protection for vehicles and equipment – an...


ShelterLogic ShelterTube Garage Review
Tackle your outdoor storage needs with the durable and stylish ShelterLogic ShelterTube Garage, designed to withstand harsh weather conditions.


RealTruck Roll-N-Lock M-Series Cover Review
Take a look at the RealTruck Roll-N-Lock M-Series Cover for your Chevy/GMC Silverado/Sierra - a secure, user-friendly option that enhances...


RealTruck Roll-N-Lock M-Series Tonneau Cover Review
Just how secure is the RealTruck Roll-N-Lock M-Series Tonneau Cover for your Ford F-150?


Ove Decors Maya Plus Vanity Review
Discover the luxurious Almond Latte finish and ample storage of the Ove Decors Maya Plus Vanity, a sleek addition to...


Ashley DuraPella Power Reclining Sofa Review
Packed with practical features and modern design, the Ashley DuraPella Power Reclining Sofa offers comfort and convenience for a satisfying...

-

 Coffee Basics3 weeks ago
10 Potential Health Risks of Single-Serve Coffee Pods and How to Mitigate Them
-

 Coffee Basics3 weeks ago
Caffeine Content Comparison: Nespresso Vs. Traditional Coffee Vs. Energy Drinks
-

 Coffee Basics2 weeks ago
Yerba Mate: The South American Superfood and Its Health Benefits
-

 Coffee Basics2 weeks ago
The Impact of Coffee on Digestive Health: What Science Says
-

 Coffee Basics3 weeks ago
Celebrity Coffee Habits: Insights From TV and Movie Stars
-

 Coffee Basics3 weeks ago
Soft Drinks and Medical Tests: What You Need to Know
-

 Coffee Basics2 weeks ago
Herbal Teas for Every Occasion: From Relaxation to Romance
-
 Coffee Basics3 weeks ago
Maximizing the Shelf Life of Your Matcha: Storage Tips and Tricks