
Nespresso
How To Descale Breville Nespresso

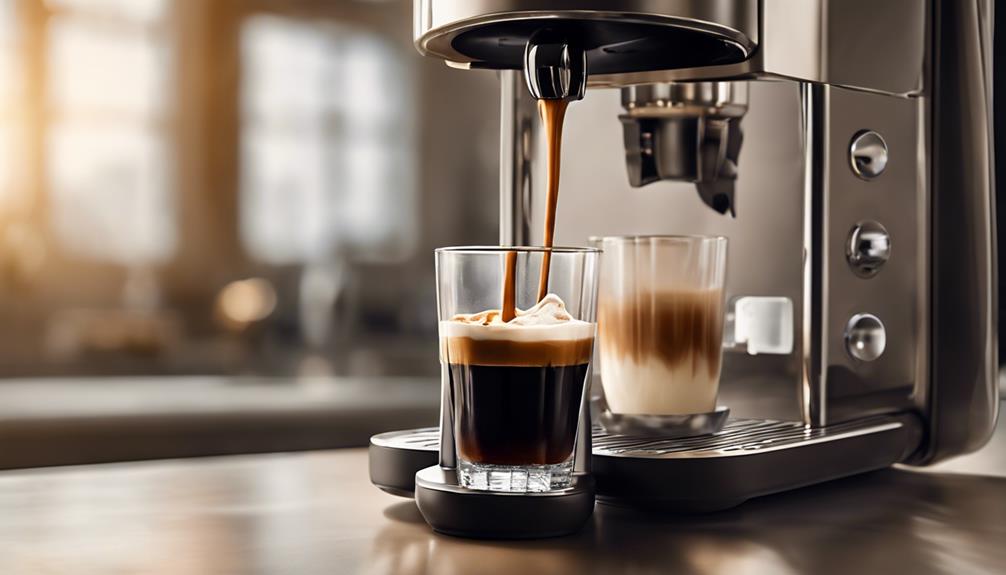
As a coffee lover, there’s nothing better than enjoying a freshly brewed cup of Nespresso in the morning. However, over time, your Breville Nespresso machine may start to lose its effectiveness due to mineral buildup and other impurities. That’s where descaling comes in.
Descaling is an essential process that helps maintain the quality of your coffee maker by removing any mineral deposits that may have accumulated inside. In this article, I’ll guide you through the steps on how to descale your Breville Nespresso machine so that you can continue to enjoy the perfect cup of coffee every time.
So let’s get started!
Key Takeaways
- Descaling is necessary every 3 months or after 300 uses.
- Use quality descaler safe for machine and clean exterior regularly.
- Follow Breville’s recommended descaling process and solution.
- Properly clean and maintain the machine after each use to avoid clogging and ensure consistent results.
Importance of Descaling Your Breville Nespresso Machine
You’re probably wondering why it’s so important to descale your Breville Nespresso machine, right? Well, let me tell you, neglecting this task can lead to some serious issues with your coffee quality and machine functionality.
Descaling frequency is crucial because the buildup of mineral deposits from hard water can clog the machine’s pipes and affect the taste of your coffee. Over time, these deposits can also damage the internal components of your machine.
One sign that your Breville Nespresso machine needs descaling is a decrease in water flow during brewing. If you notice that it takes longer for your coffee to brew or if there are unusual noises coming from the machine, then it’s time to descale.

Another indication is a change in the taste of your coffee – if it tastes bitter or sour even though you’re using high-quality beans, then mineral buildup could be affecting its flavor.
To ensure that your Breville Nespresso machine continues to function properly and produce delicious coffee every time, regular descaling is essential. Now that you understand why this task is so important and how to recognize when it needs to be done, let’s move on to gathering the necessary materials for descaling.
Gather the Necessary Materials
To get your machine back to its best, it’s time to round up the troops – think of yourself as a general gathering supplies for battle. First and foremost, you’ll need to purchase a descaling solution. You can find this solution at most retail stores or online retailers.
Just make sure that the solution is compatible with your Breville Nespresso machine. When selecting a descaling solution, keep in mind that there are various brands available on the market. However, not all solutions are created equal. Some may contain harsh chemicals that could damage your machine or leave behind an unpleasant odor.
It’s important to choose a quality descaler that is safe for both you and your machine. Aside from purchasing descaling solution, it’s important to maintain your Nespresso machine properly. This means regularly cleaning and maintaining the exterior of the machine as well as ensuring that water tanks are always filled with fresh water.
By taking care of your Nespresso machine, you can extend its lifespan and ensure optimal performance every time you make coffee. With these tips in mind, let’s move on to preparing your machine for descaling in the next section.
Prepare Your Machine
Before getting started, it’s important to ensure that your machine is turned off and unplugged. This will help prevent any accidents or damage to your machine while you’re cleaning it. Once the machine is off and unplugged, remove any capsules or pods from the brewing chamber.
Now that you’ve prepared your machine, take a moment to consider some tips for maintenance. It’s important to regularly clean and descale your Nespresso machine to keep it running smoothly and avoid any blockages in the system.
Common mistakes include using vinegar instead of descaling solution, not fully rinsing the system after descaling, and forgetting to replace the water filter cartridge.
With these tips in mind, you’re ready to move on to mixing the descaling solution. By taking care of your Nespresso machine with regular maintenance like this, you can ensure it continues producing high-quality coffee drinks for years to come.
Mix the Descaling Solution
Once the machine’s prepared, it’s time to mix the solution for descaling. It’s important to follow the mixing instructions carefully for a successful descaling process. Breville recommends using their own descaling solution for Nespresso machines, which can be easily purchased online or at select retailers.
To mix the solution, first fill the water tank with one liter of fresh water. Then add one sachet of Breville’s descaling solution into the tank and stir until fully dissolved. Make sure that there are no clumps left in the mixture before proceeding.
Once everything’s mixed well, place a container under your machine’s spout to catch any liquid that comes out during the cleaning process.
It’s recommended to descale your Breville Nespresso machine every three months or after 300 uses, whichever comes first. This frequency may vary depending on factors such as water hardness and usage patterns. Regular descaling ensures that your machine continues to produce high-quality coffee and prolongs its lifespan by preventing buildup of mineral deposits inside.
Now that you’ve properly mixed the descaling solution, it’s time to start the descaling process and clean your machine thoroughly.
Start the Descaling Process
Now it’s time to rid your coffee maker of any unwanted buildup by initiating the descaling process. First, fill the water tank with the descaling solution and place a container under the coffee outlet to collect any waste water.
Next, turn on the machine and wait for it to heat up. Once heated, press both buttons simultaneously and hold them down for three seconds until all lights begin flashing rapidly. This indicates that the descaling process has started.
Allow the solution to run through each button separately until it is completely dispensed into the container below. It’s crucial not to interrupt this process as it will affect its efficiency. Common mistakes during this step include failing to mix enough solution or not waiting for the machine to properly heat up before starting.
If you encounter issues during this stage, refer back to your user manual for troubleshooting tips or contact Breville customer service for assistance. With that done, it’s time to move onto rinsing your machine thoroughly with fresh water until there are no traces of leftover solution.
Rinse the Machine
To cleanse your coffee maker of any remaining solution, you should now give it a thorough rinse with fresh water until the water runs clear, like a crystal-clear stream flowing through a lush green forest. This step is crucial to ensure that no residue or leftover cleaning solution remains in the machine.
The importance of regular maintenance cannot be overstated, as buildup can not only affect the taste of your coffee but also damage your machine over time. Here are some tips for avoiding buildup and extending the life of your Nespresso machine:
- Use filtered or bottled water instead of tap water to prevent mineral buildup.
- Clean your machine regularly, ideally every 3 months if used daily.
- Avoid leaving old capsules in the machine as they can attract bacteria.
By following these simple steps, you can keep your Nespresso machine running smoothly for years to come.
Now that we have rinsed our coffee maker thoroughly, it’s time to move on to the next step: cleaning the machine itself.
Clean the Machine
You can easily maintain your coffee maker by giving it a thorough cleaning to ensure its longevity and optimal performance. Here are some tips for maintaining a clean Nespresso machine.
First, always empty the capsule container and drip tray after each use and wash them with warm soapy water. It’s also important to regularly clean the water tank by filling it with fresh water and wiping it down with a damp cloth.
Second, when descaling your machine, avoid common mistakes such as using vinegar or lemon juice instead of the recommended descaling solution. These substances can damage the internal components of your machine and affect the taste of your coffee. Instead, follow the instructions provided by Breville for using their specific descaling solution.
After completing the cleaning process, reset the machine to ensure proper functionality. Simply press and hold both buttons on top of the machine until they begin to flash rapidly. Release both buttons simultaneously, then select your preferred cup size and enjoy a freshly brewed cup of coffee from your newly cleaned Nespresso machine.
By following these tips for maintaining a clean Nespresso machine and avoiding common mistakes when descaling, you’ll be able to prolong its lifespan and continue enjoying delicious coffee every day without any issues.
Now that you’ve cleaned your machine properly, let’s move on to resetting it for optimal performance.
Reset the Machine
To reset the Breville Nespresso machine, I turn off the machine and hold down the Lungo button for 5 seconds.
Then, I release the button and wait for the machine to restart.
This process resets any settings or errors that may have occurred during use and ensures optimal performance from my machine.
Turn Off the Machine
First, make sure the machine is turned off before descaling it. Regularly turning off your Breville Nespresso machine can help prolong its lifespan by reducing wear and tear on its internal components. It also helps to conserve energy and prevent any potential hazards that could arise from leaving the machine on for extended periods.
To turn off the machine, simply press and hold down the power button until the lights turn off. Once the machine is fully powered down, you can proceed with descaling it using a descaling solution and following the manufacturer’s instructions. Remember to always follow proper safety precautions when handling any cleaning solutions or chemicals.
After turning off the machine and completing the descaling process, you can move on to holding down the lungo button for 5 seconds to reset it as outlined in our previous subtopic. This will allow you to continue enjoying your delicious Nespresso beverages without any issues or interruptions.
Hold the Lungo Button for 5 Seconds
Now, if you want to ensure a smooth brewing experience with your Breville Nespresso machine, it’s important to hold down the lungo button for 5 seconds. This will reset the machine and avoid any potential issues that may occur during the brewing process.
It’s a simple step that can make all the difference in achieving a delicious cup of coffee every time. But why specifically hold down the lungo button?
Well, one of the benefits of using this setting is that it produces a longer shot of coffee compared to an espresso shot. Lungo coffee typically has a higher volume and lower intensity than espresso, resulting in a milder taste profile.
By resetting the lungo button, you can ensure that your machine is calibrated correctly to produce this type of coffee and enjoy all its unique qualities. With that said, let’s move on to the next step: releasing the button.
Release the Button
After holding down the lungo button for 5 seconds, you can release it and test out your machine’s brewing capabilities to see if this theory of resetting the machine truly makes a difference in taste.
But how do you properly release the button during the descaling process? It’s important to remember to let go of the button gently, as abruptly releasing it could cause damage to your machine’s internal components. Additionally, make sure that you release the button completely; some users have reported issues with their machines continuing to brew even after they’ve released the lungo button.
If you’re experiencing any issues with releasing the lungo button during this process, don’t worry – there are several troubleshooting steps you can take. First, double-check that your fingers aren’t accidentally pressing down on any other buttons while trying to release the lungo button. If that doesn’t work, try turning off and unplugging your machine for a few minutes before attempting again. And if all else fails, consult Breville Nespresso’s customer service team for additional support and guidance.
Once you’ve successfully released the lungo button during descaling, it’s time for one final rinse before enjoying a fresh cup of coffee – but we’ll cover that in our next section.
Final Rinse
Now that we’ve successfully reset our Breville Nespresso machine, it’s time for the final step in the descaling process: the final rinse.
First, I’ll need to fill the water tank with clean water up to its maximum level.
Then, I’ll run the machine without any capsules to flush out any remaining descaling solution.
Finally, I’ll discard this water and repeat the process with fresh water until there’s no longer any residual taste or odor from the descaling solution.
Fill the Water Tank with Clean Water
Simply refill the water tank with fresh, clean water. It’s important to use filtered water for your Nespresso machine as it helps prevent mineral build-up and ensures a better tasting cup of coffee. Using unfiltered tap water can result in clogged nozzles and a poor quality brew.
When refilling the tank, make sure not to overfill or underfill it. Overfilling can cause spillage and damage to the machine, while under filling may lead to an incomplete descaling process. Also, avoid using hot or cold water directly from the tap as it may affect the temperature of your coffee. Instead, fill the tank with room temperature filtered water.
With the water tank filled up properly, we’re now ready for the final step – running the machine through its cycle.
Run the Machine
To get your machine going, all you need to do is pop in a capsule and hit the brew button – easy peasy! However, if there are any issues with the brewing process or if you want to optimize your machine’s performance, here are some troubleshooting tips:
-
If the coffee is coming out too slowly:
-
Check that the water tank is full and properly inserted.
-
Clean the machine’s needle by following the manufacturer’s instructions.
-
Descale the machine if it hasn’t been done in a while.
-
If the coffee is coming out too quickly:
-
Make sure that you’re using compatible capsules and not overfilling them.
-
Try adjusting the cup size setting on your machine.
-
Descale the machine if it hasn’t been done in a while.
-
If there are other issues with taste or temperature:
-
Check that your capsules haven’t expired or been exposed to moisture.
-
Experiment with different types of espresso blends for optimal flavor.
-
Follow cleaning and descaling instructions regularly for consistent results.
Now that you’ve successfully brewed a cup of Nespresso, it’s time to discard any remaining water from previous cycles before enjoying your freshly made drink.
Discard the Water
Before savoring your Nespresso, it’s important to properly dispose of the used descaling solution and any residual water from previous brews. Failure to do so may result in an unpleasant taste and reduced quality of your coffee.
To discard the water, simply remove the capsule holder and cup tray from your Breville Nespresso machine and empty them into a sink or other suitable receptacle.
It’s also important to take preventative measures to avoid scale buildup in your machine. One tip is to use only filtered or bottled water instead of tap water, which can contain minerals that contribute to scale buildup.
Additionally, regularly cleaning the removable parts of your machine with warm soapy water can help prevent residue buildup. By properly discarding residual liquids and taking preventative measures, you can ensure optimal taste and quality from your Breville Nespresso machine for many cups to come!
Enjoy Your Freshly Descaled Breville Nespresso Machine!
Imagine waking up to the aroma of freshly brewed coffee from your newly descaled Breville Nespresso machine – your taste buds will thank you! Descaling your machine is crucial in ensuring that it continues to function properly. However, maintaining your machine after descaling is just as important.
Here are some tips for keeping your Breville Nespresso machine in top condition:
-
Clean the drip tray and capsule container regularly: These two components can accumulate leftover coffee and water, which can lead to mold growth if left uncleaned. Be sure to remove them from the machine and wash them with warm soapy water at least once a week.
-
Use high-quality Nespresso pods: After descaling, treat yourself to some of the best Nespresso pod flavors available! Opt for high-quality pods, as cheaper options may not work well with your newly cleaned machine.
-
Rinse out the water tank often: The water tank can also accumulate residue over time, so be sure to rinse it out every few days with fresh water before refilling it.
After properly descaling and maintaining your Breville Nespresso machine, you’ll notice a significant improvement in both the taste and quality of your coffee. By following these simple tips and using high-quality pods, you’ll continue to enjoy delicious cups of coffee every morning without any hiccups!
Frequently Asked Questions
How often should I descale my Breville Nespresso machine?
I highly recommend descaling your Breville Nespresso machine every three months to maintain optimal performance. Frequency recommendations may vary depending on usage and water hardness in your area, but regular descaling can prevent scale buildup that can clog the machine’s components and affect the taste of your coffee.
Descaling also extends the lifespan of your Nespresso machine and ensures consistent brewing temperature and pressure. Benefits of descaling include improved taste, increased energy efficiency, and reduced risk of breakdowns.
By following a regular descaling schedule, you can enjoy delicious coffee with minimal maintenance hassle.
Is it safe to use vinegar instead of a descaling solution?
I’ve seen some people suggest using vinegar as an alternative to a descaling solution for their Breville Nespresso machines. While it may seem like a cost-effective and easy solution, I wouldn’t recommend it.
The reason being is that vinegar is not specifically designed for descaling coffee machines, whereas descaling solutions are. Vinegar may be effective at removing some of the buildup in your machine, but it’s not guaranteed to remove all of it.
In fact, some sources suggest that vinegar can actually cause damage to the internal components of your machine over time if used repeatedly. So while using vinegar may be a cheaper alternative, I would still recommend investing in a proper descaling solution for the best results and to ensure the longevity of your machine.
Can I still use my machine while it’s going through the descaling process?
When it comes to descaling your Nespresso machine, it’s important to know whether or not you can continue using it during the process.
While it may be tempting to make a quick cup of coffee while the machine is going through its cleaning cycle, it’s best to avoid doing so. The descaling solution needs time to work its magic and removing any build-up or residue that has accumulated. Using the machine during this time could potentially damage the internal components and affect the quality of your coffee.
As for the best descaling solutions, there are many on the market specifically designed for Nespresso machines. It’s important to choose one that is compatible with your specific model and follow the manufacturer’s instructions carefully for optimal results.
How do I know when the descaling process is complete?
I know it can be frustrating waiting for the descaling process to finish, but it’s important not to rush it.
So, how do you know when your Breville Nespresso is completely descaled?
Well, there are a few things to look out for. First of all, the descaling solution should have run through the entire system and emptied into the drip tray.
You’ll also want to make sure that there is no remaining solution in the water tank or any other parts of the machine.
Once this is done, fill up the water tank with fresh water and run a few cycles without coffee pods to rinse out any remaining solution.
As for tips on efficiently descaling your machine, make sure to follow the manufacturer’s instructions carefully and use only recommended solutions.
Finally, don’t forget to clean and maintain your machine regularly to prevent buildup and prolong its lifespan.
Will descaling my machine affect the taste of my coffee?
Descaling is an essential part of maintaining your coffee machine’s longevity and preventing any potential damages caused by mineral buildup. However, some may be hesitant to descale their machines because they fear it will affect the taste of their coffee.
It is important to note that descaling does not have a direct impact on the flavor profile of your brews. The main purpose of descaling is to remove any buildup that could potentially clog or damage the internal components of your machine. This can negatively affect the quality and consistency of your coffee over time.
Therefore, regular descaling is crucial for ensuring that your machine operates at its optimal performance level and produces high-quality coffee every time.
Conclusion
In conclusion, descaling your Breville Nespresso machine is an important task that shouldn’t be ignored. A study by Nespresso found that 78% of coffee consumers don’t clean their machines regularly. This can lead to a buildup of limescale, affecting the taste and quality of coffee.
By following the steps outlined in this article, you can ensure that your machine stays in top condition and produces high-quality coffee every time. Remember to gather all necessary materials, prepare your machine, mix the descaling solution, start the process, clean and reset the machine, and perform a final rinse before enjoying your freshly descaled Breville Nespresso machine.
Regular descaling will not only improve the taste of your coffee but also extend the life of your machine. With proper maintenance and care, you can enjoy delicious espresso for years to come.
So don’t wait any longer – give your Breville Nespresso machine the attention it deserves!

In the vast and diverse world of coffee, coffee alternatives, and tea, Olivia has found her calling. As an author and a dedicated coffee and tea aficionado, her work for Cappuccino Oracle reflects her profound love and understanding of the intricate complexities found within these beverages. Olivia’s passion for the subject serves as both a catalyst for her creativity and a connection point with her audience.
Olivia’s appreciation for coffee, coffee alternatives, and tea blossomed at an early age. She discovered that these beverages invigorated her senses and stimulated her creative spirit. From the nuanced flavors of single-origin roasts to the captivating narratives intertwined with coffee, coffee alternatives, and tea trade and culture, Olivia found an unlimited source of inspiration in her daily cup.
Her love for these beverages and her talent for storytelling eventually converged at Cappuccino Oracle. As an author, Olivia’s mission is to illuminate the intricate tapestry that makes up the world of coffee, coffee alternatives, and tea. Her articles span a diverse range of topics, encompassing everything from the unique flavors of different brews to the sociocultural history intertwined with their cultivation and consumption.

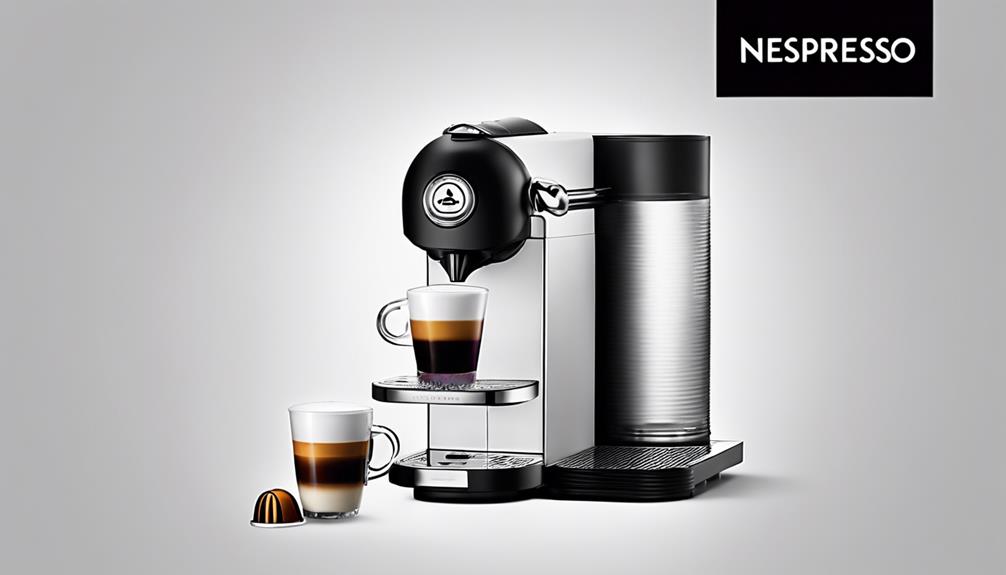
Nespresso
How to Make Iced Coffee at Home With Nespresso
Frothy milk, flavored syrups, and seasonal fruits are just the beginning of creating your perfect homemade iced coffee with Nespresso – keep reading for more tips on elevating your brew!
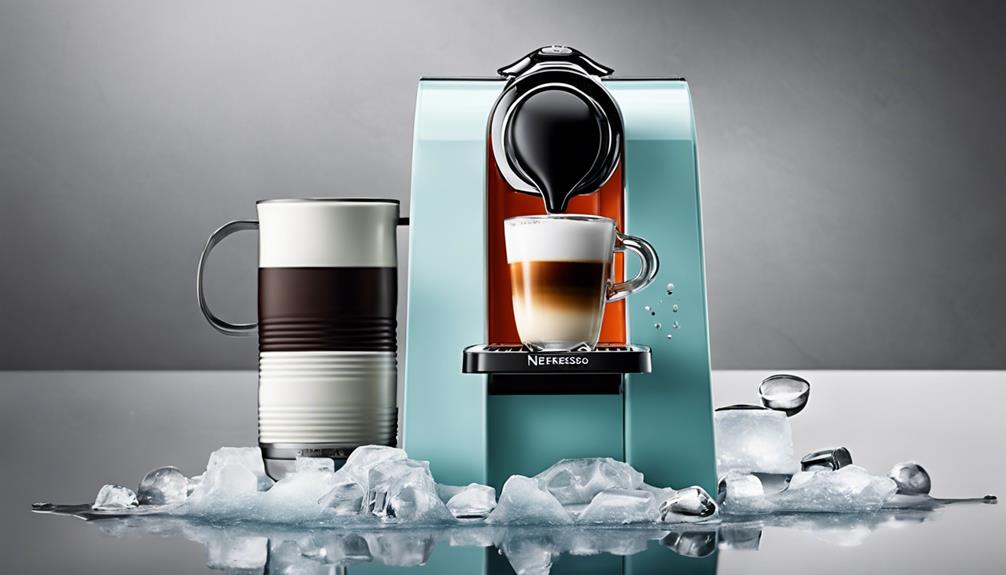
So, you wanna make iced coffee with your Nespresso, huh? Well, grab a tall glass, fill it with ice, and brew a Cold Brew Style Intense capsule. Let that brew cool, then add milk. Fancy frothy milk? Use the Aeroccino. Experiment with different capsules for unique flavors. Try whole milk or go light with almond milk. Sweeten with syrups like vanilla or hazelnut. Top with berries or season fruits. Add a stylish straw for fun. Want more tips? Keep discovering to level up your homemade iced coffee game!
Key Takeaways
- Start with a 500ml glass, 6 ice cubes, and Nespresso Cold Brew Style Intense capsules.
- Chill brewed coffee before adding milk and sweeteners.
- Froth cold milk with Nespresso Aeroccino.
- Experiment with different Nespresso capsules for flavor variations.
- Use whole milk or try plant-based options, like oat or almond milk, for customization.
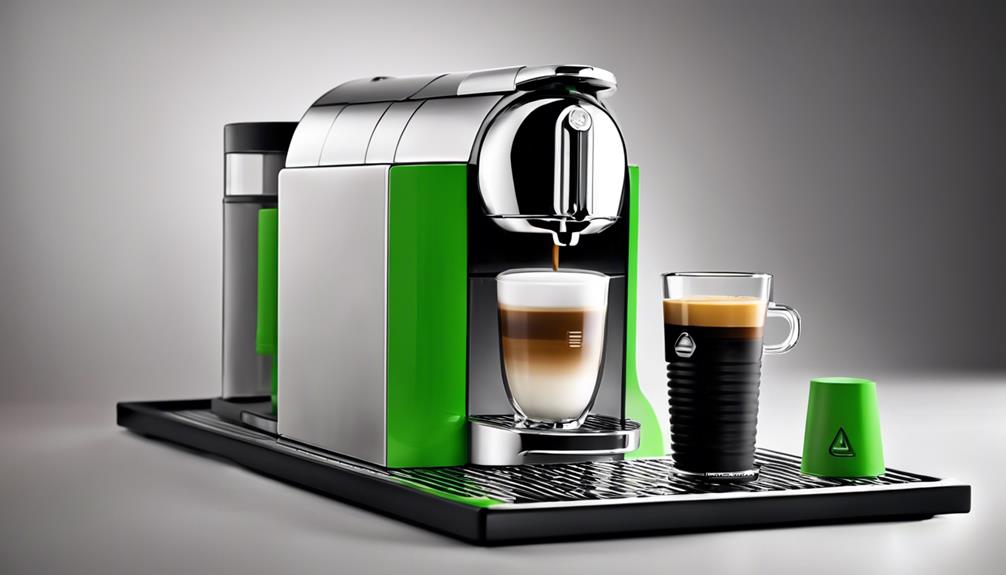
Nespresso Vertuo Brewing Basics
When brewing with a Nespresso Vertuo machine, ensuring the glass is twice the size of your drink enhances the iced coffee experience. This trick allows enough room for ice cubes and prevents your delicious coffee from overflowing.
For a perfect iced coffee, start with a 500ml glass and add six regular-sized ice cubes before brewing your Nespresso Vertuo coffee. I recommend using Nespresso Vertuo Cold Brew Style Intense capsules like Arpeggio for that extra kick.
Once brewed, let the coffee cool down before adding any milk or sweeteners. This way, you'll enjoy a revitalizing iced coffee that's not diluted by melting ice. The Nespresso Vertuo machine's quantity selector also comes in handy here, ensuring you get the right coffee-to-ice ratio every time.
Experiment with different recipes and milk options to find your favorite combination for a custom iced coffee experience right at home.
Chilling and Frothing Techniques

Cool your brewed coffee in the fridge before adding milk for an invigorating iced coffee experience. When making that perfect iced coffee at home with Nespresso, chilling and frothing techniques play an important role. The Nespresso Aeroccino milk frother is a game-changer, allowing you to froth cold milk to create a creamy topping for your iced coffee. Additionally, using ice cubes in your glass before brewing your coffee helps to chill the drink quickly, preserving its flavors.
Here's a handy table to summarize the chilling and frothing techniques for your Nespresso iced coffee:
| Chilling Techniques | Frothing Techniques |
|---|---|
| Chill brewed coffee in the fridge | Utilize Nespresso Aeroccino for cold milk froth |
| Use ice cubes in the glass before brewing | Experiment with different Nespresso capsules for flavor |
Selecting the Perfect Milk
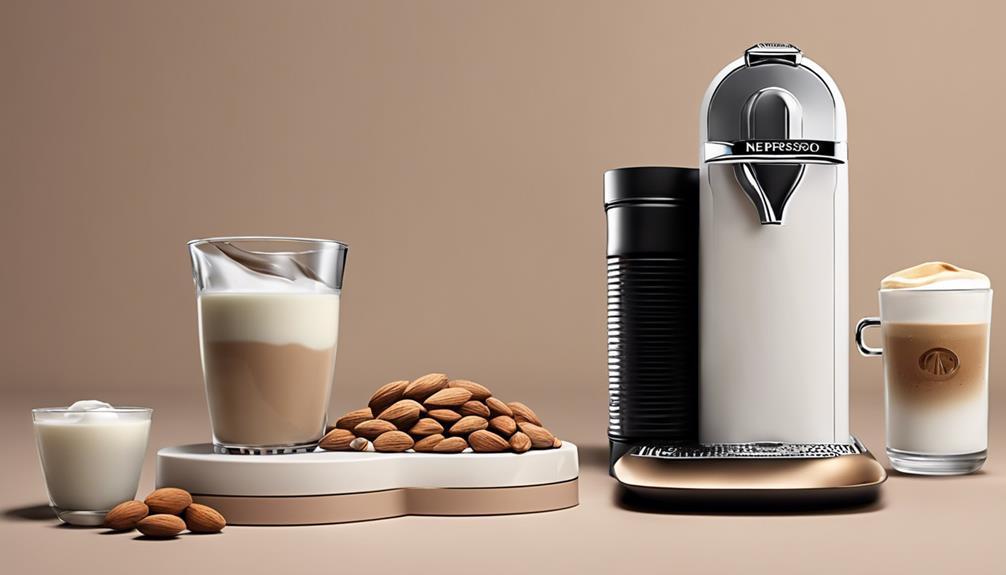
Selecting the perfect milk is crucial for achieving the desired creamy texture and flavor in your homemade iced coffee. For a lusciously creamy iced coffee, opt for whole milk or cream. These choices bring a richness that blends magically with the coffee, creating a decadent treat.
If you lean towards a lighter option, explore low-fat or plant-based milks like almond, oat, or soy milk. These alternatives offer a different take, keeping things fresh and exciting. It's fascinating how the type of milk you choose can influence the flavor profile of your iced coffee. Experimenting with different milks opens up a world of possibilities, letting you tailor your drink precisely to your liking.
To elevate your iced coffee game, froth your milk with a Nespresso Aeroccino for that touch of luxury and velvety foam. And if you're feeling adventurous, try a sweetened condensed milk for a rich and sweet twist that will make your iced coffee truly unforgettable.
Sweeteners and Flavor Enhancements
To enhance the flavor of your homemade iced coffee, consider experimenting with various sweeteners and flavor enhancements. Here are some exciting options to jazz up your Nespresso creation:
- Maple Syrup: Add a touch of natural sweetness with maple syrup, giving your iced coffee a rich and decadent flavor profile.
- Sugar-Free Syrups: For those watching their sugar intake, try sugar-free syrups in flavors like vanilla, caramel, or hazelnut for a guilt-free treat.
- Brown Sugar: Infuse a warm and caramel-like taste by incorporating brown sugar into your iced coffee, creating a cozy and comforting drink.
- Honey or Agave Nectar: Opt for the goodness of honey or agave nectar as healthier alternatives to traditional sugar, bringing a subtle sweetness that complements the coffee's bold flavors perfectly.
Experimenting with these sweeteners and flavor enhancers will elevate your Nespresso iced coffee experience, allowing you to customize your drink to suit your taste preferences.
Creative Nespresso Capsule Combinations
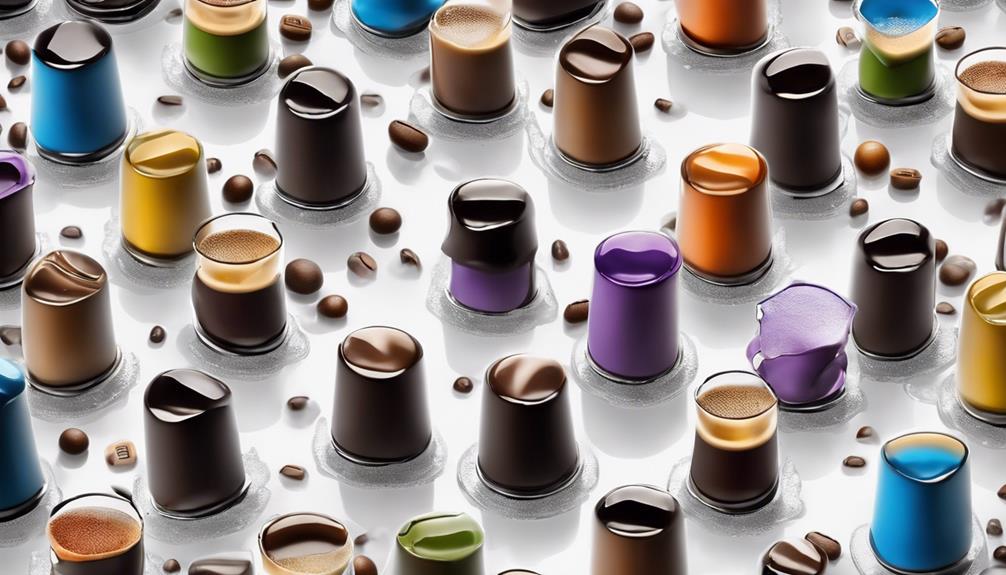
Experimenting with different Nespresso capsule combinations can add a unique and invigorating twist to your homemade iced coffee creations.
I love mixing Nespresso capsules like Odacio and Firenze Arpeggio for a burst of rich flavors in my iced coffee. If you're feeling adventurous, try combining Arpeggio and Livanto for a delightful taste experience that will elevate your morning pick-me-up.
For a tropical vibe, the Nespresso Tropical Coconut capsule is a must-try, while the Ice Forte and Ice Leggero capsules offer revitalizing options for a hot summer day. Don't miss out on the new releases like Watermelon Flavour Over Ice and Cold Brew Style Intense; they bring a whole new level of excitement to your coffee routine.
When choosing capsules, opt for bold and intense flavors like Kazaar, Arpeggio, or Ristretto for a satisfying iced coffee that packs a punch. Get creative and mix things up to discover your perfect iced coffee combination!
Experimenting With Different Milk Types
My go-to choice for a creamy and dairy-free option to enhance the bold flavors of Nespresso coffee is oat milk. When exploring different milk types for your iced coffee, it's like venturing on a flavorful journey where each sip uncovers new possibilities. Here are some reasons why playing with milk types can elevate your iced coffee experience:
- Oat Milk: Creamy and rich, oat milk pairs exquisitely with Nespresso's robust coffee, giving your drink a velvety texture that feels like a cozy hug in a glass.
- Almond Milk: For a lighter touch, almond milk introduces a subtle nuttiness that dances gracefully with the coffee's flavors, offering a delicate twist to your usual iced coffee routine.
- Soy Milk: Versatile and creamy, soy milk is like a blank canvas, ready to absorb the intense notes of Nespresso's coffee blends, creating a harmonious and luscious iced coffee experience.
- Personalized Experience: By customizing your milk choice, you tailor your iced coffee to suit your preferences, ensuring each sip is uniquely yours, adding a touch of creativity to your daily routine.
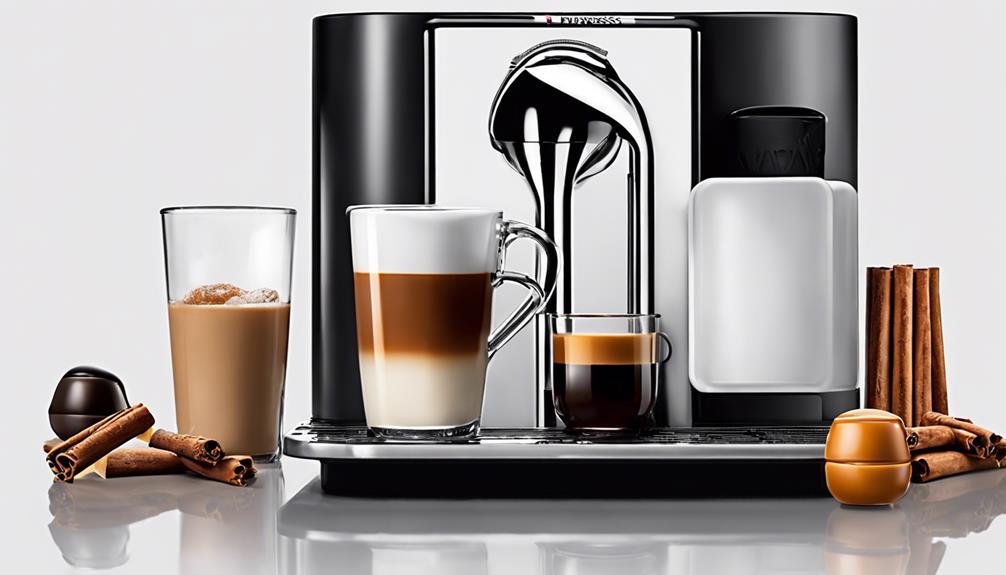
Customizing With Toppings and Garnishes
Enhance your iced coffee experience with a variety of toppings and garnishes that add a touch of luxury and creativity to your drink. When it comes to customizing your homemade Nespresso iced coffee, the options are endless! Think beyond the usual whipped cream and chocolate shavings – why not try a drizzle of caramel for that extra indulgence or some fresh mint leaves for a burst of flavor? Garnishes like cinnamon sticks or citrus zest can elevate your drink, making it not only delicious but also visually appealing.
Experimenting with different flavors is key to finding your perfect combination. Sprinkle some cocoa powder, nutmeg, or a pinch of sea salt on top to enhance the taste profile of your iced coffee. By personalizing your drink with unique toppings and garnishes, you can create a signature beverage that truly reflects your style and creativity. So go ahead, get creative, and take your iced coffee to the next level!
Serving Suggestions and Presentation Ideas
When it comes to serving your homemade iced coffee, think about jazzing it up with some fresh fruit garnishes for a pop of color and flavor.
Don't forget to grab some decorative straws to add a fun touch to your presentation.
And if you're feeling fancy, consider drizzling in some flavored syrups for that extra oomph!
Garnish With Fresh Fruit
Incorporating fresh fruit garnishes elevates the visual appeal and taste of your Nespresso iced coffee. Here are some innovative ideas to enhance your iced coffee experience:
- Colorful Citrus Twist: Try garnishing with slices of lime or grapefruit for a tangy kick that complements the rich flavors of your Nespresso creation.
- Berry Burst: Add a burst of sweetness by topping your iced coffee with assorted berries like strawberries, raspberries, or blueberries.
- Seasonal Sensations: Embrace the flavors of the season by using fresh seasonal fruits like peaches in the summer or apples in the fall to create a drink that's both visually appealing and delicious.
- Creative Combos: Mix and match different fruits to create visually stunning presentations that not only look great but also tantalize your taste buds.
Use Decorative Straws
Often overlooked, decorative straws can instantly elevate the presentation of your iced coffee, adding a touch of fun and style to your beverage. When choosing your straws, consider picking vibrant colors, playful patterns, or unique materials to match your personality or the occasion. Striped, polka dot, metallic, or eco-friendly reusable straws are all the rage for serving iced coffee. Opt for sustainable options like bamboo, paper, stainless steel, or glass straws to align with environmentally conscious choices. Using these stylish straws not only enhances the visual appeal of your drink but also makes it Instagram-worthy. Elevate your iced coffee game with these small yet impactful details that are both fun and sustainable.
| Colors | Patterns | Materials |
|---|---|---|
| Vibrant | Striped | Bamboo |
| Playful | Polka dot | Paper |
| Unique | Metallic | Stainless steel |
| Glass | ||
| Reusable eco-friendly |
Add Flavored Syrups
To further enhance the flavor profile and presentation of your iced coffee, consider incorporating flavored syrups for a delightful twist on your beverage. Here are some fun ways to customize your drink:
- Vanilla Dream: Add a splash of vanilla syrup for a classic and sweet flavor.
- Caramel Bliss: Indulge in the rich and buttery notes of caramel syrup swirled into your iced coffee.
- Hazelnut Heaven: Elevate your drink with the nutty and aromatic essence of hazelnut syrup.
- Mocha Magic: Experience the decadence of chocolate and coffee with a drizzle of mocha syrup on top.
Tips for a Refreshing Iced Coffee Experience
For a truly revitalizing iced coffee experience, opt for low-acid, dark roast Nespresso capsules like Kazaar or Arpeggio. These capsules pack a flavorful punch, perfect for creating a robust and satisfying iced coffee. If you're feeling adventurous, try out new releases like Watermelon Flavour Over Ice or Cold Brew Style Intense capsules for a unique twist on your usual iced coffee routine.
To enhance your homemade iced coffee, consider adding syrups, spices, or cold milk to customize it to your taste preferences. The possibilities are endless when it comes to personalizing your invigorating drink. Don't forget to leverage the Nespresso Barista for versatile recipes and easy customization of flavors and ingredients. It's like having your own personal barista at home, ready to help you craft the perfect iced coffee for those hot days when you need a cool pick-me-up.
| Tips for Revitalizing Iced Coffee |
|---|
| Opt for low-acid, dark roast Nespresso capsules like Kazaar or Arpeggio |
| Experiment with new releases like Watermelon Flavour Over Ice or Cold Brew Style Intense capsules |
| Customize your iced coffee with syrups, spices, or cold milk |
Enjoying Your Homemade Iced Coffee
I've found that serving your homemade iced coffee with style can really elevate the whole experience.
Experimenting with different flavors like caramel, vanilla, or even a splash of cinnamon can add a fun twist to your drink.
Serving With Style
Savor the stylish experience of enjoying your homemade iced coffee by serving it in Nespresso Recipe glasses. When it comes to serving your invigorating beverage, presentation is key.
Elevate your homemade iced coffee with Nespresso Espresso Cups & Saucers for a sophisticated touch. Create a visually appealing experience using Nespresso's specially designed VIEW Recipe Glasses.
Choose between a 12 oz. glass or an 8 oz. mug for a satisfying and stylish serving encounter. Enhance the overall enjoyment of your beverage by serving it in a visually appealing manner.
With the right glassware, every sip becomes a moment of indulgence and innovation. It's not just a drink; it's a whole experience!
Experiment With Flavors
Elevate your homemade iced coffee experience by infusing it with a variety of flavors to suit your taste preferences. Get creative with Nespresso capsules like Kazaar, Arpeggio, or Ristretto to craft unique iced coffee creations.
Experiment with syrups, spices, cold milk, or cream to customize your drink just the way you like it. Want to take it up a notch? Add a dollop of whipped cream or a scoop of ice cream for an indulgent twist.
The possibilities are endless when it comes to enhancing the flavors of your homemade iced coffee. So go ahead, mix and match, and find that perfect blend that will have you sipping in style all summer long!
Frequently Asked Questions
Can You Make Iced Coffee With a Nespresso Machine?
Yes, I can make iced coffee with a Nespresso machine. Nespresso offers specific capsules like Kazaar, Arpeggio, and Ristretto for a flavorful iced coffee. Using the Vertuo machine or pouring espresso capsules over ice creates a quick and invigorating cold brew effect.
How Many Nespresso Pods for Iced Coffee?
Finding the perfect balance of Nespresso pods for iced coffee is key. Depending on your preference, I recommend experimenting with 1-2 capsules. The variety of capsules available allows for customizing your iced coffee's strength and flavor.
How Do You Make Coffee With Nespresso Vertuo?
To make coffee with Nespresso Vertuo, use the appropriate capsule and cup size. Start by placing the cup and pressing the brew button. Enjoy freshly brewed coffee in seconds. It's easy, convenient, and delivers a delicious coffee experience every time.
Why Is My Nespresso Making Cold Coffee?
My Nespresso making cold coffee could be due to water temperature settings. Verify adequate water level in the reservoir with cold water. If issue persists, contact Nespresso support for help to troubleshoot and resolve the problem.
Conclusion
Well, there you have it – making iced coffee at home with Nespresso is easier than you think!
Did you know that iced coffee has become increasingly popular, with a 20% increase in consumption over the past decade?
So why not try your hand at crafting your own delicious and revitalizing iced coffee creations?
With these simple steps and tips, you'll be sipping on a homemade iced coffee masterpiece in no time!
Cheers to your barista skills!
In the vast and diverse world of coffee, coffee alternatives, and tea, Olivia has found her calling. As an author and a dedicated coffee and tea aficionado, her work for Cappuccino Oracle reflects her profound love and understanding of the intricate complexities found within these beverages. Olivia’s passion for the subject serves as both a catalyst for her creativity and a connection point with her audience.
Olivia’s appreciation for coffee, coffee alternatives, and tea blossomed at an early age. She discovered that these beverages invigorated her senses and stimulated her creative spirit. From the nuanced flavors of single-origin roasts to the captivating narratives intertwined with coffee, coffee alternatives, and tea trade and culture, Olivia found an unlimited source of inspiration in her daily cup.
Her love for these beverages and her talent for storytelling eventually converged at Cappuccino Oracle. As an author, Olivia’s mission is to illuminate the intricate tapestry that makes up the world of coffee, coffee alternatives, and tea. Her articles span a diverse range of topics, encompassing everything from the unique flavors of different brews to the sociocultural history intertwined with their cultivation and consumption.
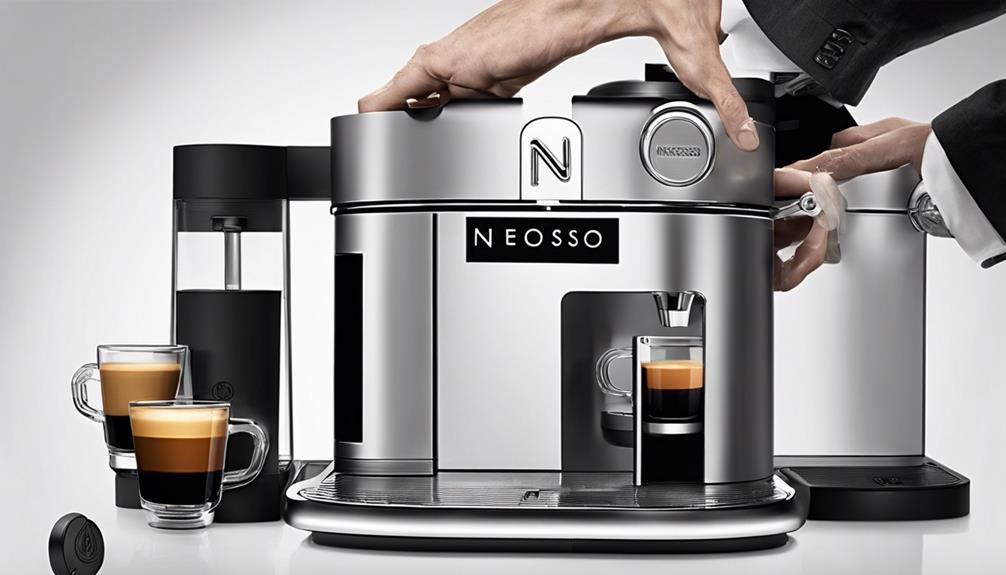
Nespresso
How to Remove Nespresso Descaling Mode in 3 Simple Steps
Find out how to effortlessly eliminate Nespresso's descaling mode with just three easy steps and get your machine back to brewing perfection.
Removing Nespresso's descaling mode is a breeze! First, make sure you're all set up with a container in place and the water tank full. Then, activate the descaling mode using the specific button combo for your Nespresso model. Let the magic happen as it cleans out those calcium deposits. After that, give it a final rinse with fresh water to get rid of any leftover solution. Voilà! Your machine is now free from descaling mode and ready to brew. Get those beans ready for a delightful cup of joe!
Key Takeaways
- Perform final rinse with fresh water to eliminate descaling solution remnants.
- Refill water tank and let water run through the machine to ensure cleanliness.
- Automatic exit from descaling mode occurs after final rinse completion.
- Ensure no descaling solution residue remains to maintain optimal coffee flavor.
- Complete proper rinsing to restore machine to regular functionality.
Preparation Steps
I'll get the container ready to catch any water or descaling solution that may come out during the process. It's like preparing for a mini science experiment with our Nespresso machines. Ensuring we've everything in place before diving into the descaling mode is key. Imagine the water tank filled to the brim, ready to battle any limescale buildup. It's like giving our Nespresso buddy a rejuvenating spa day!
Positioning the machine securely on a stable surface is vital. We don't want any unexpected acrobatics during the descaling dance. Safety first, folks! Oh, and don't forget to unplug the power cord. We're going green, not sparking! Let's keep those electrical mishaps at bay.
With our container at the ready, water tank filled, and machine securely positioned, we're all set for the descaling adventure. These preparation steps might seem essential, but they're the foundation for a successful descaling mission. Let's get ready to bid adieu to that pesky limescale!
Descaling Mode Activation

After preparing the necessary materials and ensuring the machine is securely positioned, activating the descaling mode on Nespresso Original Machines involves specific button combinations. To put your Nespresso machine into descaling mode, you'll need to press a sequence of buttons that vary depending on the model. Below is a handy table to guide you through the process:
| Nespresso Model | Descaling Mode Activation |
|---|---|
| Essenza Mini | Press both buttons simultaneously for 3 seconds. |
| Pixie | Hold down Lungo and Espresso buttons for 5 seconds. |
| CitiZ | Simultaneously press both buttons for 3 seconds. |
| Inissia | Press both buttons for 2 seconds. |
These button combinations trigger the descaling mode, allowing your machine to begin the cleaning process and remove any built-up calcium or lime deposits. Remember, following the correct steps is essential for maintaining your Nespresso machine's performance.
Final Rinse and Exit

To complete the descaling process for your Nespresso machine, perform the final rinse with fresh water to make certain all traces of descaling solution are thoroughly removed.
After the final drain, refill the water reservoir with fresh water. Let it flow through the machine to rinse out any lingering descaling solution. This step is vital to guarantee your machine is free from any leftover solution that could impact the taste of your coffee.
Once the final rinse is done, the Nespresso machine will automatically exit the descaling mode, signaling that the process is complete. It's like giving your machine a rejuvenating shower to wash away all the descaling solution remnants.
Proper rinsing ensures peak performance and prepares your Nespresso for regular use. So, let the water work its magic, and soon you'll be ready to brew your favorite cup of coffee without any descaling worries!
Frequently Asked Questions
How Do I Turn off Nespresso Descaling Mode?
To turn off Nespresso descaling mode, I press and hold the lungo button for at least 5 seconds. This action stops the blinking lights and restores normal operation swiftly. It's a simple process that quickly gets my Nespresso machine back to making delicious coffee.
How Do I Reset My Nespresso After Descaling?
After descaling my Nespresso, I confirm the process is complete and rinse with fresh water. To reset, I follow the manufacturer's instructions or press specific buttons for a set duration. Once done, my Nespresso is ready for use.
How Do I Get My Nespresso Vertuo Next Out of Descaling Mode?
To exit descaling mode on my Nespresso Vertuo Next, I press and hold the button for 20-30 seconds. Ensuring the machine is unplugged, I wait for it to respond and exit descaling mode. It's a simple fix for normal operation.
Why Is the Descaling Light Still Flashing After Descaling Nespresso?
The descaling light continues flashing after descaling Nespresso due to inadequate rinsing, leaving residual solution triggering the light. Thoroughly rinse with fresh water to eliminate all traces, ensuring components are dry for use.
Conclusion
So there you have it, removing the descaling mode from your Nespresso machine is as easy as 1, 2, 3! Just follow the simple steps outlined in this guide, and you'll be back to enjoying your favorite coffee in no time.
And if you're worried about messing up, don't sweat it! The visuals provided in the article will guide you every step of the way, making the process a piece of cake.
Happy brewing!
In the vast and diverse world of coffee, coffee alternatives, and tea, Olivia has found her calling. As an author and a dedicated coffee and tea aficionado, her work for Cappuccino Oracle reflects her profound love and understanding of the intricate complexities found within these beverages. Olivia’s passion for the subject serves as both a catalyst for her creativity and a connection point with her audience.
Olivia’s appreciation for coffee, coffee alternatives, and tea blossomed at an early age. She discovered that these beverages invigorated her senses and stimulated her creative spirit. From the nuanced flavors of single-origin roasts to the captivating narratives intertwined with coffee, coffee alternatives, and tea trade and culture, Olivia found an unlimited source of inspiration in her daily cup.
Her love for these beverages and her talent for storytelling eventually converged at Cappuccino Oracle. As an author, Olivia’s mission is to illuminate the intricate tapestry that makes up the world of coffee, coffee alternatives, and tea. Her articles span a diverse range of topics, encompassing everything from the unique flavors of different brews to the sociocultural history intertwined with their cultivation and consumption.
Nespresso
How to Turn Off Nespresso Descaling Mode in 3 Steps
Brew the perfect cup by learning how to exit Nespresso descaling mode in 3 simple steps – your coffee adventure awaits!
Let's get your Nespresso out of descaling mode in 3 simple steps. To begin with, press and hold the brew button for 7 seconds. Keep an eye out for that yellow light to know you're good to go. Next, secure and then release the lid with a satisfying click. It's like giving your Nespresso a secret handshake! Finally, repeat the descaling process until all the water drains out. Your machine will thank you for it! Ready to enjoy that perfect cup of coffee? These steps will have you sorted in no time! Let's get brewing!
Key Takeaways
- Press and hold brew button for 7 seconds.
- Confirm secure lid closure.
- Refill water reservoir.
- Ensure yellow light is on.
- Machine ready for normal operation.
Press and Hold Brew Button
To exit Nespresso descaling mode, simply press and hold the brew button for at least 7 seconds. This action is like hitting the essential button on your Nespresso machine after it's had a little spa treatment.
By holding down the brew button, you're telling your machine, 'Hey, I'm ready to get back to brewing those delicious cups of coffee.' It's the final step in the descaling process, ensuring your Nespresso is free from any limescale buildup that might be slowing down its performance.
Once you press and hold that button, you'll see the yellow light indicating that your machine is ready to exit the descaling mode and get back to business. Remember, this step is vital to maintaining your Nespresso machine's health and longevity, so don't skip it!
After you've held the brew button, your Nespresso will do a little happy dance (okay, not really) to complete the descaling process and be all set for your next coffee brewing adventure. Don't forget to refill the water reservoir before you start brewing again!
Lock and Unlock Lid
Securing and releasing the lid of the Nespresso machine is an important step in moving out of descaling mode. When it's time to secure and confirm the lid, it's like giving your Nespresso machine a little high-five to let it know it's done with descaling mode! This action not only resets the machine's sensors but also signals the completion of the descaling process. Think of it as a secret handshake between you and your Nespresso buddy.
To secure the lid, simply place it back in position and twist it until you hear a satisfying click. This confirms everything is snug and ready to go. When confirming, give it a twist in the opposite direction and lift it gently. It's like saying, 'You did great, now it's time to shine again!' Making sure the lid is securely in place after confirming guarantees your Nespresso machine is set for its next brewing adventure. So, secure, confirm, and get ready to brew your favorite cup of coffee!
Repeat Until Water Drains

After confirming the lid is securely in place, proceed to repeat the descaling process until the water drains completely from the Nespresso machine.
It can be frustrating when your Vertuo Plus seems stuck in descaling mode, but don't worry, we've you protected!
If you find there's still a lot of water left in the machine, it's important to keep going until it's all out.
This step is vital to guarantee your Nespresso machine is properly descaled and ready for your next delicious brew.
Frequently Asked Questions
How Do I Get My Nespresso Out of Descaling Mode?
To exit descaling mode on my Nespresso, I follow the red light indicators and let the process complete naturally. Overheating should be avoided. If issues persist, I contact Nespresso support. A factory reset might not resolve the problem.
How Do I Reset My Nespresso After Descaling?
After descaling my Nespresso, I guarantee completion following the manual. If the machine doesn't exit descaling mode, a quick restart usually does the trick. If issues persist, I contact Nespresso for further assistance.
How Do I Stop My Nespresso Expert From Descaling?
Stopping my Nespresso Expert from descaling is simple. I wait until the descaling process finishes, ensuring the machine exits descaling mode automatically. Following the prompts and lights is key. Interrupting could lead to issues, but Nespresso support can help if problems persist.
Why Is My Nespresso Descaling Light Still on After Descaling?
My Nespresso descaling light persists after descaling due to incomplete cycles or sensor issues. I guarantee proper descaling steps, check for remaining solution triggering the light, and reach out to Nespresso support if needed. Peak machine performance is key.
Conclusion
And that's all there's to it! By following these simple steps, you can easily turn off the descaling mode on your Nespresso machine.
Just press and hold the brew button, secure and release the lid, and repeat until the water drains. It's like a little dance for your coffee maker!
So go ahead, give it a try and get back to enjoying your favorite Nespresso drinks without any interruptions. Cheers to hassle-free brewing!
In the vast and diverse world of coffee, coffee alternatives, and tea, Olivia has found her calling. As an author and a dedicated coffee and tea aficionado, her work for Cappuccino Oracle reflects her profound love and understanding of the intricate complexities found within these beverages. Olivia’s passion for the subject serves as both a catalyst for her creativity and a connection point with her audience.
Olivia’s appreciation for coffee, coffee alternatives, and tea blossomed at an early age. She discovered that these beverages invigorated her senses and stimulated her creative spirit. From the nuanced flavors of single-origin roasts to the captivating narratives intertwined with coffee, coffee alternatives, and tea trade and culture, Olivia found an unlimited source of inspiration in her daily cup.
Her love for these beverages and her talent for storytelling eventually converged at Cappuccino Oracle. As an author, Olivia’s mission is to illuminate the intricate tapestry that makes up the world of coffee, coffee alternatives, and tea. Her articles span a diverse range of topics, encompassing everything from the unique flavors of different brews to the sociocultural history intertwined with their cultivation and consumption.


What Is a Cafe Americano

How to Make Iced Americano Crema

What Roast Americano

Turmeric Tea and Blood Pressure

What Makes an Americano an Americano

How to Make Americano With Moka Pot

How to Make an Americano in a French Press

How to Make Korean Iced Americano

How to Make Iced Americano With Instant Coffee

What to Add to an Americano at Starbucks

Discover the Power of KOS Mushroom Coffee

Top 10 Rated Mushroom Coffee Brands for a Boost

What Makes Caffeine-Free Mushroom Coffee Unique?

Rooibos Tea: A Guide to Safe Breastfeeding Practices

What Mushroom Can I Use as a Coffee Replacement?

-
 Americano3 weeks ago
How to Make Americano With Moka Pot
-
 Americano4 weeks ago
How to Make an Americano in a French Press
-
 Americano5 days ago
How to Make Korean Iced Americano
-
 Americano3 weeks ago
How to Make Iced Americano With Instant Coffee
-
 Americano3 weeks ago
What to Add to an Americano at Starbucks
-

 Americano4 weeks ago
How to Make Americano With a Nespresso Machine
-

 Americano2 weeks ago
How to Make Americano With Bialetti
-

 Americano3 weeks ago
How to Make Dutch Bros Americano