
Coffee Recipes
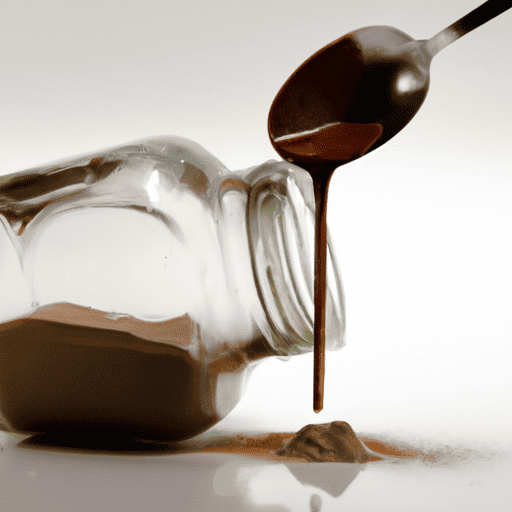
Homemade Chocolate Syrup: A 5-Minute Recipe To Try (2024)
I have always been a big fan of chocolate syrup, but the store-bought ones never seem to satisfy my cravings. That’s why I started making my own homemade version, which not only tastes better but is also healthier and more affordable.
In this article, I will share with you my 5-minute recipe for homemade chocolate syrup that you can try in 2023.
Gathering the ingredients is the first step to making this delicious treat. All you need is sugar, cocoa powder, salt and water – all of which are likely already in your pantry.
The process is simple: combine the dry ingredients in a saucepan, whisk in water until it forms a smooth mixture and heat it up until it thickens.
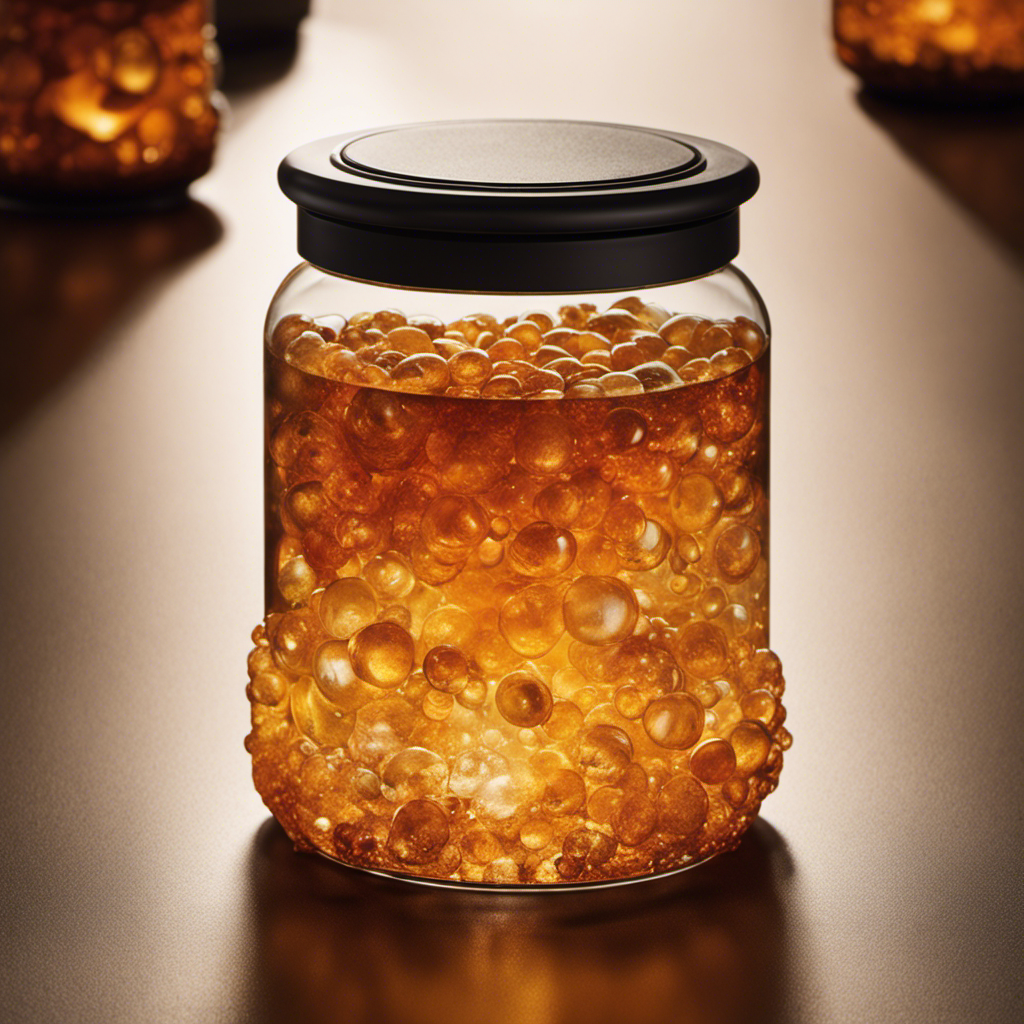
Once done, strain the mixture into a jar and voila! You now have your own homemade chocolate syrup that can be used as a topping for ice cream or as an ingredient for baking recipes such as brownies or cakes.

Key Takeaways
- Homemade chocolate syrup is a healthier and more affordable alternative to store-bought ones, and allows for experimentation with ingredient substitutions and different flavorings.
- The recipe for homemade chocolate syrup involves combining dry ingredients (sugar, cocoa powder, salt) in a saucepan, whisking in water, heating the mixture, and stirring in vanilla extract.
- Homemade chocolate syrup can be used as a topping for various desserts, added to drinks or smoothies, and used in baking recipes, with endless possibilities for experimentation and creativity.
- Making homemade chocolate syrup is quick and easy, takes only five minutes of prep time, and can save money in the long run while also providing the satisfying experience of making something from scratch.
Gather Your Ingredients
You’ll need to grab all your ingredients before diving into this delicious homemade chocolate syrup recipe. For this recipe, you’ll need sugar, cocoa powder, salt, water, and vanilla extract. I recommend using high-quality ingredients to ensure the best flavor possible.
If you’re short on any of these ingredients or want to switch things up a bit, there are some ingredient substitutions and different flavorings you can try. Instead of white granulated sugar, you can use brown sugar or coconut sugar for a deeper flavor profile. You can also add in spices like cinnamon or nutmeg for an extra kick.
Don’t be afraid to get creative with your ingredients! Once you’ve gathered everything together, it’s time to move on to the next step – combining the sugar, cocoa powder, and salt in a saucepan.
Combine Sugar, Cocoa Powder, and Salt in a Saucepan
Once you’ve got your sugar, cocoa powder, and salt in the saucepan, it’s time to start mixing. First, make sure that everything is evenly distributed before turning on the heat. This will prevent clumping and ensure a smooth texture for your chocolate syrup.
As you stir, take note of any flavor variations that you might want to add. For instance, a touch of vanilla extract can give your homemade syrup a rich and complex taste. You could also experiment with different types of cocoa powder to achieve varying degrees of bitterness or sweetness.
Aside from using it as a topping for ice cream or pancakes, there are many other uses for chocolate syrup. It can be drizzled over fresh fruit or blended into milkshakes for added depth of flavor. You could even mix it into your coffee or hot chocolate for an indulgent treat.
With all the ingredients combined and mixed thoroughly in the saucepan, it’s now time to whisk in water until everything is well incorporated. This step will help create a smooth consistency and bring out the full flavor profile of your homemade chocolate syrup.
Whisk in Water
Now it’s time to add some water and bring your chocolate mixture to life with a smooth consistency that will make your taste buds dance. The whisking technique you use will determine how well the water combines with the other ingredients. I prefer using a wire whisk because it helps me get rid of any lumps quickly.
As you start whisking, you’ll notice that the mixture becomes thicker and harder to stir. Keep at it until all the cocoa powder and sugar dissolve completely into the liquid. If you want to customize your syrup’s flavor, now’s the perfect time to experiment by adding vanilla extract or even a pinch of cinnamon.
Once everything is fully mixed in, we can move on to heating up our concoction. Be careful not to burn yourself while handling hot liquids!
Heat the Mixture
Get ready to feel the warmth of your soon-to-be delicious mixture as we turn up the heat! Heating the chocolate syrup mixture is an essential step in making sure that all ingredients are well-combined.
The benefits of heating chocolate are twofold: first, it helps melt any solid chunks and secondly, it intensifies the flavor. Different heating methods can be used for chocolate. Some people prefer using a microwave while others use a double boiler.
If you’re using a microwave, make sure to stir every 30 seconds until fully melted. On the other hand, if you’re using a double boiler, place a bowl over simmering water and stir continuously until melted.
Once your chocolate syrup mixture is fully heated and smooth, remove from heat and let cool for a few minutes before transferring it into an air-tight container. This will prevent any condensation from forming on the lid which could affect the quality of your homemade chocolate syrup.
Remove from Heat
As the mixture starts to bubble and steam, I carefully remove it from the heat source. This step is crucial in creating a smooth and velvety chocolate syrup.
The benefits of removing chocolate syrup from heat are numerous. First, it prevents the sugar from caramelizing, which can result in a burnt taste and texture. Second, it ensures that all ingredients are fully incorporated without overcooking or scorching.
Common mistakes when removing chocolate syrup from heat include leaving it on for too long or not stirring continuously. Leaving it on for too long can cause the mixture to thicken and become grainy, while not stirring continuously can result in lumps forming throughout the syrup. It’s essential to keep an eye on the mixture as you’re removing it from heat and stir vigorously until all ingredients are well combined.
Now that I’ve removed my homemade chocolate syrup from heat, I’m ready to move onto the next step: stirring in vanilla extract. This will add another layer of flavor to my delicious treat!
Stir in Vanilla Extract
Woohoo, adding a splash of vanilla extract is going to take this already scrumptious sauce to a whole new level! Vanilla extract is one of my favorite ingredients in the kitchen. It has so many uses beyond just baking.
Did you know that it can enhance the flavors of savory dishes too? Adding it to this chocolate syrup will give it a subtle but delicious complexity that store-bought syrups just don’t have.
Making homemade syrups like this one has many benefits beyond just taste. First of all, you know exactly what’s going into it – no artificial colors or preservatives here! Plus, making your own syrup saves money in the long run since you won’t have to keep buying expensive bottles from the store. And let’s not forget about how satisfying it is to make something from scratch and see the end result come together.
Now that I’ve stirred in the vanilla extract, I can’t wait to strain out any remaining bits and pour this luscious syrup over some ice cream or pancakes. But before we get there, let’s talk about straining.
Strain the Syrup
Now that the vanilla extract has been added, it’s important to strain out any remaining bits from the chocolate syrup before using it. Straining techniques vary depending on what you have available in your kitchen. You can use a fine-mesh sieve or cheesecloth to filter out any lumps or undissolved cocoa powder.
If you’re feeling adventurous, try using the leftover strained bits as an alternative ingredient in your baking recipes. The chocolatey remnants can be used as a tasty addition to brownies, cakes, and even homemade ice cream. Waste not, want not!
Once the syrup has been properly strained, store it in a jar with a tight-fitting lid and keep it refrigerated until ready for use.
This delicious homemade chocolate syrup will elevate any dessert or beverage with its rich flavor and velvety texture.
Store in a Jar
Once properly strained, this velvety chocolate syrup can be stored in a jar with a tight-fitting lid and kept refrigerated until ready to use.
One great option for storage is using mason jars. They’re durable, reusable, and come in various sizes making it easy to find the perfect fit for your homemade syrup. Plus, they make for an aesthetically pleasing addition to any kitchen shelf!
When storing your chocolate syrup in a mason jar, get creative with your labeling! You can use chalkboard labels or write directly on the jar with a permanent marker. This way you’ll always know what’s inside without having to open up each individual container. And let’s be honest, who doesn’t love a little personal touch when it comes to their food items?
Overall, storing your homemade chocolate syrup in a jar is not only practical but also adds a fun element of customization. With proper refrigeration and labeling techniques, you’ll always have delicious chocolate syrup on hand and ready to enjoy with your favorite desserts and beverages!
Enjoy with Your Favorite Desserts and Beverages
Indulge in your sweet tooth cravings by pairing this luscious chocolate syrup with your favorite desserts and beverages. This homemade chocolate syrup is versatile and can be paired with a variety of treats, from ice cream to pancakes to coffee. Here are some pairing suggestions and serving tips to take your dessert game up a notch.
First, let’s talk about desserts. You can drizzle this rich chocolate sauce over classic favorites like brownies, cakes, and cookies for an extra indulgent touch. It also pairs well with fruit-based desserts such as strawberry shortcake or banana bread. For a more adventurous twist, try topping off your cheesecake or tiramisu with this decadent sauce.
When it comes to beverages, you can elevate your hot cocoa game by adding a spoonful of this syrup for an extra boost of chocolatey goodness. You can also swirl it into milkshakes or smoothies for an added burst of flavor. And don’t forget about cocktails! This syrup makes a great addition to adult drinks like espresso martinis or mochas.
Now that you have some ideas on how to enjoy this delicious chocolate syrup, why not experiment with variations? Try adding different flavors such as peppermint extract or caramel for a unique twist on the recipe. The possibilities are endless!
Experiment with Variations
To mix things up, why not experiment with different flavors in your chocolate syrup? You can add a dash of vanilla extract or even a pinch of sea salt to enhance the richness and depth of the sauce. Did you know that adding chili powder to your chocolate syrup can give it a spicy kick? Try it out and see how many people in your family love this unique twist on a classic recipe!
Here are some flavor combinations to try:
- Mint extract for a refreshing taste
- Almond extract for a nutty flavor
- Cinnamon for a warm and cozy addition
- Orange zest for a citrusy kick
Serving suggestions are endless when it comes to homemade chocolate syrup. Drizzle it over ice cream, pancakes, waffles, or even use it as an ingredient in baking recipes. I personally love adding it to my morning coffee for an indulgent treat. The possibilities are truly endless with this versatile sauce.
So go ahead and get creative with your homemade chocolate syrup! With just five minutes of prep time, you can whip up batches of different flavors and enjoy them all week long. Who knows, you might even discover your new favorite combination!
Frequently Asked Questions
How long will the homemade chocolate syrup last in the fridge?
When it comes to homemade chocolate syrup, the shelf life can vary depending on how it’s stored. Generally speaking, if you keep your homemade chocolate syrup in an airtight container in the fridge, it should last for around 2-3 weeks.
However, if you want to extend its shelf life even further, you can freeze the chocolate syrup in an ice cube tray and then transfer the frozen cubes into a freezer-safe bag or container. This way, you’ll be able to enjoy your delicious chocolate syrup for up to 6 months! Just be sure to thaw it out before using it again.
As with any food item, proper storage is key when it comes to maximizing its longevity and freshness.
Can I substitute the sugar with a sugar alternative like honey or maple syrup?
Wow, let me tell you, I’ve tried every sugar substitute under the sun. The Sugar substitutes discussion is always a hot topic in my kitchen.
From honey to maple syrup, each one has its own unique flavor and texture that can completely change a recipe. While I haven’t specifically tried substituting sugar with either of those alternatives in chocolate syrup yet, I think it’s definitely worth experimenting with.
However, keep in mind that the sweetness level may vary and may require adjustments to other ingredients. Additionally, if you’re looking for Flavor variations discussion, consider using different types of chocolate or adding spices like cinnamon or vanilla extract to switch things up.
Overall, don’t be afraid to get creative and try new things – who knows what delicious concoctions you might come up with!
How many servings does the recipe make?
When it comes to making recipes at home, one of the most important things to consider is the number of servings or recipe yield. This information can help you plan accordingly and ensure that you have enough food for everyone.
In the case of this particular recipe, it’s unclear how many servings it makes without additional context. However, knowing the ingredients and measurements used in the recipe can give us a better idea. For example, if the recipe calls for 1 cup of sugar and 1/2 cup of cocoa powder along with other ingredients, we could estimate that it may make around 2 cups of chocolate syrup or roughly 16 ounces.
Ultimately though, it’s best to experiment and adjust as needed based on your own personal preferences and needs.
Can I use a different type of extract instead of vanilla?
When it comes to making homemade chocolate syrup, there are plenty of recipe variations you can try. One question that often comes up is whether or not you can use a different type of extract instead of vanilla. The answer is yes!
While vanilla extract is a classic choice for adding flavor to chocolate syrup, there are many other extracts you can experiment with. For example, almond extract adds a nutty sweetness, while peppermint extract gives the syrup a refreshing twist.
Ultimately, the type of extract you choose will depend on your personal taste preferences and what ingredients you have on hand. So don’t be afraid to get creative and try out different extracts in your homemade chocolate syrup recipe!
Is this recipe suitable for people with food allergies or dietary restrictions?
When it comes to food allergy alternatives and dietary restriction modifications, it’s important to always be aware of the ingredients being used in any recipe.
As someone who’s dealt with these issues myself, I understand how frustrating it can be to find recipes that fit within your specific needs. However, with a little bit of research and creativity, it’s possible to make modifications to recipes that will work for you.
Some common substitutions for allergens include using plant-based milks instead of dairy milk or swapping out wheat flour for gluten-free options. It’s also important to carefully read ingredient labels and research any potential cross-contamination risks before making any modifications.
With these considerations in mind, many recipes can be adapted to fit within your specific dietary needs.
Conclusion
And there you have it, folks! A simple and quick recipe for homemade chocolate syrup that’s sure to elevate your desserts and beverages. The best part? You know exactly what goes into making it, so you can avoid any unwanted additives or preservatives.
Personally, I love adding this syrup to my morning coffee for a decadent mocha twist. It also makes a great topping for ice cream or as a dip for fresh fruit. But don’t just take my word for it – give it a try yourself!
And if you’re feeling adventurous, why not experiment with different flavor variations? Add some peppermint extract for a holiday-inspired syrup or mix in some peanut butter for a deliciously rich twist.
One of my friends tried this recipe and used the chocolate syrup to make homemade chocolate milk for her kids. They loved it so much that they’ve been requesting it every day since! It’s little moments like these that remind me of the joy and simplicity of homemade recipes.
So go ahead and give it a try – who knows what kind of memories you’ll create with this sweet treat.

Arf, an author and an innovative enthusiast of coffee, coffee alternatives, and tea, plays a crucial role as a contributor to the esteemed Cappuccino Oracle platform. Renowned for his curiosity and passion for these captivating beverages, Arf has carved out a unique space for himself in the world of exploration and writing. He realized that coffee, coffee alternatives, and tea are not mere drinks to keep one awake, but universes of flavors and stories waiting to be explored.
Arf’s articles for Cappuccino Oracle blend meticulous research with personal experiences, providing readers with an in-depth understanding of various types of coffee, coffee alternatives, and tea, along with their unique characteristics, cultures, and histories. His honest reviews and engaging narratives guide readers on their own journeys, helping them discover their preferences and find their perfect brew.


The Perfect Blend: Espresso Martini Meets Ready-to-Drink
It has been four decades since the renowned bartender Dick Bradsell first mixed a shot of espresso with vodka, sugar, and coffee liqueur. The timeless appeal of this iconic cocktail continues to endure, and now it is available in a convenient canned version. Introducing NightOwl, the brand that skillfully combines these two trends into something truly exceptional.
, Individually Boxed")
Award-Winning Formulation
NightOwl’s founders worked on perfecting the recipe for over 18 months. Their efforts were validated by top industry awards, including multiple medals from the San Francisco World Spirits Competition and top prizes in the ready-to-drink (RTD) category at the Ultimate Spirits Challenge.
A Choice of Marks
NightOwl launched with two marks: The Classic, made with vodka, and The Original, built on tequila. Both variations are blended with real spirits and natural coffee, boasting a 12.5% ABV and 100mg worth of caffeine per 200ml can.
The Original: Tequila Shakes Up the Game
Surprisingly, the tequila-based Espresso Martini is labeled as “the original.” This naming choice follows consumer trends and preferences, especially on popular social media platforms like Instagram and TikTok.
Tequila’s Earthy Twist
Many patrons who try the tequila variation find it difficult to go back to vodka. The agave alternative, originally known as the Jalisco Espresso, offers a subtle earthiness that complements the roasty notes of the coffee modifier.

The Rise of Team Jalisco Espresso
NightOwl’s “Team Jalisco Espresso” has garnered a fervent fanbase, driving demand in the market and even leading bars to offer the canned cocktail to customers. The quality and efficiency of the product make it a popular choice, despite the absence of the traditional shaker to glass presentation.
Capturing the Experience at Home
For home bartenders, NightOwl offers a convenient way to capture the flavor of the perennially trendy Espresso Martini. Four-packs are currently available in select markets, and if you’re looking to recreate the full experience, martini glasses, shakers, and coffee bean garnishes are sold separately.

In the vast and diverse world of coffee, coffee alternatives, and tea, Olivia has found her calling. As an author and a dedicated coffee and tea aficionado, her work for Cappuccino Oracle reflects her profound love and understanding of the intricate complexities found within these beverages. Olivia’s passion for the subject serves as both a catalyst for her creativity and a connection point with her audience.
Olivia’s appreciation for coffee, coffee alternatives, and tea blossomed at an early age. She discovered that these beverages invigorated her senses and stimulated her creative spirit. From the nuanced flavors of single-origin roasts to the captivating narratives intertwined with coffee, coffee alternatives, and tea trade and culture, Olivia found an unlimited source of inspiration in her daily cup.
Her love for these beverages and her talent for storytelling eventually converged at Cappuccino Oracle. As an author, Olivia’s mission is to illuminate the intricate tapestry that makes up the world of coffee, coffee alternatives, and tea. Her articles span a diverse range of topics, encompassing everything from the unique flavors of different brews to the sociocultural history intertwined with their cultivation and consumption.
Coffee Recipes
Top Best Coffee Recipes for Home Baristas
Explore the finest collection of Best Coffee Recipes curated for home baristas seeking to elevate their coffee game with expert tips and tricks.
Have you ever wondered what it takes to craft a barista-quality coffee without stepping out of your home? As more and more enthusiasts delve into the realm of home coffee brewing, mastering the art of barista techniques becomes an exciting and rewarding journey. With insights from former baristas and coffee aficionados, this collection of coffee drink recipes is designed to upgrade your morning cup to a gourmet experience, perfectly suited to your taste and the equipment you have on hand.
Key Takeaways
- Explore a variety of coffee drink recipes ideal for home baristas.
- Learn tips and tricks from seasoned baristas and coffee enthusiasts.
- Discover how to tailor recipes to personal taste preferences.
- Understand the adaptability of techniques based on available home equipment.
- Elevate your home coffee brewing skills with barista techniques.
Introduction to Home Barista Skills
Embracing the art of making coffee at home allows enthusiasts to hone their home barista skills and savor personalized brews. Key elements such as selecting quality coffee ingredients and using the right brewing equipment significantly contribute to crafting exquisite coffee drinks.
The Importance of Quality Ingredients
High-quality coffee ingredients are the cornerstone of excellent home-brewed coffee. Opting for freshly roasted coffee beans ensures rich flavor, while premium chocolate sauces and syrups from brands like Torani and Monin can elevate taste profiles. Additionally, experimenting with various ingredient combinations can highlight the nuances in the final beverage.
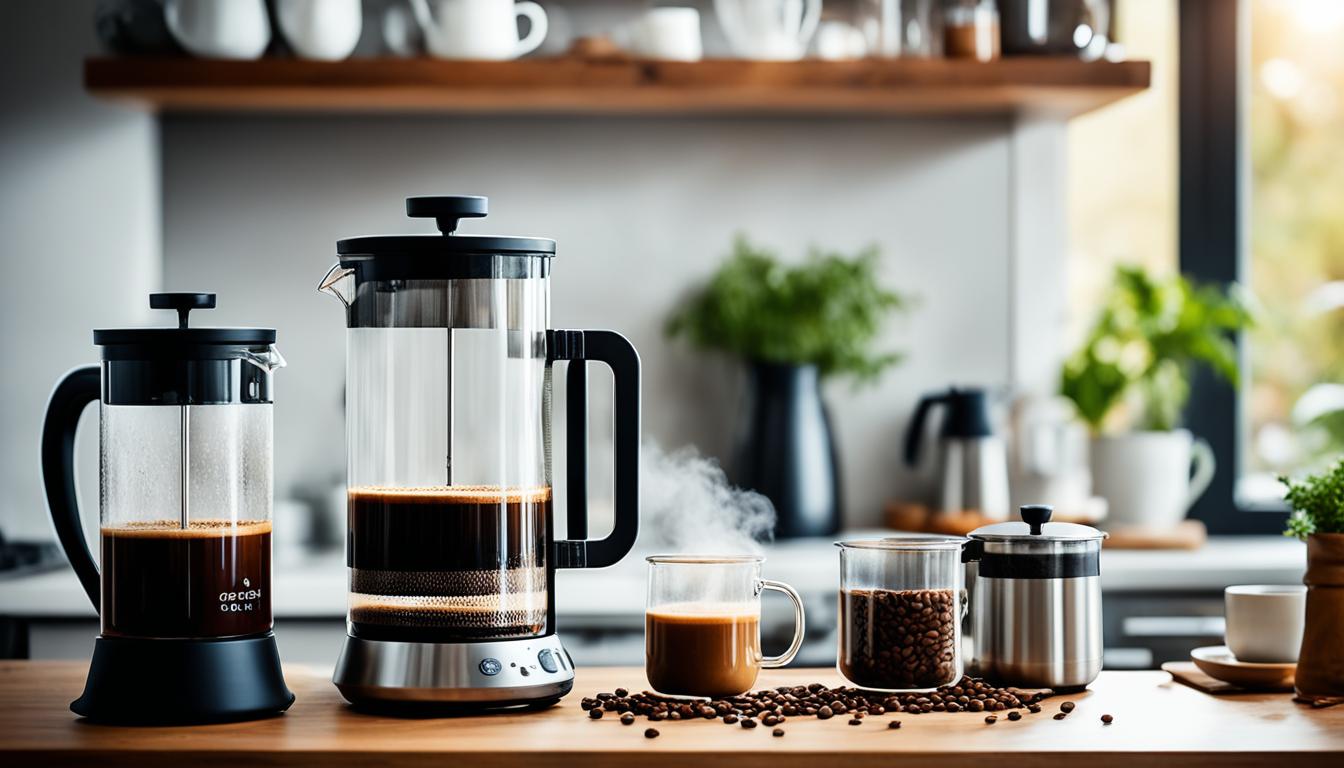
Basic Coffee Brewing Equipment
Investing in essential brewing equipment is crucial for any aspiring home barista. Tools such as espresso machines, manual espresso makers, and milk frothers are indispensable for creating a range of coffee drinks. A well-equipped setup allows for versatility and precision in brewing, enabling home baristas to perfect their home barista skills through consistent practice and experimentation.
“The journey to becoming a skilled home barista is as much about the quality of ingredients as it is about mastering the equipment.”
Combining top-tier ingredients with the right brewing tools not only makes the coffee-making process enjoyable but also results in exceptional coffee that rivals any professional café.
| Essential Equipment | Function |
|---|---|
| Espresso Machine | Brews concentrated coffee ideal for various drinks |
| Manual Espresso Maker | Allows precise control over pressure and flavor extraction |
| Milk Frother | Creates creamy, frothed milk for lattes and cappuccinos |
| Coffee Grinder | Grinds coffee beans to desired consistency |
Espresso-Based Recipes
Delving into the world of espresso recipes can transform your daily coffee ritual. Whether you’re an aficionado or a beginner, mastering the basics of home espresso brewing and the classic espresso method opens up a realm of delicious possibilities.

Classic Espresso
When it comes to classic espresso, simplicity is key. This foundational brew involves finely ground coffee and pressurized water to extract a rich, concentrated shot. Many coffee lovers rely on a traditional espresso machine to achieve optimal results, offering consistency and depth in every cup.
Simple Espresso Recipe
To create a simple yet satisfying espresso at home, follow these steps:
- Measure and grind 18-20 grams of coffee beans until they are finely ground.
- Preheat your espresso machine and portafilter to ensure temperature stability.
- Tamp the ground coffee evenly into the portafilter.
- Extract the espresso for about 25-30 seconds, aiming for a yield of approximately 1.5-2 ounces.
- Enjoy your espresso as is, or use it as a base for other delightful espresso recipes.
Even without an espresso machine, alternatives like manual espresso makers and the Aeropress can also yield impressive results. Experiment with different techniques and equipment to perfect your home espresso brewing skills and savor the fruits of the classic espresso method.
Creating the Perfect Latte
Crafting the ideal latte involves a delicate balance of robust espresso and smoothly steamed milk. The key to perfecting this beloved beverage lies in the ingredients and the technique. Whether you’re a novice home barista or an experienced coffee enthusiast, mastering a latte recipe can be both rewarding and fun.
Key Ingredients for Lattes
The foundation of any exceptional latte starts with quality ingredients. Ensuring you use fresh coffee beans and milk will significantly influence the taste. High-quality espresso and fresh, cold milk are non-negotiable components for achieving a rich and creamy consistency. Brands like Illy and Lavazza offer excellent coffee beans, while organic whole milk or oat milk can add a unique touch to your latte recipe.
Perfecting the Latte Art
Once you’ve mastered the basics of the latte recipe and milk steaming, it’s time to elevate your drink with latte art techniques. The process of steaming milk correctly is crucial for creating microfoam, which is necessary for detailed and intricate designs on top of your latte. Using a reliable espresso machine with a precision steam wand, such as those from Breville or De’Longhi, can help you achieve the perfect texture.
Here are simple steps to guide you through creating different latte art patterns:
- Pour well-extracted espresso into your cup.
- Steam the milk to create a velvety microfoam.
- Gently tap the milk frothing pitcher on a surface to remove large bubbles.
- Slowly pour the milk into the espresso, beginning in the center and moving outward.
- Use delicate wrist movements to shape patterns such as hearts, rosettas, and tulips.
These latte art techniques not only enhance your beverage’s presentation but also enrich your overall coffee experience. Practice makes perfect, so don’t be discouraged if your first attempts aren’t flawless. Enjoy the process of learning and experimenting with your latte recipe, and soon you’ll be impressing friends and family with your barista skills.
Delicious Cappuccino Variations
The cappuccino is a staple in the world of espresso-based drinks. Its classic form includes a balanced mix of espresso, steamed milk, and froth, making it a beloved choice among coffee enthusiasts. Yet, the beauty of cappuccino recipes lies in their versatility and the myriad flavors that can be integrated into this delightful beverage.

Classic Cappuccino
A well-made classic cappuccino starts with a robust shot of espresso, followed by equal parts of steamed milk and frothy milk foam. This perfect trio creates a harmonious blend that showcases the true essence of coffee while providing a creamy mouthfeel. Achieving this balance is key to crafting a satisfying homemade cappuccino that consistently delights the palate.
Flavored Cappuccino Ideas
When it comes to flavored cappuccino, the possibilities are endless. By incorporating syrups such as vanilla, caramel, or hazelnut, one can easily transform a traditional cappuccino into a personalized coffee treat. Here are a few inventive ideas to elevate your homemade cappuccino:
- Vanilla Dream: Add a shot of vanilla syrup to your espresso before pouring in the steamed milk and froth.
- Caramel Delight: Enhance your cappuccino with caramel syrup and top it with a drizzle of caramel sauce for an extra indulgent touch.
- Nutty Hazelnut: Integrate hazelnut syrup for a nutty flavor profile that complements the rich espresso base.
Exploring different syrups and toppings can add a delightful twist to your cappuccino recipes, allowing for endless experimentation and enjoyment. Whether you prefer a classic version or opt for flavored cappuccino variations, making these delicious drinks at home can be both rewarding and fun.
Best Coffee Recipes
For those seeking to craft delightful beverages at home, these top coffee recipes are a must-try. From the indulgent affogato to the sophisticated espresso martini, both amateurs and seasoned baristas can explore a variety of coffee barista recipes. Each recipe balances flavor and simplicity, ensuring any enthusiast can replicate these gourmet drinks with ease.

Among the standout recipes is the affogato, a decadent dessert coffee that combines rich espresso with silky gelato. It’s the perfect treat after dinner. Another crowd-pleaser is the espresso martini, blending the boldness of espresso with the smooth finish of vodka and coffee liqueur—a true celebration of gourmet home coffee.
For those fond of creative spins, the Twix Frappuccino copycat delivers a sweet, caramel-infused experience reminiscent of the beloved candy bar. If you’re craving something nutty and wholesome, the honey almond milk flat white is an impeccable choice. These coffee barista recipes offer an extensive range of flavors and styles, ensuring there’s something for every coffee lover.
Making the Ultimate Mocha
The ultimate mocha combines rich chocolate with robust coffee, creating a delightful treat for coffee lovers. This decadent drink is easy to prepare and deeply satisfying, especially when high-quality ingredients are used. Here’s how to master the perfect mocha recipe.
Combining Chocolate and Coffee
A great mocha begins with pairing premium espresso with high-quality chocolate. A favorite among home baristas is Ghirardelli chocolate, known for its luxurious texture and deep flavor. Start by preparing a shot of espresso and adding it to a mug along with a generous spoonful of chocolate sauce or syrup. Stir until the chocolate is fully melted and integrated, creating a smooth, rich base.
Enhancing Flavor with Sauces and Syrups
To elevate your chocolate coffee recipe, consider incorporating additional mocha sauces and syrups. Popular choices include caramel and vanilla, each adding unique layers of sweetness and complexity. Experiment with different combinations to find the perfect balance that suits your taste. Some may prefer the classic harmony of chocolate and coffee, while others might enjoy the added depth that flavored syrups bring.
| Ingredient | Purpose | Suggested Brand |
|---|---|---|
| Espresso | Provides the base coffee flavor | Lavazza |
| Chocolate Sauce | Infuses rich chocolate taste | Ghirardelli |
| Vanilla Syrup | Adds a sweet, floral note | Monin |
| Caramel Sauce | Enhances the sweetness and flavor | Torani |
Creating the ultimate mocha isn’t just about following a recipe—it’s about experimenting and discovering your perfect blend of flavors. By incorporating high-quality chocolate, robust coffee, and a variety of mocha sauces and syrups, you can craft a beverage that is both indulgent and satisfying.
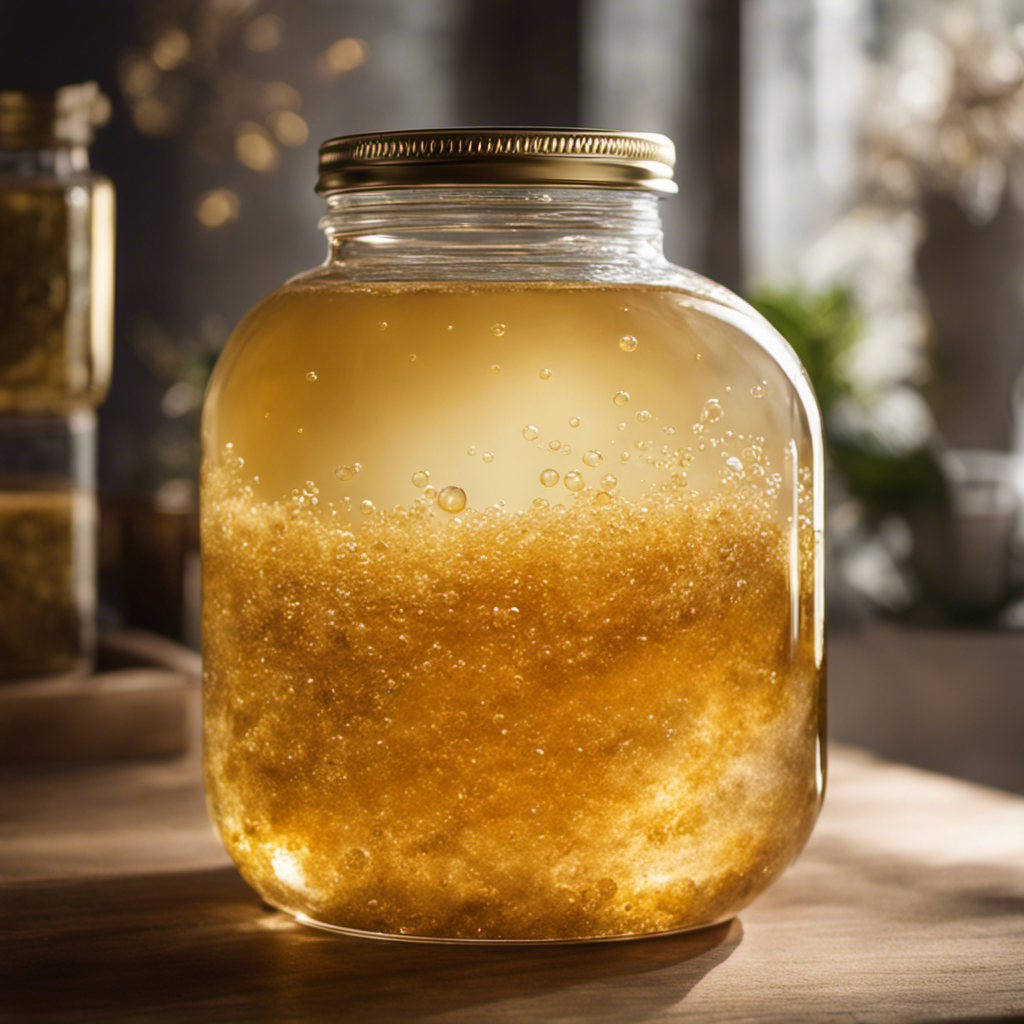
Refreshing Cold Brew Coffee at Home
Cold brew coffee offers a delightful alternative to hot coffee, particularly during the warmer months. The process involves steeping coffee grounds in cold water for an extended period, resulting in a smoother and less acidic beverage compared to its hot counterpart. Embracing various cold brew coffee ideas can make this drink even more enticing.
Cold Brew Preparation
To create the perfect homemade cold brew, start by choosing coarsely ground coffee beans. Combine them with cold water in a jar or pitcher, typically using a ratio of one cup of coffee grounds to four cups of water. Stir gently to ensure all grounds are wet, then cover and refrigerate for 12 to 24 hours. Once steeping is complete, strain the mixture through a fine-mesh sieve or a coffee filter to remove the grounds.
Cold Brew Coffee Variations
Experimenting with different cold brew coffee ideas can elevate your drink experience. Adding flavored syrups like vanilla, caramel, or hazelnut can transform your standard cold brew recipe into something extraordinary. Consider making coffee ice cubes by freezing your cold brew in ice trays. These cubes keep your drink strong and chilled without diluting its flavor.
An array of homemade cold brew variants awaits discovery, ensuring that each brew can be as unique as its creator. Whether you prefer a pure, unaltered flavor or enjoy a touch of sweetness, cold brew coffee offers endless customization possibilities.
Heavenly Affogato Dessert Drink
The affogato is a perfect symphony of temperatures and flavors, merging the robust intensity of espresso with the creamy delight of vanilla ice cream. This Italian classic has remained a favorite among coffee dessert drinks for good reason. Crafting an affogato is incredibly simple, yet it brings a touch of sophistication that can elevate any occasion.

To prepare an elegant affogato, start with high-quality ingredients. A fresh shot of espresso poured over a scoop of vanilla ice cream or gelato is the foundation of this dessert. The hot espresso slowly melts the ice cream, creating a rich, velvety concoction that is both invigorating and satisfying.
Variations to the classic affogato recipe can include experimenting with different flavors of ice cream or adding a splash of liqueur such as amaretto or Baileys for an extra indulgent twist. The versatility of the affogato allows it to adapt to various tastes and preferences, making it a beloved choice among coffee dessert drinks enthusiasts.
| Ingredients | Serving Suggestions |
|---|---|
| 1 shot of espresso | Right after meal as a dessert |
| 1 scoop of vanilla ice cream | With a biscotti or chocolate on the side |
Whether enjoyed on a hot summer day or as a delightful end to a dinner party, the affogato remains a testament to the harmonious blend of coffee and dessert. An essential addition to any home barista’s repertoire, this espresso ice cream recipe is bound to impress and satisfy.
Innovative Iced Coffee Ideas
Transforming your iced coffee from ordinary to extraordinary can be an enjoyable and rewarding experience. By experimenting with different methods and ingredients, one can achieve a variety of refreshing beverages that highlight unique and personalized flavor profiles. In this section, two innovative ideas will be covered: utilizing coffee ice cubes and creatively adding flavors to iced coffee.
Coffee Ice Cubes
Traditional ice cubes can dilute your iced coffee, leaving it less flavorful over time. The perfect solution lies in using homemade coffee ice cubes. Not only do these cubes keep your drink chilled, but they also ensure that with each melting cube, your coffee’s potency remains intact. To make these, simply pour brewed coffee into an ice cube tray and freeze. These iced coffee recipes add a twist to every sip:
- Espresso ice cubes for a robust flavor
- Adding a splash of vanilla or caramel before freezing for enhanced taste
- Blending frozen cubes for a refreshing coffee slushie

Adding Flavor to Iced Coffee
Flavoring iced coffee can elevate the drinking experience by introducing new and exciting tastes. Various syrups, extracts, and purees can be used to create a delightful drink tailored to individual preferences. Popular choices for flavoring iced coffee include:
- Strawberry puree for a fruity twist
- Mint syrup for a refreshing aftertaste
- Chocolate syrup for decadence
Combining these with the iced coffee recipes can result in a versatile and enjoyable beverage. For instance, mixing coffee ice cubes with flavored syrups offers a consistent, rich flavor until the very last sip.
| Flavor Additions | Benefits |
|---|---|
| Strawberry Puree | Fruity and refreshing |
| Mint Syrup | Cool and invigorating |
| Chocolate Syrup | Rich and indulgent |
Charming Flat White Recipe
A well-made flat white coffee is characterized by its smooth, velvety microfoam and pronounced coffee flavor. It stands out among coffee lovers for its unique balance. Crafting the perfect flat white at home requires precise preparation using the right ingredients and techniques.

Key Ingredients and Preparation
To make a flat white, it is essential to have high-quality espresso and fresh steamed milk. Start by brewing a double shot of espresso. Next, steam the milk to create a fine microfoam, ensuring it’s silky and smooth, with tiny bubbles. Mixing the two components with precision is key to achieving the luxurious texture that defines an excellent flat white coffee.
Flat White vs Latte
While both the flat white and latte share similarities, the primary differences lie in the foam and coffee intensity. A flat white coffee has less foam but a stronger coffee flavor compared to a latte, which features more foam and a lighter coffee profile. Understanding these nuances can help enthusiasts perfect both beverages, enhancing their home coffee brewing skills.
Cozy and Warming Cafe Au Lait
The cafe au lait stands as a quintessential French coffee drink, embodying warmth and comfort with every sip. This delightful beverage, rooted in French tradition, merges robust coffee flavors with the soothing creaminess of steamed milk.
French Technique
To create an authentic cafe au lait recipe, start by brewing a strong dark roast coffee. In French cafes, it’s common to use a French press or drip coffee method to achieve the desired strength. The next step involves heating milk until it is steamed but not frothy. The secret to a traditional French coffee drink lies in the equal parts ratio of coffee to steamed milk, creating a perfectly balanced beverage.
Substituting Different Milks
For those preferring dairy-free coffee options, the cafe au lait can still be enjoyed with substitutions like oat milk or almond milk. These alternatives not only cater to dietary needs but also offer a distinctive flavor profile. By using these dairy-free versions, you can achieve a similarly comforting drink that aligns perfectly with a range of preferences.
Whether indulging in a classic French coffee drink or experimenting with dairy-free coffee options, the cafe au lait recipe delivers a warm and cozy experience, ideal for any time of day.
Seasonal Pumpkin Spice Latte
The seasonal pumpkin spice latte is a beloved autumn coffee drink that captures the essence of fall with its warm spices and comforting pumpkin flavor. This cozy beverage can be easily made at home, providing a delightful alternative to store-bought versions. By preparing the mix yourself, you can tailor the flavor to your preference and enjoy the perfect balance of spices and pumpkin.

Flavors of Autumn
The flavors of autumn are beautifully represented in the pumpkin spice latte recipe. The combination of cinnamon, nutmeg, and cloves creates a warming sensation that pairs wonderfully with the smoothness of the coffee. These spices not only evoke the feeling of fall but also complement the pumpkin puree, bringing out its natural sweetness. For an added twist, consider sprinkling some ginger or allspice into the mix.
Making the Pumpkin Spice Mix
Creating the pumpkin spice mix at home is a straightforward process that can greatly enhance your homemade PSL. Start by mixing together ground spices—cinnamon, nutmeg, cloves, and optionally, ginger and allspice. Next, blend these with pure pumpkin puree, ensuring a smooth consistency. This mix can be stored in the refrigerator for future use, allowing you to enjoy this delightful autumn coffee drink throughout the season.
When preparing your latte, combine the pumpkin spice mix with freshly brewed coffee or espresso and steamed milk. Sweeten to taste with sugar or a syrup of your choice. This homemade pumpkin spice latte recipe is not only cost-effective but also allows you to control the quality and flavor of the ingredients, making each cup a personal delight.
Luxurious Hot Chocolate Variations
Indulge in gourmet hot chocolate variations that promise a delightful experience at home. Combining different chocolate sauces and syrups can elevate your hot chocolate coffee drinks, allowing for a unique and rich flavor profile. Whether you’re a fan of classic milk chocolate or prefer the depth of dark chocolate, these options cater to all.
One way to enhance your beverage is by experimenting with toppings. Adding whipped cream, marshmallows, or even a sprinkle of cinnamon can transform your drink into a luxurious treat. For those who enjoy coffee infusions, incorporating a shot of espresso creates a decadent mocha twist. This fusion not only adds depth but also brings the best of both worlds—a perfect blend for any coffee enthusiast.
- Try adding salted caramel syrup for a sweet and savory twist.
- Mix in peppermint syrup for a refreshing holiday touch.
- Top with shavings of premium chocolate for an added touch of elegance.

Furthermore, exploring different beverage recipes can introduce exciting new flavors. A hint of vanilla extract or a splash of hazelnut syrup can provide a delightful variation. These small additions can make your hot chocolate coffee drinks stand out, allowing you to customize each cup to your liking.
Below is a brief overview of various enhancements you can try for your gourmet hot chocolate:
| Chocolate Type | Syrup Flavor | Toppings |
|---|---|---|
| Dark Chocolate | Salted Caramel | Whipped Cream |
| Milk Chocolate | Peppermint | Marshmallows |
| White Chocolate | Vanilla | Cinnamon |
These luxurious hot chocolate variations not only satisfy your sweet cravings but also offer a versatile drink that caters to different preferences. Experimenting with these beverage recipes will undoubtedly add a touch of warmth and decadence to your home barista repertoire.
Alternative Sweeteners for Coffee
For those looking to enjoy the rich flavor of coffee without the added sugar, alternative sweeteners present an excellent solution. Whether you’re aiming to cut down on sugar or simply exploring new tastes, a variety of options are available that cater to different dietary preferences and needs.
Sugar-Free Syrup Options
Sugar-free coffee syrups, such as vanilla or caramel, provide the desired sweetness without the sugar crash. Brands like Torani and Jordan’s Skinny Syrups offer an array of flavors to enhance your coffee experience without the added calories. These options can be particularly beneficial for those managing diabetes or monitoring their caloric intake.
Naturally Sweetened Coffee
Natural coffee sweeteners, including honey and stevia, are favored for their minimal processing and ability to impart a touch of sweetness. Honey adds a rich, floral note that complements both hot and iced coffee. On the other hand, stevia, derived from the leaves of the Stevia rebaudiana plant, offers a calorie-free sweetness that doesn’t spike blood sugar levels.
To better understand how these sweeteners compare, consider the following table:
| Sweetener | Calories (per tsp) | Main Benefit | Taste Profile |
|---|---|---|---|
| Sugar-Free Vanilla Syrup | 0 | Zero Calories | Sweet, Subtle Vanilla |
| Honey | 21 | Natural and Antioxidant-rich | Rich, Floral |
| Stevia | 0 | Calorie-Free and Plant-based | Slightly Bitter, Sweet |
By exploring these sugar-free coffee syrups and alternative sweeteners, one can maintain their coffee ritual without compromising on taste or health goals.
Conclusion
Becoming a successful home barista starts with mastering the essentials and continuously exploring diverse coffee preparation techniques. This comprehensive guide has shown how anyone can craft barista-quality beverages right in their own kitchen, from espresso-based classics to innovative cold brews and delightful dessert drinks. By following these meticulously curated recipes, enthusiasts can enhance their coffee preparation skills and savor the joy of creating personalized, high-quality beverages.
One of the key aspects of this journey is individual experimentation. Adjusting recipes to suit personal taste preferences, exploring alternative ingredients, and refining brewing techniques enable home baristas to discover new dimensions of flavor. Preparing coffee is not just about following steps; it’s about embracing creativity and enjoying the immersive process. Each attempt at these recipes offers a new revelation in achieving the perfect cup.
The ultimate goal of this collection is to enrich beverage enjoyment, allowing every sip to be a reflection of the home barista’s dedication and passion for coffee. By mastering a broad array of recipes and techniques, home coffee enthusiasts can elevate their daily routine, turning it into an extraordinary and satisfying experience. Embrace this journey with an open mind, and discover the endless possibilities that await in the art of coffee preparation.
FAQ
What are some best coffee recipes for home baristas?
Why are high-quality ingredients important for home coffee brewing?
What basic coffee brewing equipment is necessary for home baristas?
How can one master the classic espresso at home?
What are the key ingredients for making the perfect latte?
What are some delicious variations for homemade cappuccinos?
How can one make the ultimate mocha at home?
What are the steps to prepare refreshing cold brew coffee at home?
What is an affogato, and how is it made?
How can one enhance the flavor of iced coffee at home?
What distinguishes a flat white from a latte?
How is a traditional cafe au lait prepared?
What makes a pumpkin spice latte a quintessential autumnal drink?
What are some luxurious hot chocolate variations one can make at home?
What are some alternative sweeteners for coffee?

Noah, the Editor-in-Chief at Cappuccino Oracle, plays a pivotal role in shaping the voice and vision of our renowned platform. With an unwavering passion for coffee, coffee alternatives, and tea, Noah leads Cappuccino Oracle towards new horizons in the realm of coffee journalism.
Beyond his professional responsibilities, Noah serves as a mentor and guiding force for his team. His dedication to journalistic excellence and genuine love for coffee, coffee alternatives, and tea continue to inspire and motivate the Cappuccino Oracle family. In the ever-evolving world of these beverages, Noah’s leadership ensures that our platform remains at the forefront, delivering enlightening and enjoyable content to our readers worldwide.

Being an aficionado of coffee, I constantly seek fresh and thrilling methods to indulge in my daily brew. Hence, I was ecstatic upon stumbling upon the novelty of the upside-down caramel macchiato.
This delicious twist on a classic favorite combines the rich flavors of caramel and espresso in a unique and delightful way. In this article, I’ll share with you the origins of the upside-down caramel macchiato, what sets it apart from traditional macchiatos, and a step-by-step guide to making your own.
So grab your favorite mug and let’s dive into the world of this irresistible coffee creation.
Key Takeaways
- Upside-Down Caramel Macchiato is a variation of the traditional caramel macchiato that originated in Italy in the 1980s and gained popularity in the United States in 1996.
- It is characterized by its unique flavor profile combining rich espresso, creamy caramel, and velvety milk, with a visually appealing reverse layering technique.
- Making a perfect Upside-Down Caramel Macchiato involves focusing on coffee brewing and milk frothing techniques, choosing the right coffee and high-quality caramel syrup, and enhancing the flavor with syrups and toppings.
- While it offers a balanced nutritional profile and potential health benefits, excessive consumption can pose health risks, and it is important to avoid common mistakes when making this drink.
The Origin of Upside-Down Caramel Macchiato
The origin of the upside-down caramel macchiato can be traced back to the early 2000s. This popular coffee drink has an interesting origin story and holds cultural significance in the world of coffee.
The upside-down caramel macchiato is a variation of the traditional caramel macchiato, which originated in Italy in the 1980s. It gained popularity in the United States when Starbucks introduced it to their menu in 1996.
Over the years, there have been various historical variations of the caramel macchiato, with different coffee shops and baristas putting their own unique spin on the recipe. Some famous caramel macchiato recipes include adding different syrups or toppings to enhance the flavor.
The upside-down caramel macchiato is a testament to the evolution of this beloved coffee drink and continues to be enjoyed by coffee lovers worldwide.
What Makes Upside-Down Caramel Macchiato Different
One thing that sets the upside-down caramel macchiato apart is its unique flavor profile. This delicious coffee drink originated in Italy and has gained popularity worldwide. It offers a delightful combination of rich espresso, creamy caramel, and velvety milk.
What makes it different from other coffee alternatives is the way it is prepared. Unlike traditional macchiatos, the upside-down caramel macchiato starts with the caramel sauce at the bottom of the cup, followed by steamed milk, and finally topped with a shot of espresso. This reverse layering creates a visually appealing drink with a caramel-infused taste. Popular variations include adding whipped cream or drizzling extra caramel on top.
Serving sizes may vary, but a standard cup is usually around 8 ounces. While this beverage is undeniably delicious, it is important to note that excessive consumption may lead to health concerns such as increased sugar and calorie intake.
The Perfect Ingredients for Upside-Down Caramel Macchiato
To create the perfect upside-down caramel macchiato, you’ll need a shot of espresso, steamed milk, and a drizzle of caramel sauce. When it comes to choosing caramel alternatives, you can opt for caramel syrup or homemade caramel sauce for a more intense flavor.
For alternative milk options, consider using almond milk, soy milk, or oat milk to cater to different dietary preferences.
Different brewing methods can be used for the espresso, such as using an espresso machine or a stovetop Moka pot. Selecting the right coffee beans is crucial for a rich and balanced flavor profile in your macchiato.
Lastly, adding flavor extracts like vanilla or hazelnut can elevate the taste of your drink.
Now that we have explored the ingredients, let’s move on to the step-by-step guide to making an upside-down caramel macchiato.
Step-by-Step Guide to Making Upside-Down Caramel Macchiato
Start by gathering all the necessary ingredients for your delicious caramel macchiato creation.
This popular coffee beverage has an interesting origin history, dating back to Italy in the 1980s.
The key to making a great upside-down caramel macchiato lies in the coffee brewing and milk frothing techniques.
Choose a strong espresso or dark roast coffee to provide a robust base for your drink.
Froth the milk until it is velvety and smooth, creating that signature creamy texture.
To enhance the flavor, consider adding caramel syrup or sauce, and perhaps a hint of vanilla or cinnamon.
Choosing the Right Coffee for Upside-Down Caramel Macchiato
When selecting the perfect coffee for your delicious creation, make sure to choose a bold espresso or dark roast that will provide a robust base for your drink. The right coffee can make all the difference in achieving that perfect balance of flavors in an upside-down caramel macchiato.
Consider your roast preference, as a darker roast will have a stronger and more intense flavor compared to a lighter roast. Each roast has its own unique flavor profiles that can complement the caramel notes in your macchiato. Experiment with different brewing methods to find the one that brings out the best in your coffee.
Additionally, specialty coffee options can elevate your macchiato to a whole new level of decadence.
Now that we’ve discussed the importance of choosing the right coffee, let’s dive into the next section about the importance of caramel in an upside-down caramel macchiato.
The Importance of Caramel in Upside-Down Caramel Macchiato
The key to achieving the perfect upside-down caramel macchiato lies in selecting the right caramel syrup for a rich and indulgent flavor. Caramel plays a crucial role in enhancing the overall taste and experience of this delightful beverage. Its distinct caramel flavor adds sweetness and depth to the espresso, creating a harmonious blend of flavors.
When choosing a caramel syrup, look for one that is high quality and made with real caramel. This ensures that you get an authentic caramel taste that is both smooth and luscious. Whether you prefer a caramel drizzle on top or a caramel sauce mixed into the drink, the right caramel syrup is essential for achieving that perfect caramel macchiato flavor.
Now, let’s move on to the art of frothing milk for the ultimate upside-down caramel macchiato.
The Art of Frothing Milk for Upside-Down Caramel Macchiato
Now that we understand the importance of caramel in an upside-down caramel macchiato, let’s move on to the art of frothing milk for this delightful beverage.
Frothing milk is a crucial step in creating the perfect texture and consistency for your macchiato. There are various frothing techniques you can employ, depending on your preference and available equipment. If you don’t have a steam wand, you can use a handheld frother or even a French press to achieve a similar effect.
When frothing milk, it’s essential to consider temperature control. The ideal temperature for frothing milk is between 150 to 155°F (65 to 68°C). This range ensures proper milk consistency and prevents scorching.
Moreover, if you prefer milk alternatives such as almond, soy, or oat milk, it’s important to note that different types of milk froth differently. Experiment with different alternatives to find the one that gives you the desired texture and taste.
Once you have mastered the art of frothing milk, you can move on to the exciting part – creating beautiful latte art on your upside-down caramel macchiato.
Tips for Creating Beautiful Latte Art on Upside-Down Caramel Macchiato
To create beautiful latte art on your upside-down caramel macchiato, it’s helpful to experiment with different pouring techniques and patterns. Here are some tips to enhance your latte art skills:
-
Master the milk frothing technique: Properly frothed milk is essential for creating latte art. Make sure to steam the milk to the right temperature and texture, creating a smooth and velvety consistency.
-
Choose the right caramel syrup: Opt for a high-quality caramel syrup that complements the flavors of your coffee. Experiment with different brands and flavors to find the perfect balance between sweetness and richness.
-
Adjust the coffee strength: The strength of your espresso will impact the overall taste and appearance of your latte art. Experiment with different coffee-to-water ratios to find the ideal balance based on your preferences.
-
Experiment with different coffee beans: Different coffee beans have varying flavors and aromas. Try using single-origin beans or blends with unique characteristics to add depth and complexity to your latte art.
Enhancing the Flavor of Upside-Down Caramel Macchiato With Syrups
Experiment with different syrups to enhance the flavor of your upside-down caramel macchiato. Syrups can add a burst of sweetness, depth, and complexity to your favorite coffee drink. Here are some syrup options you can try:
Syrup Flavor Description Caramel Rich and buttery, adds a caramelized sweetness to your macchiato Vanilla Classic and versatile, enhances the natural flavors of coffee Hazelnut Nutty and aromatic, pairs well with caramel and chocolate notes Coconut Tropical and creamy, adds a unique twist to your macchiato
To create exciting flavor combinations, you can mix and match syrups. For example, try a caramel-vanilla combo for a caramel latte with a hint of vanilla. Don’t forget about garnishing ideas! You can top your macchiato with whipped cream, chocolate shavings, or a drizzle of caramel sauce. If you’re looking for syrup alternatives, consider using flavored extracts or even spices like cinnamon or nutmeg. Get creative and have fun experimenting with flavors to make your upside-down caramel macchiato truly unforgettable.
How to Adjust the Sweetness Level in Upside-Down Caramel Macchiato
You can easily customize the sweetness level of your caramel macchiato by adjusting the amount of syrup you add. Here are four ways to adjust the sweetness and enhance the flavor of your upside-down caramel macchiato:
-
Start with less syrup: If you prefer a less sweet drink, begin by adding a smaller amount of caramel syrup to your espresso and milk mixture.
-
Gradually increase the syrup: For those who enjoy a sweeter taste, add a little more syrup at a time until you reach your desired sweetness level.
-
Experiment with different syrups: Try using flavored syrups like vanilla or hazelnut to create unique flavor variations and adjust the sweetness to your liking.
-
Serve with a sprinkle of cinnamon or cocoa: Adding a touch of cinnamon or cocoa powder on top can add depth to the flavor profile of your caramel macchiato.
Adjusting the sweetness of your caramel macchiato allows you to tailor it to your preferences. Remember to enjoy it in moderation and savor the health benefits of a perfectly customized drink.
Upside-Down Caramel Macchiato Variations to Try
If you’re feeling adventurous, try out different flavor combinations for your upside-down caramel macchiato variations. The key to creating delicious variations lies in the coffee selection and the techniques used to enhance the flavors.
When it comes to coffee selection, opt for a medium to dark roast to add depth and richness to your drink. Additionally, experiment with different latte art techniques to make your caramel macchiato visually appealing.
For flavor enhancement, consider adding syrups such as vanilla, hazelnut, or cinnamon to give your drink a unique twist. You can also adjust the sweetness level by using flavored syrups with varying levels of sweetness.
Serving Suggestions for Upside-Down Caramel Macchiato
For a delightful twist, consider serving your upside-down caramel macchiato with a sprinkle of cocoa powder on top. Not only does it add a touch of elegance to the presentation, but it also enhances the rich flavors of the drink.
Here are some presentation tips and alternative toppings to make your upside-down caramel macchiato even more enticing:
- Serve in a clear glass or mug to showcase the beautiful layers of caramel and espresso.
- Garnish with a drizzle of caramel sauce or whipped cream for added indulgence.
- Pair with a side of biscotti or chocolate-covered espresso beans for the perfect accompaniment.
- Serve at a slightly warmer temperature to fully appreciate the flavors and aromas.
By incorporating these tips and variations, you can create a visually stunning and delicious upside-down caramel macchiato experience.
Now, let’s dive into the health benefits of this exquisite coffee drink.
Health Benefits of Upside-Down Caramel Macchiato
Now let’s delve into the health benefits of the upside-down caramel macchiato.
This delightful beverage not only satisfies your taste buds but also provides some nutritional benefits. With its combination of espresso, caramel, and milk, it offers a balanced nutritional profile. The espresso provides a much-needed energy boost, making it perfect for those sluggish mornings or midday slumps. Additionally, the caramel syrup adds a touch of sweetness without being overly indulgent.
Moreover, the upside-down caramel macchiato contains antioxidants from the coffee beans, which can help protect against cell damage and inflammation. This can have a positive impact on your overall health. The milk in the macchiato also aids in digestion, as it contains lactose and proteins that promote healthy gut bacteria.
However, it’s important to note that excessive consumption of caramel macchiatos can lead to potential health risks. The high sugar content and calorie count can contribute to weight gain and increase the risk of conditions like diabetes and heart disease. It’s best to enjoy this beverage in moderation as part of a balanced diet.
Common Mistakes to Avoid When Making Upside-Down Caramel Macchiato
To avoid common mistakes, remember to froth the milk properly for a creamy texture in your homemade upside-down caramel macchiato. Here are some tips to ensure your drink turns out perfectly every time:
-
Use the right milk: Whole milk works best for frothing, as it has a higher fat content that creates a richer and creamier foam.
-
Temperature matters: Make sure the milk is cold before frothing, as warm milk doesn’t froth as well. A temperature of around 40-50°F is ideal.
-
Froth technique: Use a frother or whisk to create a smooth and velvety foam. Start by submerging the frother or whisk just below the surface of the milk and gradually bring it up towards the top.
-
Pouring technique: When pouring the milk into the espresso, start by pouring it in the center and gradually move in a circular motion to create the signature layered effect.
Common Mistakes to Avoid When Making Upside-Down Caramel Macchiato:
- Using low-fat milk, which won’t produce a creamy foam.
- Frothing warm milk, resulting in a less frothy texture.
- Not using the proper technique for frothing the milk.
- Pouring the milk too quickly or in one motion, which doesn’t create the layered effect.
Frequently Asked Questions About Upside-Down Caramel Macchiato
If you’re wondering about the best type of milk to use in your homemade drink, whole milk is recommended for a rich and creamy foam. However, there are other options available for those who prefer different frothing techniques or have dietary restrictions. Here’s a table comparing different milk options for your upside-down caramel macchiato:
Milk Type Creaminess Frothiness Taste Whole Milk High High Rich and creamy Skim Milk Low Low Light and thin Almond Milk Medium Medium Nutty and slightly sweet Soy Milk Medium Medium Creamy and slightly nutty Oat Milk High Medium Creamy and slightly sweet
For coffee alternatives or those looking to reduce caffeine content, you can try using decaffeinated coffee or herbal tea as a base. Additionally, if you prefer an iced version of the upside-down caramel macchiato, simply pour the frothed milk over ice and add the caramel sauce and espresso on top. Lastly, for vegan options, you can use plant-based milk alternatives such as almond milk, soy milk, or oat milk. Enjoy experimenting with different variations to find the perfect upside-down caramel macchiato for you!
Frequently Asked Questions
Can I Use a Different Type of Milk for Upside-Down Caramel Macchiato?
Yes, you can use vegan milk alternatives or other types of milk for an upside-down caramel macchiato. Experiment with different options to find the best milk for that delicious caramel flavor. Don’t forget to explore frothing alternatives and non-dairy caramel options.
How Long Does It Take to Make Upside-Down Caramel Macchiato?
It takes about 5-10 minutes to make an upside-down caramel macchiato. You’ll need to first make caramel syrup, then brew the best type of espresso for a macchiato. Don’t forget variations, common mistakes, and tips for frothing milk.
Can I Make Upside-Down Caramel Macchiato Without an Espresso Machine?
Sure, you can make an upside-down caramel macchiato without an espresso machine. There are alternative brewing methods, like using a French press or a Moka pot. You can also froth milk without a machine and try different flavor variations or non-dairy alternatives.
Can I Use a Different Type of Syrup in Upside-Down Caramel Macchiato?
Yes, you can use a different type of syrup in an upside-down caramel macchiato. It allows for alternative syrups, flavor variations, and different sweetness levels. Get creative and try unique combinations for a personalized twist.
How Can I Make Upside-Down Caramel Macchiato Vegan-Friendly?
To make an upside-down caramel macchiato vegan-friendly, I suggest using alternative sweeteners like agave syrup or maple syrup instead of caramel. Non-dairy milk options like almond or oat milk can be used. Get creative with flavor variations like adding vanilla or cinnamon.
Conclusion
In conclusion, the upside-down caramel macchiato is a delightful twist on the classic beverage. With its rich caramel flavor and velvety smooth texture, it’s no wonder this drink has become a favorite among coffee lovers.
By following the step-by-step guide, you can easily recreate this indulgent treat at home. Remember to choose the right coffee and avoid common mistakes for the best results.
Whether you enjoy it in the morning or as an afternoon pick-me-up, the upside-down caramel macchiato is sure to satisfy your cravings. Cheers to a delicious cup of coffee!
Arf, an author and an innovative enthusiast of coffee, coffee alternatives, and tea, plays a crucial role as a contributor to the esteemed Cappuccino Oracle platform. Renowned for his curiosity and passion for these captivating beverages, Arf has carved out a unique space for himself in the world of exploration and writing. He realized that coffee, coffee alternatives, and tea are not mere drinks to keep one awake, but universes of flavors and stories waiting to be explored.
Arf’s articles for Cappuccino Oracle blend meticulous research with personal experiences, providing readers with an in-depth understanding of various types of coffee, coffee alternatives, and tea, along with their unique characteristics, cultures, and histories. His honest reviews and engaging narratives guide readers on their own journeys, helping them discover their preferences and find their perfect brew.

How to Make Kombucha Tea Fizzy

How to Make Kombucha Starter Tea
Which Tea Is Best for Kombucha
What Is Kombucha Starter Tea

What Is Green Tea Kombucha Good for

How to Make Americano With Moka Pot

How to Make Korean Iced Americano

How to Make Iced Americano With Instant Coffee

What to Add to an Americano at Starbucks

How to Make Americano With Bialetti

Discover the Power of KOS Mushroom Coffee

Top 10 Rated Mushroom Coffee Brands for a Boost

What Makes Caffeine-Free Mushroom Coffee Unique?

Rooibos Tea: A Guide to Safe Breastfeeding Practices

What Mushroom Can I Use as a Coffee Replacement?

-
 Americano3 weeks ago
How to Make Americano With Moka Pot
-
 Americano1 week ago
How to Make Korean Iced Americano
-
 Americano3 weeks ago
How to Make Iced Americano With Instant Coffee
-
 Americano4 weeks ago
What to Add to an Americano at Starbucks
-
 Americano3 weeks ago
How to Make Americano With Bialetti
-

 Americano3 weeks ago
How to Make Dutch Bros Americano
-

 Americano2 weeks ago
How Many Shots of Espresso for 16 Oz Americano
-

 Americano1 day ago
How to Make an Iced Americano With Nespresso