
Beginners Guides
Cold Foam: 5 Quick And Easy Ways To Make It At Home
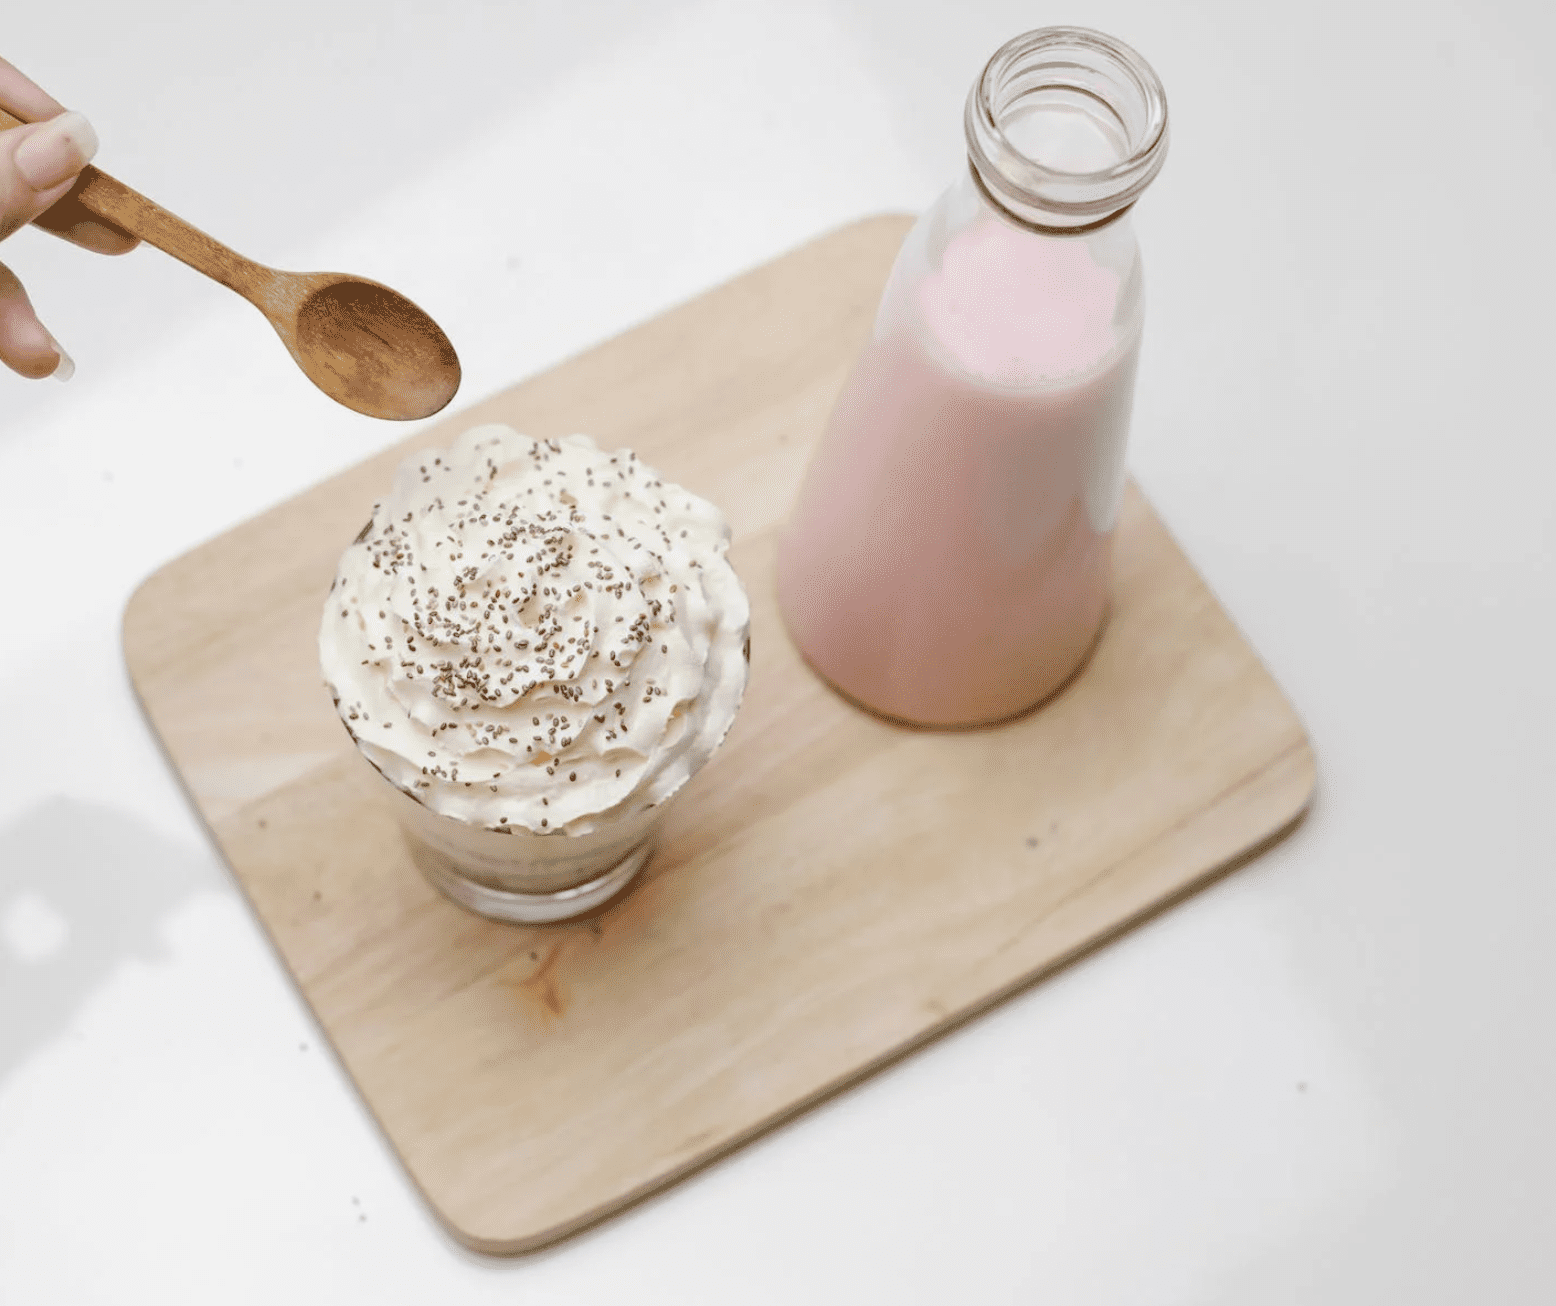
Hey there! If you’re looking for an easy and delicious way to make cold foam at home, then I’m here to help. Cold foam is a great addition to any beverage or dessert recipe that adds the perfect creamy texture and flavor. Plus, it’s surprisingly simple to make in your own kitchen. In this article, I’ll share five of my favorite recipes for making quick and easy cold foam right at home.
I’ve been crafting up cold foam creations for years now, so believe me when I say these are some of the tastiest options out there. Whether you like sweet flavors like strawberry or classic favorites like vanilla bean, each one of these recipes will be sure to please everyone around the table. And trust me – they won’t take long to whip up either!
So get ready for some serious frothy fun because we’re about to dive into five tasty ways that you can easily make cold foam at home. Let’s get started!

Meaning Of Cold Foam
Cold foam is like a cloud in a cup, light and airy with a creamy texture. It has become an essential part of coffee culture that can be enjoyed by itself or as an extra topping to your favorite beverage. But what exactly is cold foam? To put it succinctly, cold foam is the result of combining cream or milk with air bubbles to create a smooth and frothy mixture. In other words, it’s a type of whipped cream made from real dairy ingredients such as skimmed milk or half-and-half.
The significance of cold foam goes beyond its textures and flavors; when you add this topping to your morning cup of joe, you’re adding more than just sweetness – you’re also getting added nutrition! Cold foam contains calcium and protein, making it a healthier alternative to sugary syrups or artificial sweeteners. Plus, if you make cold foam at home, you know exactly what ingredients are going into each sip.
It doesn’t take much effort to concoct your own version of this popular treat either – all you need is some dairy products, sugar (optional), food coloring (also optional) and some basic kitchen equipment like whiskers or blenders. So why not give DIY cold foam a try today? With these five quick steps outlined below, creating fluffy clouds of deliciousness will soon become second nature!

Benefits Of Cold Foam
It’s no surprise that cold foam is becoming increasingly popular. Not only does it look luxurious and taste great, but it also has many health benefits as well. From providing a boost of caffeine to adding layer upon layer of delicious flavor, there are plenty of ways to get creative with making your own cold foam at home. Here are five quick and easy recipes to try:
1) Classic Cold Foam – For the classic version, all you need is espresso or strong coffee, cream, sugar (to taste), and an electric frother. Simply combine all ingredients in the frother cup before turning on the machine until creamy peaks form. Enjoy this creamy delight over your favorite espresso drink!
2) Caffeinated Cold Foam – If you’re looking for an extra kick of caffeine, add some instant coffee powder into the mix when making your cold foam. This will give it a more intense flavor profile while still maintaining its velvety texture. Even better – use decaf if desired so you can enjoy your treat without worrying about getting too jittery afterwards!
3) Sweet and Salty Cold Foam – There’s nothing quite like combining sweet and salty flavors together to create something truly unique! To make this version of cold foam, just add a pinch of salt into the mixture along with any other desired flavorings such as vanilla extract or cocoa powder. Stir everything up in the frother until light and fluffy before topping off your favorite beverage with this dreamy combination.
4) Flavored Cold Foam – Experimenting with different flavors is another fun way to explore new tastes when creating homemade cold foams. Try infusing extracts such as peppermint or almond into your recipe for unexpected bursts of flavor or even top off traditional drinks like cappuccinos with flavored syrup-infused mixtures instead! The possibilities really are endless here so feel free to play around with whatever sounds most appealing to you.
5) Nutritious Cold Foam – You can also make healthier versions by using skim milk instead of heavy cream and opting for low-calorie sweeteners like honey or agave nectar instead of sugar. Adding superfoods such as matcha green tea powder or chia seeds can further enhance the nutritional value while giving it even more depth in terms of flavor profiles – yum!
No matter which type of cold foam recipe you decide to go with, one thing’s for sure – they’re definitely worth a try! With just a few simple steps, anyone can whip up these decadent treats right at home whenever their hearts desire. Now let’s move onto discussing what ingredients and equipment we’ll need…
Ingredients And Equipment Needed
Creating your own cold foam at home is easier than you think. All you need are a few simple ingredients and some basic equipment to get started. To make enough for one serving, only about five minutes of time and 5-10 cents worth of materials is all that’s needed!
Let’s start with the ingredients and equipment needed: Cold foam requires two key components – nitrous oxide (N2O) gas and non-dairy creamer or milk substitute like almond or coconut milk. You will also need an immersion blender and a shaker bottle or jar with a tight lid to ensure proper mixing. Other optional items include flavored syrups or extracts to add flavor, as well as a teaspoon of honey or sugar if desired.
Now that we know what we’re working with, let’s move on to the step-by-step guide to making cold foam…
Step-By-Step Guide To Making Cold Foam
Ready to get started? Here are five easy ways to make cold foam at home! First, let’s talk about the blender method. To begin, you’ll need a cold-foam blender and some chilled coffee or tea of your choice. Start by pouring the beverage into the blender, then blend for one minute until it starts to froth up. Next, add a few drops of syrup to sweeten it (optional), and blend again for 30 seconds before transferring the mixture into a mug or cup. Finally, top off with ice cubes if desired and enjoy!

Next is the whisk method. This requires only a bowl and a cold-foam whisk. Begin by adding 1/4 cup of chilled liquid of your choice into the bowl along with 2 tsp sugar or maple syrup (optional). Then start vigorously whisking in an up-and-down motion until you achieve soft peaks that form on top when lifting out the whisk. If needed, add more liquid until desired texture is achieved – careful not to overdo it though as this will cause it to become too watery. Once finished, spoon mixture onto drinks or desserts as desired and serve immediately!
Finally, there’s also two other methods: shaker and charger method. The shaker method involves shaking together chilled liquids in either a cocktail shaker filled with cubed ice or just using any container with lid such as mason jar; whereas the charger method uses an iSi Cold Foam Charger which contains nitrous oxide cartridges – perfect for those looking for speedier results without having to wait around! For both methods, simply follow instructions included in their respective packaging prior to serving up your delicious homemade cold foam creations!
Blender Method
Making cold foam coffee with a blender is one of the most popular methods for creating this creamy delight. This preparation method can be done in as little as five minutes and yields enough foamy goodness to last you all week! To get started, gather together your cold foam ingredients: espresso or strong-brewed coffee, heavy cream, granulated sugar, milk, and ice cubes.
Once you have all your items together place them into the blender along with a few drops of liquid stevia (optional). Secure the lid and blend on high speed until everything has been combined completely. Depending on how powerful your blender motor is, this could take anywhere from 30 seconds to 2 minutes.
When finished blending transfer the mixture into an airtight container and store it in the refrigerator. Now that you’ve made your cold foam using a blender all that’s left to do is enjoy it! Stir up some of the mixture prior to pouring over your favorite cup o’ joe and savor every sip – because nothing beats homemade!
Whisk Method
Ready to make some cold foam? The whisk method is a great way to get started. This technique involves vigorous whisking with either an electric or manual hand-held mixer. When using this technique, it’s important to keep the consistency of the foam in mind: you’ll want something light and airy that will hold its shape when poured into your mug of coffee.
To begin making cold foam with the whisking technique, start by combining equal parts milk and sweetener (such as sugar) in a bowl. For dairy-free cold foam recipes, consider substituting almond or oat milk instead of cow’s milk. Then use your chosen mixer to whip the mixture on high speed until small bubbles form – about three minutes should do it! Once finished, pour directly over your hot beverage for a delicious treat.
The whisk method can be used for many different types of cold foams – from classic coffee flavors like vanilla or hazelnut to creative combinations like chai spice or orange blossom honey. Experiment with different flavorings and ingredients to create unique drinks tailored just to you!
Shaker Bottle Method
Making cold foam with a shaker bottle is like baking a cake from scratch. With just the right ingredients and tools, you can whip up delicious treats in no time. The shaker-bottle-method of making cold foam requires only three items: a shaker bottle, cold coffee or espresso and half & half. To start, pour the desired amount of coffee into the shaker bottle then add equal parts of half & half until it reaches the top. Securely close the lid and shake vigorously for 30 seconds to one minute. Open the lid slowly – voilà! You’ve created your own cold foam masterpiece using nothing but a simple shaker bottle.
To make sure that your cold foam is as airy and creamy as possible, use an immersion blender instead of shaking manually when using this method. This will help aerate your mixture more than manual shaking would, giving you perfectly smooth and fluffy cold foam every time. Furthermore, adding various flavors such as syrups or spices will give your concoction unique flavor profiles that can be further enhanced with garnishes like cinnamon powder or chocolate chips. Now that you know how to make perfect cold foam with a shaker bottle at home, why not experiment with different recipes? Ready to take it up a notch? Let’s explore the next step – creating restaurant-style cold foam with an immersion blender.
Immersion Blender Method
Making cold foam at home with an immersion blender is easy and fast! With a few simple steps, you can have delicious homemade cold foam in no time. Here’s what you’ll need:
Ingredient Quantity Notes Milk 1 cup Use your favorite type of milk; cow or plant-based both work well! Cream 2 tablespoons Heavy cream will give the best texture for your cold foam. Sugar 1 teaspoon Granulated sugar adds sweetness to the final product. Optional but recommended.
Now that you’ve gathered your ingredients, it’s time to make some cold foam! Begin by combining all three ingredients in a container that fits into your immersion blender’s cup attachment. Securely attach the cup to your immersion blender and blend on high speed until thick peaks form, about 5 minutes should do it. When finished, pour into cups and enjoy! To add a little extra flair, top with cocoa powder or cinnamon for a tasty treat. Making cold foam at home with an immersion blender is quick, easy, and sure to please everyone who tries it!
Nitrous Oxide Charger Method
Ahh, the Nitrous Oxide Charger Method! Aren’t we all looking for a more creative way to make our home-made cold foam? Well, look no further! This method makes it easy and is sure to be a hit with your dinner guests. Here’s what you need:
- 1 canister of nitrous oxide (N2O)
- A cream whipper or soda siphon
- Foam charger/dispenser
Take your N2O canister, fit it into the dispenser, and then fill up your cream whipper or soda siphon with some cold liquid of your choice – coffee, hot chocolate, milkshakes are all great options. Make sure that whatever you use has enough fat content so the foam will form properly when charged. Securely attach the charger to the top of the container and press down on the lever. After about five seconds, you’ll have yourself some delicious cold foam! How fun is that?!
The beauty of this method is that you can add as many chargers as desired for even bigger batches of foamy goodness. You could also experiment with adding different ingredients such as spices, sugar syrups or flavored liqueurs for extra pizzazz. And don’t forget to try out different types of liquids like almond milk or coconut water – the possibilities are endless! With this simple home recipe, everyone from amateur baristas to experienced mixologists can enjoy making their own unique creations in no time at all.
Possible Variations And Additions
It’s time to get creative! Cold foam can be made in a variety of ways, depending on your preferences and what ingredients you have available. Here are some unique recipes that will take your cold foam from ordinary to extraordinary.
| Recipe | Ingredients |
|---|---|
| Oatmeal Foam | 2 cups almond milk (or other non-dairy alternatives) 2 tablespoons pure maple syrup or honey 1 tablespoon raw almonds, finely chopped plus more for garnish(optional) ⅛ teaspoon pure almond extract (optional) Pinch of sea salt & freshly ground black pepper, to taste |
| Coconut Milk Foam | 2 cups coconut milk 1/2 tsp vanilla extract 1/4 tsp nutmeg 1/4 cup honey Pinch of sea salt |
| Honey Foam | 4 tablespoons honey ¼ teaspoon ground ginger 2 cups oat milk or organic cow’s milk ½ teaspoon vanilla extract A pinch of sea salt |
| Matcha Foam | 3 teaspoons matcha powder 2 cups almond milk (or other non-dairy alternative) 2 tablespoons agave nectar or honey Pinch of Himalayan pink salt (optional)Almond Foam3 teaspoons matcha powder 2 cups almond milk (or other non-dairy alternatives) 2 tablespoons agave nectar or honey Pinch of Himalayan pink salt (optional) |
All these recipes make delicious cold foams with different flavors and textures. Experiment by adding spices like cardamom and cloves, herbs like mint or basil, fruits like strawberries and blueberries, cocoa powder or peanut butter – the possibilities are endless! You can also adjust the sweetness level according to your preference by using less sugar or even skipping it altogether. With all these variations, there is something for everyone to enjoy.

Frequently Asked Questions
What Types Of Drinks Can I Use Cold Foam In?
If you love the creamy texture of cold foam, then you’ll be glad to know that there are so many different drinks where it can be used. From classic iced coffees and cappuccinos to decadent macchiatos and smoothies, the possibilities for creating delicious concoctions with cold foam are endless! Here is a list of some of our favorite drinks featuring this delightful topping:
- Coffee Drinks
- Cold Foam Cappuccino – For an extra luxurious take on your regular morning cup of joe, try adding a dollop or two of tasty cold foam to your traditional cappuccino. Not only will this give your drink an added creaminess, but also a bit more sweetness as well.
- Iced Coffee Cold Foam – What could be better than sipping on a cool caffeinated beverage while feeling like you’re indulging in something sweet? A great way to do both is by adding cold foam to your glass of iced coffee, which makes for an absolutely irresistible combination.
- Espresso Drinks
Cold Foam Latte – There’s nothing quite like taking a break from reality with a comforting latte topped with velvety-smooth cold foam. The best part about making one at home is that you can customize it however you’d like—add a little sugar or cinnamon if desired!
Cold Foam Macchiato – Need an energy boost after lunchtime? Then why not treat yourself to a delicious macchiato complete with heavenly cold foam? This specialty espresso drink has all the makings of a perfect afternoon pick-me-up: rich espresso combined with creamy milk and topped off with frothy goodness.
For those who want to easily whip up their own creations using cold foam, we’ve created five quick and easy ways to make it right in the comfort of your own kitchen. All you need is some heavy whipping cream, flavored syrup (if desired), and any type of milk (dairy or non-dairy). So next time you’re looking for ways to elevate your morning caffeine fix or just craving something special, don’t forget about these amazing options involving everyone’s favorite topping—cold foam!
How Long Will Cold Foam Stay Fresh After Making It?
Making cold foam is a great way to add frothy texture and flavor to your favorite drinks. But how long will it stay fresh after making it? If you want to get the most out of your cold foam, there are some tips for storing it that can help keep it tasting like new with each sip.
Storing cold foam for long-term storage isn’t as simple as putting it in the refrigerator or cupboard – there’s more to keeping your cold foam fresh than that. To ensure optimal cold-foam-freshness, be sure not to store your concoction near any foods with strong odors such as onions or garlic, as this could affect its taste.
Also make sure that you don’t overfill containers when storing; give the container enough room so air can move around the liquid without splashing around too much. This will also help prevent bacteria from forming on the surface of the mixture.
Using an airtight container whenever possible is key for keeping your cold foam fresh for longer periods of time, since oxygen exposure can lead to spoilage quickly. Additionally, if you plan on using up your batch within a few days, adding a tablespoon of vodka or similar alcohol can extend its shelf life by helping inhibit bacteria growth. Lastly, refrigerate all batches regardless if they have alcohol added—this will provide better protection against contamination and keep them fresher for longer!
By following these storing-cold-foam tips and tricks, you should be able to enjoy delicious cold foam creations even days after mixing them together! Whether you’re experimenting with flavors or simply looking for something special in your morning coffee ritual – knowing how best to store and keep your cold foam lasting longer gives you plenty of options to choose from.
Is Cold Foam Vegan-Friendly?
I’m often asked if the cold foam is vegan-friendly. The answer is yes! Vegan-friendly cold foam can be made with only a few ingredients, without any dairy or animal products. It’s surprisingly easy to make and the results are delicious – creamy, light and airy.
Creating vegan-friendly foam starts by combining coconut milk and agar flakes in a saucepan over medium heat. Once the mixture comes to a simmer, reduce heat and let it cook for 5 minutes until thickened. Then add sugar and vanilla extract for flavor, stirring occasionally until dissolved. After that remove from heat, cool slightly then pour into an electric mixer bowl fitted with a whisk attachment. Whip on high speed for 3-5 minutes until light and fluffy peaks form.
This process yields some amazingly delicious vegan-friendly cold foam perfect for topping your favorite drinks or desserts! You can even customize this recipe with different extracts such as almond or orange blossom water to create unique flavors of vegan foam. Enjoy your own homemade batch of vegan cold foam today – you won’t regret it!
Are There Any Health Risks Associated With Using A Nitrous Oxide Charger?
When it comes to making cold foam, one of the most common tools used is a nitrous oxide charger. While this can be an effective way of creating frothy foam quickly and easily, there are some health risks associated with its use that need to be taken into consideration.
Using a nitrous oxide charger has the potential to expose us to higher levels of nitrous oxide than would normally occur in nature. This means people who inhale or ingest these gases could experience dizziness, headaches, nausea and even loss of consciousness when exposed over long periods of time. For those looking for a safe alternative method of creating foam without using a nitrous oxide charger, we recommend researching other methods such as steaming or blending hot liquids together.
Safety should always come first when making cold foam at home so if you do choose to use a nitrous oxide charger make sure you take all the necessary precautions. Be sure to read up on how much gas needs to be injected into the liquid mixture and never exceed recommended amounts as this could result in injury. Also remember to store chargers in cool dry places away from direct sunlight which will help them last longer and prevent any accidents from occurring. Taking these steps can ensure your enjoyment of cold foam remains safe!
What Is The Difference Between Cold Foam And Regular Foam?
The difference between cold foam and regular foam can be confusing, especially when it comes to making the perfect cup of coffee. Cold foam is made with a combination of milk, cream, and Nitrous Oxide charger which produces an airy texture and creamy taste that makes for great latte art. On the other hand, regular foam is traditionally made by steaming milk or using a handheld frother. Both types of foams offer unique benefits but have distinct differences in ingredients and textures.
When it comes to ingredients, cold foam typically uses non-fat milk while traditional methods use whole milk or cream. The type of milk used affects the flavor profile as well as the consistency of the final product. Additionally, Nitrous Oxide chargers are required for creating cold foam whereas they aren’t necessary for regular foams.
In terms of texture comparison, cold foam offers a much lighter and fluffier feel than traditional options due to its incorporation of air bubbles from the nitrous oxide charger. Regular kinds usually provide a more velvety finish without any additional aeration or bubbly sensation associated with cold foams. Furthermore, different techniques are employed in order to create each type; for instance, steam wands are generally used for producing regular frothy coffees while whipped cream dispensers help generate cold ones with ease.
Overall, both varieties come with their advantages depending on what kind of end result you’re looking for – light and fluffy versus smooth and silky – so make sure to experiment until you find your preferred method!

Conclusion
Ah, cold foam. A fresh and frothy delight that can be added to any recipe for deliciousness! Whether you’re making a latte, cappuccino, or even a smoothie, this delicacy is sure to bring your beverages to the next level. But what if I told you that creating it yourself was just as easy? Here are 5 quick and easy ways to make cold foam at home with minimal effort:
First off, gather all of your necessary items: nitrous oxide charger (or N2O chargers), milk or plant-based alternative, measuring cup/spoon and a frothing pitcher or French press. Then fill the pitcher or French press halfway with liquid and add one N2O charger per 8 ounces of liquid desired – classic anachronism alert! Now shake vigorously for about 30 seconds then pour into glasses. Enjoy your freshly made cold foam masterpiece!
Second, try using chilled almond milk in place of regular milk for a vegan option; simply mix together equal parts almond milk and ice before adding the N2O charger. Shake until foamy then enjoy! Thirdly, use sweetened condensed milk instead of regular milk for a richer flavor; combine 1 part condensed milk with 2 parts water in a small pot over low heat until well blended – no shaking needed here either! Finally, experiment with different types of flavored syrups to customize each creation according to your taste buds’ desires.
There’s so much fun to be had when crafting up these creamy concoctions from the comfort of your own kitchen – now go forth and explore all the possibilities that await you within cold foam territory!

Justin is a seasoned author, coffee and tea enthusiast, and an essential member of the Cappuccino Oracle team. With a keen appreciation for the complexities of coffee, coffee alternatives, and tea, Justin has dedicated his professional career to exploring these realms and sharing his insights with readers worldwide.
Justin’s immersion in the world of coffee, coffee alternatives, and tea began at a young age, kindling a passion that extended beyond mere consumption. This love for these beverages led him to combine his talent for writing with his devotion to coffee and tea, bringing him to Cappuccino Oracle as a dedicated author.

Did you know that maintaining consistent extraction plays a crucial role in creating top-notch coffee? A critical factor in achieving this uniformity is ensuring the even distribution of coffee grounds. If distribution is uneven, it can result in unbalanced flavors caused by over-extraction in certain areas and under-extraction in others.
Overcoming the challenges of clumping, poor distribution, and inconsistent grind is crucial for a delightful coffee experience. In this article, we will explore the Weiss Distribution Technique (WDT) and its benefits in promoting uniform distribution and minimizing channeling during espresso extraction.
Key Takeaways
- Uneven distribution leads to inconsistent extraction, with over-extraction in some parts and under-extraction in others.
- The Weiss Distribution Technique (WDT) improves the uniformity of coffee grounds distribution and minimizes channeling during espresso extraction.
- Implementing WDT involves stirring the coffee grounds in a circular motion, leveling the coffee bed, and tamping with even pressure.
- WDT offers advantages such as improved extraction consistency, uniform water flow, reduced channeling, and enhanced flavor and aroma.
The Importance of Even Distribution for Consistent Extraction
In the pursuit of consistent extraction, the importance lies in achieving an even distribution of coffee grounds throughout the portafilter. This is because uneven distribution can lead to inconsistent extraction, resulting in over-extraction in some areas and under-extraction in others. To achieve balanced flavors, every particle of coffee grounds must contribute equally to the flavor profile. The science behind even distribution in coffee extraction involves ensuring that water finds the path of least resistance, promoting an even flow through all the coffee grounds.
To achieve even distribution, there are practical tips that can be followed. Firstly, it is important to prevent clumping of the coffee grounds, as clumps can lead to uneven extraction. Secondly, proper distribution and tamping techniques can help prevent channeling, which is the uneven flow of water through the coffee bed. Additionally, using a consistent grind and mastering the technique can also contribute to achieving even distribution.

Challenges in Achieving Perfect Distribution
Achieving perfect distribution of coffee grounds poses several challenges in the pursuit of consistent extraction. These challenges include clumping of coffee grounds, channeling caused by poor distribution or tamping, inconsistent grind from different grinders, and the tricky technique for beginners.
Overcoming these distribution challenges is essential for a delightful coffee experience. Techniques for improving distribution consistency include the Weiss Distribution Technique (WDT), which was introduced by John Weiss. WDT improves the uniformity of coffee grounds distribution, minimizes channeling during espresso extraction, and promotes even water flow by using a thin tool to stir and redistribute grounds.
Other distribution methods such as Stockfleth’s method, tapping method, leveling tools, and shaking method are also compared, but the WDT stands out for its attention to detail and effectiveness in breaking up clumps.
The Weiss Distribution Technique (Wdt) and Its Benefits
One of the notable benefits of the Weiss Distribution Technique (WDT) is its ability to improve the uniformity and consistency of coffee grounds distribution during espresso extraction.

This technique, introduced by John Weiss, has gained traction among baristas and home brewers for its effectiveness in minimizing channeling and promoting even water flow. By using a thin tool to stir and redistribute the grounds, the WDT breaks up clumps and ensures that every particle contributes to the flavor equally.
The advantages of implementing the WDT include improved extraction consistency, reduced channeling, and enhanced flavor and aroma. For beginners using the WDT technique, it is recommended to start simple, focus on consistency, and document the process for refinement over time.
Incorporating the WDT with other techniques can also elevate the coffee quality.
History and Origin of WDT
Since its introduction by John Weiss, the Weiss Distribution Technique (WDT) has evolved from a simple and effective method to a recognized technique used by baristas and home brewers alike. Here is a brief history and origin of the WDT:

-
Online tip to recognized technique: Initially, the WDT gained traction on coffee forums and communities as an effective way to improve uniformity of coffee grounds distribution. It quickly transitioned from a mere online tip to a recognized technique due to its success in minimizing channeling during espresso extraction.
-
Name after its creator: The technique is named after its creator, John Weiss, who introduced it as a simple and effective method for achieving even distribution of coffee grounds.
-
Baristas and home brewers: Over time, the WDT technique has become widely adopted by baristas and home brewers alike. Its effectiveness in breaking up clumps and promoting even water flow has made it a popular choice among coffee enthusiasts.
-
Evolution of the WDT technique: As more people started using the WDT, it has undergone refinements and variations. Baristas and home brewers have experimented with different tools and techniques to further improve the distribution process.

Common misconceptions about WDT: Despite its proven effectiveness, some misconceptions surrounding the WDT technique still exist. These include the belief that it is a complicated and time-consuming process, or that it doesn’t make a noticeable difference in the final brew. However, with proper understanding and practice, the WDT can greatly contribute to achieving consistent extraction and a delicious cup of coffee.
Implementing the WDT: Step-by-Step Guide
To successfully implement the WDT technique, follow this step-by-step guide for achieving even distribution of coffee grounds.
-
First, ensure that the portafilter is clean and ready for use.
-
Next, dose the required amount of coffee into the portafilter basket.
-
Gently stir the coffee grounds in a circular motion using a thin tool, such as a paperclip or toothpick, to break up any clumps and promote uniform distribution.
-
Once the grounds are evenly distributed, level the coffee bed with a flat edge to create a consistent surface.
-
Finally, tamp the coffee with even pressure to further enhance the even distribution.
Frequently Asked Questions
What Are Some Common Misconceptions About Even Distribution in Coffee Extraction?
Common misconceptions about even distribution in coffee extraction include the belief that it is unnecessary or that it doesn’t significantly impact flavor. Techniques for even distribution, such as the Weiss Distribution Technique, are essential for consistent extraction and balanced flavors.
Can the Weiss Distribution Technique Be Used for Other Brewing Methods Besides Espresso?
The Weiss Distribution Technique (WDT) can be used for alternative brewing methods besides espresso. It promotes even extraction, resulting in enhanced flavor and aroma. Its benefits include improved consistency and reduced channeling.
How Does Clumping Affect the Extraction Process and Flavor of the Coffee?
Clumping in coffee grounds affects extraction consistency and flavor. Uneven distribution leads to over-extraction in some parts and under-extraction in others. Techniques like the Weiss Distribution Technique (WDT) improve consistency and enhance the overall coffee experience.
Are There Any Specific Tools or Equipment Required to Implement the Weiss Distribution Technique?
Specific tools for implementing the Weiss distribution technique include a thin tool for stirring and redistributing coffee grounds. Even distribution is crucial for consistent extraction, ensuring uniform water flow and enhanced flavor and aroma.
What Are Some Alternative Methods to Achieve Even Distribution in Coffee Extraction?
Alternative techniques to achieve even distribution in coffee extraction include Stockfleth’s method, tapping method, leveling tools, and shaking method. These methods aim to break up clumps and promote uniform water flow for improved extraction consistency and enhanced flavor.
Conclusion
In the quest for the perfect cup of coffee, achieving consistent extraction is paramount. Even distribution of coffee grounds is key to this process, ensuring that each particle contributes to the overall flavor.
The Weiss Distribution Technique (WDT) has emerged as a powerful method to overcome the challenges of clumping and channeling, promoting uniformity and enhancing the espresso extraction process.
With its history and origin explored, a step-by-step guide provided, and practical tips offered, the WDT proves to be a valuable tool in the pursuit of a delightful coffee experience.

In the vast and diverse world of coffee, coffee alternatives, and tea, Olivia has found her calling. As an author and a dedicated coffee and tea aficionado, her work for Cappuccino Oracle reflects her profound love and understanding of the intricate complexities found within these beverages. Olivia’s passion for the subject serves as both a catalyst for her creativity and a connection point with her audience.
Olivia’s appreciation for coffee, coffee alternatives, and tea blossomed at an early age. She discovered that these beverages invigorated her senses and stimulated her creative spirit. From the nuanced flavors of single-origin roasts to the captivating narratives intertwined with coffee, coffee alternatives, and tea trade and culture, Olivia found an unlimited source of inspiration in her daily cup.
Her love for these beverages and her talent for storytelling eventually converged at Cappuccino Oracle. As an author, Olivia’s mission is to illuminate the intricate tapestry that makes up the world of coffee, coffee alternatives, and tea. Her articles span a diverse range of topics, encompassing everything from the unique flavors of different brews to the sociocultural history intertwined with their cultivation and consumption.

The adage ‘You are what you drink’ aptly applies, especially regarding caffeine. This natural stimulant present in tea and energy drinks significantly influences our physiology. However, have you considered the varying effects of caffeine levels in these drinks on our body?
In this article, we will delve into the fascinating world of caffeine and explore its effects on the body.
Firstly, we will examine the caffeine content in tea and energy drinks, comparing the two and highlighting any differences. We will then explore how caffeine is absorbed and metabolized by the body, shedding light on why we may experience varying effects.
From there, we will delve into the effects of caffeine on the brain and nervous system, as well as its influence on heart health. Additionally, we will explore the impact of caffeine on our sleep patterns and discuss personal factors that can affect our sensitivity to this powerful substance.
So grab a cup of tea or energy drink, and let’s dive into the stimulating world of caffeine.
Key Takeaways
- The caffeine content in tea and energy drinks can have different effects on the body.
- Tea typically contains lower levels of caffeine compared to energy drinks, which may result in milder stimulant effects.
- Energy drinks, with their higher caffeine content, may enhance exercise performance and reduce perceived exertion.
- Tea, being lower in caffeine, may have less impact on sleep patterns compared to energy drinks, which can disrupt sleep quality and duration.
Understanding Caffeine’s Effects on the Body
Understanding how caffeine affects the body differently in tea and energy drinks is crucial for comprehending the intricate ways in which these beverages impact our overall well-being.
Caffeine is a stimulant that affects the central nervous system, increasing mental alertness and reducing fatigue. When consumed before exercise, caffeine can improve performance by enhancing endurance, reducing perceived exertion, and increasing fat oxidation. Studies have shown that caffeine can also improve cognitive function, including attention, reaction time, and memory.
However, the effects of caffeine can vary depending on the source. Tea contains lower levels of caffeine compared to energy drinks, but it also contains other compounds like L-theanine, which may have calming effects.
Transitioning into the subsequent section about the caffeine content in tea, it is important to understand how these additional compounds in tea may influence the body differently.
The Caffeine Content in Tea
To truly grasp the impact, imagine how that invigorating cup of tea you enjoy every morning sends a jolt of energy coursing through your veins, making you feel more alive than ever. When it comes to caffeine content, tea usually contains less caffeine than coffee, but the exact amount can vary depending on the type of tea.
Here are three examples:
- Green tea: Contains around 20-45 mg of caffeine per 8-ounce serving.
- Black tea: Typically has 40-70 mg of caffeine per 8-ounce serving.
- Herbal tea: Usually caffeine-free, but some varieties like yerba mate may contain small amounts.
Knowing the caffeine levels in different types of tea can help you make informed choices about your daily caffeine intake.
Now, let’s delve into the caffeine content in energy drinks.
The Caffeine Content in Energy Drinks
Imagine the electrifying surge of energy that rushes through you with every sip of those fizzy, vibrant drinks you can’t resist. Energy drinks are known for their high caffeine content, which is one of the main ingredients that gives you that instant boost.
In fact, energy drinks typically contain much higher levels of caffeine compared to tea. While a cup of tea usually contains around 30-50 milligrams of caffeine, energy drinks can have anywhere from 80 to 300 milligrams per serving.
Such high levels of caffeine in energy drinks can potentially lead to caffeine overdose if consumed excessively. It is important to be mindful of your caffeine intake and not exceed the recommended limits.
Now, let’s delve into the absorption and metabolism of caffeine, and how it affects our bodies.
Absorption and Metabolism of Caffeine
The electrifying surge of energy you feel after consuming energy drinks is due to the rapid absorption and metabolism of caffeine in your body.
When you drink an energy drink, the caffeine is quickly absorbed into your bloodstream through the lining of your stomach and small intestine. From there, it is transported to your liver, where it undergoes various metabolic pathways. One of these pathways involves the enzyme cytochrome P450 1A2, which breaks down caffeine into three primary metabolites: paraxanthine, theobromine, and theophylline.
Each of these metabolites has its own effects on the body, contributing to the overall physiological response to caffeine. The absorption rate and metabolism of caffeine can vary from person to person, depending on factors such as age, genetics, and liver function.
Understanding how caffeine is absorbed and metabolized is crucial in understanding its effects on the brain and nervous system.
Effects of Caffeine on the Brain and Nervous System
Get ready to experience a surge of energy as caffeine zips through your bloodstream, activating your brain and nervous system. Caffeine has profound effects on memory and cognitive function, enhancing alertness and improving attention span. Studies have shown that it can enhance short-term memory and improve overall cognitive performance. However, excessive caffeine consumption may lead to anxiety and restlessness, as it stimulates the release of adrenaline, a hormone that triggers the body’s "fight or flight" response. In addition, caffeine can also affect mood by increasing dopamine levels, which can improve feelings of well-being and happiness. Nevertheless, it’s important to note that individual responses to caffeine vary, and excessive consumption can lead to negative effects such as jitteriness and insomnia. Transitioning into the subsequent section about the ‘impact on heart health’, caffeine not only affects the brain, but also has implications for cardiovascular health.
Impact on Heart Health
When it comes to the impact of caffeine on heart health, it’s important to consider its effect on heart rate and blood pressure. Caffeine has been shown to temporarily increase both heart rate and blood pressure, which can be concerning for individuals with pre-existing cardiovascular conditions.
Additionally, long-term consumption of caffeine has been associated with an increased risk of cardiovascular issues, such as heart disease and hypertension. These findings highlight the need for moderation and awareness when it comes to caffeine intake and its potential impact on our heart health.
Caffeine’s Effect on Heart Rate and Blood Pressure
Contrarily, sipping on a cup of tea or chugging an energy drink can have contrasting effects on your heart rate and blood pressure. While both tea and energy drinks contain caffeine, their effects on the cardiovascular system differ. Here are five key points to consider:
Tea has a moderate amount of caffeine, which can slightly increase heart rate and blood pressure. However, these effects are usually short-lived and not significant enough to cause concern.
Energy drinks, on the other hand, often contain high levels of caffeine, which can lead to a more pronounced increase in heart rate and blood pressure. This can be especially problematic for individuals with underlying heart conditions.
Caffeine’s impact on exercise performance varies. Some studies suggest that moderate caffeine consumption can enhance endurance and performance, while excessive intake may lead to negative effects.
Tea is a hydrating beverage, contributing to overall hydration levels. Energy drinks, due to their caffeine content, can have a diuretic effect, potentially increasing the risk of dehydration.
Considering the long-term effects on cardiovascular health, excessive consumption of energy drinks, with their high caffeine content and added ingredients, may pose a greater risk compared to moderate tea consumption.
With these considerations in mind, let’s explore the long-term effects on cardiovascular health.
Long-Term Effects on Cardiovascular Health
The long-term impact of regular consumption of caffeine-containing beverages on cardiovascular health is worth exploring. Research suggests that excessive intake of caffeine can have adverse effects on the cardiovascular system. Studies have shown that long-term consumption of high doses of caffeine can lead to increased risk of cardiovascular diseases such as hypertension, heart rhythm disorders, and even heart attacks. Additionally, caffeine has been found to have negative effects on cognitive function in the long term. It can impair memory, attention, and overall cognitive performance. On the other hand, caffeine has been shown to have a positive impact on exercise performance. It can enhance endurance, reduce perceived exertion, and improve overall athletic performance. These findings highlight the importance of moderation when consuming caffeine-containing beverages for long-term cardiovascular health and cognitive function. Moving on to the next section, let’s explore caffeine’s influence on sleep patterns.
Caffeine’s Influence on Sleep Patterns
Caffeine’s impact on sleep patterns can disrupt the body’s natural rhythm and lead to restless nights. Research shows that consuming caffeine, whether from tea or energy drinks, can affect the quality and quantity of sleep.
Caffeine’s influence on cognitive function is well-documented, with studies suggesting that it can improve alertness and concentration. However, when it comes to sleep, caffeine acts as a stimulant that can delay the onset of sleep and reduce overall sleep duration. This can have significant implications on athletic performance, as sleep is crucial for recovery and optimal physical functioning.
It’s important to note that individual sensitivity to caffeine varies, with some people being more affected by its sleep-disrupting effects than others. Transitioning into the next section, personal factors and sensitivity to caffeine play a role in determining how individuals respond to its effects without needing to take a step.
Personal Factors and Sensitivity to Caffeine
When it comes to caffeine, everyone is different in terms of their tolerance and sensitivity. Some people may be able to handle large amounts of caffeine without feeling any negative effects, while others may be more sensitive and experience jitters, anxiety, or trouble sleeping even with small amounts.
These individual differences in caffeine sensitivity can be influenced by various factors, including genetics. Research has shown that certain genetic variations can affect how our bodies process and metabolize caffeine, which can ultimately impact our response to it.
Individual Tolerance and Sensitivity
Feeling tired? Did you know that your individual tolerance and sensitivity can determine how caffeine affects your body differently in tea and energy drinks? Everyone has a unique response to caffeine based on their individual tolerance and sensitivity levels. Some people may be more sensitive to caffeine and experience its effects more strongly, while others may have a higher tolerance and not feel the same impact. Factors such as age, weight, metabolism, and overall health can influence individual tolerance and sensitivity. Understanding your own caffeine tolerance can help you make informed decisions about consuming tea or energy drinks.
In the next section, we’ll explore how genetic variations in caffeine processing can also play a role in how our bodies react to caffeine.
Genetic Variations in Caffeine Processing
Genetic variations can play a role in how our bodies react to caffeine, but how exactly do these variations impact our response? Well, when it comes to caffeine metabolism, certain genetic variations can affect how quickly or slowly our bodies break down and eliminate caffeine. This can ultimately influence our sensitivity to caffeine and how it affects us.
One key genetic variation that has been studied is in the gene CYP1A2, which is involved in caffeine metabolism. People with certain variations in this gene may metabolize caffeine more slowly, leading to higher levels of caffeine in their system and potentially increased sensitivity to its effects. On the other hand, individuals with faster caffeine metabolism may experience a reduced sensitivity to caffeine.
To illustrate the potential impact of genetic variations on caffeine metabolism, consider the following table:
| Genotype | Caffeine Metabolism Speed | Caffeine Sensitivity |
|---|---|---|
| Slow metabolizer | Slow | Increased |
| Fast metabolizer | Fast | Reduced |
This table demonstrates the potential relationship between genetic variations in caffeine metabolism, caffeine sensitivity, and the speed at which caffeine is broken down in the body. While genetic variations are just one piece of the puzzle, they can contribute to individual differences in how caffeine affects us.
Frequently Asked Questions
Can caffeine in tea and energy drinks cause dehydration?
Yes, caffeine in tea and energy drinks can cause dehydration. It acts as a diuretic, increasing urine production. This can lead to fluid loss and potentially impact cognitive function and sleep quality.
Is it true that caffeine can enhance athletic performance?
Yes, it is true that caffeine can enhance athletic performance. Caffeine increases caffeine metabolism, which can lead to improved endurance and reduced fatigue. It also has stimulant effects that can increase heart rate during exercise.
Are there any long-term effects of consuming high levels of caffeine?
Consuming high levels of caffeine can have long-term health risks such as heart problems and addiction. Additionally, it can negatively impact sleep quality, leading to insomnia and restlessness.
Does the caffeine content in tea and energy drinks affect weight loss or weight gain?
The caffeine content in tea and energy drinks can affect weight loss or weight gain. It can enhance metabolism and increase calorie burning, potentially aiding in weight management. However, other factors such as diet and exercise also play a crucial role.
Can caffeine withdrawal symptoms occur when reducing or stopping the consumption of tea and energy drinks?
Experiencing caffeine withdrawal symptoms, like headaches and fatigue, is common when reducing or stopping the consumption of tea and energy drinks. These symptoms can also disrupt sleep quality, making it harder to get a good night’s rest.
Conclusion
In conclusion, the caffeine content in tea and energy drinks affects the body differently based on factors such as absorption, metabolism, and individual sensitivity.
While both beverages contain caffeine, the higher levels found in energy drinks can lead to increased alertness and energy levels. On the other hand, the lower caffeine content in tea allows for a more gradual and sustained release of energy.
For instance, a case study conducted on individuals who consumed energy drinks showed a significant increase in heart rate and blood pressure, while those who consumed tea experienced a more moderate and manageable effect on their cardiovascular system.

Arf, an author and an innovative enthusiast of coffee, coffee alternatives, and tea, plays a crucial role as a contributor to the esteemed Cappuccino Oracle platform. Renowned for his curiosity and passion for these captivating beverages, Arf has carved out a unique space for himself in the world of exploration and writing. He realized that coffee, coffee alternatives, and tea are not mere drinks to keep one awake, but universes of flavors and stories waiting to be explored.
Arf’s articles for Cappuccino Oracle blend meticulous research with personal experiences, providing readers with an in-depth understanding of various types of coffee, coffee alternatives, and tea, along with their unique characteristics, cultures, and histories. His honest reviews and engaging narratives guide readers on their own journeys, helping them discover their preferences and find their perfect brew.

Sitting here, enjoying my warm tea, I find myself curious about how the caffeine levels in my drink alter with various brewing techniques. It’s intriguing to consider that just altering the way we make our tea could significantly change the caffeine content we ingest.
In this article, we will delve into the world of tea and explore how different brewing techniques can alter the caffeine levels in our favorite beverage.
Tea, as we know, contains caffeine, a natural stimulant that gives us that much-needed energy boost. But did you know that the amount of caffeine extracted from tea leaves can vary depending on factors such as steeping time, water temperature, and even the type of tea?
By understanding these variables and their effects on caffeine extraction, we can gain insight into how to control our caffeine intake and tailor our tea-drinking experience to our preferences.
So, let’s embark on this scientific journey together, as we uncover the secrets behind the caffeine content in tea and discover how different brewing methods can influence it.
Key Takeaways
- Different brewing methods can significantly impact the caffeine content in tea.
- Longer brewing time and hotter water tend to increase the caffeine content in tea.
- Shorter brewing time and cooler water can help reduce the amount of caffeine in tea.
- Herbal teas, such as chamomile and peppermint, are caffeine-free alternatives to traditional tea.
Understanding Caffeine in Tea
If you want to fully understand the caffeine content in tea, you’ll have to delve into the intricate relationship between brewing methods and the resulting levels of this stimulating compound.
The amount of caffeine in tea can vary depending on several factors, including the type of tea leaves used, the brewing time, and the water temperature. Caffeine metabolism also plays a role, as individuals with a higher metabolism may process caffeine more quickly than others. Additionally, caffeine sensitivity varies among individuals, with some people being more sensitive to its effects than others.
Scientific studies have shown that brewing methods such as steeping time and water temperature can significantly impact the caffeine content in tea. These factors affect the extraction process and can result in higher or lower caffeine levels.
Transitioning to the next section, let’s explore the impact of different brewing methods on caffeine content in tea.
Impact of Different Brewing Methods
Surprisingly, the way you brew your tea can have a significant effect on the amount of caffeine it ends up containing. Temperature control and brewing time variations play a crucial role in determining the caffeine content in your cup of tea.
When it comes to temperature, higher temperatures generally result in more caffeine extraction. For example, using boiling water can lead to a greater release of caffeine compared to using lower temperatures.
Similarly, brewing time also affects caffeine extraction. Longer brewing times tend to extract more caffeine from the tea leaves, while shorter brewing times result in lower caffeine content.
Understanding these factors and their impact on caffeine extraction is essential for controlling the caffeine levels in your tea. Transitioning into the subsequent section about ‘factors affecting caffeine extraction’, it is important to consider other variables that influence this process.
Factors Affecting Caffeine Extraction
To truly understand the factors that impact the extraction of caffeine, you must delve into the intricacies of your brewing process. Two key factors that affect caffeine extraction in tea are temperature and steeping time.
The temperature of the water used for brewing has a significant effect on the amount of caffeine extracted. Higher temperatures tend to extract more caffeine, while lower temperatures extract less.
Additionally, the length of time the tea leaves are steeped in hot water also influences caffeine extraction. Longer steeping times generally result in higher caffeine content.
These effects of temperature and steeping time on caffeine extraction can vary depending on the type of tea and its specific characteristics.
Moving forward to the subsequent section about caffeine content in black tea, we can explore how these factors play a role in determining its caffeine levels.
Caffeine Content in Black Tea
Black tea, known as the energizing elixir, holds within its depths the secrets of a stimulating experience. When it comes to caffeine extraction in black tea, the brewing method plays a crucial role in determining the caffeine content. Different tea varieties also have varying levels of caffeine. To understand this better, let’s take a look at the table below:
| Tea Variety | Caffeine Content (mg) |
|---|---|
| Assam | 50-90 |
| Darjeeling | 30-70 |
| Earl Grey | 20-60 |
| English Breakfast | 40-80 |
| Ceylon | 30-60 |
As we can see, the caffeine content in black tea can range from 20 to 90 mg, depending on the variety and brewing method. This information is important for those who want to control their caffeine intake or prefer a milder or stronger cup of tea. Moving on to green tea, a popular alternative to black tea, we will explore how its caffeine content compares in the next section.
Caffeine Content in Green Tea
With its refreshing and invigorating properties, green tea offers a delightful alternative to black tea that’ll leave you feeling rejuvenated. Green tea is known for its numerous health benefits, including its high antioxidant content and potential to aid in weight loss.
When it comes to caffeine content, green tea generally contains less caffeine than black tea. However, the levels of caffeine in green tea can vary depending on factors such as the type of green tea leaves used and the brewing method employed. Some studies suggest that consuming green tea can promote weight loss by increasing metabolism and fat oxidation.
While green tea may contain less caffeine than black tea, it still provides a gentle energy boost.
Moving on to the subsequent section about caffeine content in white tea, we’ll explore another intriguing aspect of tea brewing.
Caffeine Content in White Tea
You’ll be surprised to find that white tea packs a punch with its subtle but energizing qualities, making it a perfect choice for those seeking a milder caffeine boost. When it comes to caffeine extraction techniques, white tea differs from green tea. White tea is made from the young buds and leaves of the Camellia sinensis plant, which undergo minimal processing. This minimal processing allows for a higher retention of caffeine compared to other types of tea. Additionally, the caffeine content in white tea can be affected by steeping time. Studies have shown that longer steeping times can lead to higher caffeine extraction from white tea leaves. To better understand this, refer to the table below which showcases the caffeine content in white tea at different steeping times:
| Steeping Time (minutes) | Caffeine Content (mg) |
|---|---|
| 1 | 15 |
| 2 | 25 |
| 3 | 35 |
| 4 | 45 |
| 5 | 55 |
Considering the caffeine extraction techniques and the effect of steeping time on caffeine content, it is evident that white tea offers a range of caffeine levels depending on personal preference. Moving forward, let’s explore the caffeine content in herbal tea.
Caffeine Content in Herbal Tea
Discover the invigorating world of herbal tea and experience the delightful array of flavors that can be enjoyed without worrying about the impact of caffeine on your system.
Herbal teas are naturally caffeine-free, making them an excellent choice for those looking to avoid the stimulating effects of caffeine. While the benefits of caffeine in tea include improved focus and increased energy, some individuals may be sensitive to its effects or prefer to limit their intake.
Fortunately, there are numerous decaffeinated herbal tea options available that allow you to enjoy the soothing qualities of tea without the caffeine. These teas are often made from herbs and botanicals that offer their own unique health benefits.
So, if you’re looking for a caffeine-free alternative to traditional teas, explore the world of herbal teas and discover a variety of flavors that can enhance your well-being.
Transitioning into the subsequent section about ‘tips for controlling caffeine intake,’ it’s important to be aware of the different brewing methods that can affect the caffeine content in tea.
Tips for Controlling Caffeine Intake
If you thought controlling your caffeine intake was an easy task, think again – there’s a whole world of unexpected ways to unintentionally consume more caffeine than you realize. When it comes to managing caffeine levels, there are a few tips that can help you stay in control.
First, be aware of the brewing time and temperature when making tea. The longer the brewing time and the hotter the water, the higher the caffeine content will be. So, if you’re looking to reduce your caffeine intake, consider brewing your tea for a shorter period of time and using slightly cooler water.
Additionally, if you’re looking for alternatives to tea, there are several options available. Herbal teas, such as chamomile or peppermint, are naturally caffeine-free and can be a great choice for those looking to reduce their caffeine intake. Other alternatives include decaffeinated tea or non-caffeinated beverages like herbal infusions or fruit juices.
By being mindful of your brewing methods and exploring alternative options, you can effectively manage your caffeine intake.
Frequently Asked Questions
Can the caffeine content in tea vary depending on the brand or type of tea?
Yes, the caffeine content in tea can vary depending on the brand or type of tea. Different brands and types of tea have different levels of caffeine due to variations in processing and growing conditions. Additionally, brewing techniques can also affect the caffeine content in tea.
Are there any health benefits associated with consuming caffeine in tea?
There are potential health benefits associated with consuming caffeine in tea. However, it is important to consider the recommended daily intake and potential risks, as excessive caffeine consumption can lead to negative effects on health.
Does the temperature of the water used for brewing tea affect the caffeine content?
Water temperature significantly affects the extraction of compounds in tea. Higher temperatures release more caffeine and other flavor compounds, resulting in a stronger and more robust flavor. Lower temperatures produce a more delicate and milder flavor.
Can the length of time tea is brewed impact the amount of caffeine extracted?
The length of time tea is brewed can have an impact on the amount of caffeine extracted. Studies suggest that longer brewing times result in higher caffeine content. However, the optimal brewing time for maximum caffeine content varies depending on the type of tea.
Is it possible to completely remove caffeine from tea through various brewing methods?
Removing caffeine from tea is possible through various brewing methods, such as using solvents or carbon dioxide. These methods extract caffeine while preserving the flavor of the tea. However, the effectiveness of decaffeination varies depending on the technique used.
Conclusion
In conclusion, it’s evident that the caffeine content in tea is greatly influenced by various brewing methods. Through careful examination and analysis, it’s clear that factors such as temperature, steeping time, and tea type all play a significant role in the extraction of caffeine.
Whether you prefer a bold black tea or a soothing herbal blend, understanding the caffeine content can help you make informed choices. So next time you brew a cup of tea, remember to take into account these factors to control your caffeine intake.
Knowledge is power, and with this knowledge, you can truly savor your cup of tea.
Arf, an author and an innovative enthusiast of coffee, coffee alternatives, and tea, plays a crucial role as a contributor to the esteemed Cappuccino Oracle platform. Renowned for his curiosity and passion for these captivating beverages, Arf has carved out a unique space for himself in the world of exploration and writing. He realized that coffee, coffee alternatives, and tea are not mere drinks to keep one awake, but universes of flavors and stories waiting to be explored.
Arf’s articles for Cappuccino Oracle blend meticulous research with personal experiences, providing readers with an in-depth understanding of various types of coffee, coffee alternatives, and tea, along with their unique characteristics, cultures, and histories. His honest reviews and engaging narratives guide readers on their own journeys, helping them discover their preferences and find their perfect brew.


Discover the Magic of Mushroom Coffee: Ryze Organic Unveiled
How Long Does Tea Need to Steep Kombucha

Where Can Kombucha Tea Be Purchase
How to Prepare Kombucha Tea
How Many Tea Bags per Half Gallon of Kombucha

How to Make Americano With Moka Pot

How to Make Korean Iced Americano

How to Make Iced Americano With Instant Coffee

How to Make Americano With Bialetti

How to Make Dutch Bros Americano

Discover the Power of KOS Mushroom Coffee

Top 10 Rated Mushroom Coffee Brands for a Boost

What Makes Caffeine-Free Mushroom Coffee Unique?

Rooibos Tea: A Guide to Safe Breastfeeding Practices

What Mushroom Can I Use as a Coffee Replacement?

-
 Americano4 weeks ago
How to Make Americano With Moka Pot
-
 Americano2 weeks ago
How to Make Korean Iced Americano
-
 Americano4 weeks ago
How to Make Iced Americano With Instant Coffee
-
 Americano4 weeks ago
How to Make Americano With Bialetti
-
 Americano4 weeks ago
How to Make Dutch Bros Americano
-

 Americano6 days ago
How to Make an Iced Americano With Nespresso
-

 Americano2 weeks ago
How Many Shots of Espresso for 16 Oz Americano
-

 Americano4 weeks ago
How to Make a Hazelnut Americano