Coffee Recipes
Homemade Mocha Frappuccino: A 5-Minute Recipe (2024)

I don’t know about you, but I love a good frappuccino. The perfect blend of coffee and sweetness, topped with whipped cream and drizzled with chocolate syrup – it’s a treat that always hits the spot.
But let’s be real, those Starbucks prices can add up quickly. That’s why I’ve been on a mission to create my own homemade version of my favorite drink, and after much experimentation (and many failed attempts), I’ve finally found the perfect recipe for a mocha frappuccino that tastes just as good as the real deal.
And the best part? It only takes 5 minutes to make! That means no more waiting in long lines or spending a fortune on expensive drinks. With just a few simple ingredients and some basic kitchen tools, you can whip up your own delicious mocha frappuccino anytime you want.
So grab your blender and get ready to become your very own barista – trust me, once you try this recipe, you’ll never go back to buying store-bought frappuccinos again.
Key Takeaways
- Making a homemade mocha frappuccino is easy and takes only 5 minutes.
- Blending techniques and ingredient substitutions are important for achieving the desired texture and flavor.
- The recipe can be customized to personal preferences and dietary restrictions.
- Making your own coffee drink allows for cost savings and ingredient control.
Gather Your Ingredients
Gather all the ingredients you’ll need for this delicious mocha frappuccino recipe in just a few minutes! To make the perfect homemade mocha frappuccino, I recommend using high-quality coffee beans that have a rich and robust flavor. My personal favorite is dark roast coffee, as it pairs perfectly with the chocolatey goodness of this drink. However, if you’re not a fan of strong coffee, feel free to experiment with lighter roasts or even decaf.
In addition to coffee beans, you’ll also need milk (dairy or non-dairy), granulated sugar (or any sweetener of your choice), unsweetened cocoa powder, and ice cubes. Don’t worry if you don’t have all these ingredients on hand – there are plenty of substitutions available.
For example, if you don’t have cocoa powder, use melted chocolate instead. If you prefer a sweeter drink, add more sugar or even flavored syrups.
Now that you’ve gathered all your ingredients, let’s move onto brewing your coffee! Simply brew 1 cup of strong coffee using your preferred method. If you’re unsure which method to use, try a French press or pour-over for maximum flavor extraction.
Once brewed, let the coffee cool down before assembling the frappuccino.
Brew Your Coffee
First, you’ll need to brew your coffee strong and let it cool for a bit. The key to a great homemade mocha frappuccino is the coffee you use, so make sure to choose a good quality blend.
There are many brewing techniques such as French press, pour-over or drip machine, but I prefer using my espresso machine for this recipe. It gives me a strong and rich base that perfectly complements the sweetness of the chocolate. When selecting your coffee type, consider its flavor profile and roast level. Dark roasts tend to have more chocolatey notes which work well with this recipe. You can also experiment with flavored coffees like hazelnut or vanilla if you want to add an extra layer of complexity.
Once you’ve brewed your coffee, let it cool down in the fridge for at least 15 minutes before proceeding.
Now that your coffee is ready, we can move on to the next step: preparing our blender. With our main ingredient sorted out, we can focus on creating the perfect texture for our frappuccino by blending all ingredients together until smooth and creamy. So grab your blender and get ready!
Prepare Your Blender
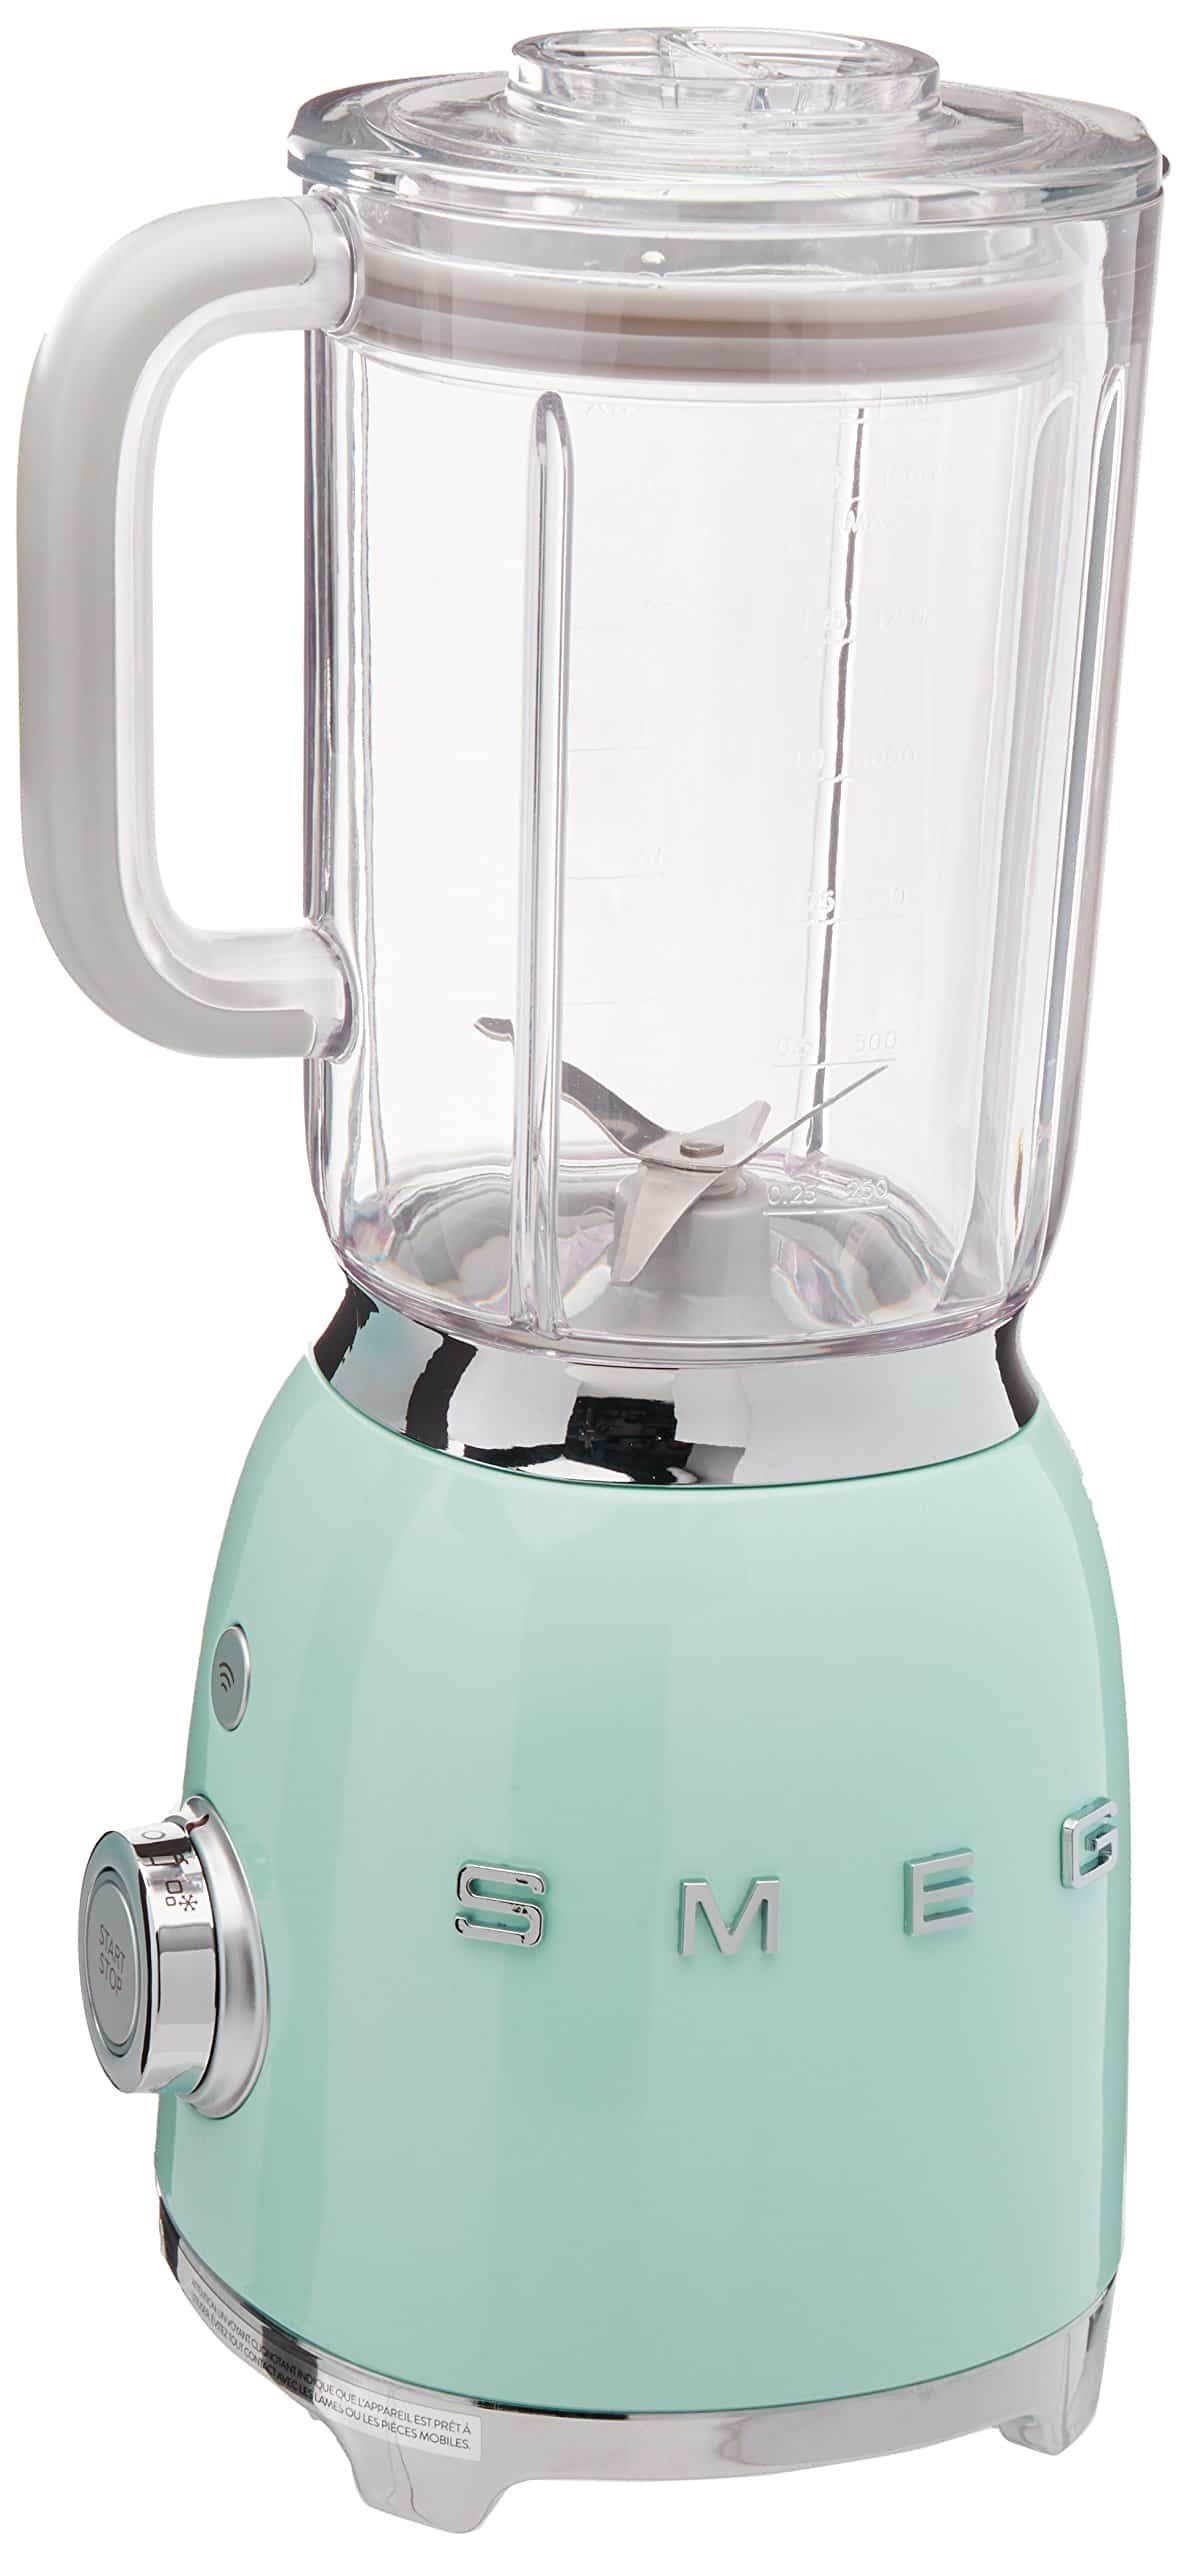
Now it’s time to get your blender ready for the ultimate creamy and indulgent beverage you’re about to make. Before anything else, it’s important to ensure that your blender is well-maintained. Check if the blades are sharp and in good condition, as dull blades may result in a chunky or gritty texture. If necessary, sharpen them with a blade sharpener or replace them altogether.
Next, give your blender a thorough cleaning using appropriate cleaning techniques. Start by unplugging the appliance and disassembling all removable parts such as the pitcher, lid, and gasket seal. Wash these parts separately with warm soapy water and rinse thoroughly before wiping dry with a clean towel.
Wipe down the base of the blender with a damp cloth to remove any dust or residue that may have accumulated over time. Be careful not to get any water on the electrical components of the appliance as this could damage it.
With your well-maintained and clean blender at hand, you’re now ready to move on to adding your ingredients.
With your blender cleaned and maintained like new, let’s proceed to add our delicious ingredients for our homemade mocha frappuccino!
Add Your Ingredients
Now it’s time to add the key ingredients for our homemade mocha frappuccino. First, I’ll need some strong brewed coffee and cold milk. I like to use a 2:1 ratio of coffee to milk for a rich and creamy taste.
Next, I’ll add some chocolate syrup for that classic mocha flavor, followed by sugar or sweetener to taste.
Finally, I’ll top it off with plenty of ice to make it refreshing and perfectly blended.
Coffee and Milk
Combining the rich taste of coffee with creamy milk creates a perfect balance of flavors in this homemade mocha frappuccino recipe. If you’re not a fan of coffee, don’t worry! There are plenty of coffee alternatives and milk substitutes that you can use instead.
Almond milk and soy milk are great options for those who are lactose intolerant or looking for a vegan alternative. You can also try using coconut milk or cashew milk for an even creamier texture. When choosing your coffee, opt for a strong brew as it will provide the base flavor for your frappuccino.
I prefer to use freshly brewed espresso shots, but if you don’t have an espresso machine at home, you can substitute with instant coffee powder or cold-brewed coffee. As for the milk, whole milk will give you the creamiest texture, but low-fat or skimmed milk works just as well.
Now that we’ve got our coffee and milk sorted out, let’s move on to adding some sweetness to our drink with chocolate syrup.
Chocolate Syrup
To make your drink extra indulgent, drizzle chocolate syrup over the top of your frothy coffee and milk mixture. Not only does it add a deliciously rich flavor to your homemade mocha frappuccino, but it also makes for a beautiful presentation.
But did you know that there are other uses for chocolate syrup beyond just adding it to your coffee? One option is to use it as a topping for ice cream or pancakes. You can also mix it into milkshakes or hot cocoa for an extra decadent treat. And if you’re feeling adventurous, try making your own homemade chocolate syrup using cocoa powder, sugar, water, and vanilla extract.
It’s simpler than you may think and allows you to customize the sweetness level to your liking. Speaking of sweetness…
Sugar or Sweetener
If you’re looking to cut back on calories, using a sugar substitute in your homemade mocha frappuccino can be like having your cake and eating it too.
Sugar vs sweetener is an ongoing debate among coffee lovers, but it ultimately comes down to health effects vs taste preferences.
While sugar is a natural ingredient that adds sweetness and thickness to your drink, it also contains empty calories that can lead to weight gain and other health problems if consumed in excess.
On the other hand, sweeteners such as stevia or Splenda provide zero or low calorie alternatives that can satisfy your sweet tooth without compromising your health goals. However, some people argue that they don’t taste as good as sugar and may leave a bitter aftertaste.
Ultimately, the choice between sugar and sweetener depends on personal preferences and dietary needs. As for me, I prefer using a combination of both for the perfect balance of flavor and nutrition in my homemade mocha frappuccino.
Speaking of balance, let’s move on to the next step – ice!
Ice
Now it’s time to add ice to your blender, which helps create the creamy texture you love in a frappuccino. You can use regular ice cubes or get creative with different variations such as coffee ice cubes or almond milk ice cubes for an extra boost of flavor. Using frozen bananas instead of traditional ice is also a great option for a healthier version.
Aside from adding texture and flavor, ice also has some health benefits. It can help keep you hydrated and regulate your body temperature. Plus, using less sugar and more ice can lower the calorie count of your homemade mocha frappuccino.
To blend your ingredients seamlessly, make sure to add enough liquid (such as milk or non-dairy alternative) to cover the blades before blending. This will ensure everything blends smoothly without any clumps or chunks.
Blend Your Ingredients
Blend your brew with the blender blade, bringing together the bold flavors of coffee and chocolate. To achieve a thick, creamy consistency, it’s important to use blending techniques that ensure all ingredients are well-mixed.
Start by pulsing the mixture a few times to break up any large chunks of ice or chocolate chips. Then, increase the speed and blend until smooth.
Here are three tips to make sure your frappuccino turns out perfectly:
-
Use cold coffee: Hot coffee will melt the ice too quickly and result in a watery drink.
-
Add extra chocolate: For an extra decadent treat, add more chocolate syrup or even some chopped up dark chocolate.
-
Substitute milk alternatives: If you’re looking for a dairy-free option, try using almond milk or coconut milk instead of regular milk.
Once you’ve blended everything together, taste test your creation. Adjust to your liking by adding more sweetener if needed or topping off with whipped cream and shaved chocolate for an indulgent finish.
Next up, let’s talk about how to serve this delicious homemade mocha frappuccino!
Adjust to Your Liking
Make your frappuccino perfect for you by tweaking the sweetness or adding whipped cream and chocolate shavings, creating a treat that will leave you feeling indulged and satisfied. The beauty of making homemade mocha frappuccinos is that you can customize them to your taste preferences. If you like your drinks on the sweeter side, add an extra tablespoon of sugar or drizzle some honey on top. Alternatively, if you prefer a bittersweet taste, reduce the amount of sugar in the recipe.
To help guide your customization options, here’s a handy table:
| Customization | Additions | Amount |
|---|---|---|
| Sweetness | Sugar | +1 tbsp |
| Honey | Drizzle | |
| Creaminess | Whipped Cream | Dollop |
| Milk | +1/4 cup | |
| Chocolatey-ness | Chocolate Shavings | Sprinkle |
Remember, these are just suggestions to get started with. Feel free to get creative with your additions – maybe try adding a dash of cinnamon or nutmeg for some spice! Whatever you choose to do, remember that this is all about making something that tastes great to YOU.
Now that you’ve customized your frappuccino exactly how you like it, it’s time to pour and serve.
Pour and Serve
It’s time to indulge in your personalized icy treat, complete with all the sweet, creamy, and chocolatey additions that make it uniquely yours. Now that you’ve adjusted the recipe to your liking, it’s time to pour and serve your homemade mocha frappuccino.
Here are some creative variations you can try out:
- Add a scoop of vanilla ice cream for a richer flavor.
- Top with whipped cream and sprinkle cocoa powder or shaved chocolate on top for an extra decadent treat.
- Swap out regular milk for almond milk or coconut milk if you prefer a dairy-free option.
When it comes to recommended serving sizes, this recipe will yield about 2 servings. However, feel free to adjust the measurements accordingly based on your personal preferences. If you’re making this as a refreshing afternoon pick-me-up, one serving might be just enough. But if you’re sharing with friends or indulging after dinner, go ahead and double up on the ingredients for larger servings.
With your homemade mocha frappuccino ready to go, let’s move onto optional toppings that can take this drink from delicious to extraordinary without adding too much effort!
Optional Toppings
I love adding toppings to my homemade mocha frappuccino! Whipped cream is always a must-have for me, as it adds a creamy texture and a sweet taste that complements the coffee perfectly.
Chocolate shavings are another favorite of mine, giving the drink an extra chocolatey kick. And if I’m feeling indulgent, I’ll sometimes add a drizzle of caramel on top, which adds a delightful sweetness and richness to the overall flavor profile.
Trust me, these optional toppings take this already delicious drink to the next level!
Whipped Cream
To achieve a velvety texture, don’t skimp on the heavy cream when whipping it into soft peaks.
Whipped cream is an essential topping for any mocha frappuccino, adding a creamy and sweet touch to the already delicious drink. But whipped cream isn’t just limited to coffee drinks; there are many uses for this versatile topping.
You can use whipped cream as a topping for pies, cakes, and other desserts. You can also add different flavors to your whipped cream by incorporating ingredients like vanilla extract or cocoa powder. The possibilities are endless when it comes to variations of whipped cream, so don’t be afraid to get creative with your toppings!
Now that we have our whipped cream ready, let’s move on to the next step: chocolate shavings.
Chocolate Shavings
For a fancy touch, sprinkle chocolate shavings on top of your whipped cream. Did you know that the world’s largest chocolate bar weighed over 12,000 pounds?
Chocolate shavings are an easy way to add some extra pizzazz to any dessert or drink. Here are some uses for chocolate shavings and tips for perfecting chocolate garnishes:
- Use as a topping for ice cream or hot cocoa.
- Mix into cake batter or cookie dough for added texture and flavor.
- Use as a decorative garnish on cakes, cupcakes, or cocktails.
To make perfect chocolate shavings, start with a block of high-quality chocolate and use a vegetable peeler to create thin strips. Be sure the chocolate is at room temperature before shaving it to prevent it from cracking. To avoid melting the shavings when sprinkling them onto your creation, chill them in the refrigerator beforehand.
Now that we’ve got our whipped cream and chocolate shavings ready, let’s move on to the next step: adding caramel drizzle!
Caramel Drizzle
Indulge in the sweet and gooey goodness of caramel drizzle by generously pouring it over your homemade mocha frappuccino. The luscious, velvety texture of caramel sauce complements the bitter taste of coffee and chocolate perfectly, creating a heavenly blend of flavors that’s hard to resist.
However, if you’re looking for a healthier or vegan option, there are plenty of caramel sauce alternatives available in the market like coconut milk or date syrup that can be used instead.
When choosing between caramel drizzle and caramel syrup for your homemade drinks or desserts, consider their pros and cons carefully. Caramel syrup has a thinner consistency than its drizzly counterpart and is easier to mix into beverages uniformly. On the other hand, caramel drizzle adds an aesthetic appeal to your drink or dessert with its dramatic dripping effect but may not disperse evenly throughout the liquid.
Whichever option you choose, make sure to use high-quality ingredients to enhance the flavor profile of your homemade mocha frappuccino.
To ensure that your freshly made mocha frappuccino stays fresh for longer periods, store it in an airtight container in the refrigerator. Proper storage also helps prevent crystallization and separation of ingredients over time.
With these tips at hand, get ready to savor every sip of your delicious homemade mocha frappuccino topped with decadent caramel drizzle!
Storage Tips
When it comes to my homemade mocha frappuccino, I always end up making a little too much. That’s why proper storage is key!
I usually refrigerate any leftover frappuccino in an airtight container for up to two days, but if I want to save it for longer, I’ll freeze it in ice cube trays and use them as the base for a future drink.
Refrigerating Leftovers
To keep your leftover mocha frappuccino fresh, you should refrigerate it within 2 hours of making it. Maximizing freshness and preventing spoilage are important when it comes to storing perishable food items. Understanding expiration dates is also crucial in ensuring that the leftovers are still safe to consume.
When refrigerating your homemade frappuccino, make sure to transfer it into an airtight container or a sealable bottle. This will prevent air from entering and causing the drink to oxidize quickly. By doing so, you can extend the shelf life of your beverage by up to three days.
However, if you don’t plan on consuming it within that time frame, freezing it for later is always an option!
Freezing for Later
If you’re looking to savor the taste of your favorite coffee drink on a hot summer day, freeze it for later and enjoy it whenever you want! Freezing your homemade mocha frappuccino is an excellent way to keep it fresh for longer periods.
The best containers to use are plastic or glass bottles with tight-fitting lids that can hold up to 16 ounces of liquid. You can find these containers at any kitchen store or online retailer.
When freezing your mocha frappuccino, be sure to leave some space at the top of the container, as liquids expand when frozen. It’s also essential to label each container with the date you made it and what type of drink it is. This will help you keep track of how long each container has been in the freezer and ensure that you always have a fresh supply ready to go.
With these freezing tips in mind, you’ll never have to worry about running out of your favorite cold coffee drink again!
Now that you know how easy it is to make and store your homemade mocha frappuccino, it’s time to sit back, relax, and enjoy! Whether you’re lounging by the pool or just need a pick-me-up during a long workday, this delicious beverage will hit the spot every time.
So grab your frozen bottle from the freezer, give it a good shake or stir once thawed, pour into a glass over ice (if desired), and savor every sip!
Enjoy Your Homemade Mocha Frappuccino!
Now you can savor the delicious taste of your homemade mocha frappuccino and indulge in your coffee cravings any time of day! Making your own coffee drink has many benefits, including saving money and controlling the ingredients. Plus, with just a few easy steps, you can have a perfect consistency every time.
To enjoy your homemade mocha frappuccino, start by pouring it into a tall glass. Take in the rich aroma and creamy texture as you prepare to take your first sip. Feel free to add whipped cream on top for an extra indulgent treat.
As you sip on your homemade creation, let yourself be transported to a cozy coffee shop or sunny outdoor patio. Enjoy the familiar taste of chocolate and espresso blended perfectly together in this refreshing drink.
With this recipe at hand, you’ll never need to wait in line for an overpriced frappuccino again!
Frequently Asked Questions
What is the nutritional value of the homemade mocha frappuccino?
I can’t wait to share the nutritional value of my go-to homemade frappuccino recipe! As a coffee lover, I’m always on the lookout for ways to enjoy my favorite beverage while reaping its benefits.
Coffee consumption has been linked to improved cognitive function, increased metabolism, and reduced risk of certain diseases. But what about the sugar in frappuccinos? Luckily, there are plenty of alternatives to sweeten your drink without sacrificing flavor.
By using unsweetened cocoa powder and a natural sweetener like honey or maple syrup, you can indulge in a delicious mocha frappuccino while keeping your sugar intake in check. Plus, making your own at home means you have control over the ingredients and can customize it to your liking.
So go ahead and treat yourself while still maintaining a healthy lifestyle!
Can the recipe be made with decaf coffee?
When it comes to making a mocha frappuccino, there are plenty of decaf alternatives available. As someone who prefers to limit my caffeine intake, I’ve tried a few different options in place of regular coffee.
While the taste comparison may vary depending on your personal preferences, I’ve found that using decaf espresso or even decaf instant coffee still provides a great flavor for the drink. Additionally, opting for decaf has health benefits such as reducing anxiety and improving sleep quality.
It’s also important to note that while the caffeine content will be significantly reduced with decaf options, there is still some present so it’s important to keep that in mind if you’re highly sensitive or trying to avoid caffeine altogether.
How long can the frappuccino be stored in the refrigerator?
When it comes to storing homemade frappuccinos, there are a few storage tips that I always follow. First and foremost, I make sure to transfer the frappuccino into an airtight container before placing it in the refrigerator. This helps to prevent any air from getting in and altering the flavor of the drink.
Additionally, I try to consume the frappuccino within 2-3 days of making it for optimal freshness. However, if you need to store it for longer than that, you can freeze it in an ice cube tray and use the frozen cubes as needed.
As for flavor variations, there are endless possibilities when it comes to customizing your frappuccino recipe. You can experiment with different types of milk (such as almond or coconut), add in flavored syrups or extracts (like vanilla or caramel), or even mix in some fresh fruit for added sweetness and nutrition.
The key is to have fun and get creative with your ingredients!
Can almond milk or soy milk be substituted for regular milk in the recipe?
When it comes to making a dairy-free homemade mocha frappuccino, both almond milk and soy milk can be great substitutes for regular milk.
Almond milk has a slightly nutty flavor that adds an interesting twist to the drink, while soy milk has a creamier consistency that makes it taste more like traditional dairy.
Both options are also lower in fat and calories than regular milk, which can be a bonus for those watching their diet.
Ultimately, the choice between almond or soy milk comes down to personal preference and any dietary restrictions or allergies.
Whether you choose one of these dairy-free options or stick with regular milk, this easy 5-minute recipe is sure to satisfy your craving for a deliciously cool and caffeinated treat.
Can the recipe be adjusted to make a larger or smaller batch?
When it comes to cooking, I like to think big. I mean, who wants a recipe that only makes enough for one person? That’s why I always try to adjust the size of my batches so that I can have leftovers for days.
And let me tell you, adjusting recipe size is easier than you might think! Whether you want to make a larger or smaller batch of your favorite dish, all you need to do is some simple math and voila – you’re ready to go.
And don’t even get me started on ingredient substitutions! As someone who prefers dairy-free options, I’ve become quite the expert at swapping out regular milk for almond milk or soy milk in recipes. It’s all about finding the right balance of flavors and textures.
So if you’re looking to mix things up in the kitchen, don’t be afraid to experiment with different amounts and ingredients – trust me, it’s worth it!
Conclusion
In conclusion, whipping up a homemade mocha frappuccino is a quick and easy way to indulge in a delicious coffee treat from the comfort of your own home. The creamy blend of rich chocolate and bold espresso creates a flavor explosion that’ll leave your taste buds wanting more.
With just a few simple ingredients and 5 minutes of your time, you can become your own barista and impress yourself with your newfound skills. So go ahead, gather those ingredients, brew that coffee, and blend away! Your taste buds will thank you for this delectable delight.
Overall, making a homemade mocha frappuccino is not only cost-effective but also allows for customization to suit your personal preferences. Whether you prefer it sweet or strong, hot or cold, the possibilities are endless.
So don’t hesitate to try out different variations until you find the perfect recipe for you. Satisfy your cravings today with this heavenly homemade concoction!
Arf, an author and an innovative enthusiast of coffee, coffee alternatives, and tea, plays a crucial role as a contributor to the esteemed Cappuccino Oracle platform. Renowned for his curiosity and passion for these captivating beverages, Arf has carved out a unique space for himself in the world of exploration and writing. He realized that coffee, coffee alternatives, and tea are not mere drinks to keep one awake, but universes of flavors and stories waiting to be explored.
Arf’s articles for Cappuccino Oracle blend meticulous research with personal experiences, providing readers with an in-depth understanding of various types of coffee, coffee alternatives, and tea, along with their unique characteristics, cultures, and histories. His honest reviews and engaging narratives guide readers on their own journeys, helping them discover their preferences and find their perfect brew.
Coffee Recipes
Caramel Coffee: A Homemade Recipe You Need To Try In 2023

As someone who adores coffee, I’m constantly on the hunt for fresh and thrilling methods to savor my beloved drink. And I must say, caramel coffee is a wonderful indulgence that not only satiates your sweet cravings but also provides that essential kick of caffeine. Whether you have experience as a barista or are new to the coffee game, this do-it-yourself recipe is a must-try for the year 2023.
Originating in France in the 17th century, caramel has been used as a flavoring for centuries. It wasn’t until the 19th century that it was combined with coffee to create the delicious drink we know today.
The combination of rich espresso and sweet caramel creates an indulgent and decadent flavor profile that’s sure to become your new go-to drink. So grab your apron and get ready to make some seriously delicious caramel coffee!
Key Takeaways
- Caramel coffee is a delicious and popular drink that can be made at home with just a few ingredients.
- Homemade caramel sauce can be used to enhance the flavor of desserts and can easily be made at home.
- Caramel coffee can be customized with different types of milk, sweeteners, and spices to create unique variations.
- There are various types of caramel coffee, including iced, latte, and macchiato, and different versions can be found in cafes and restaurants worldwide.
The History and Origin of Caramel Coffee
Let’s dive into the fascinating history and origin of caramel coffee, shall we?
Caramel coffee dates back to the 17th century when Dutch traders brought coffee to Europe. They discovered that adding a sweetener like caramel enhanced the flavor. From there, it became a popular drink in France and eventually spread throughout Europe.
The popularity of caramel coffee continued to grow throughout the years, especially in America during the mid-20th century. It was during this time that companies such as Dunkin’ Donuts and Starbucks incorporated caramel flavors into their coffee drinks.
Today, you can find various versions of caramel coffee from cafes and restaurants worldwide.
Now that we know about its rich history and popularity, let’s talk about the ingredients you need to make this delicious homemade recipe.
The Ingredients You Need
Assemble the necessary components, like a composer gathering his notes for a symphony, to create a delectable beverage that will leave your taste buds singing.
To make the perfect caramel coffee at home, you’ll need some basic ingredients such as freshly brewed coffee, milk, sugar, and vanilla extract. However, if you’re looking to switch things up or you’re missing certain ingredients from your pantry, there are plenty of ingredient substitutions that can be made.
The key to achieving the perfect caramel flavor in your coffee is using the right type of beans. Opt for medium roasted beans with natural sweetness and low acidity. Some popular options include Brazilian Santos or Colombian Supremo beans. These types of beans pair well with caramel flavors and give your coffee a smooth finish.
With these simple ingredients and some creativity in choosing substitute options or finding the best beans for your palate, you’ll be well on your way to creating a delicious cup of homemade caramel coffee.
So, let’s dive into how to put it all together step by step!
Step-by-Step Instructions for Making Caramel Coffee
First, start by brewing a fresh pot of medium roast coffee that has natural sweetness and low acidity. This will complement the caramel flavor and not overpower it. Once your coffee is brewed, you’re ready to add in the key ingredients for making caramel coffee: caramel sauce and milk.
To make the perfect cup of caramel coffee, simply follow this easy-to-follow table:
| Step | Ingredients | Directions |
|---|---|---|
| 1 | Coffee | Brew a pot of medium roast coffee |
| 2 | Caramel sauce | Add 1-2 tablespoons of caramel sauce to your mug |
| 3 | Milk or creamer | Heat up milk or creamer on stove top or microwave and pour into mug |
| 4 | Stir & Enjoy! | Mix together until well blended |
The combination of sweet caramel with creamy milk creates a delicious balance that will have you wanting more. If you want to switch things up, try experimenting with different flavor combinations such as adding cinnamon or nutmeg for an extra kick.
While there are store-bought alternatives available, making homemade caramel coffee allows you to control the amount of sweetness and customize it to your liking. Plus, it’s easy and cost-effective! With just a few simple steps, you can have a delicious cup of caramel coffee any time of day. Now that you know how to make the basic recipe, let’s move on to some tips for customizing your own unique blend.
Tips for Customizing Your Recipe
When it comes to making caramel coffee, I love to add my personal touch. There are so many ways you can customize this recipe to make it your own!
Try adjusting the sweetness by adding more or less sugar, experiment with different flavorings like vanilla or cinnamon, and switch up the milk for a creamier texture.
Trust me, these small changes can take your homemade caramel coffee to the next level.
Adjusting sweetness
Don’t be afraid to experiment with the sweetness level – it’s the key to making your caramel coffee taste like a cozy hug in a mug.
If you find that your coffee is too sweet, try adding alternative sweeteners such as honey or maple syrup instead of granulated sugar. These options not only add sweetness but also provide unique flavors that complement the caramel notes in the coffee.
On the other hand, if you want to intensify the caramel flavor, try adjusting the amount of caramel sauce used in your recipe. Adding more caramel sauce will give your coffee a richer and bolder taste.
It’s all about finding a balance that suits your personal preferences, so don’t be afraid to play around with different combinations until you get it right.
Once you’ve found the perfect sweetness level for your caramel coffee, it’s time to move on to adding flavorings without compromising on its delicious taste.
Adding flavorings
Get ready to take your caramel coffee to the next level by adding a burst of irresistible flavorings that’ll have you reaching for another cup.
Adding spices like cinnamon, nutmeg, or ginger can give your homemade caramel coffee a warm and comforting taste that’s perfect for cold mornings or lazy afternoons. Just a sprinkle of any of these spices can elevate the aroma and flavor profile of your drink in an instant.
For those who want to go beyond traditional spices, you can also try incorporating flavor extracts into your recipe. Vanilla extract is always a great option, but you can also experiment with other flavors like almond, hazelnut, or even coconut.
These extracts are concentrated and potent, so be sure to add them gradually until you reach your desired taste. With just a few drops of any flavor extract of your choice, you’ll be surprised at how much it enhances the overall taste of your caramel coffee.
Now, let’s move on to experimenting with different types of milk without losing the rich and creamy texture.
Experimenting with different types of milk
Adding flavorings to my homemade caramel coffee has been a game changer, but I’ve found that experimenting with different types of milk takes it to another level.
Almond milk alternatives have been my go-to recently since they add a nutty flavor that complements the sweetness of the caramel perfectly. Not only does it taste great, but it’s also a healthier option compared to regular milk.
Another aspect to consider when using different types of milk is foam consistency. Some milks don’t froth as well as others, so finding the right one can be crucial in achieving that perfect latte art on top of your coffee.
Personally, I’ve found that oat milk produces a thick and creamy foam that makes for an impressive presentation. However, everyone’s preferences are different, so don’t be afraid to try out various alternatives until you find your favorite combination.
To take your homemade caramel coffee from good to great, here are three tips for experimenting with different types of milk:
- Try almond milk for a subtle nutty flavor.
- Use oat milk for a thick and creamy foam consistency.
- Don’t be afraid to try out various alternatives until you find your favorite combination.
Now that we’ve perfected our caramel coffee recipe, let’s move onto serving suggestions!
Serving Suggestions
I absolutely love serving caramel coffee in different ways depending on my mood and the occasion.
If I’m feeling cozy, I’ll make a steaming hot cup with whipped cream on top.
On warm days, I opt for an iced version with plenty of ice cubes and a drizzle of caramel sauce.
And if I need an extra pick-me-up, a creamy caramel latte always hits the spot.
Let me tell you about each one!
Hot caramel coffee
Indulge in the deliciousness of a steaming hot cup of caramel coffee, perfect for warming you up on a chilly day. Not only does this beverage provide warmth, but it also offers numerous benefits.
The combination of caffeine and sugar can boost your energy levels while satisfying your sweet tooth. Additionally, research suggests that coffee may have antioxidant properties that can improve brain function and reduce the risk of certain diseases.
When it comes to making hot caramel coffee at home, there are several options for caramel sauce and coffee brands on the market. Some top-rated caramel sauces include Ghirardelli and Torani, both known for their rich flavor and creamy texture.
For coffee, consider trying Starbucks or Dunkin Donuts blends for a bold taste that pairs perfectly with the sweetness of caramel. So go ahead, brew yourself a cup of hot caramel coffee and savor each sip before transitioning to our next topic: iced caramel coffee.
Iced caramel coffee
Cool off and quench your thirst with a smooth and creamy beverage that combines the richness of caramel with the refreshing kick of iced java. Iced caramel coffee variations are perfect for those who want to switch up their usual hot coffee routine or simply enjoy a cold drink during warmer months.
Here are three ways you can enjoy this delicious treat:
-
Classic Iced Caramel Coffee: Brew your favorite coffee, then chill it in the fridge until it’s cold. Add a few tablespoons of caramel sauce and stir well. Pour over ice and top with whipped cream.
-
Salted Caramel Iced Coffee: Follow the same steps as above but add a pinch of sea salt to enhance the sweetness of the caramel.
-
Caramel Frappuccino: Blend chilled coffee, milk, ice cubes, and caramel sauce in a blender until frothy and smooth.
The best time to enjoy iced caramel coffee is on warm summer days when you need something refreshing to cool down with. But don’t limit yourself – this tasty beverage can be enjoyed year-round!
Now, let’s move on to another delectable drink – the creamy and indulgent caramel latte.
Caramel latte
Get ready to savor the rich and creamy goodness of a classic coffeehouse favorite with this easy-to-make caramel latte. This homemade recipe is perfect for those who want to enjoy a delicious cup of coffee in the comfort of their own home.
To make a caramel latte, you’ll need some espresso, milk, and caramel sauce. First, brew your espresso shot and set it aside. Then, heat up your milk on the stove or in the microwave until it’s hot but not boiling.
Add some caramel sauce to your mug and pour in your espresso shot followed by the heated milk. Stir well and top off with whipped cream if desired. The result is a decadent and indulgent drink that is sure to satisfy any caffeine craving.
If you’re looking for a way to indulge without feeling guilty, keep reading about the health benefits of caramel coffee.
Health Benefits of Caramel Coffee
Did you know that caramel coffee can provide a delicious way to boost your energy and even has potential health benefits? As someone who loves coffee, I’m always looking for new ways to enjoy my daily caffeine fix. That’s why I was excited to learn about the possible health benefits of drinking caramel coffee.
Firstly, many people wonder whether caramel coffee is keto-friendly. The answer is yes, as long as you use sugar-free caramel syrup or make your own using keto-approved sweeteners such as stevia or erythritol. This means that you can enjoy the sweet taste of caramel without compromising your low-carb diet.
Secondly, when compared to other sweetened coffee drinks like mochas or lattes, caramel coffee can actually be a healthier option. While these drinks are often loaded with sugar and calories from chocolate syrup or whipped cream, a simple caramel syrup adds sweetness without adding too much extra fat or sugar.
Incorporating caramel into your daily cup of joe could be a great way to add some variety to your routine while still enjoying the potential health benefits of drinking coffee. Now that we’ve talked about the benefits of incorporating caramel into your morning brew, let’s move on to some variations on the classic recipe!
Variations on the Classic Caramel Coffee Recipe
I’m excited to share with you some variations on the classic caramel coffee recipe that will take your caffeine fix to the next level.
First up is salted caramel coffee, which adds a savory twist to the sweet drink.
Then there’s the caramel macchiato, a popular Starbucks order that you can easily make at home.
And for those hot summer days, try a refreshing caramel frappuccino.
Trust me, these recipes are easy and delicious!
Salted caramel coffee
You’ll be in for a treat with this salted caramel coffee that will add a sweet and savory touch to your morning cup of joe. To make this delicious beverage, you’ll need some salted caramel syrup and freshly brewed caramel coffee beans. The combination of these two ingredients creates a rich and indulgent flavor that will satisfy any sweet tooth.
To give you an idea of just how tasty this recipe is, here’s a table showcasing the ingredients and steps needed to create the perfect cup of salted caramel coffee:
| Ingredient | Amount |
|---|---|
| Salted Caramel Syrup | 2 tablespoons |
| Freshly Brewed Caramel Coffee Beans | 1 cup |
| Milk (optional) | As desired |
- Start by brewing your favorite caramel coffee beans.
- While the coffee is brewing, heat up the salted caramel syrup in a small saucepan or microwave.
- Once heated, pour the syrup into your freshly brewed coffee and stir well.
- If desired, add milk to taste.
- Enjoy your delicious homemade salted caramel coffee!
If you’re looking for something even more indulgent than this amazing drink, why not try making a homemade caramel macchiato?
Caramel macchiato
Indulge in the ultimate coffeehouse treat with this creamy and decadent caramel macchiato. This classic espresso-based drink is made with steamed milk, a shot of espresso, and a generous drizzle of sweet caramel sauce.
Here are three ways to switch up your caramel macchiato game:
-
Try it iced: On a hot summer day, there’s nothing better than sipping on an iced caramel macchiato. Simply pour your steamed milk over ice, add your shot of espresso, and top it off with a swirl of caramel sauce.
-
Make it dairy-free: If you’re lactose intolerant or vegan, don’t worry – you can still enjoy a delicious caramel macchiato! Substitute the regular milk for almond or oat milk for a creamy and nutty flavor.
-
Experiment with different brands: While Starbucks may be the most well-known purveyor of caramel macchiatos, there are plenty of other coffee shops and brands that offer their own unique take on this classic drink. Some popular options include Dunkin’ Donuts, Peet’s Coffee & Tea, and Lavazza.
Looking for more ways to satisfy your sweet tooth? Up next: how to make a homemade caramel frappuccino without breaking the bank!
Caramel frappuccino
Cool and creamy, this frozen treat is the perfect pick-me-up on a hot summer day. The caramel frappuccino recipe is one of my favorites to make at home. It’s easy to prepare and can be customized to suit your taste preferences.
All you need are some strong coffee, milk, ice cubes, caramel syrup, and whipped cream. If you’re not in the mood for making your own caramel frappuccino at home, there are plenty of coffee shops that offer this delicious beverage.
Starbucks is a popular choice with their signature Caramel Frappuccino being a fan favorite. Other great options include Dunkin’ Donuts, Tim Hortons, and Costa Coffee. No matter where you go, you’re sure to find a delicious version of this sweet treat.
As we move on to discussing caramel coffee around the world, it’s important to note how versatile this flavor really is. From iced drinks like the caramel frappuccino to warm cups of cappuccinos with a hint of caramel syrup, there’s something for everyone when it comes to this beloved drink!
Caramel Coffee Around the World
Traveling the world, you’ll find that caramel coffee is a popular drink in many countries. There are endless variations of this delicious beverage.
From Colombia’s Cafe de Olla, which is made by simmering coffee with cinnamon sticks and piloncillo (unrefined cane sugar) to Italy’s Caffe Caramellato, where espresso shots are poured over homemade caramel sauce.
One of the most unique caramel coffee inventions comes from South Korea. Dalgona Coffee, also known as whipped coffee, became popular on social media during the COVID-19 pandemic. The recipe involves whipping equal parts instant coffee, sugar, and hot water until it becomes fluffy and meringue-like. This mixture is then spooned over hot or cold milk for a decadent treat.
In addition to these homemade recipes, there are also many popular caramel coffee shops around the world. Starbucks has launched a ‘Caramel Flan Latte’ in Japan, while in Australia and New Zealand, Gloria Jean’s Coffees offers a ‘Caramelatte.’ These specialty drinks add an extra touch of sweetness to your morning caffeine fix.
Speaking of sweetness – if you’re looking to make your own caramel sauce for your homemade brews at home – read on! Making your own DIY caramel sauce recipe is easier than you might think. With just sugar and water heated together until golden brown and adding cream or butter for richness – you can have the perfect topping for all your future cups of caramel coffee!
DIY Caramel Sauce Recipe
Imagine the warm, golden liquid pouring over your favorite dessert, adding a touch of sweetness and decadence to every bite. That’s exactly what homemade caramel sauce can do for your desserts. And it’s incredibly easy to make! All you need is sugar, butter, heavy cream, and a little bit of patience.
Once you have your homemade caramel sauce ready, the possibilities are endless. You can drizzle it over ice cream, pancakes or waffles for breakfast, or even use it as a topping for cheesecake or brownies. Trust me; this sauce will take any ordinary dessert to the next level.
But did you know that caramel coffee could also be used as a dessert topping? Simply pour some hot caramel coffee over vanilla ice cream and watch as it melts into the most delicious dessert imaginable.
And if you have any leftover caramel sauce from making your coffee recipe, don’t throw it away! It can be stored in an airtight container in the refrigerator for up to two weeks and used as a topping on just about anything you desire.
Frequently Asked Questions
How long does caramel coffee stay fresh?
I’ve found that the shelf life of caramel coffee can vary depending on how it’s stored. Generally, if you keep it in an airtight container and store it in the freezer, it can stay fresh for up to two weeks.
However, if you leave it out at room temperature or in the fridge for too long, it may only last for a few days before losing its flavor and aroma. To ensure that your caramel coffee stays as fresh as possible, I recommend storing it in smaller portions so that you can thaw only what you need at a time.
Additionally, make sure to use high-quality ingredients and follow safe food handling practices to minimize any risk of spoilage or contamination. With these storage tips, you’ll be able to enjoy delicious homemade caramel coffee whenever your heart desires!
Can I substitute the type of coffee used in the recipe?
Yes, you can definitely substitute the type of coffee used in the recipe for caramel coffee. There are many alternative coffee substitutes available, such as decaf, espresso, or flavored coffees, that can be used to create a variety of flavor variations for caramel coffee.
For example, if you want a stronger coffee taste, try using espresso instead of regular drip coffee. Or, if you prefer a sweeter taste, opt for a flavored coffee like hazelnut or vanilla bean. Experimenting with different types of coffee can lead to new and exciting flavors that will keep your taste buds satisfied. So, don’t be afraid to mix things up and try something new!
Is there a non-dairy alternative for the milk in the recipe?
I’ve found that there are many non-dairy alternatives available for milk in recipes. Some popular options include almond milk, soy milk, coconut milk, and oat milk. Each of these alternatives has its own unique flavor profile, so it’s important to choose one that complements the other flavors in the recipe.
For example, if you want a nutty taste in your coffee, almond milk would be a great choice. If you prefer a creamy texture with a slightly sweet flavor, oat milk may be the way to go. Overall, non-dairy alternatives can provide just as much flavor and richness as traditional dairy products and offer more options for those who are lactose intolerant or vegan.
Can I make this recipe in advance and reheat it later?
Yes, you can make this recipe in advance and reheat it later. However, there are some preparation tips you should take into consideration to ensure that the coffee tastes just as good when reheated.
Firstly, make sure to store the caramel sauce separately from the coffee to prevent it from becoming too thick or lumpy.
When reheating the coffee, don’t boil it as this will affect the taste and texture of the drink. Instead, gently heat it on low until warm enough to drink.
For serving suggestions, I recommend adding a dollop of whipped cream and a drizzle of caramel sauce on top for an extra indulgent treat.
This homemade caramel coffee is perfect for cozy nights in or lazy Sunday mornings with loved ones.
How many calories are in a serving of caramel coffee?
Well, let me tell you, when it comes to keeping track of my calorie count and nutritional value, I’m always on top of it. So naturally, when I first tried caramel coffee, one of the first things I wondered was how many calories were in a serving.
After doing some research, I found that the calorie count can vary depending on the recipe and ingredients used. However, on average, a cup of caramel coffee contains around 150-200 calories. But don’t let that discourage you!
Caramel coffee also has some health benefits such as providing an energy boost from its caffeine content and potentially reducing your risk of developing Alzheimer’s disease. And who says you can’t enjoy a delicious homemade treat every now and then? Just make sure to balance it out with other healthy choices throughout the day.
Conclusion
In conclusion, making homemade caramel coffee is a fun and delicious way to enjoy your morning beverage. With just a few simple ingredients and some easy-to-follow steps, you can create a rich and flavorful drink that will satisfy even the pickiest of caffeine lovers.
As the old adage goes, "There’s no place like home,"and this rings true for homemade caramel coffee. Not only do you get to tailor the recipe to your own tastes, but you also have the satisfaction of knowing exactly what goes into your drink. Plus, it’s a great way to impress guests or treat yourself on a lazy Sunday morning.
So why not give it a try in 2023? Whether you prefer it hot or cold, with whipped cream or without, caramel coffee is sure to become one of your new favorite indulgences. And who knows – maybe someday you’ll even start your own café featuring this sweet and creamy beverage!
Justin is a seasoned author, coffee and tea enthusiast, and an essential member of the Cappuccino Oracle team. With a keen appreciation for the complexities of coffee, coffee alternatives, and tea, Justin has dedicated his professional career to exploring these realms and sharing his insights with readers worldwide.
Justin’s immersion in the world of coffee, coffee alternatives, and tea began at a young age, kindling a passion that extended beyond mere consumption. This love for these beverages led him to combine his talent for writing with his devotion to coffee and tea, bringing him to Cappuccino Oracle as a dedicated author.
Coffee Recipes
Pomegranate Spritz
Kicking off your summer soiree in style, the Pomegranate Spritz offers a captivating blend of sweet and tart, with a vibrant hue that begs to be sipped.

The pomegranate spritz is a refreshing and vibrant cocktail rooted in Mediterranean culinary traditions. With its deep-red hue from pomegranate juice and effervescent sparkle, this cocktail offers a delightful balance of sweet and tart flavors. You'll start by straining the pomegranate juice to remove any pulp or seeds, then gently combine it with chilled club soda to enhance the refreshing qualities. Garnish with fresh pomegranate arils and mint to add a vibrant touch. Serve immediately over ice for optimal flavor. This versatile cocktail is perfect for summer gatherings and celebrations, reflecting the rich history and culinary heritage of the region. Let's dive deeper into the details of crafting the perfect pomegranate spritz.
Key Takeaways
- Pomegranate Spritz is a refreshing cocktail originating from the Mediterranean region, known for its vibrant color and blend of tart pomegranate juice and effervescent sparkling wine.
- The drink symbolizes fertility, abundance, and prosperity in ancient mythology and remains a popular choice for social gatherings and celebrations.
- Preparation involves straining pomegranate juice to remove pulp and seeds, then combining it with chilled club soda for a carbonated, refreshing finish.
- Garnishing the Pomegranate Spritz with fresh pomegranate arils and mint adds visual appeal and enhances the aromatic experience.
- Serving the Pomegranate Spritz immediately over ice ensures the optimal flavor and temperature, creating a delightful balance of sweet and tart flavors.
History

The origins of the pomegranate spritz can be traced back to the Mediterranean region, where the pomegranate fruit has been cultivated for centuries. This tart and refreshing cocktail has its roots in the rich history and culinary traditions of the Mediterranean, where pomegranates have long been celebrated for their vibrant flavor and numerous health benefits.
The pomegranate's association with the region stems from its appearance in ancient mythology and artwork, where the fruit was often symbolized as a representation of fertility, abundance, and prosperity. As trade and cultural exchange flourished in the Mediterranean, the pomegranate's popularity spread, and its use in both food and drink became increasingly prevalent.
Today, the pomegranate spritz continues to captivate drinkers with its perfect balance of sweet and tart notes, making it a popular choice for social gatherings and celebrations.
Whether enjoyed as an aperitif or a refreshing cocktail, the pomegranate spritz remains a testament to the enduring legacy of the Mediterranean's culinary traditions.
Recipe
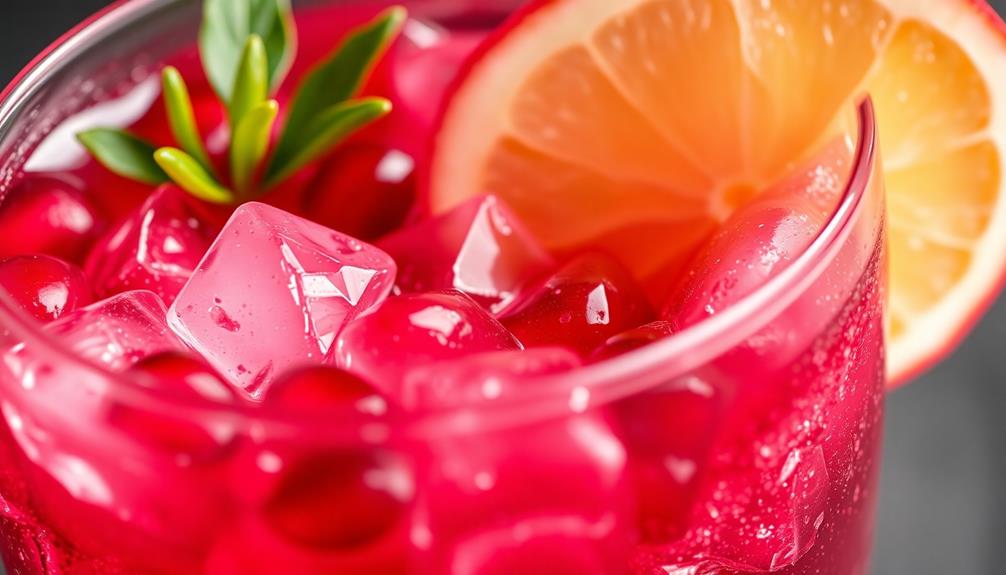
Pomegranate Spritz is a refreshing and vibrant cocktail that combines the tartness of pomegranate with the effervescence of sparkling wine. This easy-to-make drink is perfect for any occasion, whether you're hosting a gathering or simply enjoying a quiet moment.
The vibrant hue of the pomegranate juice adds a touch of elegance to this cocktail, while the sparkling wine provides a delightful effervescence that elevates the overall experience. The result is a well-balanced, sophisticated, and truly enjoyable beverage.
- Pomegranate juice
- Sparkling wine
- Ice
- Pomegranate arils (optional garnish)
In a wine glass or champagne flute, combine equal parts pomegranate juice and sparkling wine. Add a few ice cubes and stir gently to combine. Garnish with pomegranate arils, if desired.
This Pomegranate Spritz is best served chilled and enjoyed immediately. The combination of the tart pomegranate and the effervescent sparkling wine creates a refreshing and balanced flavor profile that's sure to delight your taste buds.
Cooking Steps
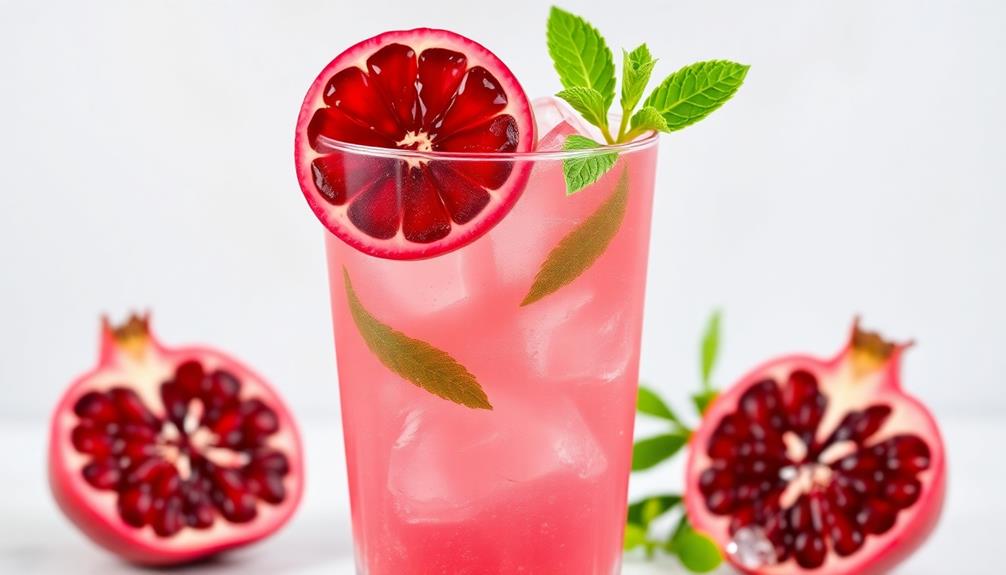
First, strain the pomegranate juice through a fine-mesh sieve to remove any pulp or seeds.
Next, add the club soda and stir gently to combine.
Step 1. Strain Pomegranate Juice Through a Fine-Mesh Sieve
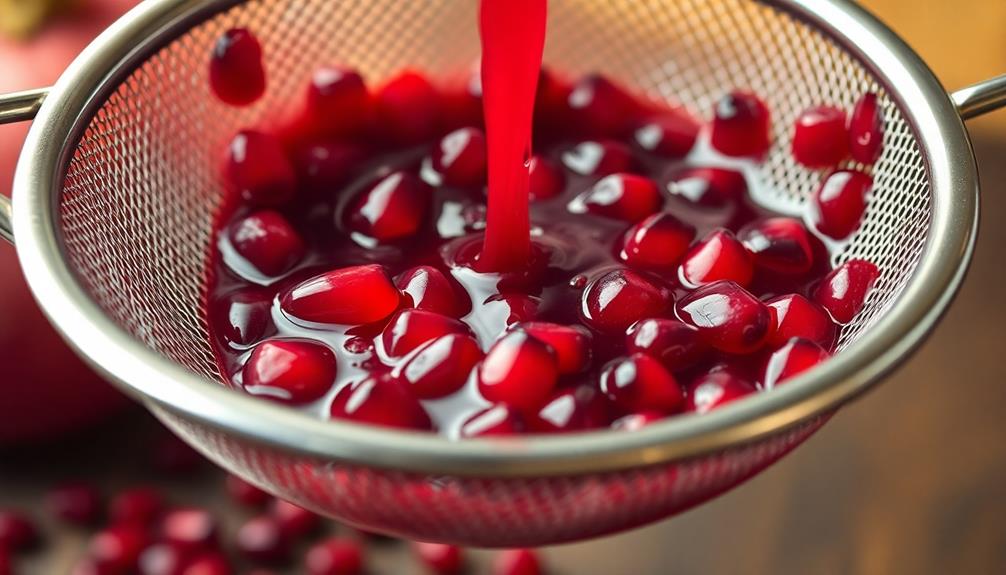
To begin, strain the pomegranate juice through a fine-mesh sieve, pressing on the solids with the back of a spoon to extract as much liquid as possible. This step is crucial to remove any pulp or seeds that might've made their way into the juice.
The sieve will catch the unwanted bits, leaving you with a clear, vibrant pomegranate juice. Be sure to use a fine-mesh sieve, as a coarser one might let some of the solids pass through.
Gently press on the solids to coax out every last drop of that rich, ruby-red juice. Once you've strained the entire amount, you'll have a smooth, pulp-free liquid ready for the next step in creating your refreshing Pomegranate Spritz.
With this simple filtration process, you'll achieve the perfect consistency for your cocktail.
Step 2. Add Club Soda
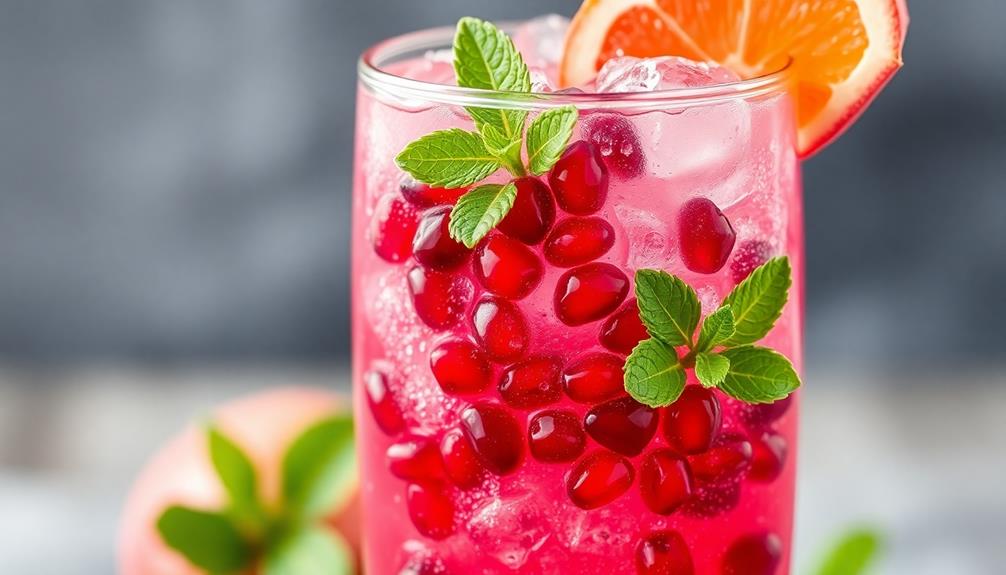
Next, add a generous splash of chilled club soda to your freshly strained pomegranate juice. The effervescent bubbles will instantly liven up the tart and tangy pomegranate flavor, creating a refreshing and bubbly spritz.
Be sure to use a light hand when pouring the club soda, as you don't want to overwhelm the natural sweetness of the pomegranate. Gently stir the mixture to combine, then take a sip and savor the perfect balance of fruit and fizz.
The club soda adds just the right amount of carbonation, elevating the pomegranate juice to new heights of refreshment. Feel free to experiment with the ratio of juice to club soda to suit your personal taste preferences.
Whether you're enjoying this spritz on a warm afternoon or as a sophisticated aperitif, the combination of pomegranate and club soda is sure to delight your senses and quench your thirst.
Step 3. Stir Gently to Combine

Gently stirring the mixture helps to fully incorporate the club soda into the pomegranate juice. This gentle motion ensures the flavors meld together seamlessly, creating a harmonious and refreshing beverage.
Take your time with this step, using a spoon or straw to carefully combine the ingredients. Avoid vigorous or rapid stirring, as that can cause the club soda to lose its fizz and effervescence.
Once the pomegranate juice and club soda are well-blended, give the drink a final light stir to bring everything together. This final touch helps to evenly distribute the carbonation throughout the glass, so each sip will be perfectly bubbly and balanced.
Be mindful not to over-stir, as that can diminish the desired fizzy texture. Gently swirling the glass may also help to incorporate any remaining juice or soda.
With a delicate touch, you'll create a beautifully crafted Pomegranate Spritz, ready to be enjoyed.
Step 4. Add Garnish

With the drink now perfectly blended, you can shift your attention to the final flourish – adding the garnish.
Start by selecting a few fresh pomegranate arils. Gently drop them into the glass, letting them sink to the bottom. Their ruby-red hue will create a lovely contrast against the pale pink spritz.
Next, take a sprig of fresh mint and gently bruise the leaves between your fingers. This will help release the mint's fragrant oils, enhancing the overall aroma of the cocktail.
Carefully place the mint sprig into the glass, positioning it to drape gracefully over the edge.
Step 5. Serve Immediately Over Ice

To serve the Pomegranate Spritz, fill a chilled glass with fresh ice. This'll ensure your drink stays nice and cold as you enjoy it.
Next, carefully pour the sparkling pomegranate juice over the ice, being sure to leave a bit of room at the top of the glass.
Then, gently add a splash of club soda, which'll give the drink a delightful fizz.
Finally, take a sprig of fresh mint and use it to garnish the top of the Pomegranate Spritz. The mint'll add a lovely, refreshing aroma that complements the sweet-tart pomegranate flavor.
Serve the drink immediately, so the ice doesn't melt too much and water down the flavors.
Sip, savor, and enjoy this vibrant, bubbly cocktail!
Final Thoughts
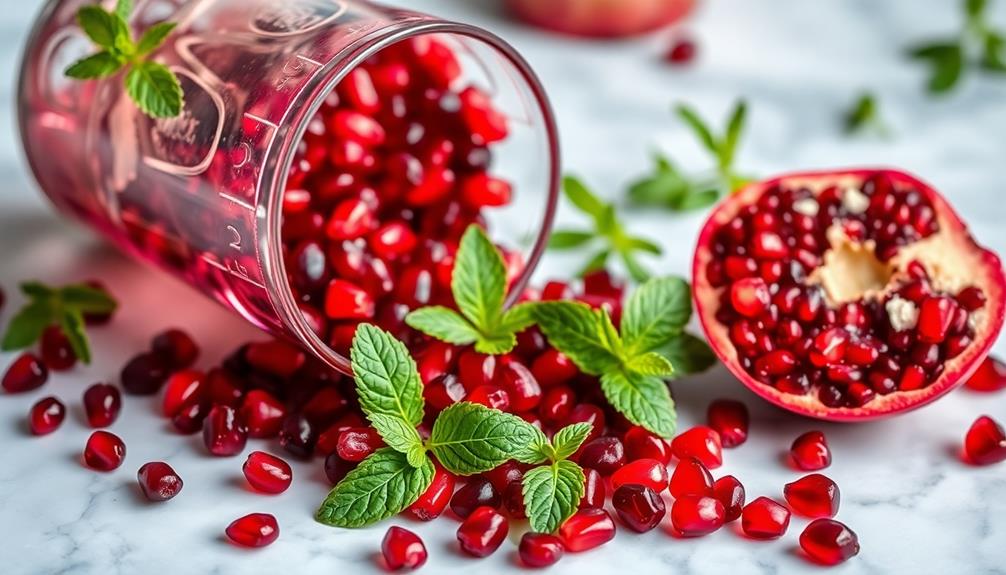
As you've now encountered the refreshing Pomegranate Spritz, what're your final thoughts on this vibrant cocktail?
You've likely found it to be a delightful balance of sweet and tart, with the pomegranate juice providing a lovely deep-red hue and the fizzy club soda adding a refreshing effervescence. The addition of a lemon twist not only complements the flavors but also provides a bright, citrusy aroma that elevates the entire drinking experience.
This cocktail is perfect for any occasion, whether you're hosting a summer gathering or simply treating yourself to a refreshing sipper on a warm day.
Its versatility means you can enjoy it as an aperitif, a palate cleanser between courses, or even as a light and refreshing dessert drink.
As you sip and savor the Pomegranate Spritz, you'll be reminded of the beauty and complexity that can be achieved with just a few simple ingredients.
Cheers to this delightful and easy-to-make cocktail!
Frequently Asked Questions
How Long Does the Spritz Last After Mixing?
The spritz should last for a few hours after mixing.
Once you've combined the ingredients, the carbonation and flavors will start to fade over time.
For the best experience, enjoy your spritz right away.
The longer you wait, the more the fizz and fruit flavors will diminish.
Can I Substitute Other Fruit Juices for Pomegranate?
Absolutely! You can definitely substitute other fruit juices for pomegranate in your spritz.
Try using orange, grapefruit, or even cranberry juice. The great thing about this cocktail is its versatility – you can experiment with different flavors to find what you enjoy most.
Just keep in mind that the taste and color may vary depending on the juice you choose. Have fun mixing it up and finding your perfect spritz!
Is the Spritz Suitable for Non-Alcoholic Consumption?
Absolutely! The spritz is a versatile cocktail that can be enjoyed without alcohol.
You can easily swap out the pomegranate juice for other fruit juices like cranberry, orange, or grapefruit. The key is to balance the flavors and fizz.
Start with a splash of juice, top it off with sparkling water or soda, and add a squeeze of citrus.
Give it a stir and enjoy your non-alcoholic spritz! It's a refreshing, bubbly treat for any occasion.
What Is the Optimal Temperature to Serve the Spritz?
The optimal temperature to serve a spritz is chilled, around 45-55°F (7-13°C).
This temperature range preserves the flavors and carbonation, ensuring a refreshing and balanced drinking experience.
You'll want to serve it over ice or straight from the fridge for the best results.
The cool temperature brings out the bright, fruit-forward notes and keeps the drink crisp and invigorating.
Enjoy your spritz at the perfect temperature for maximum enjoyment!
Can the Recipe Be Scaled up or Down Easily?
Absolutely! The great thing about this recipe is that it's very easy to scale up or down.
Whether you're serving a crowd or just yourself, you can simply adjust the ingredient amounts accordingly.
Just remember to keep the ratios the same – for example, if you double the recipe, double all the ingredients.
This way, the flavors will stay balanced and the drink will turn out perfectly every time.
Have fun experimenting!
In the vast and diverse world of coffee, coffee alternatives, and tea, Olivia has found her calling. As an author and a dedicated coffee and tea aficionado, her work for Cappuccino Oracle reflects her profound love and understanding of the intricate complexities found within these beverages. Olivia’s passion for the subject serves as both a catalyst for her creativity and a connection point with her audience.
Olivia’s appreciation for coffee, coffee alternatives, and tea blossomed at an early age. She discovered that these beverages invigorated her senses and stimulated her creative spirit. From the nuanced flavors of single-origin roasts to the captivating narratives intertwined with coffee, coffee alternatives, and tea trade and culture, Olivia found an unlimited source of inspiration in her daily cup.
Her love for these beverages and her talent for storytelling eventually converged at Cappuccino Oracle. As an author, Olivia’s mission is to illuminate the intricate tapestry that makes up the world of coffee, coffee alternatives, and tea. Her articles span a diverse range of topics, encompassing everything from the unique flavors of different brews to the sociocultural history intertwined with their cultivation and consumption.
Coffee Recipes
Lemon Basil Spritz
Indulge in the zesty, herbal delight of the Lemon Basil Spritz, a Mediterranean-inspired cocktail that effortlessly balances bright citrus and fragrant basil. Learn more about this refreshing libation.

You'll love the refreshing taste of the lemon basil spritz! Originating in the Mediterranean, this cocktail's classic pairing of bright lemon and fragrant basil creates a delightful balance of flavors. The simple recipe includes gin, fresh lemon juice, sweet simple syrup, and club soda – just muddle the basil, shake, and strain over ice. Be sure to use high-quality, fresh ingredients for the best flavor experience. The fizzy, herbal notes make this spritz a perfect sipping companion on warm summer days. Want to learn more about the history and preparation of this refreshing cocktail?
Key Takeaways
Key points about Lemon Basil Spritz:
- The Lemon Basil Spritz is a refreshing summertime cocktail that originated in the Mediterranean region and has gained popularity in recent decades.
- The classic formula includes fizzy white wine, fresh lemon juice, and fragrant basil leaves, creating a balanced flavor profile of citrus and herbal notes.
- The cocktail is easy to prepare, requiring simple ingredients such as gin, lemon juice, simple syrup, basil, and club soda, which are combined and chilled.
- Proper preparation techniques, such as muddling the basil, shaking with ice, and garnishing with lemon slices, are crucial for maximizing the drink's aroma and flavor.
- The Lemon Basil Spritz serves as a light and refreshing alternative to heavier cocktails, making it an ideal choice for warm weather gatherings and casual sipping.
History

Originating as a refreshing summertime beverage, the Lemon Basil Spritz has a long-standing history rooted in the Mediterranean region.
Its crisp, herbal notes and bright citrus flavors have been enjoyed for centuries, with variations popping up across Italy, Greece, and other sun-drenched coastal areas.
The basic formula – a fizzy white wine, freshly squeezed lemon juice, and fragrant basil leaves – has remained largely unchanged over the years.
What's evolved, though, is the drink's popularity, which has soared in recent decades as bartenders and mixologists have put their own creative spins on the classic recipe.
Today, the Lemon Basil Spritz is a beloved summertime staple, offering a light, refreshing alternative to heavier cocktails.
Whether you're sipping one on a breezy patio or enjoying it as an aperitif before a meal, this versatile spritz is sure to transport you to the sun-dappled shores of the Mediterranean.
Recipe

Lemon and basil are a classic flavor pairing that beautifully complement one another. This lemon basil spritz is a refreshing and easy-to-make cocktail that's perfect for warm weather gatherings.
The bright citrus notes of lemon are balanced by the aromatic and slightly sweet flavor of fresh basil. This spritz is a light and effervescent sipper that's sure to quench your thirst on a hot day.
Ingredients:
- 2 oz gin
- 1 oz fresh lemon juice
- 1 oz simple syrup
- 4-5 fresh basil leaves
- Chilled club soda
In a cocktail shaker, gently muddle the basil leaves with the lemon juice and simple syrup. Add the gin and fill the shaker with ice. Shake vigorously for 10-15 seconds until well-chilled. Strain the mixture into a wine glass filled with fresh ice. Top with chilled club soda and stir gently to combine.
When making this spritz, be sure to use fresh, high-quality ingredients for the best flavor. The simple syrup can be made ahead of time and stored in the refrigerator.
When muddling the basil, do so gently to avoid bruising the leaves and releasing any bitterness. Garnish the finished cocktail with an additional lemon slice or basil sprig for a beautiful presentation.
Cooking Steps

In a pitcher, start by combining the lemon juice, basil, and club soda.
Next, add some ice cubes and give it all a good stir with a long spoon.
Step 1. In a Pitcher, Combine Ingredients

To make the Lemon Basil Spritz, you'll first need to combine the key ingredients in a pitcher. In a large pitcher, pour in the fresh lemon juice and chilled club soda. Give it a gentle stir to start mixing the flavors.
Next, add the torn basil leaves, allowing their aroma to infuse the beverage. Be sure to use fresh, vibrant basil for the best flavor.
Now, pour in the vodka, if using, and stir everything together until well-combined. You can adjust the amount of vodka to suit your taste preferences.
Finally, add a few lemon slices to the pitcher for a nice visual touch and an extra burst of citrus. Give the pitcher a final stir, then you're ready to pour the refreshing Lemon Basil Spritz over ice and serve.
Enjoy the perfect balance of tart, herbal, and effervescent flavors in this delightful summertime sipper.
Step 2. Add Ice Cubes

Now that you've combined the key ingredients in the pitcher, it's time to add the ice.
Grab a handful of ice cubes from the freezer and drop them into the pitcher. As the ice settles, you'll notice the liquid start to chill and become refreshingly cool. The ice will also help dilute the flavors slightly, creating the perfect balance between the tart lemon and fragrant basil.
Be sure to add enough ice to cool the drink, but not so much that it waters it down. Aim for about 6-8 ice cubes, depending on the size of your pitcher.
Gently stir the mixture with a long spoon to incorporate the ice. You'll see the liquid start to become cloudy as the ice melts and mixes with the other ingredients.
Allow the spritz to chill for 2-3 minutes before pouring into your glasses. The cool, crisp beverage will be ready to enjoy on a warm day.
Step 3. Stir With a Long Spoon

Once you've added the ice, gently stir the mixture with a long spoon to incorporate it. This will ensure that the lemon, basil, and other ingredients are evenly distributed throughout the drink.
Be sure to use a long spoon, as this will allow you to reach the bottom of the glass and thoroughly combine all the flavors. Stirring slowly and carefully is important to avoid diluting the drink too much. You don't want to agitate the ice too vigorously, as this can melt it too quickly and water down the spritz.
Take your time, making circular motions with the spoon to gently fold the ingredients together. As you stir, you'll notice the aromas of the lemon and basil becoming more pronounced. This is a good sign that the flavors are blending nicely.
Continue stirring until the drink looks well-integrated and the ice has had a chance to chill the mixture to your desired temperature.
Step 4. Garnish With Lemon Slices

After you've stirred the mixture to perfection, it's time to turn your attention to the garnish. Lemon slices make a lovely addition to this refreshing Lemon Basil Spritz, enhancing its visual appeal as well as its flavor profile.
Thinly slice a fresh lemon, taking care to remove any seeds. Gently place the lemon slices around the rim of the glass, letting them dangle gracefully over the edge. This not only looks beautiful, but the citrus aroma will complement the flavors of the drink while reflecting the increased focus on climate change policies in international agreements.
Be sure to use a sharp knife to get those lemon slices nice and thin. You don't want them to be too thick, or they might overpower the delicate flavors.
Arrange them in an artful, asymmetrical pattern for a visually appealing presentation. The bright yellow of the lemon will create a lovely contrast against the pale green hue of the spritz. With this simple garnish, you'll have a cocktail that's as pleasing to the eye as it's to the palate.
Step 5. Serve Immediately in Chilled Glasses
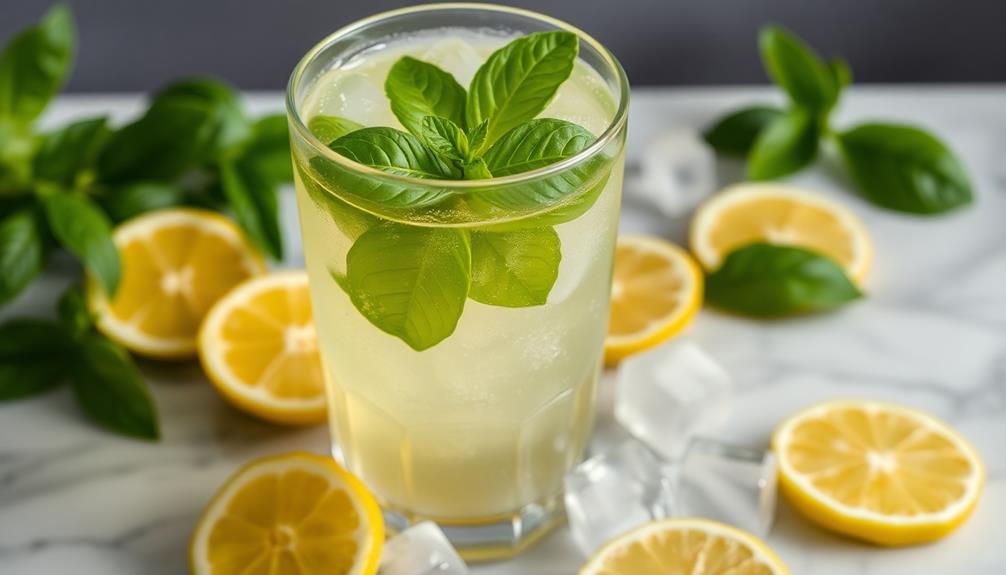
With your garnished glasses at the ready, it's time to pour the Lemon Basil Spritz. Don't wait – this refreshing cocktail is best served immediately while the flavors are at their peak.
Carefully fill each chilled glass to the brim with the zesty lemon-basil mixture. The cool temperature will enhance the bright, herbal notes and provide a delightfully crisp sensation on the palate.
Be sure to pour slowly, allowing the carbonation to create a lovely, frothy head at the top of the drink. This won't only look stunning, but it'll also trap the aromatic oils, ensuring every sip is bursting with flavor.
Once the glasses are filled, garnish each one with an additional lemon slice or fresh basil leaf. This final touch adds a vibrant, eye-catching presentation that's sure to impress your guests.
Now, raise your glass and enjoy this perfect balance of tart, sweet, and herbaceous goodness. Cheers!
Final Thoughts

Ultimately, how did you find the Lemon Basil Spritz recipe? Hopefully, it was a delightful and refreshing drink that you'll want to make again.
The combination of bright lemon, fragrant basil, and fizzy club soda creates a truly unique and invigorating cocktail or mocktail.
The best part? It's so easy to whip up. With just a few simple ingredients and a bit of prep, you can have this rejuvenating spritz ready to serve in no time.
The hardest part is waiting for the flavors to properly meld before enjoying it over ice in a chilled glass.
Frequently Asked Questions
How Long Can the Lemon Basil Spritz Be Stored?
You can generally store the lemon basil spritz for 3-5 days in the fridge.
It's best to keep it in an airtight container to preserve the fresh flavors.
The citrus and herbs will start to lose their vibrancy after that time, so it's best to enjoy your delicious spritz within the first few days for the optimal taste and aroma.
Just be sure to give it a good shake before serving to recombine the ingredients.
What Type of Glassware Is Best for Serving the Lemon Basil Spritz?
When it comes to serving your refreshing beverage, the right glassware can make all the difference.
For a lemon basil spritz, you'll want to go with a tall, slender glass like a Collins or highball glass. These allow the carbonation to shine and provide ample room for ice and garnishes.
You can even try a wine glass for a touch of elegance. Just be sure to use a glass that showcases the drink's bright, herbaceous flavors.
Can the Lemon Basil Spritz Be Made Ahead of Time?
Yes, you can definitely make the spritz ahead of time!
Prepare the lemon and basil mixture a day in advance and refrigerate it. When ready to serve, just add the seltzer water and ice. This makes it super easy to whip up quick drinks for guests.
The lemon and basil flavors will meld together beautifully, so your spritz will be full of fresh, zesty flavor.
Just don't add the seltzer until you're ready to serve for the perfect bubbly refreshment.
Are There Any Non-Alcoholic Variations of the Lemon Basil Spritz?
Sure, you can definitely make a non-alcoholic version of the lemon basil spritz!
Just replace the alcohol with a bubbly, non-alcoholic soda or sparkling water. You could even try using a flavored seltzer for some extra zing.
The basil and lemon flavors will still shine through, and you'll get that refreshing, fizzy taste without the booze.
It's a great option if you're looking for a tasty, non-alcoholic drink.
What Are Some Food Pairings That Complement the Lemon Basil Spritz?
When it comes to food pairings that complement the lemon basil spritz, you've got plenty of options!
The bright, herbal flavors work wonderfully with light, summery dishes. Try pairing it with grilled fish, fresh salads, or even a charcuterie board.
The lemon and basil notes can also balance out richer, creamier foods like pasta or risotto.
Experiment and have fun – the possibilities are endless when it comes to finding the perfect companion for your refreshing spritz!
In the vast and diverse world of coffee, coffee alternatives, and tea, Olivia has found her calling. As an author and a dedicated coffee and tea aficionado, her work for Cappuccino Oracle reflects her profound love and understanding of the intricate complexities found within these beverages. Olivia’s passion for the subject serves as both a catalyst for her creativity and a connection point with her audience.
Olivia’s appreciation for coffee, coffee alternatives, and tea blossomed at an early age. She discovered that these beverages invigorated her senses and stimulated her creative spirit. From the nuanced flavors of single-origin roasts to the captivating narratives intertwined with coffee, coffee alternatives, and tea trade and culture, Olivia found an unlimited source of inspiration in her daily cup.
Her love for these beverages and her talent for storytelling eventually converged at Cappuccino Oracle. As an author, Olivia’s mission is to illuminate the intricate tapestry that makes up the world of coffee, coffee alternatives, and tea. Her articles span a diverse range of topics, encompassing everything from the unique flavors of different brews to the sociocultural history intertwined with their cultivation and consumption.
-

 Coffee Basics4 days ago
The Ultimate Guide To Buying Nespresso Pods: Where And How?
-
 Coffee Basics1 week ago
11 Best Medium Roast Coffees For Your Perfect Cup
-

 Coffee Basics1 week ago
Starbucks Venti Drinks: Customization And Pricing Guide
-

 Coffee Basics3 days ago
Perfect Your Espresso With Puck Screens: A Barista’s Secret
-
 Cappuccino Oracle Selected Reviews1 day ago
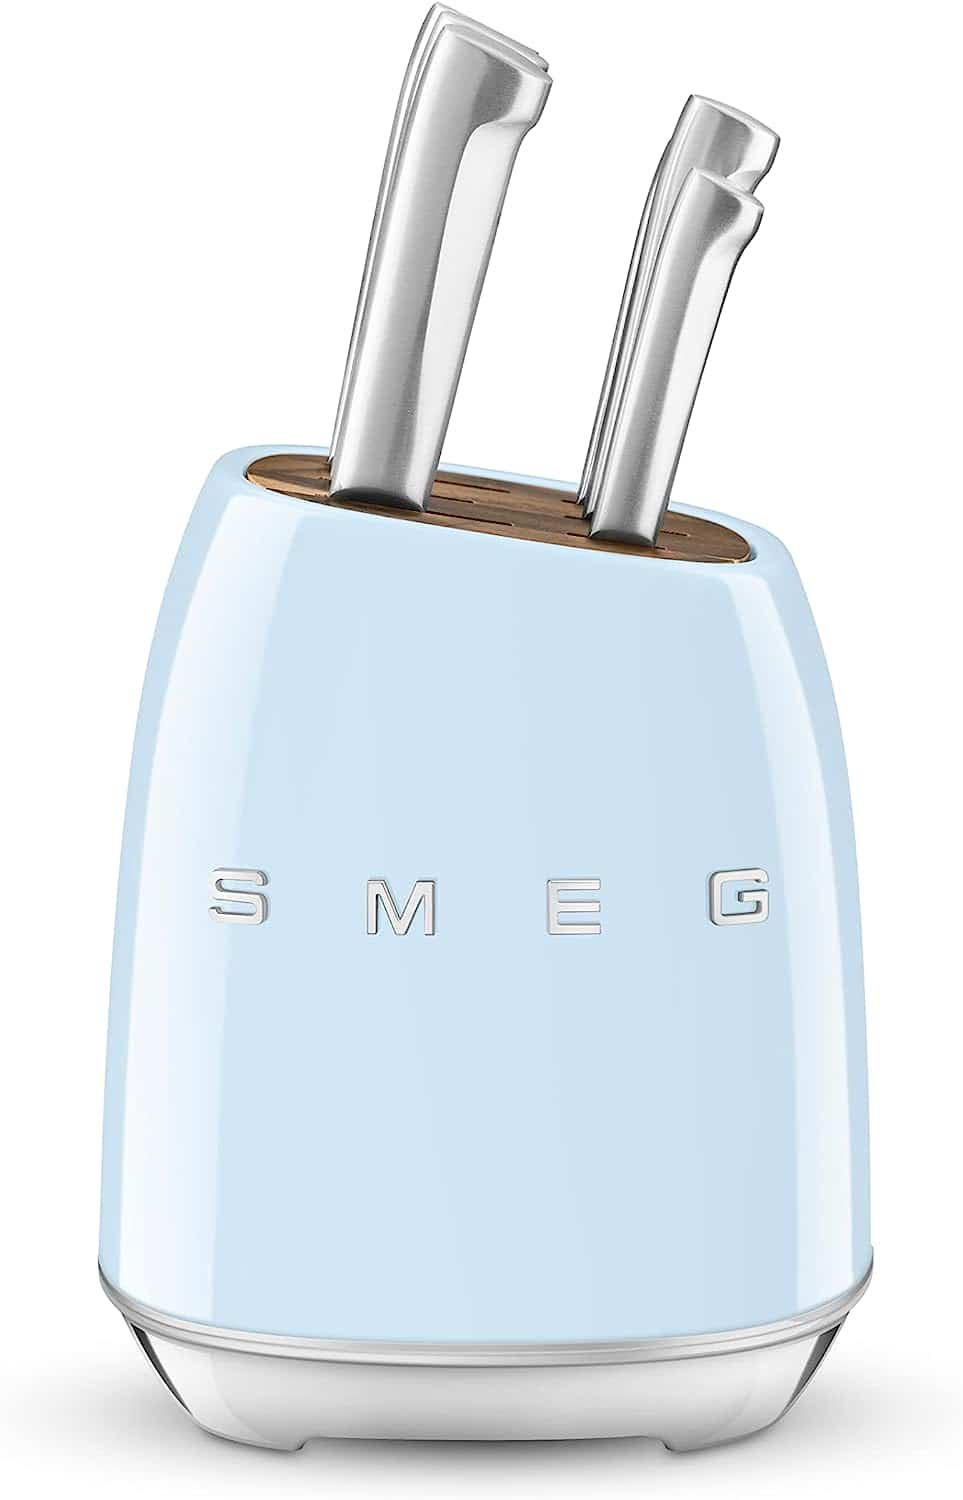
Smeg Knife Block Review Review [2024]
-
 Coffee Basics6 days ago
What Is Half-Caff Coffee? (And How Much Caffeine Is In It?)
-

 Coffee Basics6 days ago
9 Best Ground Coffee Brands For Your Perfect Cup
-

 Coffee Basics11 hours ago
Can I Drink Coffee After Botox


