
Turmeric Tea
How To Use Turmeric Oil For Skin Lightening

If you’re looking for a natural and effective way to lighten your skin and achieve a brighter, more even complexion, turmeric oil may be just what you need. This powerful essential oil has been used for centuries in traditional medicine and skincare practices, and its benefits for the skin are well-documented.
In this article, I will guide you through the process of using turmeric oil for skin lightening, from choosing the right oil for your skin type to incorporating it into your daily skincare routine. With the right knowledge and approach, you can enjoy the many benefits of turmeric oil and achieve the radiant, glowing skin you’ve always wanted.
So let’s get started!
Key Takeaways
- Turmeric oil is a natural and effective way to lighten skin and achieve a brighter, more even complexion.
- Proper skin preparation is important before applying turmeric oil, including effective cleansing and patch testing for allergic reactions or sensitivity.
- Turmeric oil can be applied topically as a spot treatment or mixed with carrier oil, and long-term use is recommended for lasting results such as reducing dark spots and promoting a more even complexion.
- Choosing high-quality, pure turmeric oil is crucial to ensure the best possible benefits for skin, and synthetic ingredients should be avoided.
Understanding the Benefits of Turmeric Oil for Skin Lightening
You’re going to love how turmeric oil can brighten and even out your skin tone, all while providing a natural, healthy glow! Turmeric oil is extracted from the roots of the turmeric plant and has been used for centuries in Ayurvedic medicine for its numerous health benefits.
When it comes to skin lightening, turmeric oil is an excellent natural alternative to harsh chemicals and lightening creams. Turmeric oil usage is simple and easy to incorporate into your skincare routine. It can be used topically as a spot treatment or mixed with a carrier oil such as coconut or jojoba oil.
The oil has anti-inflammatory properties that can help reduce redness, acne, and scars. The high concentration of antioxidants in turmeric oil also makes it effective in reducing hyperpigmentation and dark spots on the skin.

Choosing the right turmeric oil for your skin is important, and we’ll discuss this in the next section.
Choosing the Right Turmeric Oil for Your Skin
When it comes to choosing the right turmeric oil for my skin, I always prioritize quality and purity. I want to make sure that the oil I use is free from harmful additives and synthetic ingredients that may cause adverse effects on my skin.
By selecting high-quality, pure turmeric oil, I can ensure that I’m getting the best possible benefits for my skin.
Quality and Purity of the Oil
To ensure you’re using the best turmeric oil for skin lightening, make sure it’s pure and of high quality. Here are a few ways to determine the purity and quality of your turmeric oil:
-
Purity testing: Look for essential oil brands that conduct purity testing on their products. This can ensure that the oil is free from contaminants and adulterants. You can also check for the Latin name of the plant to ensure that you’re getting the right species of turmeric.
-
Sourcing options: Consider where the turmeric oil is sourced from. Turmeric from regions with a long history of producing the spice, such as India, may be of higher quality. Additionally, organic and sustainable farming practices can contribute to a higher quality oil.
-
Extraction method: Different extraction methods can result in different qualities of turmeric oil. Look for brands that use steam distillation, which is considered the most effective and gentle method for obtaining high-quality essential oils.
Ensuring that your turmeric oil is pure and of high quality is crucial for achieving the best results. However, it’s also important to avoid synthetic ingredients, as they can irritate the skin and cause adverse reactions.
Avoiding Synthetic Ingredients
Steer clear of artificial additives like a plague, as they can be a thorn in the side of your skin and result in unwanted side effects. When it comes to skin lightening, synthetic ingredients can be quite harmful and counterproductive. They can cause skin irritation, rashes, and other undesirable effects, which can damage your skin in the long run.
Instead, choosing natural alternatives can be a safer and more effective way to go about it. Natural ingredients like turmeric oil have been used for centuries for their skin lightening properties. They’re gentle on the skin and don’t contain harmful chemicals that can cause damage.
By avoiding synthetic additives and opting for natural alternatives like turmeric oil, you can achieve a brighter and more even skin tone without compromising your skin’s health and well-being. Now that you know the importance of avoiding synthetic ingredients, let’s move on to the next step – preparing your skin for turmeric oil application.
Preparing Your Skin for Turmeric Oil Application
Before applying turmeric oil to my skin, it’s important for me to prepare it properly to ensure maximum benefits and minimize any potential risks.
Firstly, I need to cleanse my skin thoroughly to remove any dirt or impurities that may interfere with the absorption of the oil.
Secondly, I should perform a patch test on a small area of my skin to check for any allergic reactions or sensitivity to the oil.
By taking these simple steps, I can ensure that my skin is ready to receive the full benefits of turmeric oil.
Cleanse Your Skin Thoroughly
First, make sure you wash your skin thoroughly to prepare it for the benefits of turmeric oil. Effective cleansing is important to remove any dirt, oil, or makeup that may be on your skin. Use a gentle cleanser that is appropriate for your skin type, like a foaming or cream-based cleanser. Avoid using harsh scrubs or exfoliants as they can irritate your skin and make it more sensitive to the oil. Proper exfoliation can help to remove dead skin cells and unclog pores, but it is best to do this step separately from the oil application.
Once you have cleansed your skin, make sure to gently pat it dry with a clean towel. Avoid rubbing your skin as this can cause irritation and redness. Now that your skin is clean and dry, it is ready for the next step – performing a patch test. This will help you determine if your skin is sensitive to the oil and prevent any adverse reactions.
Perform a Patch Test
Now that you’ve thoroughly cleansed and dried your skin, it’s time to see how it reacts to the turmeric oil with a simple patch test. It’s important to take sensitivity precautions before applying any new product to your skin.
Here’s how to perform a patch test:
- Apply a small amount of turmeric oil to a small area of your skin, such as the inside of your wrist or behind your ear.
- Wait 24 hours to see if any redness, irritation, or allergic reactions occur.
If there are no adverse reactions, you can proceed with using turmeric oil for skin lightening.
It’s recommended to wait at least 24 hours after the patch test before applying turmeric oil to your entire face. This waiting period ensures that you give your skin enough time to react to the oil and avoid any potential negative consequences.
By taking the time to perform a patch test, you can avoid any unwanted skin reactions and safely move on to applying turmeric oil to achieve a brighter, more even complexion.
Applying Turmeric Oil to Achieve a Brighter, More Even Complexion
To achieve a brighter, more even complexion, you’ll want to try using turmeric oil – it’s like a ray of sunshine for your skin, illuminating it from within.
When applying turmeric oil, there are a few techniques to keep in mind. First, make sure your face is clean and dry before application. Then, add a few drops of turmeric oil to your favorite moisturizer or serum and apply it to your face and neck. Massage it into your skin using upward circular motions.
It’s important to note that while turmeric oil can be effective for skin lightening, it’s not a quick fix. Long-term use is recommended in order to see lasting results. With consistent use, turmeric oil can improve the overall appearance of your skin by reducing dark spots and promoting a more even complexion.
Incorporating turmeric oil into your skincare routine can be a game-changer for those seeking a natural and effective way to brighten their skin.
Incorporating Turmeric Oil into Your Skincare Routine
Transform your daily skincare routine into a luxurious experience by infusing it with the radiant energy of turmeric oil, leaving your complexion glowing with the warmth of the sun. The benefits of turmeric oil for skin are endless. It’s a natural anti-inflammatory, antioxidant, and antiseptic. Here are some tips for incorporating turmeric oil into your skincare routine:
- Mix a few drops of turmeric oil with your favorite moisturizer to brighten and hydrate your skin.
- Add a drop of turmeric oil to your face wash for a gentle exfoliation that’ll leave your skin feeling smooth and refreshed.
- Apply turmeric oil directly to dark spots or hyperpigmentation for a targeted treatment that’ll help even out your complexion.
When it comes to applying turmeric oil, it’s important to patch test first to make sure you’re not allergic or sensitive to it. Start with a small amount and gradually increase as your skin adjusts. With consistent use, turmeric oil can help you achieve a brighter, more even complexion.
Frequently Asked Questions
Can turmeric oil be used on all skin types?
As someone with sensitive skin, I understand the importance of considering skin sensitivity when using any new product. While turmeric oil can be beneficial for skin lightening, it’s important to patch test first and avoid using if it causes irritation.
Is it safe to use turmeric oil on sensitive skin?
As someone with sensitive skin, I understand the importance of properly diluting turmeric oil. Using turmeric oil for skin lightening: A beginner’s guide should always include researching proper dilution techniques to avoid irritation.
Can turmeric oil be used to lighten dark spots or only the overall complexion?
Oh, just use turmeric oil to lighten your overall complexion, they said. But why stop there when you can also use it for dark spot treatment? Combining it with other natural remedies can enhance its benefits.
How often should turmeric oil be applied to see results?
For best results, I apply turmeric oil to my skin twice a week. It’s important to dilute it with a carrier oil and do a patch test first. Be cautious of staining clothing. Turmeric oil application tips are to massage gently and leave on for 20-30 minutes before rinsing off.
Are there any side effects of using turmeric oil for skin lightening?
Potential risks and precautions of using turmeric oil for skin lightening include allergic reactions, skin irritation, and staining. Alternatives like lemon juice or vitamin C serums may be safer and more effective than turmeric oil.
Conclusion
After researching the benefits and uses of turmeric oil for skin lightening, I’m convinced that it’s a valuable addition to any skincare routine. While the scientific evidence is limited, many people have reported improvements in their complexion after using turmeric oil.
However, it’s important to choose a high-quality oil and take precautions when applying it to avoid skin irritation. As with any skincare product, it’s important to do your own research and consult with a dermatologist before trying something new.
While turmeric oil may not be a miracle cure for all skin concerns, it can provide a natural and effective way to brighten and even out your complexion. So go ahead and give it a try – you may just love the results!

In the vast and diverse world of coffee, coffee alternatives, and tea, Olivia has found her calling. As an author and a dedicated coffee and tea aficionado, her work for Cappuccino Oracle reflects her profound love and understanding of the intricate complexities found within these beverages. Olivia’s passion for the subject serves as both a catalyst for her creativity and a connection point with her audience.
Olivia’s appreciation for coffee, coffee alternatives, and tea blossomed at an early age. She discovered that these beverages invigorated her senses and stimulated her creative spirit. From the nuanced flavors of single-origin roasts to the captivating narratives intertwined with coffee, coffee alternatives, and tea trade and culture, Olivia found an unlimited source of inspiration in her daily cup.
Her love for these beverages and her talent for storytelling eventually converged at Cappuccino Oracle. As an author, Olivia’s mission is to illuminate the intricate tapestry that makes up the world of coffee, coffee alternatives, and tea. Her articles span a diverse range of topics, encompassing everything from the unique flavors of different brews to the sociocultural history intertwined with their cultivation and consumption.

As a fan of kombucha, I’ve always been intrigued by the pleasant fizz that tickles my taste buds with each sip.
In this guide, I’ll share my secrets to making kombucha tea fizzier than ever before. Get ready to unlock the science behind this effervescent delight and discover the key ingredients that will elevate your brew.
Follow my step-by-step instructions and learn the carbonation techniques that will make your kombucha bubble with excitement.
Say goodbye to flat brews and hello to the perfect fizzy kombucha tea!
Key Takeaways
- Carbonation in kombucha is a result of yeast converting sugar into alcohol and carbon dioxide gas during fermentation.
- Second fermentation in a sealed container and longer fermentation time can increase the fizziness of kombucha.
- Using fresh and ripe fruit juices or purees can add depth and complexity to the kombucha and contribute to carbonation.
- Natural carbonation techniques involve bottling with added sugar and fermenting, while forced carbonation using a carbonation system allows for precise control and quicker results for those who prefer higher levels of fizz.
The Science Behind Fizziness in Kombucha Tea
To understand why your kombucha tea becomes fizzy, you need to know the science behind it.
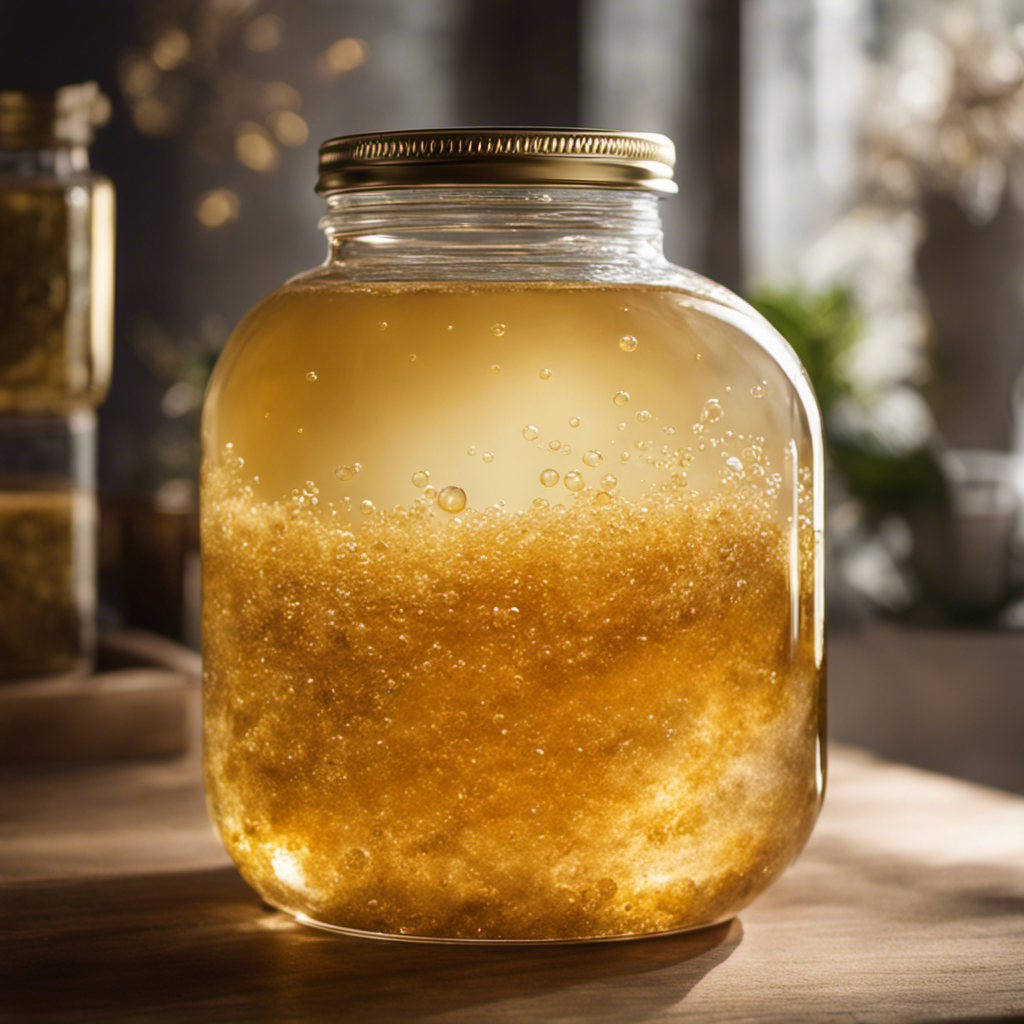
The carbonation process in kombucha is mainly due to the role of yeast during fermentation. When making kombucha, a SCOBY (Symbiotic Culture of Bacteria and Yeast) is added to sweetened tea. The yeast in the SCOBY consumes the sugar and converts it into alcohol and carbon dioxide gas through a process called fermentation.
The carbon dioxide gas produced gets trapped in the liquid, creating the fizziness. As the fermentation continues, the carbonation level increases. This is why it’s important to let your kombucha undergo a second fermentation in a sealed container to build up carbonation.
The longer you let it ferment, the fizzier your kombucha will be.
Choosing the Right Ingredients for Fizzy Kombucha Tea
When choosing the right ingredients, you’ll want to ensure that you use fresh fruit juices or purees to achieve a fizzy kombucha tea. These ingredients are crucial for the fermentation process, which is responsible for creating carbonation in the tea. Here are a few key points to consider:
-
Quality of Fruit: Choose fruits that are ripe and flavorful, as they will add depth and complexity to your kombucha. Avoid using fruits that are overly sweet or acidic, as they can affect the fermentation process.
-
Freshness: It is essential to use fresh fruit juices or purees to ensure the best results. Fresh ingredients contain natural sugars and enzymes that contribute to the fermentation process and carbonation.
-
Variety: Experiment with different fruits to find your desired flavor profile. Some popular choices include berries, citrus fruits, and tropical fruits. Each fruit brings its unique characteristics to the kombucha, resulting in a diverse range of flavors.
Step-by-Step Guide to Fermenting Kombucha Tea for Maximum Fizz
Follow these steps to ensure you achieve maximum fizz when fermenting your kombucha tea.
The fermentation process is crucial in creating that desired effervescence.
- First, prepare a sweetened tea base and let it cool.
- Then, add a SCOBY (symbiotic culture of bacteria and yeast) to initiate fermentation.
- Cover the container with a breathable cloth to allow air circulation.
- Let the tea ferment for 7-10 days, depending on your flavor preferences.
- As the fermentation progresses, bubbles will form, indicating the carbonation is building up.
After the desired fermentation time, it’s time to bottle your kombucha.
- Add some fruit juice or other flavorings to create delicious flavor variations.
- Seal the bottles tightly and allow them to sit at room temperature for a few days to build carbonation.
Carbonation Techniques for Fizzy Kombucha Tea
Achieving maximum fizz in your kombucha is all about using the right carbonation techniques. Carbonation gives kombucha its signature effervescence, making it a refreshing and enjoyable beverage. Here are some methods to help you achieve that perfect fizz:
-
Natural Carbonation: This method involves bottling the kombucha with added sugar and allowing it to ferment further, creating carbonation naturally. This process takes a few days to a week, but the result is a well-carbonated kombucha with a smooth and consistent fizz.
-
Forced Carbonation: Utilizing a carbonation system like a soda siphon or kegging system, forced carbonation allows you to control the level of carbonation precisely. This method is quicker than natural carbonation and is ideal for those who prefer a higher level of fizz.
-
Flavor Variations: Experimenting with different flavors during the carbonation process can add a new dimension to your kombucha. Adding fruits, herbs, or spices to the bottle before carbonation can infuse unique flavors into your fizzy kombucha.
Troubleshooting Tips for Achieving the Perfect Fizz in Kombucha Tea
To troubleshoot and achieve the perfect fizz in your kombucha, you can try adjusting the fermentation time or temperature.
Carbonation is a key aspect of kombucha, but sometimes it can be challenging to get it just right. One common problem is a lack of fizz, which can leave your kombucha tasting flat and unappealing.
To troubleshoot this issue, you can try increasing the fermentation time. This allows the yeast to consume more sugar and produce more carbon dioxide, resulting in a fizzier brew. Another option is to adjust the fermentation temperature. Yeast activity is influenced by temperature, so finding the optimal range can help promote carbonation.
Experimenting with these troubleshooting techniques can help you achieve the perfect fizz in your homemade kombucha.
Conclusion
In conclusion, achieving the perfect fizz in kombucha tea is not only possible but also quite fascinating. By understanding the science behind the fizzy nature of kombucha, choosing the right ingredients, and following a step-by-step fermentation process, you can create a bubbly and refreshing beverage.
Experimenting with carbonation techniques such as secondary fermentation or adding fruit juices can further enhance the fizziness. Imagine enjoying a glass of sparkling kombucha tea on a hot summer day, its effervescence dancing on your taste buds, invigorating and satisfying.
The possibilities are endless!
In the vast and diverse world of coffee, coffee alternatives, and tea, Olivia has found her calling. As an author and a dedicated coffee and tea aficionado, her work for Cappuccino Oracle reflects her profound love and understanding of the intricate complexities found within these beverages. Olivia’s passion for the subject serves as both a catalyst for her creativity and a connection point with her audience.
Olivia’s appreciation for coffee, coffee alternatives, and tea blossomed at an early age. She discovered that these beverages invigorated her senses and stimulated her creative spirit. From the nuanced flavors of single-origin roasts to the captivating narratives intertwined with coffee, coffee alternatives, and tea trade and culture, Olivia found an unlimited source of inspiration in her daily cup.
Her love for these beverages and her talent for storytelling eventually converged at Cappuccino Oracle. As an author, Olivia’s mission is to illuminate the intricate tapestry that makes up the world of coffee, coffee alternatives, and tea. Her articles span a diverse range of topics, encompassing everything from the unique flavors of different brews to the sociocultural history intertwined with their cultivation and consumption.

Have you ever heard that Kombucha has been enjoyed for generations and is thought to provide a variety of health advantages?
Well, I’m here to show you how to make your own Kombucha Starter Tea, so you can enjoy its probiotic goodness right at home.
In this article, I’ll guide you through the process step-by-step, from choosing the right ingredients to fermenting and storing your tea.
Get ready to embark on a journey of homemade Kombucha greatness!
Key Takeaways
- Kombucha starter tea offers benefits such as improved digestion, increased energy levels, probiotic properties, and a wide range of flavor variations.
- Choosing the right ingredients for kombucha starter tea involves using organic sugar, filtered water, and black, green, or white tea leaves without artificial flavors or additives.
- The step-by-step guide to brewing kombucha starter tea includes preparing the ingredients and equipment, brewing the tea, combining the ingredients, fermenting the tea, and troubleshooting common issues.
- Some fermentation tips for kombucha starter tea include keeping the jar in a warm and dark area, adjusting fermentation time, adding fruit juice or pureed fruit for a fruity twist, experimenting with herbs and spices, and troubleshooting common issues.
Benefits of Kombucha Starter Tea
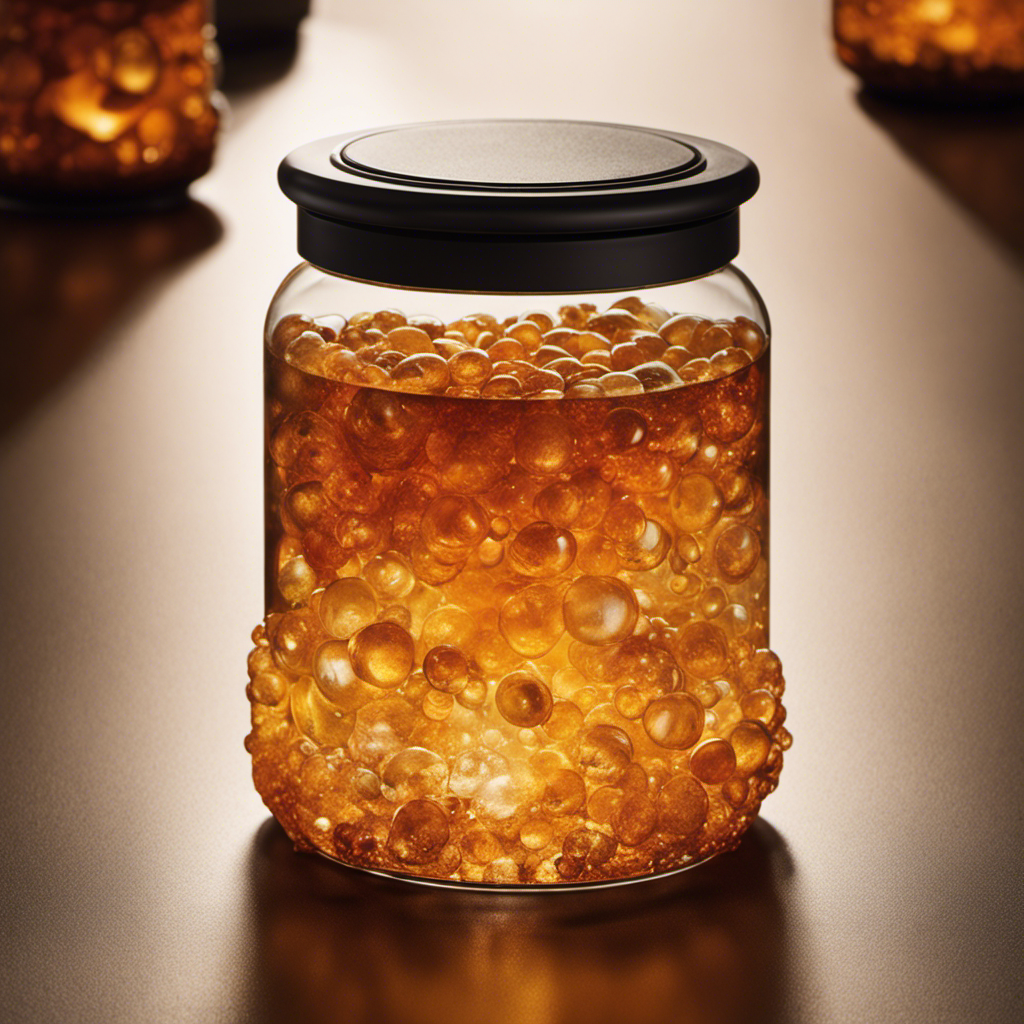
There are numerous benefits to drinking kombucha starter tea. One of the main advantages is improved digestion and increased energy levels. Kombucha is a fermented tea that contains probiotic properties. These probiotics are beneficial bacteria that aid in promoting a healthy gut. By introducing these good bacteria into your digestive system, kombucha starter tea can help improve digestion and overall gut health.
Additionally, kombucha starter tea is known for its energizing effects. This is due to the presence of B vitamins and iron, which are essential nutrients for maintaining energy levels. So, not only does kombucha starter tea offer health benefits, but it also provides a delicious and refreshing beverage option.
Another advantage of kombucha starter tea is its wide range of flavor variations. From fruity to tangy, there is a flavor for everyone’s taste preferences. This makes it a versatile drink that can be enjoyed by anyone looking for a tasty and healthy beverage option.
Choosing the Right Ingredients for Kombucha Starter Tea
When choosing the right ingredients for your kombucha starter tea, it’s important to use organic sugar and filtered water. Organic sugar ensures that your kombucha is free from harmful pesticides and chemicals, while filtered water removes impurities that may affect the fermentation process.
Here are some brewing process tips to consider:
- Use organic tea leaves: Opt for black, green, or white tea leaves that are free from artificial flavors or additives.
- Avoid flavored teas: Flavored teas may contain oils or additives that can harm the SCOBY culture.
- Choose a healthy SCOBY: Look for a firm and smooth SCOBY with no signs of mold or discoloration.
- Maintain the right temperature: Keep your brewing vessel in a warm area, ideally between 75-85°F, to promote fermentation.
Step-by-Step Guide to Brewing Kombucha Starter Tea
To brew your own kombucha, start by gathering the necessary ingredients and equipment. Here’s a step-by-step guide to help you make your own delicious kombucha starter tea.
Prepare the ingredients and equipment:
- 1 gallon glass jar
- 8-10 tea bags or 2 tablespoons loose tea
- 1 cup sugar
- 1 SCOBY (Symbiotic Culture of Bacteria and Yeast)
- 2 cups starter liquid (previously made kombucha)
Brew the tea:
- Bring 4 cups of water to a boil and steep the tea for 5-7 minutes.
- Stir in the sugar until dissolved, then let it cool to room temperature.
Combine the ingredients:
- Add the cooled tea to the glass jar, then pour in the starter liquid.
- Gently place the SCOBY on top of the liquid.
Ferment the tea:
- Cover the jar with a breathable cloth and secure it with a rubber band.
- Place the jar in a warm, dark area and let it ferment for 7-14 days.
Troubleshooting common issues:
- If your kombucha tastes too sweet, let it ferment for a few more days.
- If it tastes too sour or vinegary, ferment it for a shorter time.
- If you see mold on the surface, discard the entire batch and start over.
Fermentation Tips for Kombucha Starter Tea
For better fermentation, keep the glass jar containing your kombucha starter tea in a warm and dark area. This will create the optimal environment for the fermentation process to take place.
Here are some tips to troubleshoot common issues in fermenting kombucha starter tea and explore different flavor variations:
-
Troubleshooting common issues:
-
If your kombucha tastes too sweet, it may not have fermented long enough. Let it ferment for a few more days to achieve a more tart flavor.
-
If your kombucha tastes too sour or vinegary, it may have fermented for too long. Shorten the fermentation period to achieve a milder taste.
-
Exploring different flavor variations:
-
Add fruit juice or pureed fruit during the second fermentation for a fruity twist.
-
Experiment with herbs and spices like ginger, lavender, or mint to add unique flavors to your kombucha.
Storage and Maintenance of Kombucha Starter Tea
To properly store and maintain your kombucha starter tea, ensure that the glass jar is tightly sealed to prevent any contamination or air exposure.
Storing your starter tea correctly is essential for maintaining its quality and ensuring the success of your kombucha brewing. Here are some storage tips to help you keep your starter tea fresh and healthy.
First, make sure to store the jar in a cool and dark place, away from direct sunlight. Sunlight can degrade the tea and affect the fermentation process.
Secondly, avoid storing the jar near strong odors as the starter tea is known to absorb smells easily.
Lastly, regularly check the seal of the jar to make sure it is still airtight. Troubleshooting common issues such as mold or off-flavors can often be traced back to improper storage.
Conclusion
In conclusion, making kombucha starter tea is like planting a seed of health and vitality. As the tea ferments and transforms, it symbolizes the potential for growth and transformation within ourselves.
Just as the tea becomes a nourishing elixir, so too can we cultivate a stronger, more resilient body and mind. By following the simple steps outlined in this guide, we can harness the power of kombucha to support our overall well-being.
So, let’s raise a glass to health and embark on this journey of kombucha brewing!

Arf, an author and an innovative enthusiast of coffee, coffee alternatives, and tea, plays a crucial role as a contributor to the esteemed Cappuccino Oracle platform. Renowned for his curiosity and passion for these captivating beverages, Arf has carved out a unique space for himself in the world of exploration and writing. He realized that coffee, coffee alternatives, and tea are not mere drinks to keep one awake, but universes of flavors and stories waiting to be explored.
Arf’s articles for Cappuccino Oracle blend meticulous research with personal experiences, providing readers with an in-depth understanding of various types of coffee, coffee alternatives, and tea, along with their unique characteristics, cultures, and histories. His honest reviews and engaging narratives guide readers on their own journeys, helping them discover their preferences and find their perfect brew.

As a passionate fan of kombucha, I have always been captivated by the complex process of crafting this probiotic-packed drink.
One essential element that often goes overlooked is the selection of tea. Just like a painter carefully chooses their colors, the type of tea we use in kombucha can greatly impact its taste and quality.
So, which tea is truly the best for kombucha? Join me as we dive into the world of tea varieties, flavor profiles, and blending techniques to uncover the answer together.
Key Takeaways
- Caffeine from tea is essential for nourishing the SCOBY during kombucha fermentation.
- Traditional teas like black and green are recommended for optimal fermentation results.
- Black tea provides a strong base with a robust flavor, while green tea offers a lighter taste with potential for complex flavors.
- Experimenting with different tea varieties and blends enhances the flavor profiles of kombucha.
The Importance of Tea Selection for Kombucha
When making kombucha, it’s crucial that you choose the right tea. The role of caffeine in kombucha and the impact of herbal teas on kombucha fermentation are important factors to consider.
Caffeine plays a vital role in the fermentation process as it provides nourishment for the SCOBY (symbiotic culture of bacteria and yeast) that transforms the tea into kombucha. The caffeine content in black and green teas is ideal for supporting the SCOBY’s growth and ensuring a healthy fermentation.
On the other hand, herbal teas, such as chamomile or hibiscus, may not contain enough nutrients for the SCOBY to thrive, leading to weak fermentation or a lack of desired flavors. Therefore, it’s best to stick to traditional teas like black or green when brewing kombucha for optimal results.
Factors to Consider When Choosing Tea for Kombucha
One important factor to consider when selecting tea for kombucha is the steeping time. The length of time that the tea leaves are steeped in hot water can significantly impact the flavor and health benefits of the final kombucha brew.
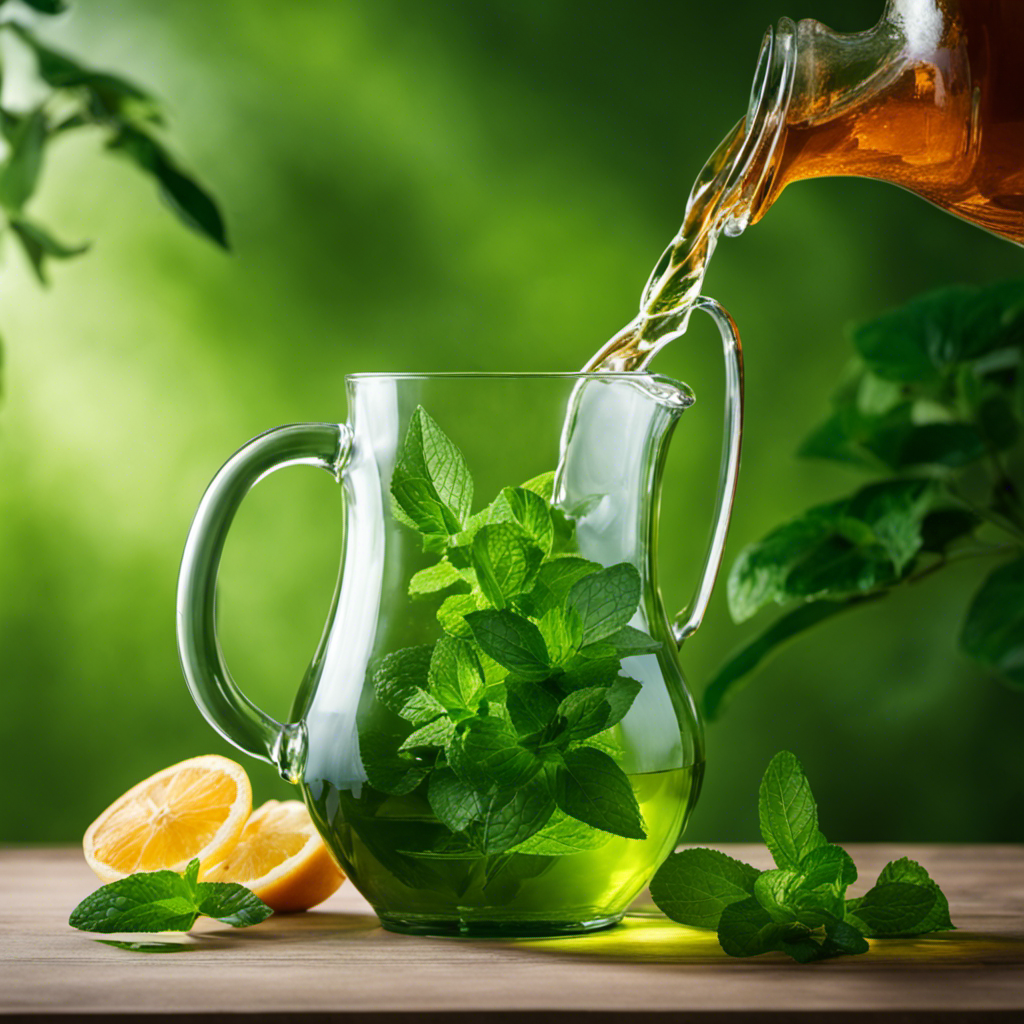
Generally, black, green, and white teas are the most common choices for kombucha. Black tea, with its robust flavor, provides a strong base for fermentation. Green tea, on the other hand, offers a lighter and more delicate taste. White tea, with its subtle floral notes, can add a unique flavor profile to the kombucha.
Factors to consider when choosing tea for kombucha include the quality of the tea leaves, the presence of any additives or flavors, and personal taste preferences. Ultimately, the right tea selection can contribute to a delicious and healthful kombucha brew.
Popular Tea Varieties for Brewing Kombucha
Among the popular tea varieties for brewing kombucha, black tea is known for its robust flavor that provides a strong base for fermentation. However, it is not the only option to consider. Exploring green tea options can also be beneficial, as it brings a lighter and more delicate taste to the final product. Green tea is packed with antioxidants and has been linked to numerous health benefits, including improved brain function and a lower risk of heart disease. To help you make an informed decision, here is a comparison between the two:
| Black Tea | Green Tea |
|---|---|
| Robust flavor | Light and delicate taste |
| Strong base for fermentation | Potential for complex flavors |
| Rich in polyphenols | High in antioxidants |
Both black and green tea have their own unique qualities that can contribute to the fermentation process and the overall taste of your kombucha. So, whether you prefer the boldness of black tea or the subtlety of green tea, the choice ultimately depends on your personal preference and desired flavor profile.
Exploring the Flavor Profiles of Different Teas in Kombucha
If you want to explore the flavor profiles of different teas in your kombucha, you can try experimenting with a variety of options to find the one that suits your taste preferences. When it comes to kombucha, the type and quality of tea you use can greatly impact the fermentation process and the final taste of your brew.
By exploring tea origins in kombucha, you can discover unique flavors and characteristics that each tea brings to the table. Tea quality is also crucial, as higher quality teas tend to produce a more complex and well-rounded flavor profile in kombucha. The type of tea you choose, whether it’s black, green, white, or herbal, will contribute its own distinct notes to the final product.
So, let’s dive into the world of tea and discover how different varieties can elevate your kombucha-making experience.
Now that we understand the importance of tea in kombucha fermentation, let’s move on to some tips for experimenting with tea blends in kombucha-making.
Tips for Experimenting With Tea Blends in Kombucha-Making
Let’s dive into some tips for experimenting with different tea blends when making kombucha. When it comes to creating unique and delicious flavors in your kombucha, the tea blend ratios and flavor combinations you choose play a crucial role. By combining different types of tea, you can create a complex and well-balanced flavor profile.
Here are some tips to get you started:
-
Experiment with different ratios: Try mixing black tea with green tea or herbal tea to create a unique flavor. Start with a 50/50 ratio and adjust to your taste.
-
Blend flavors: Combine fruity teas with floral teas or add a hint of spice to create interesting flavor combinations.
-
Consider caffeine levels: If you prefer a caffeine-free kombucha, try using herbal teas as the base. For a stronger kick, opt for black tea or a blend with higher caffeine content.
-
Don’t be afraid to get creative: Add dried fruits, herbs, or spices to enhance the flavor and aroma of your kombucha.
With these tips, you’ll be able to create a wide variety of delicious kombucha flavors using different tea blends.
Happy brewing!
Conclusion
In conclusion, the choice of tea for kombucha is a crucial factor in determining the flavor and quality of the final brew. By considering factors such as caffeine content, flavor profiles, and fermentation properties, one can select the best tea for their kombucha-making endeavors.
Whether it’s the earthy notes of black tea, the floral aromas of green tea, or the delicate flavors of white tea, there is a tea out there to suit every kombucha enthusiast’s taste.
So, why not embark on a tea-tasting journey and discover the perfect blend for your homemade kombucha?

Noah, the Editor-in-Chief at Cappuccino Oracle, plays a pivotal role in shaping the voice and vision of our renowned platform. With an unwavering passion for coffee, coffee alternatives, and tea, Noah leads Cappuccino Oracle towards new horizons in the realm of coffee journalism.
Beyond his professional responsibilities, Noah serves as a mentor and guiding force for his team. His dedication to journalistic excellence and genuine love for coffee, coffee alternatives, and tea continue to inspire and motivate the Cappuccino Oracle family. In the ever-evolving world of these beverages, Noah’s leadership ensures that our platform remains at the forefront, delivering enlightening and enjoyable content to our readers worldwide.

How to Make Kombucha Tea Fizzy
How to Make Kombucha Starter Tea
Which Tea Is Best for Kombucha
What Is Kombucha Starter Tea
What Is Green Tea Kombucha Good for

How to Make Americano With Moka Pot

How to Make Korean Iced Americano

How to Make Iced Americano With Instant Coffee

What to Add to an Americano at Starbucks

How to Make Americano With Bialetti

Discover the Power of KOS Mushroom Coffee

Top 10 Rated Mushroom Coffee Brands for a Boost

What Makes Caffeine-Free Mushroom Coffee Unique?

Rooibos Tea: A Guide to Safe Breastfeeding Practices

What Mushroom Can I Use as a Coffee Replacement?

-
 Americano3 weeks ago
How to Make Americano With Moka Pot
-
 Americano1 week ago
How to Make Korean Iced Americano
-
 Americano4 weeks ago
How to Make Iced Americano With Instant Coffee
-
 Americano4 weeks ago
What to Add to an Americano at Starbucks
-
 Americano3 weeks ago
How to Make Americano With Bialetti
-

 Americano3 weeks ago
How to Make Dutch Bros Americano
-

 Americano2 days ago
How to Make an Iced Americano With Nespresso
-

 Americano2 weeks ago
How Many Shots of Espresso for 16 Oz Americano