
Turmeric Tea
How To Remove Turmeric Stains From Skin
As a lover of all things natural, I’ve been experimenting with turmeric for years. I add it to my meals, drinks, and even face masks. But, as much as I love this spice, I can’t deny its staining power.
Turmeric stains are notoriously difficult to remove, especially from skin. Trust me, I’ve learned this the hard way. If you’ve ever cooked with turmeric or used it in your beauty routine, you know how frustrating it can be to deal with the yellow-orange stains it leaves behind.
But, fear not, because I’ve gathered some effective tips and tricks to help you remove those stubborn turmeric stains from your skin. With a little bit of patience and the right techniques, you can say goodbye to those pesky stains and enjoy the benefits of turmeric without any worry.
Key Takeaways
- Prevention techniques include using petroleum jelly or gloves to avoid turmeric stains.
- Natural remedies for removing stains include lemon juice and baking soda, turmeric powder and milk paste, coconut oil, and honey and sugar mixture.
- Store-bought products such as turmeric stain remover, makeup remover, and hydrogen peroxide can also be effective.
- Exfoliation can help lift away stubborn turmeric stains, and applying heat with a warm damp towel or heating pad can speed up the removal process.
Understanding Turmeric Stains
Don’t you hate it when turmeric stains your skin and it seems impossible to get rid of? Turmeric is an amazing spice that has been used for centuries in cooking and medicine, but it can also be a nuisance when it comes to staining skin.
The yellow pigment in turmeric, known as curcumin, is the main culprit behind these stains. When curcumin comes into contact with skin, it can cause a reaction that results in a yellow or orange color on the skin.
Turmeric stains can be particularly stubborn, especially if they’re not addressed immediately. However, with the right techniques, you can remove these stains and prevent them from happening in the first place.

In the next section, we’ll explore some prevention techniques that can help you avoid turmeric stains altogether.
Prevention Techniques
One simple way to prevent turmeric stains on your skin is to take preventive measures before handling the spice. Applying a protective layer of petroleum jelly or coconut oil on your hands or other exposed areas of skin can create a barrier between your skin and the turmeric, preventing it from staining your skin. This technique is especially useful if you’re handling large quantities of turmeric or using it in a recipe that requires you to touch it frequently.
While using a protective layer can be an effective short-term solution, there are also long-term solutions to preventing turmeric stains on your skin. Wearing gloves while handling turmeric can prevent the spice from coming into contact with your skin altogether. Additionally, using a spoon or other utensil to handle the spice instead of your hands can also prevent staining.
By taking these preventive measures, you can avoid the frustration of trying to remove stubborn turmeric stains from your skin. In the subsequent section, we’ll discuss natural remedies for removing turmeric stains from skin.
Natural Remedies
If you’re feeling frustrated with yellow discoloration on your hands after cooking, try mixing a small amount of lemon juice and baking soda together to create a natural exfoliant that can help reveal fresh, clean skin. It’s one of the many herbal remedies you can use to remove turmeric stains from your skin.
Another option is to make a paste out of turmeric powder and milk, which can help lighten the stain and leave your skin feeling soft and smooth.
When it comes to home remedies, there are plenty of options available to you. For instance, you can try rubbing your hands with coconut oil or using a mixture of honey and sugar to exfoliate your skin. These natural remedies can be just as effective as store-bought products, and they’re often more affordable and easily accessible.
However, if you’re looking for a quick fix or you’re dealing with a particularly stubborn stain, you may want to consider turning to the store-bought products section.
Store-Bought Products
When it comes to removing turmeric stains from skin, sometimes natural remedies just don’t cut it. That’s when store-bought products come in handy.
Three effective options are turmeric stain remover, makeup remover, and hydrogen peroxide. I’ve personally used all three and found them to be reliable solutions for getting rid of stubborn turmeric stains.
Turmeric Stain Remover
To get rid of those pesky turmeric stains on your skin, grab some lemon juice and baking soda and make a paste. Start by mixing a teaspoon of baking soda with a small amount of lemon juice until it forms a paste.
Apply the paste onto the affected area and gently rub it in a circular motion. Leave it on for a few minutes before rinsing it off with warm water. This method works well, especially for removing turmeric stains caused by a turmeric paste or turmeric face mask.
Turmeric stains can be stubborn and difficult to remove, but this simple and natural method can do wonders. However, if you have turmeric stains on your clothes or other surfaces, this method may not work.
In the next section, we’ll discuss how to remove turmeric stains from clothes and other surfaces using makeup remover.
Makeup Remover
After trying out various turmeric stain removers, I realized that some of them were too harsh on my skin. As someone who values my skin’s health, I started to look for alternative ways to remove turmeric stains without causing any damage.
That’s when I stumbled upon makeup removing techniques that are gentle on the skin. Makeup removers are designed to remove stubborn makeup from the skin, and they can also help to remove turmeric stains. Some of the best makeup removing techniques include using micellar water, oil-based cleansers, and cleansing balms. These products dissolve the turmeric stains without drying out the skin.
Additionally, incorporating skin care tips like using a moisturizer after removing the stains can help to soothe the skin. With these gentle makeup removing techniques and skin care tips, I was able to remove the turmeric stains from my skin without any damage.
And now, I can move on to the next step, which involves using hydrogen peroxide to tackle tougher stains.
Hydrogen Peroxide
Now, you can effectively tackle tougher stains with the help of hydrogen peroxide. Hydrogen peroxide is a common household item that has various uses in skincare. It’s often used as a skin lightener, teeth whitener, and wound cleanser.
When it comes to removing turmeric stains from skin, hydrogen peroxide can also be an effective solution. However, it’s important to note that using hydrogen peroxide on the skin comes with some risks. It can cause skin irritation, redness, and dryness. Therefore, it should be used in moderation and diluted with water before applying it to the skin. Additionally, it’s not recommended for individuals with sensitive skin or those prone to allergies.
With that said, hydrogen peroxide can be a useful tool in removing stubborn turmeric stains from skin when used safely and correctly.
Now that we’ve covered the uses and risks of hydrogen peroxide in skincare, let’s move on to the next step of removing turmeric stains from skin – using exfoliation.
Using Exfoliation
Gently scrubbing your skin with an exfoliating cleanser can help lift away stubborn turmeric stains. Exfoliation works by removing dead skin cells on the surface of the skin, which can trap pigment and cause discoloration. Additionally, exfoliation promotes cell turnover, which can help fade the appearance of turmeric stains over time.
Here are three DIY recipes that incorporate exfoliation to help remove turmeric stains:
-
Mix equal parts of baking soda and water to create a paste. Gently massage the paste onto the affected area, then rinse with warm water.
-
Combine 1 tablespoon of honey with 1 tablespoon of sugar. Apply the mixture to the skin and massage in circular motions for 1-2 minutes. Rinse with warm water.
-
Create a paste using 1 tablespoon of olive oil and 1 tablespoon of sugar. Apply to the affected area and gently rub for 1-2 minutes. Rinse with warm water.
Now that you’ve exfoliated your skin to remove turmeric stains, the next step is to apply heat to further aid in the removal process.
Applying Heat
To speed up the process of getting rid of the pesky yellow marks, try applying a warm compress to the affected area, like a cozy hug for your skin. Heat application can help dissolve the turmeric pigments and make them easier to remove.
You can use a warm damp towel or a heating pad to apply gentle heat to the affected area. Make sure the temperature is not too high to avoid burning your skin.
There are benefits and risks to using heat application to remove turmeric stains. The benefits include faster removal of the stains and a soothing effect on the skin. However, excessive heat can damage the skin and cause burns. It’s important to use caution when applying heat and to stop immediately if you feel any discomfort.
In the next section, we will discuss how to remove stains from specific areas.
Removing Stains from Specific Areas
If you’ve spilled turmeric on your clothes or carpet, tackling the stain can be tricky. But with a few household items, you can easily get rid of the stubborn yellow marks. Here are some tips to remove turmeric stains from specific areas:
-
Removing stains from clothes: Start by blotting the stain with a paper towel to remove as much of the turmeric as possible. Then, mix equal parts of dish soap and hydrogen peroxide and apply the solution directly to the stain. Let it sit for 10-15 minutes before washing the garment in cold water. Repeat the process until the stain disappears.
-
Nail polish remover: If you accidentally got turmeric on your nails or skin, try using nail polish remover. Soak a cotton pad with nail polish remover and gently rub it on the affected area. Be careful not to get it in your eyes or mouth. This method may take a few attempts, but it should eventually remove the stain.
-
Removing stains from carpet: First, scrape off any excess turmeric with a spoon or knife. Then, mix equal parts of white vinegar and water and apply the solution to the stain. Blot the area with a paper towel until the stain disappears. If the stain is still visible, repeat the process or try using a carpet cleaner.
It’s important to note that if the stain persists or if you’re dealing with a large stain, seeking professional help may be the best option. A professional cleaner can remove the stain without damaging the fabric or carpet.
Seeking Professional Help
Don’t hesitate to reach out to a professional cleaner if you’re dealing with a persistent turmeric stain on your skin. While there are several home remedies to try, some stains may be too stubborn to remove on your own. In such cases, seeking professional skincare help can make all the difference.
A dermatologist consultation can also be helpful if you have sensitive skin or if you’re dealing with a particularly stubborn turmeric stain. They can recommend safe and effective products and treatments to help remove the stain without causing further irritation or damage. With the help of a professional, you can rest assured that your skin will be left looking and feeling healthy and glowing. Transitioning into the subsequent section about ‘tips for sensitive skin’, it’s important to keep in mind that these tips can also be useful for those who have had a professional skincare consultation.
Tips for Sensitive Skin
When it comes to taking care of my sensitive skin, I always make sure to do a patch test before trying out any new products. This helps me avoid any potential allergic reactions or irritation.
I also use gentle techniques when cleansing and exfoliating to prevent any damage to my skin.
Patch Test
Before you start using any new product, it’s always a good idea to do a patch test to ensure that you won’t have any adverse reactions. The same goes for trying out these turmeric stain removal methods on your skin. The benefits of patch testing are numerous, as it helps you identify any allergies or sensitivities before applying a product to your entire face or body.
To do a patch test, apply a small amount of the turmeric stain removal method on a small area of your skin, preferably on the inside of your elbow or behind your ear. Leave it on for 24 hours and observe any adverse reactions such as redness, itching, or swelling. If there are no negative reactions, then it’s safe to use the method on your skin.
One of the common mistakes while patch testing is not waiting long enough to observe any reactions. Some people may experience delayed reactions after 24 hours, so it’s important to wait for at least 48 hours before using the method on your skin.
Another mistake is not testing the product on the area where the stain is located. It’s important to test the product on the affected area to ensure that it won’t cause any adverse reactions or worsen the stain.
Once you’ve successfully patch tested the turmeric stain removal method, you can move on to using gentle techniques to remove the stain from your skin.
Gentle Techniques
To tenderly treat your tainted tissue, try these tips that are terrifically tame and tactful. If you have sensitive skin, it’s essential to use gentle methods to avoid irritation and further damage. Here are some alternative methods to remove turmeric stains from skin without causing harm:
-
Use milk: Milk is a natural cleanser that is gentle on the skin. Soak a cotton ball in milk and dab it on the affected area. Leave it on for a few minutes before rinsing it off with warm water.
-
Apply honey: Honey has antibacterial properties that can help soothe and heal the skin. Apply a small amount of honey to the stained area and leave it on for 10-15 minutes before washing it off with warm water.
-
Use baking soda: Baking soda is a mild exfoliant that can help remove dead skin cells and turmeric stains. Mix baking soda with water to form a paste and gently massage it onto the affected area. Rinse it off with warm water.
-
Try lemon juice: Lemon juice is a natural bleaching agent that can help lighten turmeric stains. Squeeze some lemon juice onto a cotton ball and apply it to the affected area. Leave it on for a few minutes before rinsing it off with warm water.
Remember to moisturize your skin after using lemon juice as it can be drying.
Frequently Asked Questions
Can turmeric stains on skin be harmful?
Are turmeric stains on skin harmful? Turmeric is generally safe for topical use but can cause temporary yellowing of the skin. Prevent stains by using gloves or a barrier cream when handling turmeric.
How long does it usually take for turmeric stains to fade from skin?
Turmeric stains on skin can take a few days to fade, but there are natural remedies for quick removal. Rubbing lemon juice or baking soda paste on the affected area can help lighten the stain.
Are there any foods or beverages that can help prevent turmeric stains on skin?
To prevent turmeric stains on skin, I recommend incorporating turmeric into your diet gradually to build up your tolerance. Additionally, you can try natural remedies like applying a mixture of lemon juice and honey to the skin before cooking with turmeric.
Can turmeric stains on nails be removed with the same techniques as on skin?
Turmeric nail stains can be removed using similar methods as on skin, such as lemon juice or a baking soda paste. However, preventing turmeric stains on nails is best achieved by wearing gloves or applying a barrier cream before handling turmeric.
What should I do if I experience an allergic reaction to a turmeric stain removal product?
If I experience an allergic reaction to a turmeric stain removal product, I should stop using it immediately and seek medical attention. Alternative remedies like aloe vera or coconut oil can be used with precautions such as patch testing before use.
Conclusion
Well, that’s all, folks! I hope you’ve found this article informative and helpful in removing those pesky turmeric stains from your skin.
Remember, prevention is key, so be sure to use protective measures when using turmeric in your cooking or beauty routine. If you do end up with a stain, don’t fret—there are plenty of natural remedies and store-bought products that can help.
But if all else fails and you’re still struggling with stubborn stains, don’t hesitate to seek professional help. And for those of you with sensitive skin, be sure to patch test any products or remedies before applying them to larger areas of your skin.
Trust me, the joy of having stain-free skin is worth the effort. So go forth and conquer those turmeric stains with confidence (and maybe a little hyperbole).

Noah, the Editor-in-Chief at Cappuccino Oracle, plays a pivotal role in shaping the voice and vision of our renowned platform. With an unwavering passion for coffee, coffee alternatives, and tea, Noah leads Cappuccino Oracle towards new horizons in the realm of coffee journalism.
Beyond his professional responsibilities, Noah serves as a mentor and guiding force for his team. His dedication to journalistic excellence and genuine love for coffee, coffee alternatives, and tea continue to inspire and motivate the Cappuccino Oracle family. In the ever-evolving world of these beverages, Noah’s leadership ensures that our platform remains at the forefront, delivering enlightening and enjoyable content to our readers worldwide.

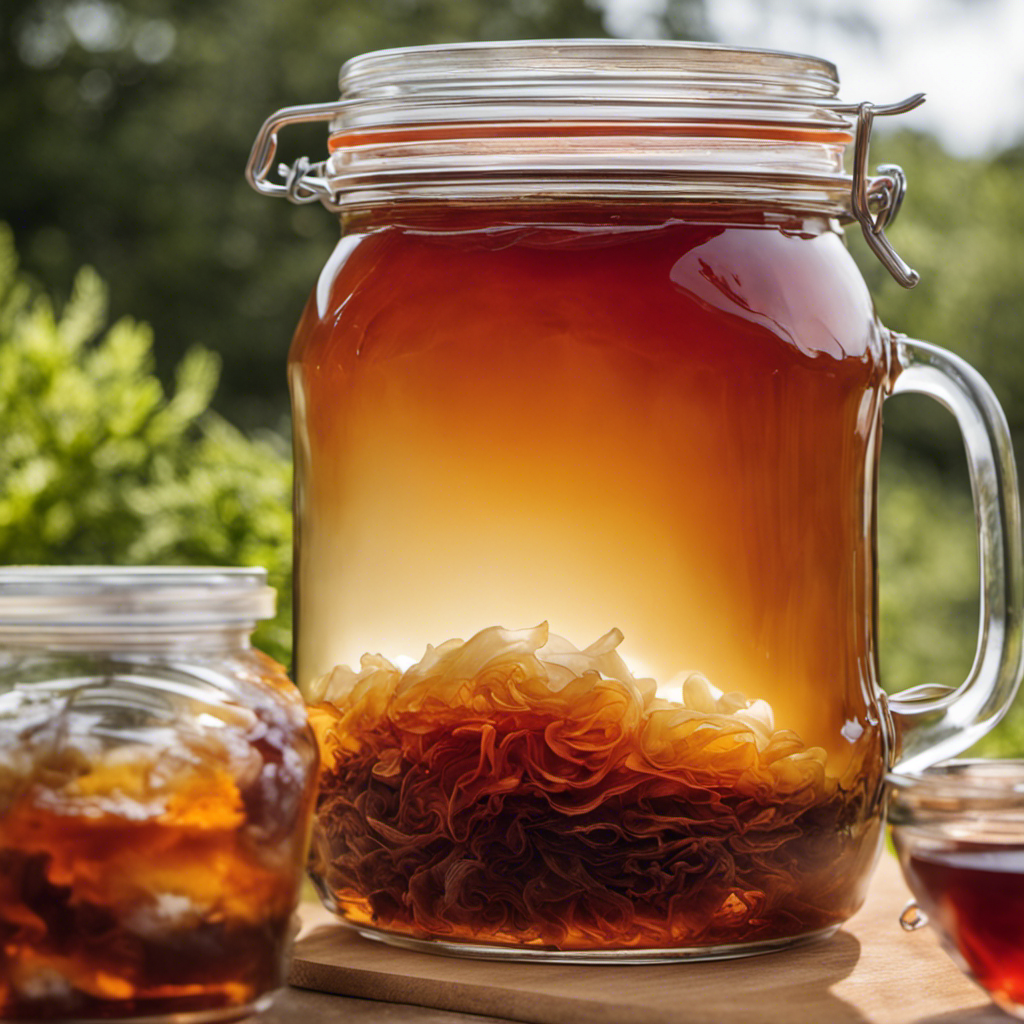
As I observe the graceful movement of the scoby in my fermenting vessel, I am astonished by the ability of this living organism to turn a basic cup of tea into a tangy and bubbly drink called kombucha.
In this article, I will delve into the fascinating world of kombucha fermentation and explore the role of the scoby in converting the tea into this probiotic-rich beverage.
We will uncover the factors that influence the scoby’s ability to perform this alchemical conversion and discover tips and tricks for achieving optimal tea to kombucha conversion.
Key Takeaways
- The scoby is essential for the fermentation process of kombucha, as it metabolizes sugars in the tea and produces organic acids, vitamins, and enzymes.
- Factors such as fermentation time, temperature, and tea-to-sugar ratio can affect the flavor and acidity of the final kombucha product.
- The scoby interacts with various components in tea, including caffeine, tannins, polyphenols, and sugars, enhancing the aromatics and adding complexity to the kombucha.
- To achieve optimal tea to kombucha conversion, it is important to use the proper temperature and steeping time for different types of tea, ensure water is free from contaminants, experiment with different tea blends, and get creative with unique flavors.
The Role of Scoby in Kombucha Fermentation
The scoby plays a crucial role in converting tea into kombucha. During the fermentation process, the scoby, which stands for ‘symbiotic culture of bacteria and yeast,’ acts as a living organism that metabolizes the sugars present in the tea. This metabolic activity results in the production of various compounds, including organic acids, vitamins, and enzymes, which give kombucha its unique flavor and health benefits.
Without the scoby, fermentation would not occur, and tea would remain just tea. The scoby acts as a biofilm, providing a surface for the microorganisms to adhere to and grow. It also creates a controlled environment by regulating the pH and oxygen levels, ensuring the optimal conditions for fermentation.
Therefore, the scoby is of utmost importance in kombucha production, as it drives the fermentation process and contributes to the transformation of tea into the tangy and fizzy beverage we know as kombucha.
In the following section, we will delve into the conversion process: tea to kombucha.
The Conversion Process: Tea to Kombucha
During fermentation, black or green tea mixed with sugar and the scoby undergoes a process that turns it into kombucha. This conversion process involves the interaction of various microorganisms that transform the tea and sugar mixture into a tangy and fizzy beverage.
To enhance the flavors of kombucha, different brewing techniques can be employed. These techniques include increasing the fermentation time, adjusting the temperature, and experimenting with different tea-to-sugar ratios. By manipulating these factors, a stronger and more complex flavor profile can be achieved.
Additionally, the type of tea used in kombucha fermentation can greatly impact the taste of the final product. Exploring different types of tea, such as black, green, oolong, or white tea, can result in unique kombucha flavors, ranging from earthy and robust to light and floral.
Factors Affecting Scoby’s Conversion of Tea to Kombucha
To enhance the flavors of your kombucha, you can experiment with different brewing techniques such as adjusting the fermentation time, temperature, and tea-to-sugar ratios. These factors greatly influence the fermentation process and can have a significant impact on the flavor profile of your kombucha. The fermentation time determines how long the bacteria and yeast in the scoby have to convert the tea and sugar into kombucha. This can range from 7 to 30 days, depending on your desired flavor and acidity. The temperature at which you ferment your kombucha also affects the flavor. Higher temperatures (around 80°F) result in a faster fermentation process and a more acidic flavor, while lower temperatures (around 70°F) produce a milder and smoother taste. Lastly, adjusting the tea-to-sugar ratio can alter the flavor intensity. A higher sugar content will yield a sweeter kombucha, while a lower sugar content will result in a more tart and tangy beverage.
| Factors Influencing Fermentation Process | Scoby’s Impact on Flavor Profile |
|---|---|
| Fermentation time | Sweetness and acidity |
| Temperature | Intensity of flavor |
| Tea-to-sugar ratio | Tartness and tanginess |
Understanding Scoby’s Interaction With Tea Components
When experimenting with brewing techniques, you can observe how different components in the tea interact with the scoby to create unique flavors. The scoby’s microbial ecosystem plays a crucial role in the fermentation process, breaking down the tea’s components and transforming them into kombucha.
Here’s a breakdown of the scoby’s interaction with tea components:
-
Caffeine: The scoby’s enzymes act on caffeine, breaking it down and reducing its concentration in the final brew.
-
Tannins: Tannins give tea its astringency. The scoby interacts with tannins, mellowing their flavor and reducing their impact on the kombucha’s taste.
-
Polyphenols: These compounds contribute to the tea’s antioxidant properties. The scoby metabolizes polyphenols, releasing flavorful metabolites and adding complexity to the kombucha.
-
Sugars: The scoby consumes sugars present in the tea, producing carbon dioxide and ethanol as byproducts.
-
Aromatics: The scoby’s fermentation process enhances the aromatics of the tea, resulting in a rich and diverse flavor profile.
Understanding these interactions allows brewers to manipulate the brewing process and create kombucha with varying flavors and characteristics.
Tips and Tricks for Optimal Tea to Kombucha Conversion
For the best results, it’s important to ensure the proper conversion of tea into kombucha by following these tips and tricks.
When it comes to brewing techniques, it’s crucial to use the right temperature and steeping time for your tea. Different types of tea require different brewing parameters, so be sure to research and follow the recommendations for each specific variety.
Additionally, pay attention to the quality of your water and make sure it is free from chlorine and other contaminants that can hinder the fermentation process.
As for flavor profiles, experiment with different tea blends to find the perfect combination that suits your taste buds. Some popular options include green tea, black tea, and herbal infusions. Don’t be afraid to get creative and try unique flavors like jasmine or earl grey.
Frequently Asked Questions
How Long Does It Take for the Scoby to Convert Tea Into Kombucha?
It takes several factors into account when determining how long it takes for the scoby to convert tea into kombucha. The presence of oxygen plays a crucial role in this conversion process.
Can I Use Any Type of Tea for Making Kombucha?
Using different types of tea for making kombucha can yield unique flavors and benefits. Green tea is commonly used, with its antioxidants and caffeine. Black tea provides a stronger flavor and more tannins, which aid in fermentation.
What Are the Signs That the Scoby Is Actively Converting Tea Into Kombucha?
Signs of active fermentation include the formation of a new scoby, a tangy taste, and the release of carbon dioxide bubbles. Kombucha benefits gut health due to the probiotics and organic acids it contains.
Can I Speed up the Conversion Process by Adding More Scoby to the Tea?
Adding more scoby to the tea may speed up the fermentation process. The benefits of using multiple scobies include increased microbial activity and a faster conversion of tea to kombucha.
Is There a Specific Temperature Range That Is Ideal for Scoby to Convert Tea Into Kombucha?
The ideal temperature range for scoby fermentation depends on several factors. Factors that can affect scoby’s ability to convert tea into kombucha include temperature, pH level, oxygen availability, and sugar content.
Conclusion
In conclusion, the role of Scoby in converting tea to kombucha is essential for the fermentation process.
Through its interaction with various components in tea, Scoby undergoes a complex conversion process that results in the creation of this popular fermented beverage.
Factors such as temperature, time, and tea quality can affect Scoby’s ability to convert tea effectively.
By understanding these interactions and implementing proper techniques, one can achieve optimal tea to kombucha conversion.
So, remember to maintain the right conditions and give your Scoby the best tea to ensure a successful fermentation process.
Noah, the Editor-in-Chief at Cappuccino Oracle, plays a pivotal role in shaping the voice and vision of our renowned platform. With an unwavering passion for coffee, coffee alternatives, and tea, Noah leads Cappuccino Oracle towards new horizons in the realm of coffee journalism.
Beyond his professional responsibilities, Noah serves as a mentor and guiding force for his team. His dedication to journalistic excellence and genuine love for coffee, coffee alternatives, and tea continue to inspire and motivate the Cappuccino Oracle family. In the ever-evolving world of these beverages, Noah’s leadership ensures that our platform remains at the forefront, delivering enlightening and enjoyable content to our readers worldwide.

I am constantly seeking out low-fat beverages to maintain my health. That’s why I was curious to explore the benefits of kombucha tea.
In this article, we’ll dive into the nutritional profile of kombucha tea and explore its fat content. I’ll also share the health benefits of this popular drink and compare its fat content to other beverages.
So, if you’re curious about how much fat is in kombucha tea and how it fits into a low-fat diet, keep reading!
Key Takeaways
- Kombucha tea has a low-fat content, with less than 1 gram of fat per cup.
- It is also low in calories, with an average of 30 calories per cup, making it suitable for weight management.
- Kombucha tea is a probiotic powerhouse, supporting a healthy gut and digestion.
- Compared to high-fat beverages like soda and fruit juice, kombucha is a healthier option for reducing fat intake.
The Nutritional Profile of Kombucha Tea
You’ll be interested to know that kombucha tea has a low-fat content. This makes it a great beverage option for those who are looking to lose weight or maintain a healthy weight. In fact, a cup of kombucha tea typically contains less than 1 gram of fat.
This low fat content is one of the reasons why kombucha tea is often recommended as a healthier alternative to sugary drinks or high-fat beverages. Additionally, kombucha tea is also low in calories, with an average of 30 calories per cup.
This combination of low fat and low calorie content makes kombucha tea a suitable choice for individuals who are watching their weight. Understanding the fat content in kombucha tea is important in order to make informed choices about your diet and overall health.
Understanding the Fat Content in Kombucha Tea
Understanding the amount of fat in kombucha tea can be beneficial when it comes to managing your weight. Fortunately, kombucha tea is virtually fat-free, making it a great choice for those looking to shed some pounds. With its low fat content, kombucha tea can be a valuable addition to a weight loss plan.
This fermented beverage is made from tea, sugar, and a symbiotic culture of bacteria and yeast (SCOBY), which act together to create a tangy, fizzy drink. The fermentation process breaks down the sugars in the tea, resulting in a beverage that is low in calories and fat. So, if you’re watching your fat intake while trying to lose weight, kombucha tea can be a refreshing and guilt-free option.
Now that we’ve explored the fat content of kombucha tea, let’s delve into its numerous health benefits.
Exploring the Health Benefits of Kombucha Tea
If you’re looking to improve your overall health, exploring the benefits of kombucha tea can be a great place to start. Not only is it a refreshing beverage, but it also offers numerous health benefits.
Here are four reasons why you should consider incorporating kombucha tea into your daily routine:
-
Probiotic Powerhouse: Kombucha tea is fermented using a SCOBY (Symbiotic Culture of Bacteria and Yeast), which results in the production of beneficial bacteria and yeast. These probiotics can support a healthy gut and improve digestion.
-
Immune Boosting: The fermentation process of kombucha tea produces organic acids, such as acetic acid and gluconic acid, which have antimicrobial properties and can help strengthen the immune system.
-
Detoxification: Kombucha tea contains antioxidants and enzymes that aid in the detoxification process by supporting the liver’s natural detoxifying abilities.
-
Potential Health Benefits: Some studies suggest that kombucha tea may have potential benefits such as reducing inflammation, improving heart health, and supporting mental health.
Overall, kombucha tea can be a delicious and beneficial addition to your daily routine, thanks to its fermentation process and probiotic properties.
How Does Kombucha Tea Compare to Other Beverages in Terms of Fat
When it comes to comparing kombucha tea to other beverages, you’ll find that it generally has a lower fat content. This makes kombucha a healthier option for those who are watching their fat intake.
Let’s take a closer look at how kombucha compares to soda and fruit juice in terms of fat content.
Soda is known for being high in sugar and calories, but it also tends to have a higher fat content compared to kombucha. This is because soda often contains added fats like high fructose corn syrup, which can contribute to weight gain and other health issues.
On the other hand, fruit juice can vary in its fat content depending on the type and brand. While some fruit juices may contain small amounts of fat, it is generally lower than what you would find in soda. However, when compared to kombucha, fruit juice can still have a higher fat content.
Overall, if you’re looking to reduce your fat intake, opting for kombucha over soda or fruit juice can be a wise choice.
Tips for Incorporating Kombucha Tea Into a Low-Fat Diet
To incorporate kombucha into a low-fat diet, try adding a splash of it to your morning smoothie for a tangy twist. Here are four tips for incorporating kombucha tea into a low-fat diet:
-
Swap out sugary beverages: Replace high-fat drinks like soda or sugary juices with kombucha. Not only does kombucha have a lower fat content, but it also provides a refreshing and healthier alternative.
-
Use it as a marinade: Kombucha can be used as a flavorful marinade for meats and vegetables. Its tangy taste adds a unique twist to your dishes without adding unnecessary fat.
-
Make kombucha popsicles: Freeze kombucha into popsicle molds for a delicious and low-fat treat. It’s a great way to satisfy your sweet tooth without compromising your diet.
-
Mix it into dressings: Create a low-fat salad dressing by combining kombucha with olive oil, herbs, and spices. It adds a zesty flavor while keeping the fat content low.
Incorporating kombucha tea into a low-fat diet not only helps reduce fat intake but also provides numerous health benefits. Its probiotic properties support a healthy gut and immune system. Compared to other high-fat beverages, kombucha is a smart choice for those looking to maintain a low-fat diet.
Frequently Asked Questions
Can Drinking Kombucha Tea Help With Weight Loss?
Drinking kombucha tea may aid in weight loss. It’s believed to boost metabolism and reduce appetite. However, scientific evidence is limited, and other factors like diet and exercise play a significant role in overall effectiveness.
Is Kombucha Tea High in Calories?
Kombucha tea is a low-calorie beverage that can be enjoyed guilt-free. It contains minimal fat content, making it a healthy choice for those watching their calorie intake. So, go ahead and sip away!
Can Kombucha Tea Replace Other High-Fat Beverages in My Diet?
Kombucha tea can be a low-fat alternative to high-fat beverages in your diet. It is beneficial for weight management as it contains minimal fat content, making it a healthier choice.
Can Kombucha Tea Be a Part of a Low-Carb Diet?
Yes, kombucha tea can be a part of a low-carb diet. It has many benefits, such as aiding in weight loss and promoting ketosis. Incorporating kombucha into your diet can help you achieve your low-carb goals.
What Are the Potential Side Effects of Drinking Kombucha Tea?
Potential side effects of drinking kombucha tea include upset stomach, allergic reactions, and lactic acidosis. These health risks can be minimized by consuming it in moderation and ensuring the tea is properly brewed and stored.
Conclusion
In conclusion, after exploring the nutritional profile and fat content of kombucha tea, it’s evident that this fermented drink is an excellent choice for those following a low-fat diet.
With zero grams of fat per serving, kombucha tea provides a refreshing and healthy alternative to other high-fat beverages.
Its numerous health benefits, such as promoting gut health and boosting the immune system, make it a worthy addition to any diet.
So why not raise a glass of kombucha tea and toast to a healthier you?

Justin is a seasoned author, coffee and tea enthusiast, and an essential member of the Cappuccino Oracle team. With a keen appreciation for the complexities of coffee, coffee alternatives, and tea, Justin has dedicated his professional career to exploring these realms and sharing his insights with readers worldwide.
Justin’s immersion in the world of coffee, coffee alternatives, and tea began at a young age, kindling a passion that extended beyond mere consumption. This love for these beverages led him to combine his talent for writing with his devotion to coffee and tea, bringing him to Cappuccino Oracle as a dedicated author.
As an experienced homebrewer, I know how crucial it is to achieve the ideal balance in each batch of jun kombucha.
It’s not just about the sweetness or the tanginess; it’s about achieving that elusive tea strength that brings out the best flavors.
In this article, I will guide you through the art of measuring tea for jun kombucha, taking into account factors that affect the taste and sharing tips to help you create a brew that will leave you truly satisfied.
Key Takeaways
- Use a 1:15 ratio of tea to water for the perfect balance of flavors.
- Consider the strength of the tea; stronger teas require fewer leaves.
- Adjust the amount of tea used based on the batch size.
- Experiment with different brewing times to achieve the desired tea strength.
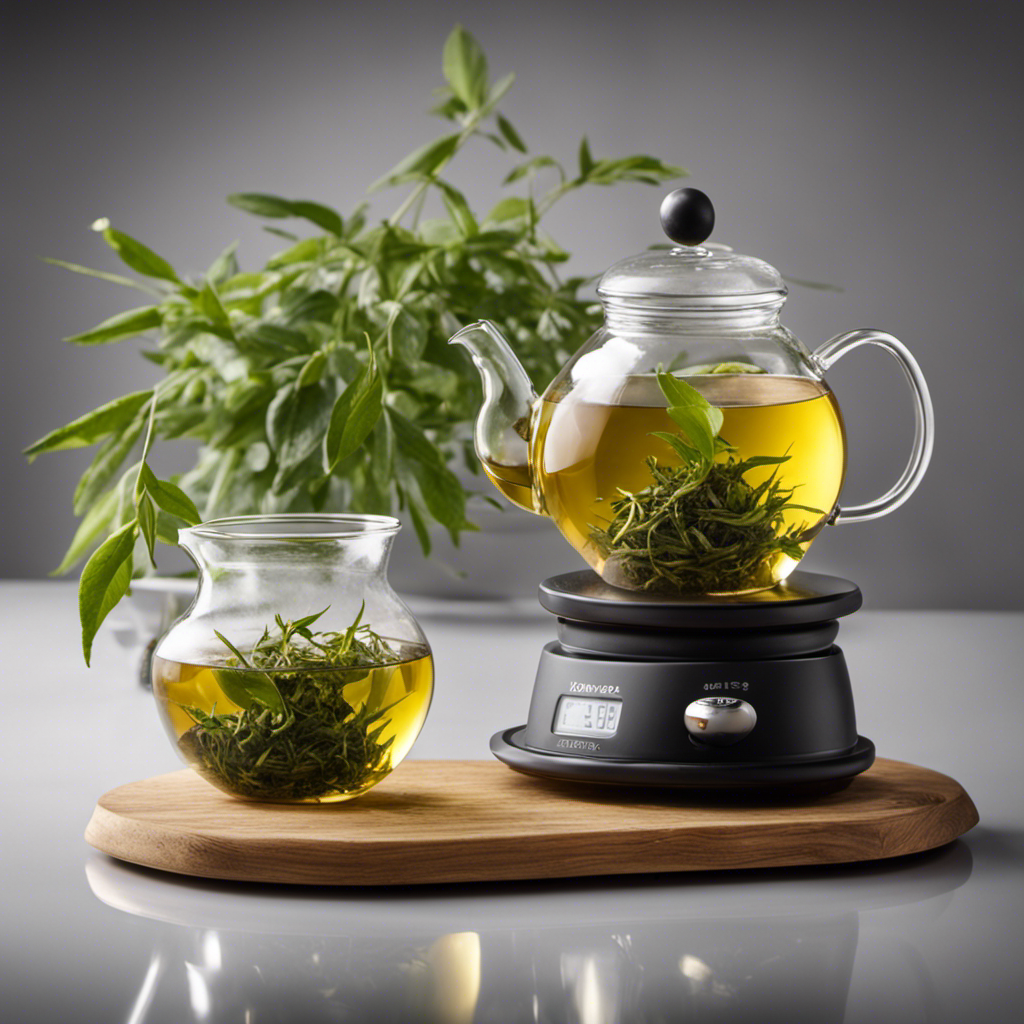
Understanding the Tea-to-Water Ratio
To achieve the perfect tea-to-water ratio for your jun kombucha, you should use a 1:15 ratio of tea to water. This ratio ensures that you extract the optimal flavors from the tea leaves while maintaining the right balance of water for fermentation.
When brewing jun kombucha, it is important to pay attention to the tea brewing techniques and steeping time. Start by measuring out 1 part tea to 15 parts water. For example, if you have 1 tablespoon of tea, you would use 15 tablespoons of water. This ratio allows the tea leaves to steep properly, releasing their flavors and nutrients into the water.
Steeping time can vary depending on the type of tea you are using, but generally, for jun kombucha, a steeping time of 7-10 minutes is recommended. This ensures that the tea is strong enough to provide flavor and support fermentation, but not overly bitter.
Factors Affecting the Amount of Tea Needed
When making your jun kombucha, you’ll need to consider various factors that affect the amount of tea required. Factors influencing tea fermentation and the type of tea you choose play a significant role in determining the right amount of tea for your jun kombucha.
The first factor to consider is the strength of the tea. Stronger teas, such as black tea, will require less tea leaves compared to lighter teas like green or white tea. Additionally, the desired flavor profile of your jun kombucha will also impact the amount of tea needed. For a stronger and more robust flavor, you may choose to use a higher tea-to-water ratio. On the other hand, if you prefer a milder taste, you can reduce the amount of tea used.
These factors, along with your personal preferences, will guide you in selecting the perfect tea for your jun kombucha.
Now, let’s dive into the recommended tea measurements for jun kombucha.
Recommended Tea Measurements for Jun Kombucha
Consider using the recommended tea measurements for your jun kombucha to ensure the perfect balance of flavors in your brew.
When it comes to brewing techniques for jun kombucha, the amount of tea you use plays a crucial role in determining the flavor profiles of your final product. Too much tea can result in a strong, overpowering taste, while too little can leave your brew lacking in depth.
For a standard batch of jun kombucha, it is generally recommended to use 1 tablespoon of loose leaf tea per 1 cup of water. This ratio allows the flavors of the tea to infuse into the brew without overpowering the delicate flavors of the honey and the SCOBY.
However, feel free to adjust the measurements according to your personal taste preferences.
Adjusting Tea Quantity for Different Batch Sizes
For different batch sizes, you can easily adjust the amount of tea used in your brew. When it comes to jun kombucha, experimenting with tea proportions is key to finding the perfect balance of flavors and fermentation.
Whether you’re making a small one-gallon batch or a larger five-gallon batch, the ratio of tea to water remains consistent, but the total amount of tea used will vary.
As a general guideline, for a one-gallon batch, you would typically use around 1-2 tablespoons of tea leaves. If you’re making a larger five-gallon batch, you might increase the amount to 1/4 cup or more.
It’s always a good idea to start with a smaller amount and adjust to your taste preferences. Remember, the strength of the tea will influence the overall taste of your jun kombucha, so don’t be afraid to experiment and find the perfect tea-to-water ratio for your desired batch size.
Tips for Achieving the Perfect Tea Strength in Jun Kombucha
To achieve the perfect tea strength in your jun kombucha, start by experimenting with different brewing times. Brewing techniques play a crucial role in determining the taste and potency of your kombucha.
It is important to find the right balance between brewing time and tea strength to achieve a well-rounded flavor profile. Start by choosing the right tea blend for your jun kombucha. Green tea and honey are the traditional ingredients, but you can also experiment with other tea varieties like white tea or jasmine tea. Each tea blend will result in a unique flavor profile, so don’t be afraid to try different combinations.
Remember to monitor the brewing time closely, as a longer steeping time can result in a stronger tea flavor. With practice and experimentation, you will discover the perfect tea strength for your jun kombucha.
Frequently Asked Questions
Can I Use Any Type of Tea for Making Jun Kombucha?
Yes, any type of tea can be used for making jun kombucha. The tea selection will affect the flavor profile of the final product. It is important to consider the brewing time for different types of tea.
How Long Should I Steep the Tea Leaves Before Adding the Starter Culture?
To achieve the perfect flavor profile in Jun kombucha, it is crucial to know how to properly steep tea leaves. Steeping time will depend on the type of tea used, but generally, 5-7 minutes should suffice before adding the starter culture.
Should I Use Loose Tea Leaves or Tea Bags for Making Jun Kombucha?
For making jun kombucha, I prefer using loose tea over tea bags. Loose tea leaves allow for better flavor extraction and provide more control over the strength of the brew. Plus, loose tea offers a wider variety of options for experimenting with different flavors.
Is It Necessary to Use Organic Tea for Making Jun Kombucha?
Using organic tea for making jun kombucha is not necessary, but it offers health benefits. Organic tea is free from pesticides, ensuring a cleaner brew. However, conventional tea can still be used if desired.
Can I Reuse the Tea Leaves From a Previous Batch of Jun Kombucha to Make a New Batch?
Yes, you can reuse tea leaves from a previous batch of jun kombucha to make a new one. However, using fresh tea leaves has its benefits, such as ensuring a better flavor profile and maximizing the health benefits of the tea.
Conclusion
In conclusion, achieving the perfect tea strength in Jun Kombucha requires understanding the tea-to-water ratio and considering factors that affect the taste.
While some may argue that using less tea would save money, it is important to note that the recommended tea measurements are crucial for a well-balanced and flavorful brew.
Adjusting the tea quantity for different batch sizes is also essential to ensure consistency.
By following these guidelines, you can create a delicious Jun Kombucha that will satisfy your taste buds and provide the numerous health benefits associated with this fermented beverage.

Arf, an author and an innovative enthusiast of coffee, coffee alternatives, and tea, plays a crucial role as a contributor to the esteemed Cappuccino Oracle platform. Renowned for his curiosity and passion for these captivating beverages, Arf has carved out a unique space for himself in the world of exploration and writing. He realized that coffee, coffee alternatives, and tea are not mere drinks to keep one awake, but universes of flavors and stories waiting to be explored.
Arf’s articles for Cappuccino Oracle blend meticulous research with personal experiences, providing readers with an in-depth understanding of various types of coffee, coffee alternatives, and tea, along with their unique characteristics, cultures, and histories. His honest reviews and engaging narratives guide readers on their own journeys, helping them discover their preferences and find their perfect brew.


Dabbsson DBS3000B Review: Portable Power for All Needs
Join the revolution of portable power with the Dabbsson DBS3000B, a game-changer for all your energy needs.


Suncast Tremont Shed Review
Starting with the letter 'S', discover why the Suncast Tremont Shed stands out for its durability, functionality, and modern design...


Ispring WCS50KG Water Softener Review
Uncover the compact and efficient Ispring WCS50KG Water Softener, a sleek solution for improving water quality that promises hassle-free installation...


RealTruck Roll-N-Lock M-Series Tonneau Cover Review
Yearning for a reliable and stylish tonneau cover?


Sojag Portland Gazebo Review: Outdoor Sun Shelter Insights
Optimize your outdoor space with the sturdy Sojag Portland Gazebo - discover why it's a must-have for sun shelter seekers!


Arrow Carports Galvanized Steel Carport Review
Meticulously designed for durability and ease of assembly, the Arrow Carport offers robust protection for vehicles and equipment – an...


ShelterLogic ShelterTube Garage Review
Tackle your outdoor storage needs with the durable and stylish ShelterLogic ShelterTube Garage, designed to withstand harsh weather conditions.


RealTruck Roll-N-Lock M-Series Cover Review
Take a look at the RealTruck Roll-N-Lock M-Series Cover for your Chevy/GMC Silverado/Sierra - a secure, user-friendly option that enhances...


RealTruck Roll-N-Lock M-Series Tonneau Cover Review
Just how secure is the RealTruck Roll-N-Lock M-Series Tonneau Cover for your Ford F-150?


Ove Decors Maya Plus Vanity Review
Discover the luxurious Almond Latte finish and ample storage of the Ove Decors Maya Plus Vanity, a sleek addition to...


Ashley DuraPella Power Reclining Sofa Review
Packed with practical features and modern design, the Ashley DuraPella Power Reclining Sofa offers comfort and convenience for a satisfying...


VEVOR Commercial Ice Maker Review
Want a commercial ice maker that produces 440lbs of ice in minutes?

-

 Americano3 weeks ago
How to Make Korean Iced Americano
-

 Americano1 day ago
How to Make Americano With Delonghi Magnifica
-

 Americano2 weeks ago
How to Make an Iced Americano With Nespresso
-

 Americano4 weeks ago
How Many Shots of Espresso for 16 Oz Americano
-
 Turmeric Tea3 weeks ago
Turmeric Saffron Tea
-

 Americano3 weeks ago
What Does Papa Americano Mean
-

 Americano3 weeks ago
In What Movies Was We No Speak Americano
-

 Americano2 weeks ago
What Had More Caffeine Venti Coffee or Venti Americano