
Frequently asked questions about coffee
How To Expertly Clean And Maintain Hardwood Or Wooden Floors After A Latte Spill
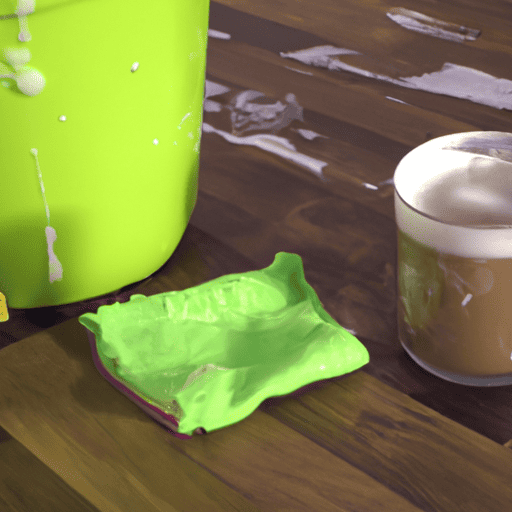
Ah, the joy of sipping a hot latte in the comfort of your home. The warmth and aroma of coffee can uplift your mood and bring energy to your day. However, accidents happen, and a spilled latte on your beautiful hardwood or wooden floor can quickly turn into a nightmare.
As an expert in floor maintenance, I understand how frustrating it can be to deal with stains and damages caused by spills. But fear not! With proper knowledge and tools, you can easily clean and maintain your wood floors after a latte spill.
In this article, I will guide you through the necessary steps to expertly clean and maintain hardwood or wooden floors after a latte spill. We will assess the damage caused by the spill, gather necessary tools and materials, remove the stain effectively without damaging the finish of your floors, rinse the area thoroughly, evaluate any damage done to the finish if applicable, repair it if necessary using simple techniques that you can do yourself at home before applying protective coating as well as regular maintenance tips for keeping your floors looking their best year-round.
So sit back with another cup of coffee (hopefully not too close to your floors), and let’s get started!
Key Takeaways
- Assess the damage caused by the spill and use cleaning solutions specifically designed for wood to avoid damaging the surface.
- Quick stain removal is crucial to prevent permanent damage to the floors, and different methods can be used such as white vinegar and water or baking soda mixed with water.
- Preventive measures can be taken to avoid future spills and prolong the lifespan of the flooring, such as using coasters, rugs, and immediate spill clean-up.
- Regular maintenance is necessary to keep the floors looking their best year-round, including daily sweeping or vacuuming, periodic deep cleaning, and investing in furniture pads or felt protectors for chair and table legs.
Assess the Damage
Now, you need to take a close look at the spill and assess the damage done to your beautiful hardwood floors. The first step in repairing any damage is to carefully evaluate the extent of the problem.
Depending on how much liquid was spilled, there may be only minor discoloration or staining, or there could be more significant warping or cracking of the floorboards. To start assessing the damage, it’s essential to identify whether any moisture has seeped into the wood.

This can happen if a latte spill is left untreated for too long, especially if it occurred on an unfinished or poorly sealed wooden surface. If this is indeed the case, then you’ll likely need to call in a professional to help with restoration work.
However, if the damage appears relatively minor, you may be able to handle repairs yourself. There are several repair options available depending on the type and severity of damage that your floors have sustained.
With proper assessment and attention paid early on after a spillage incident occurs, it’s possible to restore your beautiful hardwood floors back to their original state with ease and efficiency. Now that we understand what needs fixing, let’s move onto gathering all necessary tools and materials required for cleaning up a latte spill off our hardwood floors!
Gather the Necessary Tools and Materials
Before I start cleaning my hardwood floors, I make sure to gather all the necessary tools and materials.
First on my list are the cleaning solutions, which may vary depending on the type of spill or stain.
Next, I choose the appropriate cleaning tools such as mops, microfiber cloths, and brushes.
Lastly, I never forget to put on protective gear like rubber gloves and safety glasses to ensure my safety while handling potentially harmful chemicals.
By having all these items at hand, I can clean my floors effectively and efficiently without any mishaps.
Cleaning Solutions
To keep your hardwood floors shining like new, you’ll want to grab some cleaning solutions that are specifically designed for wood. These solutions work effectively in removing stains and dirt from your wooden floor without damaging the surface.
When choosing a cleaning solution, make sure to read the label carefully, as some products may contain harsh chemicals that can be harmful to your floor’s finish. For stain removal, you can try using hydrogen peroxide mixed with water or white vinegar diluted in warm water.
Be careful not to use too much liquid when cleaning as excess moisture can damage the wood. Additionally, avoid using abrasive cleaners or scrubbing pads as they can scratch and dull the surface of your hardwood floor.
With these cleaning solutions at hand, you’re one step closer to maintaining a beautiful and polished hardwood floor. Next up, let’s talk about the essential tools you need for expertly cleaning your wooden floors.
Cleaning Tools
Make sure you’ve got the right tools on hand if you want to keep your hardwood floors looking their best. Using the right cleaning techniques and safety precautions is important, but without the proper cleaning tools, you may not be able to effectively remove all of the stains and dirt from your floors.
Here are some essential cleaning tools that you should consider adding to your arsenal:
- Broom and Dustpan – Sweep away any debris or surface dirt before deep cleaning.
- Microfiber Mop – Use a microfiber mop for regular cleanings as it’s gentle on hardwood floors.
- Flat Mop Head – A flat mop head will help evenly distribute cleaner across the floor.
- Washable Pads – Washable pads are eco-friendly and cost-effective.
- Vacuum Cleaner with Hardwood Floor Attachment – Use a vacuum cleaner with a hardwood floor attachment to quickly pick up dirt and debris in hard-to-reach areas.
By having these essential cleaning tools, you’ll be well-equipped to tackle any spills or messes that may occur on your hardwood floors.
Now that we’ve gone over the necessary tools, let’s talk about protective gear and how it can help make your cleaning process even more effective.
Protective Gear
Equipping oneself with proper protective gear is crucial when cleaning and preserving the quality of hardwood floors. Not only does using the right protective gear ensure that you avoid any potential accidents, but it also helps to protect your skin from any harsh chemicals or fumes that may arise during the cleaning process. When it comes to protective gear, there are a few key items that every cleaner should have on hand.
Firstly, gloves are an essential part of your cleaning toolkit. They help keep your hands free of dirt and grime while also protecting them from any chemicals in the cleaning solution. Secondly, wearing safety goggles can prevent any liquids or debris from getting into your eyes while you work. Lastly, a dust mask helps filter out any airborne particles such as sawdust or pet hair that may be present in the air. By following these safety precautions and equipping yourself with proper protective gear, you can safely clean and maintain your hardwood floors without any risk of harm.
Now that we’ve covered the importance of protecting yourself during the cleaning process let’s move on to removing the latte stain from our hardwood floors.
Remove the Stain
First, you need to assess the damage and determine which type of cleaner is best for removing the latte stain from your hardwood floors. Preventing spills is always the best course of action, but accidents happen. Quick stain removal is crucial in preventing permanent damage to your floors.
If left unattended, coffee stains can seep deep into the wood fibers and become nearly impossible to remove. When it comes to removing a latte stain from hardwood floors, there are a few different options available.
One method involves creating a solution with equal parts white vinegar and water. Apply the solution directly onto the stained area and let it sit for a few minutes before wiping it away with a damp cloth. Another option is using baking soda mixed with water or dish soap diluted in warm water.
Regardless of which method you choose, remember to be gentle when scrubbing as vigorous rubbing could further damage your floors. Once you have successfully removed the latte stain from your hardwood floors, rinse the area thoroughly with clean water and dry immediately using a soft towel or mop.
It’s important not to leave any excess moisture on your wooden floors as this can cause warping or cracking over time. Now that you’ve tackled how to remove stains from your hardwood floor caused by spilled lattes, we’ll move on to discussing how you can maintain your wooden flooring’s pristine look for years to come.
Rinse the Area
Now it’s time for you to rinse the area where the latte stain was removed, making sure to use clean water and a gentle touch so as not to damage your beautiful hardwood flooring. To start, dip a clean cloth into a bucket of warm water and wring out any excess liquid. Then, gently wipe down the area where the stain was located, being careful not to oversaturate the floorboards with too much water.
Preventive measures can be taken to avoid future spills on your hardwood floors. Consider using coasters under glasses or cups, placing rugs in high-traffic areas or near spill-prone furniture, and wiping up spills immediately before they have a chance to seep into the wood. These simple actions can help prolong the lifespan of your flooring.
If rinsing with water alone does not completely remove any remaining residue from the spill, alternative cleaning methods may need to be used. A mixture of vinegar and warm water can be effective in removing stubborn stains while also helping disinfect surfaces. Just remember not to use overly abrasive cleaning tools that could scratch or damage your floors.
With these tips in mind, you’re now ready to evaluate the damage done by the spill and take appropriate action towards restoring your hardwood floors back to their original beauty.
Evaluate the Damage to the Finish
As you assess the extent of the damage, you might start to feel a sinking feeling in your stomach. The good news is that with proper care and attention, even hardwood floors that have been stained or scratched can be restored to their former glory. Here are some tips on how to evaluate the damage to the finish:
-
Repairing scratches: If there are only minor scratches on your hardwood floor, you may be able to repair them yourself with a touch-up kit from your local hardware store. For deeper scratches, it’s best to call in a professional who can sand and refinish the affected area.
-
Refinishing options: If the latte spill has caused significant damage to the finish of your hardwood floor, refinishing may be necessary. This involves sanding down the surface of your floor and applying a new coat of finish. You can choose between oil-based or water-based finishes depending on your preference.
-
Professional evaluation: It’s always a good idea to seek out professional help when dealing with damaged floors. A flooring specialist will be able to assess the extent of the damage and recommend appropriate solutions for repair.
-
DIY solutions: If you’re feeling handy, there are also DIY solutions available for repairing damaged floors such as using vinegar and vegetable oil for light scratches or tea bags for deeper ones.
Now that you’ve evaluated the damage done by the latte spill, it’s time to move onto repairing the finish itself!
Repair the Finish
Restoring the shine and smoothness of your damaged hardwood floor’s finish can be achieved through proper refinishing techniques and materials. There are two options for refinishing: DIY or professional help. If you have experience with woodworking and refinishing, then doing it yourself is an option. However, if you’re unsure about your skills, it’s best to hire a professional.
Before starting the refinishing process, make sure to match the finish to the original look of your flooring. This ensures that there won’t be any visible differences between old and new finishes. It’s essential to use high-quality products when refinishing your floors because they last longer than cheap ones. When using a stain, test it on an inconspicuous area first before applying it to the entire floor.
Once you’ve repaired the finish of your hardwood floor, it’s important to apply a protective coating to maintain its beauty over time. Applying a polyurethane sealant will protect against scratches and spills while also giving your flooring a glossy appearance.
With these steps in mind, you can confidently restore your hardwood floors from any spill damage they may encounter in the future.
Apply a Protective Coating
When it comes to protecting hardwood or wooden floors, applying a protective coating is essential. The first step is to choose the right coating for your specific type of flooring.
Once you’ve selected the appropriate product, it’s important to apply the coating properly and allow sufficient time for it to dry before walking on the floor.
Choose the Right Protective Coating
To ensure your hardwood floors are well-protected, you should choose the right type of protective coating for them. When selecting a coating, consider whether it’s oil-based or water-based. Oil-based coatings tend to enhance the natural color and grain of the wood, while water-based coatings won’t yellow over time.
Additionally, decide whether you want a matte or gloss finish. Matte finishes offer a more natural look and can hide scratches better, whereas gloss finishes provide more shine but may highlight imperfections.
It’s also important to compare the long-term durability of different coatings before making your final decision. Some coatings may require more frequent reapplication than others, which can be costly and time-consuming in the long run.
Ultimately, choosing the right protective coating for your hardwood floors requires careful consideration of these factors to ensure they remain beautiful and protected for years to come.
Now that we’ve covered how to choose the right protective coating for your floors, let’s move on to applying it effectively.
Apply the Coating
Now that you’ve chosen the perfect protective coating for your hardwood floors, it’s time to apply it with precision and care. Applying a coating is an essential step in maintaining your wooden floors after a latte spill, as it helps protect them from future damage.
There are different types of coatings available on the market, each with their own benefits; some provide a glossy finish while others offer a matte look. To apply the coating, start in one corner of the room and work your way out using either a roller or brush.
It’s crucial to apply thin coats evenly and allow each layer to dry completely before proceeding to the next. This ensures that there are no bubbles or bumps on the surface of your floors once they’re dry.
Once you’ve applied all necessary layers of coating, remember to allow enough time for everything to dry properly before moving furniture back into place or walking across your newly coated floors.
Allow Time to Dry
Be patient and resist the urge to rush the process; allowing ample time for your newly coated floors to fully dry is crucial to achieving a flawless finish that will last for years to come. Here are some tips for quick drying and best air circulation methods:
- Open all windows and doors to increase air flow throughout the room.
- Use fans or portable air conditioning units to help circulate air more efficiently.
- Avoid walking on or placing furniture on the floors until they’re completely dry.
- Consider using a moisture meter to ensure that all areas of the floor have reached an appropriate level of dryness.
By following these tips, you can ensure that your hardwood or wooden floors are dried properly after applying a coating, which will ultimately lead to a more durable finish in the long run.
Now let’s move on to discussing regular maintenance for your newly cleaned and coated floors.
Regular Maintenance
Keeping your hardwood floors in top shape involves regular maintenance. This includes daily sweeping or vacuuming to remove dirt, dust, and debris that can scratch the surface of your floors. Regular light mopping with a damp microfiber mop is also recommended to keep the floors clean and prevent buildup.
In addition to daily cleaning, it’s important to periodically deep clean your floors with DIY cleaning methods or professional services. DIY options include using vinegar and water solutions, steam mops, or specialized hardwood floor cleaners. Professional services may offer more advanced equipment such as buffing machines or chemical treatments.
By maintaining a regular cleaning schedule and periodically deep cleaning your hardwood floors, you can prevent damage from spills like latte stains. However, accidents still happen so it’s important to take preventative measures such as using coasters and wiping up spills immediately.
With proper care and attention, your hardwood floors can last for many years while retaining their natural beauty.
Prevention
To ensure your beautiful hardwood floors remain pristine, you’ll want to take preventative measures such as using coasters and promptly wiping up any spills that may occur. One of the best ways to prevent spills from damaging your floors is by placing coasters under glasses and cups. This simple measure can go a long way in protecting your floors from liquid stains and water damage.
Another effective preventive measure is to use spill-proofing techniques. For example, you may consider using rugs or mats in high traffic areas where spills are more likely to occur. Additionally, you may want to invest in furniture pads or felt protectors for the legs of chairs and tables, which can scratch or gouge wooden floors if moved frequently.
It’s important to be diligent about cleaning up any spills as soon as they happen. The longer liquids sit on your hardwood floors, the more likely they are to soak into the wood and cause damage. Always keep a clean cloth or mop nearby so that you can wipe up spills immediately before they have a chance to do any harm.
By following these preventive measures and spill proofing techniques, you can help ensure that your beautiful hardwood floors stay looking their best for years to come!
Frequently Asked Questions
Can I clean my hardwood floors with just water and a mop?
Yes, you can clean your hardwood floors with just water and a mop, but there are some pros and cons to this cleaning method.
The pros include that it’s quick, easy, and affordable. Water’s also a natural and safe cleaning solution to use on hardwood floors.
However, the cons are that water alone may not be able to remove tough stains or dirt buildup on your floors. Additionally, using too much water or leaving it sitting on your hardwood floors for too long could cause damage such as warping or swelling.
If you prefer an alternative cleaning solution to just water, you can try using vinegar mixed with warm water for added cleaning power without harsh chemicals.
Regardless of which cleaning method you choose, make sure to use a soft microfiber mop and avoid excessive moisture on your hardwood floors to maintain their natural beauty and durability over time.
How often should I apply a protective coating to my hardwood floors?
When it comes to the frequency of coating application for hardwood floors, it really depends on a few factors. The type of finish you have on your floors, how much traffic they receive and the overall condition of the wood itself should all be taken into consideration.
Generally speaking, most experts recommend applying a protective coating every 3-5 years to keep your floors looking their best. As for the best protective coatings for hardwood floors, there are several options available including polyurethane, oil-based finishes or water-based finishes.
Each has their own benefits and drawbacks so it’s important to do your research and choose one that works best for your specific needs and preferences. Ultimately, investing in regular maintenance and protection for your hardwood floors can help ensure they last for many years to come.
What should I do if the latte spill has caused warping or buckling of the wood planks?
If you’re dealing with warping or buckling of wood planks due to a latte spill, it’s important to take action as soon as possible.
Wood plank restoration can be a difficult and time-consuming process, but there are professional repair options available that can help.
Depending on the severity of the damage, you may need to replace some or all of the affected planks.
A professional flooring contractor can assess the damage and provide recommendations for how best to proceed.
It’s also important to address any underlying moisture issues in order to prevent further damage from occurring in the future.
While prevention is always best, accidents happen – so don’t hesitate to seek out professional help if needed!
Can I use vinegar to clean my hardwood floors?
Yes, you can use vinegar to clean hardwood floors, but it should be diluted with water. A good ratio to use is one part vinegar to three parts water. However, there are many other cleaning solutions available that are safe for hardwood floors if you are looking for alternatives to vinegar. For example, you can mix dish soap with warm water or use a specialized hardwood floor cleaner. It’s important to avoid using abrasive materials like steel wool or harsh chemicals that could damage the finish of your floors. To keep your hardwood floors in top condition, regular cleaning is essential. Vacuum or sweep up debris daily and wipe up spills immediately to prevent damage and prolong the life of your flooring. A microfiber mop or cloth is recommended as the best cleaning tool for hardwood floors because it is gentle on the surface and won’t scratch the wood.
How long should I wait before walking on the hardwood floors after applying a protective coating?
After applying a protective coating to hardwood floors, it’s important to wait for the appropriate waiting period before walking on them. The length of time will depend on the type of coating used and the manufacturer’s instructions.
It’s best to refer to the specific product label or consult with a professional for guidance. In addition, there are alternative coatings available that may have different recommended waiting periods. These may include water-based polyurethane, oil-based polyurethane, and wax finishes.
Each type of coating has its own set of benefits and drawbacks, so it’s important to do research and choose the right one for your needs. Overall, following proper maintenance guidelines and using appropriate coatings can help keep hardwood floors looking beautiful for years to come.
Conclusion
Well, that was quite an experience! I never thought that a simple latte spill could cause such damage to my beloved hardwood floors.
But with the right tools and techniques, I was able to expertly clean and maintain them.
As I look at the now pristine surface of my floors, I can’t help but feel a sense of satisfaction and relief.
However, this is not the end of it. Maintaining hardwood floors requires regular care and attention to keep them looking their best.
So, while I may have conquered this latte spill, there will surely be more challenges ahead.
But now that I know what to do, I’m confident that my floors will continue to shine for years to come.

In the vast and diverse world of coffee, coffee alternatives, and tea, Olivia has found her calling. As an author and a dedicated coffee and tea aficionado, her work for Cappuccino Oracle reflects her profound love and understanding of the intricate complexities found within these beverages. Olivia’s passion for the subject serves as both a catalyst for her creativity and a connection point with her audience.
Olivia’s appreciation for coffee, coffee alternatives, and tea blossomed at an early age. She discovered that these beverages invigorated her senses and stimulated her creative spirit. From the nuanced flavors of single-origin roasts to the captivating narratives intertwined with coffee, coffee alternatives, and tea trade and culture, Olivia found an unlimited source of inspiration in her daily cup.
Her love for these beverages and her talent for storytelling eventually converged at Cappuccino Oracle. As an author, Olivia’s mission is to illuminate the intricate tapestry that makes up the world of coffee, coffee alternatives, and tea. Her articles span a diverse range of topics, encompassing everything from the unique flavors of different brews to the sociocultural history intertwined with their cultivation and consumption.

I have always been a coffee lover, but I recently discovered a new favorite way to enjoy my beloved beverage: cold brew coffee.
Not only is it a refreshing and delicious alternative to hot coffee, but it also has numerous health benefits that make it a great choice for anyone looking to improve their diet.
Cold brew coffee is less acidic than regular coffee, which means it’s gentler on the stomach and can reduce acid reflux. It’s also naturally sweeter and has a smoother taste than hot coffee, making it a great option for those who prefer less bitter coffee.
Plus, it has 22.8% more caffeine than regular drip coffee, which can give you a much-needed energy boost without the jitters that come with other caffeinated beverages.
In this article, I’ll share everything you need to know about cold brew coffee, including its benefits, how to make it at home, and why it’s a sustainable and convenient choice for coffee lovers everywhere.
Key Takeaways
- Cold brew coffee has numerous health benefits, such as being less acidic, naturally sweeter, and having more caffeine than regular coffee.
- Consuming caffeine in moderation can lead to various health benefits, including reducing the risk of diseases, improving memory, and aiding in weight loss.
- Making cold brew coffee at home is a simple and enjoyable process, and it can introduce drinkers to new and enticing flavor profiles.
- Cold brew coffee is a great alternative to regular coffee for those looking for a healthier, tastier, and more enjoyable cup of joe.
Benefits of Cold Brew
I love that cold brew coffee has so many benefits. It’s less acidic, naturally sweeter, and has more caffeine than regular coffee. As someone with a sensitive stomach, I appreciate that cold brew is less acidic and easier on my digestive system.
Plus, the natural sweetness of cold brew eliminates the need for added sugar and syrups, making it a healthier option for coffee lovers.
Another benefit of cold brew is its higher caffeine content, which is great for those looking for an extra boost of energy. As a fitness enthusiast, I also appreciate that cold brew is better for exercise due to its lower acidity, making it easier on the stomach before, during, and after a workout.
Drinking cold brew after a workout can also help replenish glycogen levels faster and strengthen muscles, making it a great option for post-workout recovery.
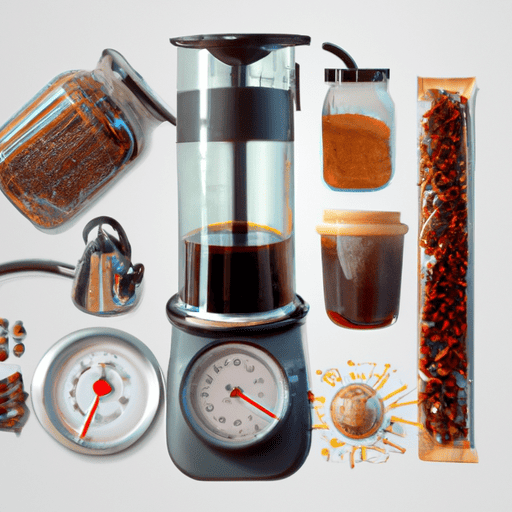
Making Cold Brew
To make this delicious beverage, all you need are coarsely ground coffee beans and room temperature water. Simply combine the two in a large jug and let it steep for 12-24 hours.
Once the steeping process is complete, strain the coffee grounds using a cheesecloth strainer and enjoy your homemade cold brew coffee.
There are plenty of DIY methods for making cold brew, and each one can result in a unique flavor profile. You can experiment with different coffee bean varieties, water-to-coffee ratios, and steeping times to find the perfect combination that suits your taste.
Making cold brew can be a fun and rewarding activity, and the end result is a healthier, sweeter, and stronger coffee that you can enjoy all week long.
Comparison to Regular Coffee
Comparing the caffeine content between cold brew and regular coffee, it’s important to note that cold brew has 22.8% more caffeine than drip coffee. This makes it an ideal choice for those who need an extra boost of energy in the morning or before a workout. While some may argue that espresso is the strongest form of coffee, it’s important to note that cold brew can have a higher caffeine content and a smoother taste than espresso.
To better understand the differences between cold brew and regular coffee, take a look at this table:
Cold Brew Drip Coffee Caffeine content 200mg per 8oz 163mg per 8oz Acidity Less acidic, smoother taste More acidic, bitter taste Preparation Steeped in cold water for 12-24 hours Coffee grounds are run through hot water for a few minutes Health benefits More caffeine for an energy boost Lower acidity for easier digestion
In terms of health benefits, cold brew may be the better choice for those with sensitive stomachs or those looking for a healthier option. With its lower acidity and higher caffeine content, cold brew can provide the energy boost without the negative side effects of regular coffee. However, it’s important to note that moderation is key, as consuming too much caffeine can have negative effects on the body. Ultimately, the choice between cold brew and regular coffee comes down to personal preference and individual needs.
Caffeine Content
As a coffee lover, I was surprised to discover the caffeine content difference between my usual cup and cold brew. It was eye-opening and added an extra boost to my morning routine. Compared to drip coffee, cold brew has a whopping 22.8% increase in caffeine content, making it a stronger option for those needing an extra jolt of energy.
It’s also worth noting that cold brew has less caffeine than espresso, so it’s a great middle-ground option for those who find espresso too intense. Not only does the higher caffeine content in cold brew provide an energy boost, but it’s also been shown to increase productivity.
Consuming caffeine in moderation has been linked to improved focus, alertness, and overall cognitive function. So, if you’re looking for a way to kickstart your mornings or stay focused during a long workday, cold brew could be a great option to try.
Health Benefits of Caffeine
I’ve learned that moderate caffeine consumption can have various health benefits, such as reducing the risk of diseases and improving cognitive function. Studies have shown that caffeine can help protect against diseases such as Parkinson’s and Alzheimer’s, which affect the brain’s cognitive function.
Additionally, caffeine has been shown to improve memory and cognitive performance, making it a great supplement for those looking to enhance their mental clarity. Another benefit of moderate caffeine consumption is that it can aid in weight loss. Caffeine has been shown to increase metabolic rate and fat burning, making it a great addition to a healthy diet and exercise routine.
However, it’s important to remember that excessive caffeine consumption can have negative effects on one’s health, so moderation is key. Overall, incorporating moderate amounts of caffeine, such as in a cup of cold brew coffee, can have positive effects on both cognitive function and weight loss.
Collagen Protein Powder
Adding collagen protein powder to my post-workout cold brew creates a creamy and nourishing elixir that helps with muscle recovery and promotes healthy skin. Collagen supplements have been gaining popularity in recent years, and for good reason.
Collagen is a protein that makes up a large part of our skin, bones, and muscles. As we age, our bodies produce less collagen, leading to wrinkles, joint pain, and weaker muscles. By adding collagen protein powder to my cold brew, I’m providing my body with the necessary building blocks to maintain healthy skin and strong muscles.
But the benefits of collagen protein powder go beyond just aesthetics. When consumed after a workout, collagen can help with post-workout recovery by reducing inflammation and promoting muscle growth. It can also aid in joint health, as it is a major component of cartilage.
By incorporating collagen into my cold brew routine, I’m not only enjoying a delicious and healthier cup of coffee but also giving my body the essential nutrients it needs to function at its best.
Convenient and Sustainable
By incorporating collagen protein powder into my post-workout routine, I’m able to conveniently and sustainably provide my body with the essential nutrients it needs for optimal performance and recovery.
Collagen protein powder is a convenient and easy way to supplement my diet with the necessary amino acids that support muscle growth and repair. Not only is collagen protein powder an excellent source of protein, but it’s also easy to mix into my cold brew coffee, making it a convenient and delicious way to refuel after a tough workout.
Using collagen protein powder in my cold brew coffee also helps me reduce waste. By batch brewing a large amount of cold brew at once, I’m able to minimize the amount of packaging and waste that comes with buying individual servings of protein drinks. This not only saves me money in the long run but also helps me feel good about my impact on the environment.
Overall, incorporating collagen protein powder into my cold brew coffee has been a game-changer for my post-workout routine. It provides me with the energy and nutrients I need in a convenient and sustainable way.
Author and Website Information
Moving on from the convenience of cold brew, let me introduce you to the author and website behind this informative text. I developed an obsession with coffee. This fascination led me to write for Cappuccino Oracle, where I explore my love for coffee and help others brew their perfect cup.
Cappuccino Oracle is a participant in the Amazon Services LLC Associates Program, an affiliate advertising program designed to provide a means for sites to earn advertising fees by advertising and linking to Amazon.com. My passion for coffee has driven me to research and discover new brewing techniques and flavor profiles continuously.
Through Cappuccino Oracle, I aim to share my knowledge and expertise with fellow coffee enthusiasts and help them enjoy a healthier, sweeter, and stronger cup of coffee.
Discussion Ideas Description The Science of Coffee Discuss the chemistry behind coffee and how it affects its taste and aroma. Brewing Techniques Share different brewing techniques and methods to make the perfect cup of coffee. Coffee Bean Varieties Explore the different types of coffee beans and how they contribute to the flavor and aroma of coffee. Coffee and Health Discuss the various health benefits and drawbacks of consuming coffee in moderation. Cold Brew vs. Hot Brew Compare and contrast the differences between cold brew and hot brew coffee, and which one is better for certain occasions or preferences. The History of Coffee Explore the origins and evolution of coffee, from its discovery in Ethiopia to its global popularity today.
Frequently Asked Questions
What is the best type of coffee bean to use for cold brew?
What’s the best type of coffee bean to use for cold brew? Well, it all depends on your personal preference.
When it comes to the roasting process, medium to dark roast coffee beans tend to work best for cold brew as they have a bolder flavor profile. Additionally, exploring different flavor notes can lead to a more complex and enjoyable cup of cold brew. Some popular flavor notes include chocolate, nutty, and fruity.
It’s also important to consider the brew time and dilution when choosing coffee beans for cold brew. A longer brew time with coarsely ground coffee beans can result in a stronger and more concentrated cold brew, while a shorter brew time with a finer grind can lead to a lighter and more refreshing cup.
Experimentation is key to achieving the perfect cold brew ratio with different coffee beans.
Can cold brew be made with hot water instead of room temperature water?
I’ve experimented with making cold brew using hot water as an alternative to room temperature water, and I’ve found that it doesn’t produce the same smooth and sweet taste as traditional cold brew.
Cold brew is naturally less acidic and sweeter than regular hot coffee, and using hot water can result in a bitter and unbalanced flavor.
Additionally, one of the main benefits of cold brew is its higher caffeine content, which is achieved through a longer steeping process with room temperature water.
Overall, I would recommend sticking to the traditional method of making cold brew with room temperature water to fully experience its benefits.
How long does cold brew last in the refrigerator?
Storing cold brew in the refrigerator can be a tricky task, but with a little bit of know-how, it’s easy to keep your cold brew fresh for days. To properly store cold brew in the refrigerator, it’s important to transfer it from the brewing container to an airtight container. This will help prevent the coffee from absorbing any odors or flavors from the surrounding foods.
I recommend using a glass jar or bottle with a tight-fitting lid. Cold brew can last up to two weeks in the refrigerator if stored properly. If you’re looking to make cold brew without a coffee maker, there are a few tips to keep in mind.
First, you’ll need to use coarsely-ground coffee to ensure that the coffee doesn’t become too strong. Second, you’ll need to steep the coffee for at least 12 hours to achieve the desired strength and flavor. Lastly, make sure to strain the coffee through a cheesecloth or fine-mesh strainer to remove any sediment or grit.
With these tips in mind, making cold brew at home is easy and rewarding.
Is cold brew more expensive than regular coffee?
When it comes to cost comparison, cold brew coffee may seem more expensive than regular coffee at first glance. However, the economic impact of making cold brew at home can be significant.
While a cup of regular coffee may cost less per serving, cold brew can be made in larger batches and stored in the refrigerator for up to a week, providing a more cost-effective solution in the long run.
Additionally, making cold brew at home can be a fun and rewarding hobby, allowing you to experiment with different coffee beans and flavor profiles while also saving money.
So, while the initial cost of cold brew may be higher, the economic benefits of making it at home make it a worthwhile investment.
Can cold brew be made with decaf coffee beans?
I recently tried making cold brew coffee using decaf alternatives and was pleasantly surprised by the results. Although the caffeine content was significantly lower, the taste comparison was still enjoyable.
The process of making cold brew is the same regardless of whether you use regular or decaf beans, simply steeping them in room temperature water for 12-24 hours.
This alternative is great for those who want to enjoy the taste of cold brew without the caffeine jitters or those who are sensitive to caffeine. So, if you’re looking for a new way to enjoy coffee without the caffeine, give decaf cold brew a try.
Conclusion
Well, folks, it’s been a pleasure introducing you to the wonderful world of cold brew coffee. It’s a healthier, sweeter, and stronger alternative to regular coffee, and it’s incredibly easy to make at home.
Not only does it taste delicious, but it also has numerous health benefits that can help improve your overall well-being. So go ahead, give it a shot.
Your taste buds will thank you, and your body will too. Who knows, maybe cold brew will become your new best friend. As for me, I’ll be enjoying my cold brew with a splash of collagen protein powder, because who doesn’t love a little extra boost of health benefits?
Cheers to your new favorite cup of joe!

Arf, an author and an innovative enthusiast of coffee, coffee alternatives, and tea, plays a crucial role as a contributor to the esteemed Cappuccino Oracle platform. Renowned for his curiosity and passion for these captivating beverages, Arf has carved out a unique space for himself in the world of exploration and writing. He realized that coffee, coffee alternatives, and tea are not mere drinks to keep one awake, but universes of flavors and stories waiting to be explored.
Arf’s articles for Cappuccino Oracle blend meticulous research with personal experiences, providing readers with an in-depth understanding of various types of coffee, coffee alternatives, and tea, along with their unique characteristics, cultures, and histories. His honest reviews and engaging narratives guide readers on their own journeys, helping them discover their preferences and find their perfect brew.
As a coffee lover, I know that the freshness of coffee beans is the key to a perfect cup of Joe. That’s why proper storage is essential. In this article, I’ll share with you 5 tips for mastering coffee bean storage that will help you maintain the freshness of your coffee beans and ensure that every cup you brew is delicious and satisfying.
First, we’ll discuss why proper storage matters. Coffee beans are sensitive to heat, light, and air, which can cause them to lose their flavor and aroma. When coffee beans are exposed to these elements, they can become stale and tasteless.
Proper storage is essential to protect the beans from these harmful factors and maintain their freshness. With these 5 tips for coffee bean storage, you’ll be able to enjoy a consistently great-tasting cup of coffee every time.
Key Takeaways
- Proper storage is crucial for maintaining the freshness of coffee beans and preserving their taste and quality.
- Glass or ceramic storage containers that are tightly sealed and kept in a cool, dry, and dark place are preferred over metal tins to prevent interference with natural oils and flavors.
- The shelf life of coffee beans varies depending on their roast level, with lighter roasts having a shorter shelf life than darker roasts. Pre-roasted beans with a roast date ensure freshness.
- In addition to being a delicious beverage, coffee also provides various health benefits such as reducing the risk of cardiovascular disease and diabetes, aiding in weight loss, and providing antioxidants.
Why Proper Storage Matters
I know that proper storage is crucial for the freshest, best-tasting coffee, and it’s important to understand why.
One of the main reasons is the effects of moisture on coffee. When coffee beans or grounds are exposed to moisture, they can become stale and lose their flavor. This is why it’s important to store coffee in a cool, dry, and dark place away from sunlight. Fridges and freezers are not recommended for storing coffee as they can expose the coffee to moisture and affect its taste and quality.
Another important aspect of proper storage is buying small amounts of coffee. When coffee is exposed to air, it begins to oxidize and lose its freshness and flavor. Therefore, it’s better to buy small amounts of coffee and use it up quickly rather than buying in bulk and storing it for a long time.
Whole bean coffee lasts longer than pre-ground coffee, and ground coffee should be brewed within 15 minutes of grinding to maximize freshness. By following these tips for proper storage, you can ensure that your coffee stays fresh and flavorful for as long as possible.
Best Storage Practices
Glass or ceramic containers are preferable to metal tins when storing coffee beans to maintain their freshness and quality. These materials don’t have any negative effect on the taste and aroma of the coffee. Additionally, they provide a non-reactive environment that prevents any interference with the natural oils and flavors of the beans.
Glass or ceramic containers also help to keep moisture out, which can ruin the beans and lead to mold growth. To further prevent moisture, it’s important to keep the container tightly sealed and in a cool, dry, and dark place away from sunlight.
It’s also recommended to buy and store small amounts of coffee to ensure maximum freshness. This way, you won’t have to worry about the coffee going stale or losing its nutritional value.
By following these simple storage practices, you can enjoy a delicious cup of coffee that tastes just as good as the day it was roasted.
Additional Considerations
Finding the perfect spot to store your coffee beans can be a bit of a puzzle, but like any good mystery, it’s all about uncovering the clues.
In addition to the best storage practices mentioned earlier, there are a few more things to consider when it comes to keeping your coffee fresh and flavorful.
First, it’s important to consider the roasting techniques used for your coffee beans. Lightly roasted beans tend to have a shorter shelf life than darker roasts, so it’s important to use them up quickly.
Additionally, if you’re roasting your own beans at home, it’s important to let them rest for a few days before brewing to allow the gases to escape and the flavors to fully develop. And if you’re buying pre-roasted beans, look for ones with a roast date on the bag to ensure maximum freshness.
Finally, don’t forget about the health benefits of coffee! In addition to its delicious taste, coffee has been shown to have numerous health benefits, including reducing the risk of cardiovascular disease and diabetes, aiding in weight loss, and providing antioxidants.
So, by taking care to properly store your coffee beans, you can not only enjoy a great cup of coffee, but also reap the many health benefits it has to offer.
Frequently Asked Questions
Can coffee be stored in the fridge or freezer to extend its shelf life?
Storing coffee in the fridge or freezer may seem like a good idea to extend its shelf life, but it can actually have a negative impact on the flavor. Both environments expose coffee to moisture, affecting its taste and quality.
It’s better to store coffee in a cool, dry, and dark place away from sunlight, such as a pantry or cupboard. To tell if coffee has gone bad, you can perform a smell or taste test. If it has a sour or rancid smell, or tastes off, it’s time to get rid of it.
Proper storage is crucial for maintaining the freshness and nutritional value of coffee, and buying and storing small amounts can help.
Is it better to buy whole bean or pre-ground coffee for storage purposes?
After investigating the truth of the theory, it’s better to buy whole bean coffee for storage purposes.
This is because whole bean coffee lasts longer than pre-ground coffee. Additionally, grinding methods can affect the freshness of the coffee.
Grinding the coffee just before brewing it can enhance its flavor and aroma. Moreover, the type of coffee bean variety can also impact the shelf life of the coffee.
Arabica beans are higher quality and have a longer shelf life than Robusta beans. Therefore, it’s recommended to buy whole bean Arabica coffee and grind it just before brewing for the freshest and best-tasting coffee.
How long can you store coffee before it starts to lose its freshness?
Proper storage techniques are crucial for maximizing coffee freshness. Whole bean coffee can last up to two weeks if stored in a cool, dry, and dark place away from sunlight. Ground coffee, on the other hand, should be brewed within 15 minutes of grinding to ensure maximum freshness.
Glass or ceramic containers are preferable to metal tins as they do not affect taste. It’s recommended to buy and store small amounts of coffee to maintain freshness and quality. Roasting at home is also an option for maximum freshness but can be impractical.
Ultimately, the main reason to worry about storage is freshness, as proper storage techniques can counteract loss of freshness and nutritional value.
Are there any specific types of containers that are best for storing coffee?
When it comes to storing coffee, the type of container used can make a big difference.
Mason jars are a popular choice, but they may not be the best option. Vacuum sealed bags are a great choice for keeping coffee fresh and preventing exposure to air and moisture.
Opaque containers are also preferred over clear containers, as they prevent sunlight from affecting the coffee’s flavor.
Overall, it’s important to choose a container that is airtight and keeps the coffee in a cool, dry place. As someone who appreciates a good cup of coffee, I know that choosing the right container can make all the difference in the taste and freshness of my daily brew.
Does the type of roast affect how long coffee can be stored?
Roast levels have a significant impact on how long coffee can be stored. The aging process of coffee beans begins as soon as they’re roasted and continues over time.
Lighter roasts tend to have a shorter shelf life as they have a higher acidity level and contain more moisture. Darker roasts, on the other hand, have a longer shelf life as they have a lower acidity level and less moisture content.
However, it’s important to note that regardless of the roast level, coffee beans should be consumed within a few weeks of roasting to ensure the freshest and best-tasting coffee. Proper storage can also help extend the shelf life of coffee beans.
Conclusion
In conclusion, proper coffee bean storage is crucial for maintaining freshness and flavor. The five tips outlined above provide a comprehensive guide to mastering the art of coffee storage. By investing in airtight containers, storing beans away from light and moisture, and monitoring the roast date, coffee lovers can enjoy a consistently satisfying cup of Joe.
Remember, the key to fresher coffee is attention to detail. Don’t overlook the importance of proper storage, and don’t hesitate to experiment with different storage methods to find what works best for you. With these tips in mind, you’ll be well on your way to brewing the perfect cup of coffee every time.
So go forth and enjoy the rich, robust flavors of freshly stored coffee beans!
Arf, an author and an innovative enthusiast of coffee, coffee alternatives, and tea, plays a crucial role as a contributor to the esteemed Cappuccino Oracle platform. Renowned for his curiosity and passion for these captivating beverages, Arf has carved out a unique space for himself in the world of exploration and writing. He realized that coffee, coffee alternatives, and tea are not mere drinks to keep one awake, but universes of flavors and stories waiting to be explored.
Arf’s articles for Cappuccino Oracle blend meticulous research with personal experiences, providing readers with an in-depth understanding of various types of coffee, coffee alternatives, and tea, along with their unique characteristics, cultures, and histories. His honest reviews and engaging narratives guide readers on their own journeys, helping them discover their preferences and find their perfect brew.

As someone who relies on coffee to power through the day, I know the importance of understanding the caffeine content in my cup. Not all coffees are created equal, and the amount of caffeine can vary greatly depending on the type of coffee, brewing method, and serving size.
That’s why I’ve put together the ultimate guide to caffeine content in coffee, to help you find the perfect cup of coffee for your caffeine needs.
In this article, we’ll explore the different types of coffee and how they impact caffeine content, from bold and rich espresso shots to smooth and creamy lattes.
We’ll also dive into the various factors that can affect caffeine levels, including the roast level, brewing time, and water temperature.
And if you’re curious about the benefits of caffeine or just want to learn some fun coffee facts, we’ve got you covered there too.
So let’s get started and explore the world of caffeine content in coffee.
Key Takeaways
- Different types of coffee have varying amounts of caffeine, with drip coffee having the highest amount and specialty coffees having less due to added milk.
- Factors such as serving size, brewing method, water temperature, and roast degree also affect caffeine levels in coffee.
- Cold brew coffee typically has less caffeine than hot brewed coffee, but it could still be stronger due to smaller serving sizes.
- Drinking dark roast coffee regularly may reduce the risk of developing diabetes, according to Harvard researchers, and caffeinated beverages can lead to better brain function and increased exercise.
Types of Coffee
Oh great, just what I needed – more options to choose from when it comes to types of coffee and their varying caffeine levels. As someone who relies on caffeine to start their day, it’s important to know which types of coffee have the most caffeine.
Caffeine sources play a significant role in determining caffeine levels. Robusta coffee beans contain about twice as much caffeine as Arabica beans. This is because Robusta plants are easier to grow and have a higher yield, making them a more affordable option for coffee producers.
Brewing techniques also affect the caffeine content in coffee. Espresso has the most caffeine per ounce because of the way it’s brewed – hot water is forced through finely ground coffee at high pressure, extracting more caffeine. Drip coffee, on the other hand, has a lower caffeine content because the water passes through coarser grounds and is not under pressure. Cold brew coffee has less caffeine than hot brewed coffee because it’s brewed with cold water, which extracts caffeine more slowly. However, people often drink cold brew in smaller amounts, so the caffeine concentration per serving may still be higher.
Knowing the caffeine content of different types of coffee and brewing techniques can help you make a more informed choice when it comes to your daily cup of joe.
Factors Affecting Caffeine Levels
I’ve learned that the amount of caffeine in my coffee can vary greatly depending on factors such as the type of bean, roast level, and brewing method. Brewing methods play a crucial role in determining caffeine content, with espresso having the highest amount of caffeine per ounce. This is because the coffee is extracted under high pressure, resulting in a concentrated shot.
On the other hand, drip coffee has a higher caffeine content per serving due to its larger serving size. Serving sizes also affect caffeine levels, as a larger serving size means more caffeine intake. For example, a 16 oz cold brew can have up to 200 mg of caffeine, which is equivalent to an 8 oz serving of drip coffee.
It’s important to keep these factors in mind when ordering coffee, as the caffeine content can vary greatly even within the same type of coffee. Understanding these factors can help me make better choices when it comes to my caffeine intake.
Benefits and Curiosities
One thing that I find interesting is that drinking dark roast coffee regularly may reduce the risk of developing diabetes, according to Harvard researchers. This is because dark roast coffee contains a higher amount of compounds that protect the cells in our body from damage.
In addition to reducing the risk of diabetes, coffee has other health benefits such as reducing the risk of liver and colorectal cancer, and improving cognitive function.
Fun facts about coffee include that Arabica cherries must be handpicked when ripe, making it a labor-intensive process. This is why Arabica coffee is more expensive than Robusta coffee, which can be harvested mechanically.
Additionally, people in the US prefer drip coffee, while in Europe and other countries, espresso-based drinks are more popular. These differences in coffee culture highlight the diverse ways in which people enjoy their caffeine fix.
Overall, coffee is not just a delicious beverage, but it also has numerous health benefits and cultural significance.
Frequently Asked Questions
Is it possible to completely remove caffeine from coffee?
Completely removing caffeine from coffee is not feasible as it is a natural component of the bean. Decaf coffee goes through a process that removes most of the caffeine but can affect taste and availability.
Can the caffeine content in coffee vary depending on the time of day it is consumed?
The caffeine content in coffee can vary depending on the time of day it is consumed due to the Circadian rhythm impact on our body’s absorption and processing of caffeine. Additionally, brewing method effects can also impact caffeine levels in coffee.
How does the caffeine content in instant coffee compare to other types of coffee?
Wow, instant coffee is like a shot of adrenaline! Compared to brewed coffee, instant coffee has significantly higher caffeine content. The impact of roast on caffeine levels is also important to consider.
Are there any health risks associated with consuming high amounts of caffeine in coffee?
Consuming high amounts of caffeine in coffee can lead to long term effects such as increased heart rate, insomnia, and anxiety. Alternative options include decaf coffee, herbal tea, and reducing caffeine intake gradually.
How does the caffeine content in coffee compare to other popular caffeinated beverages, such as tea or soda?
Comparing coffee to tea and energy drinks, coffee typically has higher caffeine content per serving. A standard cup of coffee has 95-200mg of caffeine, while tea has 20-80mg, and energy drinks have 70-200mg per can.
Arf, an author and an innovative enthusiast of coffee, coffee alternatives, and tea, plays a crucial role as a contributor to the esteemed Cappuccino Oracle platform. Renowned for his curiosity and passion for these captivating beverages, Arf has carved out a unique space for himself in the world of exploration and writing. He realized that coffee, coffee alternatives, and tea are not mere drinks to keep one awake, but universes of flavors and stories waiting to be explored.
Arf’s articles for Cappuccino Oracle blend meticulous research with personal experiences, providing readers with an in-depth understanding of various types of coffee, coffee alternatives, and tea, along with their unique characteristics, cultures, and histories. His honest reviews and engaging narratives guide readers on their own journeys, helping them discover their preferences and find their perfect brew.


Dabbsson DBS3000B Review: Portable Power for All Needs
Join the revolution of portable power with the Dabbsson DBS3000B, a game-changer for all your energy needs.
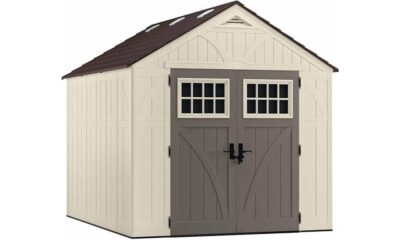

Suncast Tremont Shed Review
Starting with the letter 'S', discover why the Suncast Tremont Shed stands out for its durability, functionality, and modern design...
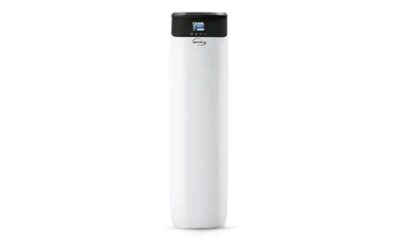

Ispring WCS50KG Water Softener Review
Uncover the compact and efficient Ispring WCS50KG Water Softener, a sleek solution for improving water quality that promises hassle-free installation...
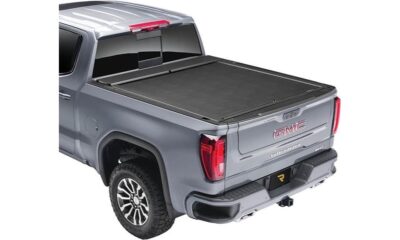

RealTruck Roll-N-Lock M-Series Tonneau Cover Review
Yearning for a reliable and stylish tonneau cover?
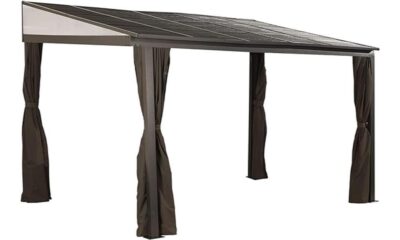

Sojag Portland Gazebo Review: Outdoor Sun Shelter Insights
Optimize your outdoor space with the sturdy Sojag Portland Gazebo - discover why it's a must-have for sun shelter seekers!

Arrow Carports Galvanized Steel Carport Review
Meticulously designed for durability and ease of assembly, the Arrow Carport offers robust protection for vehicles and equipment – an...


ShelterLogic ShelterTube Garage Review
Tackle your outdoor storage needs with the durable and stylish ShelterLogic ShelterTube Garage, designed to withstand harsh weather conditions.


RealTruck Roll-N-Lock M-Series Cover Review
Take a look at the RealTruck Roll-N-Lock M-Series Cover for your Chevy/GMC Silverado/Sierra - a secure, user-friendly option that enhances...


RealTruck Roll-N-Lock M-Series Tonneau Cover Review
Just how secure is the RealTruck Roll-N-Lock M-Series Tonneau Cover for your Ford F-150?

Ove Decors Maya Plus Vanity Review
Discover the luxurious Almond Latte finish and ample storage of the Ove Decors Maya Plus Vanity, a sleek addition to...


Ashley DuraPella Power Reclining Sofa Review
Packed with practical features and modern design, the Ashley DuraPella Power Reclining Sofa offers comfort and convenience for a satisfying...

VEVOR Commercial Ice Maker Review
Want a commercial ice maker that produces 440lbs of ice in minutes?

-

 Americano3 weeks ago
How to Make Korean Iced Americano
-

 Americano2 days ago
How to Make Americano With Delonghi Magnifica
-
 Americano2 weeks ago
How to Make an Iced Americano With Nespresso
-

 Americano4 weeks ago
How Many Shots of Espresso for 16 Oz Americano
-
 Turmeric Tea3 weeks ago
Turmeric Saffron Tea
-

 Americano3 weeks ago
What Does Papa Americano Mean
-

 Americano3 weeks ago
In What Movies Was We No Speak Americano
-

 Americano2 weeks ago
What Had More Caffeine Venti Coffee or Venti Americano